
The Samsung S20 is a powerful and feature-rich smartphone that offers a seamless mobile experience. One of the essential functions of any smartphone is managing your contacts, and the Samsung S20 makes it easy to edit and update your contact list. Whether you need to add a new contact, edit an existing one, or delete an outdated entry, the Samsung S20 provides a user-friendly interface and intuitive options to make contact management a breeze. In this article, we will guide you through the process of editing contacts on the Samsung S20, helping you keep your contact list organized and up to date. So, let’s dive in and discover how you can effortlessly edit contacts on your Samsung S20.
Inside This Article
- Accessing the Contacts App- Step-by-step guide on how to open the Contacts app on your Samsung S20 device.
- Editing Contact Information- Detailed instructions for editing contact details such as name, phone number, email, and other relevant information.
- Adding and Deleting Contacts
- Grouping and Sorting Contacts- Tips and techniques for organizing your contacts into groups and sorting them alphabetically or by other criteria.
- Syncing Contacts with Other Devices
- Conclusion
- FAQs
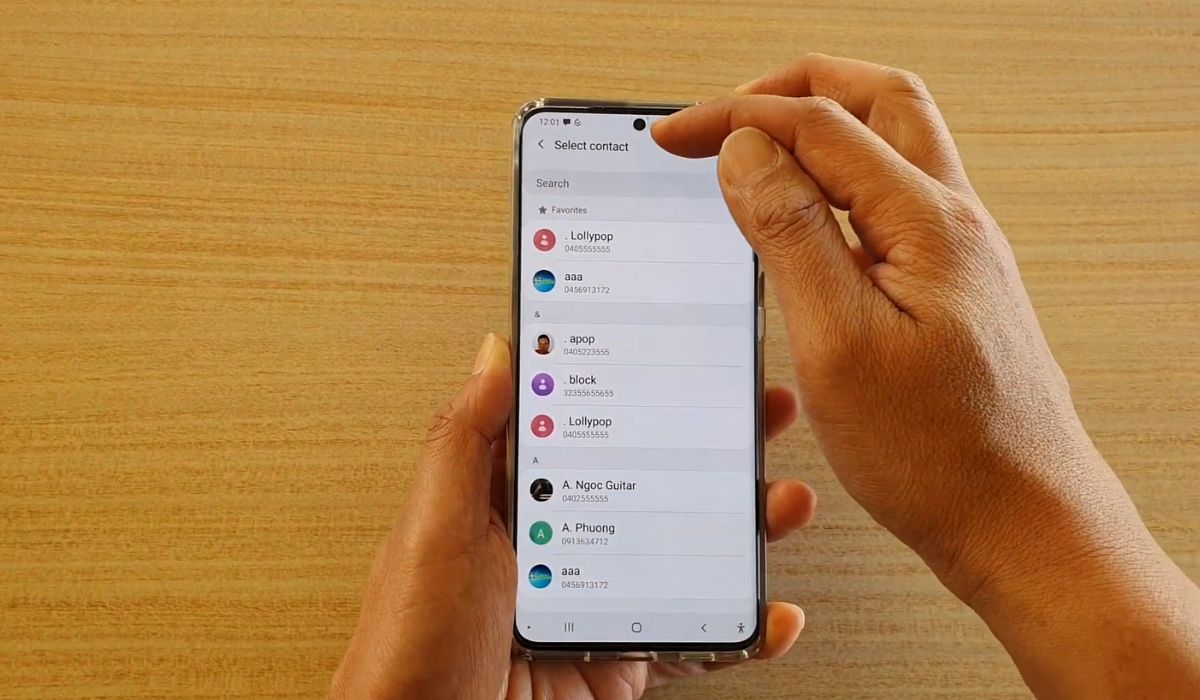
Accessing the Contacts App- Step-by-step guide on how to open the Contacts app on your Samsung S20 device.
Having easy access to your contacts is vital for efficient communication on your Samsung S20 device. Whether you need to make a phone call, send a text message, or just want to keep your contacts organized, knowing how to access the Contacts app is essential. In this step-by-step guide, we will walk you through the process of opening the Contacts app on your Samsung S20.
To access the Contacts app on your Samsung S20, follow these simple steps:
- Start by unlocking your device using your preferred unlocking method, such as PIN, pattern, or biometric authentication like fingerprint or face recognition.
- Once you are on the home screen, locate the “Contacts” icon. It usually appears as a small icon with a person’s silhouette, labeled “Contacts”.
- If you cannot find the Contacts icon on the home screen, you can swipe up or down to access the app drawer. The app drawer contains all the apps installed on your device. Look for the “Contacts” app icon within the app drawer.
- Once you have located the Contacts app icon, tap on it to open the app.
That’s it! You have successfully accessed the Contacts app on your Samsung S20 device. Now you can view, edit, and manage all your contacts effortlessly.
Remember, having easy access to your contacts ensures that you can quickly find and communicate with the people you need, making your Samsung S20 device even more user-friendly and convenient.
Editing Contact Information- Detailed instructions for editing contact details such as name, phone number, email, and other relevant information.
Editing contact information on your Samsung S20 is a straightforward process that allows you to update and modify the details of your contacts. Whether you need to change a contact’s name, phone number, email address, or any other relevant information, you can easily do so using the built-in contact editing features of your device.
To edit contact information on your Samsung S20, follow these simple steps:
- Open the Contacts app on your Samsung S20. You can find it on the home screen or in the app drawer.
- Scroll through your contacts and select the contact you wish to edit.
- Tap on the “Edit” button, usually represented by a pencil icon, located at the top right corner of the contact’s details page.
- Once in the edit mode, you can make changes to various contact details such as name, phone number, email address, and more.
- To edit the contact’s name, simply tap on the name field and enter the updated name using the on-screen keyboard.
- To edit the contact’s phone number, tap on the phone number field and make the necessary changes.
- If you want to edit the contact’s email address, tap on the email field and replace the existing email with the updated one.
- Similarly, you can edit other relevant information such as address, company name, job title, and more, depending on the available fields.
- Once you have finished editing the contact’s information, tap on the “Save” or “Done” button to save the changes.
It’s important to note that the steps mentioned above may vary slightly depending on the version of the Contacts app or the Samsung One UI interface on your device. However, the general process remains the same for most Samsung S20 devices.
By following these simple steps, you can easily edit contact information on your Samsung S20, ensuring that your contacts are up to date and accurate.
Adding and Deleting Contacts
One of the basic functions of a mobile phone is the ability to store and manage your contacts. Whether you’re adding a new contact or deleting an existing one, the process is quick and straightforward on the Samsung S20. In this article, we’ll guide you through the steps to add new contacts and delete unwanted ones from your device.
Adding a New Contact
To add a new contact to your Samsung S20, follow these simple steps:
- Open the Phone app on your device by tapping on the Phone icon from the home screen or the app drawer.
- Select the “Contacts” tab at the bottom of the screen to access your contact list.
- Tap the “+” or “Add” button, usually found at the bottom-right corner of the screen.
- Enter the contact’s name using the on-screen keyboard. You can specify the first name, last name, and any other details you’d like to include.
- Add the contact’s phone number by selecting the “Phone” field and entering the number.
- If desired, you can also add additional information such as an email address, home address, or notes by selecting the respective fields and entering the relevant details.
- Once you’ve entered all the necessary information, tap the “Save” or “Done” button to save the new contact to your phonebook.
That’s it! You’ve successfully added a new contact to your Samsung S20. The contact will now be available in your contacts list, making it easy for you to call, message, or reach out to them whenever needed.
Deleting a Contact
If you want to remove a contact from your Samsung S20, follow these steps:
- Open the Phone or Contacts app on your device.
- Scroll through your contacts list or use the search bar to locate the contact you wish to delete.
- Tap on the contact to open their details.
- Once you’re viewing the contact, tap on the three-dot menu icon, usually located in the top-right corner of the screen.
- From the menu options, select “Delete” or “Remove.”
- A confirmation prompt will appear on the screen. Review the message and if you’re sure you want to proceed with deleting the contact, tap “OK” or “Delete” to confirm.
That’s it! The selected contact has now been deleted from your Samsung S20. You’ll no longer find it in your contacts list or be able to access their information.
Managing your contacts is essential for keeping your phonebook organized and up to date. Whether you’re adding new contacts or removing outdated ones, the Samsung S20 offers a user-friendly interface and intuitive steps to make the process quick and hassle-free.
Grouping and Sorting Contacts- Tips and techniques for organizing your contacts into groups and sorting them alphabetically or by other criteria.
Keeping your contacts organized is essential for effective communication and staying connected. With the Samsung S20, you have the flexibility to group and sort your contacts based on different criteria, making it easier to find the right person at the right time. Whether you want to sort your contacts alphabetically or create custom groups for friends, family, or colleagues, the Samsung S20 provides powerful tools to simplify contact management.
Here are some tips and techniques for organizing your contacts on the Samsung S20:
- Creating Contact Groups: One of the most useful features on the Samsung S20 is the ability to create contact groups. This allows you to categorize your contacts into different groups, such as Family, Friends, or Work. To create a contact group, open the Contacts app, go to the Groups tab, and tap on the “Add” button. Give your group a name, and then select the contacts you want to add to the group. You can even assign a specific ringtone or message tone for a group to easily identify incoming calls or messages.
- Sorting Contacts Alphabetically: If you prefer a more traditional approach to contact organization, you can sort your contacts alphabetically. To do this, open the Contacts app and go to the All Contacts tab. Tap on the three-dot menu at the top right corner of the screen and select “Sort by.” Choose “First name” or “Last name” to sort your contacts accordingly. This will help you locate a contact quickly based on their name.
- Using Smart Groups: The Samsung S20 introduces a feature called Smart Groups, which automatically groups your contacts based on certain criteria. For example, you may have a Smart Group for all your contacts with a specific job title or those who are located in a particular city. To access Smart Groups, open the Contacts app, go to the Groups tab, and scroll down to find the Smart Groups section. You can also create your custom criteria for Smart Groups by tapping on “Create new” and setting the desired conditions.
- Merging Duplicate Contacts: Over time, you may accumulate duplicate contacts on your Samsung S20. These duplicates can clutter your contact list and make it harder to manage. Luckily, the S20 makes it easy to merge duplicate contacts. Open the Contacts app and go to the All Contacts tab. Tap on the three-dot menu and select “Manage contacts.” From there, choose “Merge contacts” to find and merge any duplicates. This helps to keep your list streamlined and free from redundant entries.
By utilizing these tips and techniques, you can effectively organize your contacts on your Samsung S20, making it easier to find and communicate with the people who matter most to you. Whether you prefer grouping contacts into categories or sorting them alphabetically, the Samsung S20 offers the flexibility and tools to streamline your contact management.
Syncing Contacts with Other Devices
Explaining the process of syncing your Samsung S20 contacts with other devices, such as your computer or another smartphone.
Keeping your contacts up-to-date and accessible across different devices is essential in today’s interconnected world. With your Samsung S20, you have the convenience of syncing your contacts with other devices like your computer or another smartphone. This synchronization allows you to easily access and manage your contacts no matter where you are.
Syncing your contacts is a simple process. Here’s how you can do it:
- Syncing with your computer:
- Download and install the Smart Switch software on your computer.
- Launch the Smart Switch software and connect your Samsung S20 to your computer using a USB cable.
- Once the connection is established, select the “Contacts” option in the Smart Switch software.
- Click on the “Sync” button to start the synchronization process. The software will transfer your contacts from your Samsung S20 to your computer successfully.
- Syncing with another smartphone:
- Using Bluetooth: Turn on Bluetooth on both devices and pair them. Then, go to the Contacts app on your Samsung S20, select the contacts you want to sync, and choose the option “Share” or “Send via Bluetooth.” Select the other smartphone as the recipient, and the contacts will be transferred.
- Using Google Account: If you have a Google Account, you can sync your contacts with it. On your Samsung S20, go to Settings and select “Accounts and Backup.” Add your Google Account if you haven’t already. Enable contact synchronization, and your contacts will be synced with your Google Account. You can then sign in to your Google Account on the other smartphone to access the synced contacts.
- Using third-party apps: There are various third-party apps available on Google Play Store that allow you to sync contacts between different smartphones. Install one of these apps on both devices, follow the instructions, and transfer your contacts effortlessly.
To sync your Samsung S20 contacts with your computer, you can use Samsung’s Smart Switch software. This software enables you to transfer contacts, along with other data, between your phone and computer. The process involves the following steps:
If you want to sync your Samsung S20 contacts with another smartphone, there are a few ways to do it:
By syncing your contacts with other devices, you ensure that you always have access to your important contacts, regardless of which device you’re using. Whether it’s your computer or another smartphone, syncing makes managing and organizing your contacts a seamless experience. Take advantage of the syncing capabilities of your Samsung S20 and keep your contacts up to date and easily accessible across all your devices.
Conclusion
In conclusion, editing contacts on the Samsung S20 is a simple and convenient process. With the Samsung Contacts app, users can easily add, update, or delete contacts on their device. Whether you need to save a new phone number, update an existing contact’s information, or remove an outdated entry, the Contacts app provides all the necessary tools.
By following the step-by-step guide outlined in this article, you can seamlessly manage your contacts list and keep it organized. Remember to make use of the various features offered by the Contacts app, such as grouping contacts, utilizing favorites, and syncing with other accounts for a more streamlined experience.
The Samsung S20 offers a user-friendly interface and intuitive contact management system, making it easy for users to edit their contacts and stay connected with family, friends, and colleagues. With its powerful features and efficient functionality, the Samsung S20 is an excellent choice for those seeking a cutting-edge smartphone experience.
FAQs
1. How do I edit contacts on Samsung S20?
To edit contacts on Samsung S20, follow these steps:
1. Open the Contacts app on your Samsung S20.
2. Locate the contact you want to edit and tap on it to open it.
3. Once the contact is open, tap on the “Edit” button, usually represented by a pencil icon.
4. You can now make changes to the contact’s name, phone number, email address, and any other information you want to edit.
5. After making the necessary changes, tap on the “Save” button to save the edited contact.
That’s it! The contact will now be updated with the new information you provided.
2. Can I edit multiple contacts at once on Samsung S20?
Yes, you can edit multiple contacts at once on Samsung S20. Here’s how:
1. Open the Contacts app on your Samsung S20.
2. Tap on the three-dot menu icon located at the top right corner of the screen.
3. From the dropdown menu, select “Manage contacts” or a similar option.
4. Choose the contacts you want to edit by tapping on the checkboxes next to their names.
5. Once you have selected the contacts, tap on the “Edit” button, usually represented by a pencil icon.
6. You can now make the desired changes to the selected contacts.
7. After making the necessary edits, tap on the “Save” button to save the changes made to multiple contacts simultaneously.
3. How do I delete a contact on Samsung S20?
To delete a contact on Samsung S20, follow these steps:
1. Open the Contacts app on your Samsung S20.
2. Locate the contact you want to delete and tap on it to open it.
3. Once the contact is open, tap on the three-dot menu icon located at the top right corner of the screen.
4. From the dropdown menu, select “Delete” or a similar option.
5. Confirm the deletion by tapping on “Delete” again when prompted.
The contact will now be permanently deleted from your Samsung S20.
4. Can I recover a deleted contact on Samsung S20?
Yes, you can recover a deleted contact on Samsung S20 if you have a backup available. Here’s how:
1. Open the Contacts app on your Samsung S20.
2. Tap on the three-dot menu icon located at the top right corner of the screen.
3. From the dropdown menu, select “Settings” or a similar option.
4. Look for the “Account sync” or “Sync” section and tap on it.
5. Enable the option for syncing contacts with your Google account or any other backup option you have used previously.
6. Once the syncing is complete, your deleted contacts should be restored if they were backed up before being deleted.
5. How do I merge duplicate contacts on Samsung S20?
To merge duplicate contacts on Samsung S20, follow these steps:
1. Open the Contacts app on your Samsung S20.
2. Tap on the three-dot menu icon located at the top right corner of the screen.
3. From the dropdown menu, select “Manage contacts” or a similar option.
4. Look for the “Merge contacts” or “Find and merge duplicates” option and tap on it.
5. The Contacts app will now scan for duplicate contacts and provide a list.
6. Review the list and select the duplicate contacts you want to merge by tapping on the checkboxes next to their names.
7. Once you have selected the duplicate contacts, tap on the “Merge” button.
The selected duplicate contacts will now be merged into one, eliminating any duplicates and ensuring a cleaner contact list on your Samsung S20.