
The post-processing part of a project, be it photography or video, usually happens in desktops. Editing photos and videos can be a tedious process and often requires a bigger screen and memory that most mobile devices lack.
As the number of smartphone users worldwide grows, however, software developers learned to adapt. Many mobile photo editing apps are accessible today both for Android and iPhone users. Some desktop software, like Adobe Photoshop and Lightroom, also now have mobile versions for fast and convenient photo editing.
This trend is not only for photos. You can also find several impressive video editing apps for your smartphone. One of them is the Adobe Premiere Rush.
In this review, we will discuss what makes the app stand out over the competition, from its cost to its features. This review will also give you a quick guide on how to use the app.
What Is Adobe Premiere Rush
Adobe Premiere Rush is an all-in-one video editing tool. It is a product of Adobe, a software company known for its creative programs, including Photoshop, Lightroom, Premiere Pro, and Illustrator, among others. It was launched in 2018 to provide online video creators with a simplified program to edit their content.
For example, you don’t need to create your animated title card for your videos. The app is equipped with motion graphics templates you can use. Premiere Rush also helps you enhance your video’s audio. The app adjusts the volume of the background music during a voice-over through its auto-duck audio mixing feature.
If you want to use Premiere Pro, which is the professional version, to edit your video, you still can. Files from the mobile app are compatible with the desktop program.
How Much Does Adobe Premiere Rush Cost?
You can get Premier Rush in multiple ways. One of them is by purchasing Adobe’s Creative Cloud All Apps plan for $52.99 per month. This plan gives you access to Adobe’s over 20 creative desktop and mobile apps, including Premiere Rush.
In case you don’t need all of Adobe’s programs, you may purchase the Premiere Pro plan for $20.99 per month. This plan includes access to Premiere Rush, 100 GB of cloud storage, and other perks.
You can also download the app alone for free on the App Store and Play Store, depending on your device’s OS. The free starter plan includes the following
- 3 exports
- 2 GB of cloud storage
- Adobe Fonts
What Are the In-App Purchases for Adobe Premiere Rush?
If you want to get full access to all of Premiere Rush’s features and expand your cloud storage, you can upgrade to the paid version, which is available as an in-app purchase for $9.99 per month.
Purchasing the Premiere Rush Single App plan gives you access to the following:
- Unlimited exports
- 100 GB of cloud storage
- Adobe Portfolio, Fonts, and Spark
You can also add Adobe Stock to your purchase. You’ll get one month free with up to ten images. Cancel the subscription after the trial ends or pay for the Stock subscription fee of $49.99.
Adobe Premiere Rush Features
The quality of your videos is vital in generating more viewers. Editing videos on Premiere Pro can be intimidating and challenging, especially for beginners. Premiere Rush is ideal for those looking for an app that has similar features as professional programs, but easier and more convenient to use.
How to Use Adobe Premiere Rush?
Premiere Rush is similar to Adobe Premiere Pro, albeit being simplified. It allows you to edit a video and publish it on YouTube and other social media platforms. The app is equipped with Adobe’s suite of video and audio editing tools.
Here are the features of Premiere Rush and how to use them.
Easy-to-Use Video Editing Tools
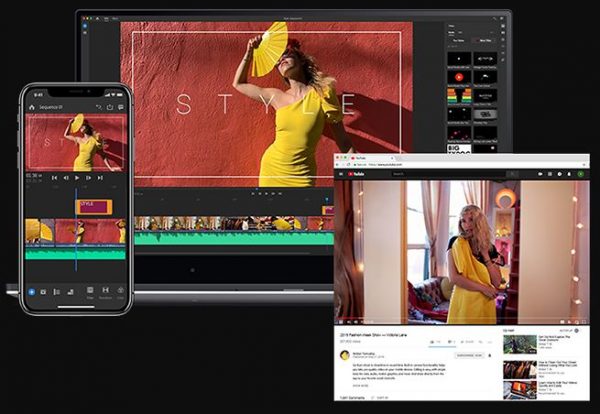
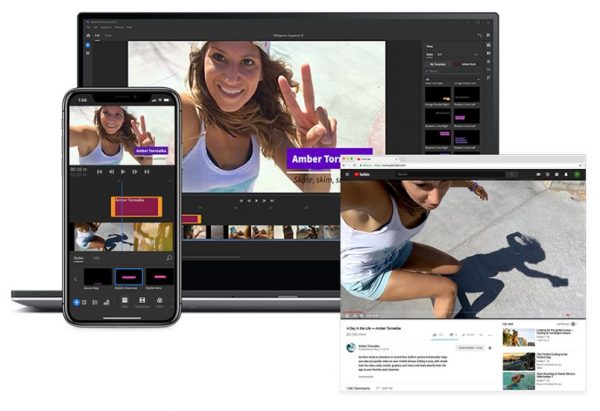
Premiere Rush allows you to edit your videos anytime and anywhere using any device. It works on Android, iPhone, iPad, and desktop. The app automatically syncs your projects to the cloud, so you can continue working on your project even if you switch devices.
The app has an intuitive interface, making it easy to add titles and motion graphics and customize color, audio, and other aspects of your video. If you want to make your videos look more professional, the app lets you import your projects to Premiere Pro without problems.
You can find the editing tools at the bottom left of the app’s editing workspace. Here is a quick guide on how to use Premiere Rush’s video editing tools.
Cut Clips
- Place the playhead to the part that you want to cut.
- Press the scissors icon to cut the video clip.
Duplicate Clips
- Select the clip you want to duplicate.
- Click on the Duplicate button.
Delete Clips
- Select the clip to delete.
- Click on the Trash icon, which you’ll find in the lower left.
Rearrange Clips
- Select the clip/s.
- Drag it to the new location (other clips will adjust accordingly).
Zoom In and Out of the Timeline
- Find the scroll bar at the bottom of the timeline.
- Select and drag the circle at the end of the scroll bar to zoom in or out.
Adjust Audio Separately
- Click on the Expand Audio Icon to show the audio of your video clip.
- Adjust the audio the way you want it without affecting the video.
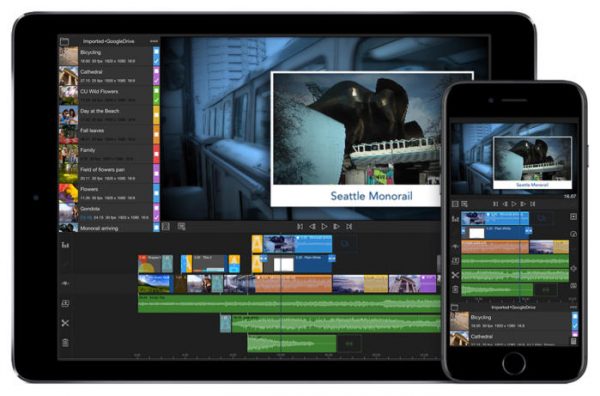
Premiere Rush is programmed to determine the audio type in your timeline. It automatically shows icons for voice, music, and other types of audio. The app supports up to four video tracks and three audio tracks, as well.
You can also access Premiere Rush’s refinement tools, such as built-in title templates, transitions, and color presets. For controlling the position, rotation, and scale of a clip, use the app’s transform tools.
Improving Your Social Media Presence
Premiere Rush is more than just a video editing tool. The app can also help you improve your social media presence by providing you with the tools to customize your social media and YouTube content.
Since Premiere Rush is an all-in-one app, you can use the app to take videos and edit them in one place. It has tools to give your videos clear and crisp audio so your viewers can enjoy them. The app also allows you to add animated text to your videos, including titles and captions.
Adding Text to Your Videos
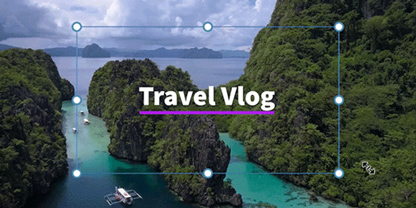
This feature helps you personalize your videos by using motion graphics templates to add text. Premiere Rush makes it easier to fit your words to your videos, whether you will post them on YouTube or other social media sites.
Creating a Title for Your Video
In Premiere Rush, you can add a simple, text-only title to your video or spice it up by using a title with text, graphics, and animation through Motion Graphics templates. Find the Titles panels to choose from an array of built-in title styles. You can also find more selections in Adobe Stock.
After choosing the style you want, select your preferred font, and add the text to create your title. The app allows you to change the font color, size, and other details to help you achieve your desired look.
Adding Simple Titles
- Select where you want the tile to appear in the video.
- On the left toolbar, click the blue + icon and select Title.
- Edit the text by selecting the title clip in the timeline and double-clicking on the text.
- Click on the Edit tab to customize the look of the title. You can customize the font, font size, and other details on your title.
Changing Title Style
- Open the Titles panel by selecting the title clip in the timeline and clicking the Title icon.
- Select a template with your preferred style from the Titles panel.
- Click on Edit in the Titles panel for more customization options.
- Change the font, color, size, and other properties of the title by selecting the text layer in the Preview monitor.
Adjusting the Size, Position, and Duration of a Title
- Select the title clip. When the blue handles appear, use them to move the title anywhere or change its size.
- Use the orange trim handles around the clip to adjust its duration. You can also move the clip around the timeline.
Adding Titles Using Motion Graphics Templates
Motion Graphics artists in Premiere Pro or After Effects have created Motion Graphics templates for Premiere Rush. You can use them to create titles, transitions, and other elements to make your videos look professional without the complicated process.
Motion Graphics templates you can use to create titles are included in the app. These templates are accessible through your computer. If you want to expand your options, browse Adobe Stock, or use a shared template from Creative Cloud Libraries.
Using Templates from Adobe Stock
- Click Adobe Stock in the Titles panel.
- Enter keywords to search for a template you want
- Drag the Motion Graphics template to the timeline
Installing Motion Graphics templates
- Click on the “…” icon in the Titles panel.
- Select Install Template for macOS or Import Template for Windows.
- Find the Motion Graphics template you want to import.
This allows you to use templates available on your computer or in Creative Cloud Files, which you can apply to any project.
Deleting Title Clips
If you want to delete a title clip, simply select the clip you want to remove and click the Delete icon.
Saving and Sharing Your Videos
Once you’ve finished your Premiere Rush project, you can save it on your phone or your computer, or share it on different social media channels. Premiere Rush lets you add information to your video when you share it, such as title, description, hashtags, and a custom thumbnail.
Saving a video to your device
- Click on Share, then select Local
- In Settings, specify the following options
- Filename – change the name of your file or use the default filename.
- Save to – indicate where you want to save the video.
- Click on Export
Before you click on Export, you can alter the advanced settings or use the default advanced settings, which is set based on the type of video and where you will post it. Unless you need to meet a specific video requirement, this is not necessary.
Tweaking the default preset allows you to control the resolution, frame rate, audio channels, and quality of the video. Adjusting these elements will affect the overall quality and size of the final output.
Sharing Your Videos on Social Media
Premiere Rush allows you to share your videos directly to your social media channels, such as YouTube, Facebook, and Instagram. Here are the steps on how to do it.
YouTube
1. In the toolbar, click on Share and choose YouTube
2. Sign in to YouTube
3. In the Settings, set the following
-
- Title
- Description
- Tags
- Privacy when shared
- Category
- Playlist
- Schedule
- Keep a copy of this file
- Preset
4. Set a thumbnail for your video
5. Preview your video before rendering and exporting your video
6. Click on Export
7. Once the app successfully rendered the video, click on Publish
The app will notify you when your video has been published on YouTube.
- Go to the Share tab and choose Facebook
- Sign in to Facebook
- In the Settings, set the following
-
- Pages
- Title
- Description
- Keep a copy of this file
- Preset
4. Set a thumbnail for the video
5. Preview your video
6. Click on Export
7. Click on Publish once the rendering is finished
You will get a notification from Facebook when the video has been published.
- Choose Instagram on the Share tab
- In the Settings, set the following
-
- Save to
- Preset
3. Preview your video
4. Click on Export
5. Log into Instagram
6. Share your video
If you saved your video on your desktop, you need to move it to your phone before sharing it on Instagram.
Pros and Cons of Adobe Premiere Rush
Like other video editing apps, Premiere Rush has its advantages and disadvantages. Take a look at the app’s pros and cons to help you decide whether this is the right app for your projects.
Pros
- Well-designed and organized layout
- User-friendly interface
- Compatible with different devices
- Allows you to post your videos directly to social media
- Allows you to shift between Premiere Rush and Premiere Pro easily
Cons
- Has fewer video effects than the professional counterpart
- Limited transitions
- No storyboard templates to help with your video structure
- Doesn’t have features like green screen, freeze-frame capabilities, and motion tracking that you can find in other video editing apps
Adobe Premiere Rush vs. Other Editing Apps
As the number of video content creators grows, from YouTube vloggers to streamers, you can find plenty of video editing apps today. Editing your videos using a smartphone is easier than ever, be it for social media or vlogs.
Here are three of the leading video editing apps available today and learn how they perform compared to Premiere Rush.
LumaFusion ($29.99)
LumaFusion is one of the smartphone apps that are close to professional editing software. It offers a wide range of features with a straightforward touch-based IU. That is why the app is one of the few mobile apps that act like the desktop version.
If you’re familiar with other video editing programs, you’ll learn how to use this app easily. But you can find online tutorials to help you navigate its features.
Unlike Premiere Rush, LumaFusion doesn’t have a subscription plan. Once you purchase the app, it’s all yours. The cost may be huge for an app, but it’s more practical than paying for a subscription plan for a long time.
The app, however, is only available for iOS devices.
KineMaster ($3.99)
KineMaster is a popular video editing app among Android users. This app is ideal for editing videos for social media, including Facebook and Instagram. It also has advanced features that you wouldn’t find in other Android video editing apps.
This app has fewer features than Premiere Rush, but it’s more affordable despite being a subscription-based app. It has a free version but paying for the premium version removes the watermark and ads. Premium users can also access other features that the free version lacks.
KineMaster allows you to use images, texts, handwriting, and overlay layers for as many as you like. It also supports a maximum of ten video tracks and eight audio tracks. You can also use a green screen by enabling the chroma key so your creativity will flourish.
Vlogit (Free)

If you’re looking for an app specifically for vlogging, Vlogit would be an excellent choice. This app allows you to create content quickly without spending too much on an app. It minimizes the vlogging process because you can record videos and edit them within the app.
Vlogit allows you to add text, music, stickers, and effects on your videos. You can also design a video thumbnail to attract viewers using the app’s thumbnail editor. Like Premiere Rush, you can also export your videos directly to your social media channels, such as YouTube, Instagram, and Facebook, without watermark.
This app is available for Android and iOS devices.
Adobe Premiere Rush, despite being a simplified version of Adobe Premiere Pro, is an incredible video editing app for smartphones. It gets the job done without compromising the quality of your video. This is also an ideal app if you want to learn how to edit videos but are not confident enough to use a professional program.
If you want to know more about the alternatives to Adobe Premiere Rush, check out our InShot, VivaVideo, and the best Android video editor apps today!