
In the ever-evolving landscape of online content creation, gaming videos have emerged as one of the most popular and engaging forms of entertainment. Platforms like YouTube have allowed gamers from all over the world to share their gameplay experiences and connect with a global audience. While many content creators use high-end equipment to record their gaming videos, you may be surprised to learn that you can also create fantastic gaming content using just your mobile phone. In this article, we will explore the possibilities of recording gaming videos for YouTube on your phone, discussing the necessary tools, techniques, and tips to help you produce high-quality and captivating gaming content without breaking the bank. So, buckle up and get ready to level up your YouTube game with your trusty companion, your mobile phone!
Inside This Article
- Setting up the Screen Recording App
- Adjusting Audio and Visual Settings
- Recording the Gaming Video
- Adding Commentary or Voiceover
- Editing and Enhancing the Video
- Uploading and Sharing the Video on YouTube
- Conclusion
- FAQs
Setting up the Screen Recording App
Recording gaming videos on your phone requires the right screen recording app. Follow these simple steps to set up the screen recording app and get ready to capture all your gaming moments:
1. Choose a reliable screen recording app: There are several screen recording apps available for both iOS and Android devices. Some popular options include AZ Screen Recorder, Mobizen, and DU Recorder.
2. Install the selected app: Go to the app store on your phone and search for the screen recording app you’ve chosen. Tap on the “Install” button and wait for the app to download and install on your device.
3. Open the app: Once the app is installed, locate its icon on your home screen or app drawer and tap on it to open the screen recording app.
4. Grant necessary permissions: Upon opening the app for the first time, you may be prompted to grant certain permissions, such as access to your device’s screen and microphone. Follow the on-screen instructions to enable these permissions.
5. Familiarize yourself with the app’s interface: Take a moment to explore the features and settings within the screen recording app. You may have options to customize video resolution, adjust frame rate, and enable or disable audio recording.
6. Set up video quality and other preferences: Before you start recording, go into the settings of the screen recording app and select the desired video quality. Higher quality videos may occupy more storage space on your device, so consider your storage capacity when making your selection.
7. Enable the ‘Floating Widget’: Some screen recording apps offer a floating widget that allows you to control the recording without interrupting your gameplay. Enable this feature if available, as it can make the recording process more seamless.
8. Test the recording: To ensure everything is set up correctly, try recording a short test video. Open your favorite game, start the screen recording app, and begin recording. Play the game for a few seconds, then stop the recording. Play it back to ensure the video and audio quality meet your expectations.
Once you’ve successfully set up the screen recording app, you’re ready to move on to adjusting audio and visual settings to further enhance your gaming videos.
Adjusting Audio and Visual Settings
When recording gaming videos on your phone for YouTube, it’s important to ensure that the audio and visual settings are optimized to enhance the viewer’s experience. Here are some key steps for adjusting the audio and visual settings:
1. Check the microphone: Before you start recording, make sure that the microphone on your phone is functioning properly. This will ensure that your voice or commentary can be clearly heard in the video. You can test the microphone by recording a short audio clip and playing it back to ensure the quality is satisfactory.
2. Set the video resolution: Depending on the capabilities of your phone, you may have the option to adjust the video resolution. Higher resolutions will result in better video quality, but keep in mind that higher resolutions may also require more storage space and processing power. Find the optimal balance based on your device’s capabilities and the desired video quality.
3. Enable screen recording: Most screen recording apps allow you to adjust the frame rate and resolution of the recorded video. It’s recommended to set the frame rate to a minimum of 30 frames per second (fps) to ensure smooth gameplay footage. Additionally, set the resolution to match the aspect ratio of your device’s screen to avoid any distortion.
4. Adjust game settings: In order to record high-quality gameplay, take some time to adjust the in-game graphics settings. Lowering graphics settings like shadows, anti-aliasing, and motion blur can improve the performance of your device and result in smoother recording without compromising too much on visual quality.
5. Consider external accessories: If you want to further enhance the audio quality, you can invest in external accessories, such as a microphone or a headset. These can help eliminate background noise and provide clearer audio in your videos. Additionally, using a tripod or a phone mount can stabilize the phone during recording and prevent shaky footage.
6. Test and tweak: Before starting to record your gaming video, take some time to test the audio and visual settings. Record a short sample video, play it back, and make any necessary adjustments. This will ensure that you have optimized the settings and are ready to start recording your actual gaming video.
By adjusting the audio and visual settings before recording your gaming videos on your phone, you will ensure that your viewers have an immersive and enjoyable experience. So take the time to fine-tune these settings and get ready to showcase your gaming skills on YouTube!
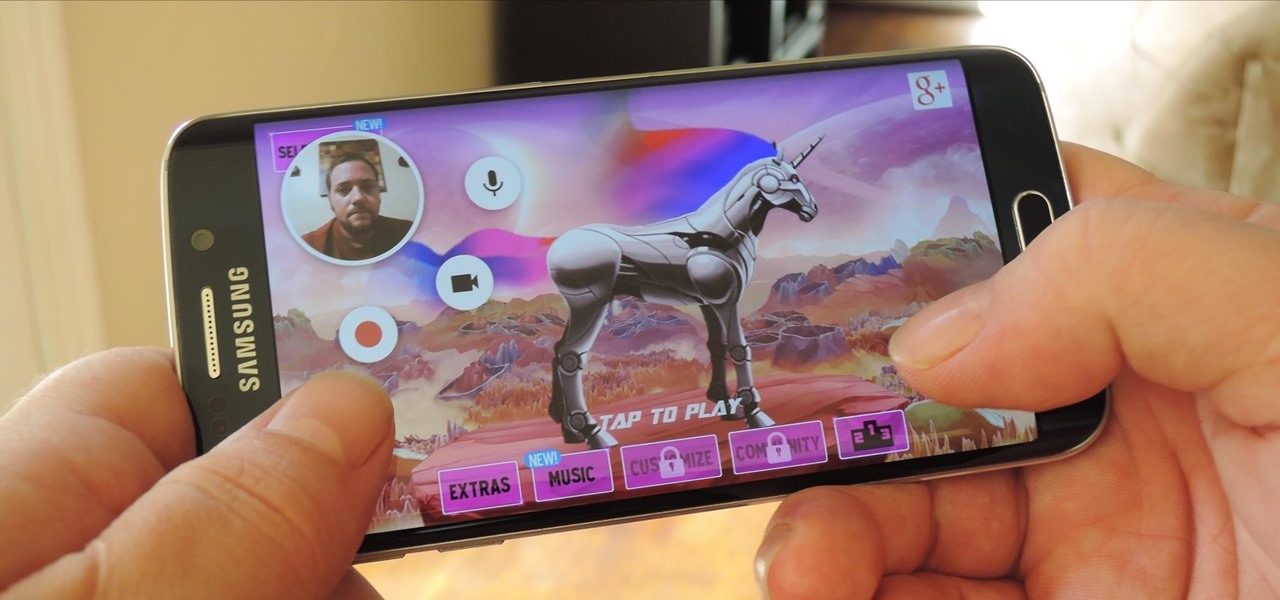
Recording the Gaming Video
Now that you have set up your screen recording app and adjusted the audio and visual settings, it’s time to dive into recording your gaming video. Follow these steps to capture exciting gameplay moments:
- Launch the game you want to record on your mobile phone. Make sure the app recorder is running in the background.
- Set up your gaming area for optimum recording. Find a comfortable position and ensure there is no glare or distraction on your screen.
- Start the screen recording app and select the desired options, such as recording quality and orientation.
- Once everything is set, tap the record button to begin capturing your gameplay.
- Play the game naturally, showcasing your skills and strategies. Remember to stay focused and engaged to deliver an entertaining video.
- During gameplay, make sure to capture all the highlights and exciting moments. Whether it’s a high-score, an impressive move, or a funny incident, these elements will engage your viewers.
- Keep an eye on the recording progress to ensure everything is being captured correctly. If needed, pause or stop the recording if you need to take a break or encounter any issues.
- Once you have recorded enough footage, stop the recording by tapping the stop button in the screen recording app.
Remember, practice makes perfect. Don’t worry if your first recording isn’t flawless. Experiment with different games, techniques, and recording settings to enhance your gaming videos.
Adding Commentary or Voiceover
Adding commentary or a voiceover to your gaming videos can greatly enhance the viewer’s experience and provide additional insights or entertainment value. Whether you want to provide strategy tips, funny commentary, or simply engage with your audience, incorporating your voice into the video is a fantastic way to do it. Here’s how you can add commentary or voiceover to your gaming videos using your phone:
1. Find a suitable voice recording app: Start by finding a reliable voice recording app for your phone. Some popular options include Voice Recorder, Smart Recorder, or Easy Voice Recorder. These apps are usually available for free on your phone’s app store.
2. Connect a microphone (optional): If your phone’s built-in microphone doesn’t produce the desired sound quality, you may want to consider connecting an external microphone. There are various microphone models compatible with phones, such as lavalier microphones or USB microphones. These can help ensure clear and high-quality audio for your commentary.
3. Prepare a script or outline: Before recording the commentary, it’s helpful to have a script or outline prepared. This will ensure a smooth delivery and help you stay on track while providing commentary during gameplay. You can include important points, jokes, or specific moments you want to highlight to make the voiceover engaging and captivating.
4. Open the screen recording app: Open the screen recording app you previously installed on your phone. Most recording apps have a simple interface with a record button prominently displayed.
5. Start the voice recording: Once the screen recording app is opened, start the voice recording simultaneously. Make sure to position the microphone close to your mouth for clear audio. Begin speaking and providing commentary while playing the game. Try to match your voiceover with the on-screen action to create a seamless viewing experience.
6. Monitor the audio levels: While recording, keep an eye on the audio levels to ensure that your voice is not too soft or too loud. Adjust the microphone or app settings accordingly to achieve optimal audio quality. You can do a quick test recording before starting the actual gameplay to ensure everything is working correctly.
7. Review and edit the recording: Once you’ve finished recording the gameplay with the voiceover, review the footage. Pay attention to the audio clarity and ensure that your commentary is synchronized with the gameplay. If needed, make any necessary edits using a video editing app to fine-tune the overall quality of the video.
8. Save and export the video: After reviewing and editing the recording, save the video file. Most screen recording apps allow you to save the video to your device’s gallery or a specific folder. This step is crucial before proceeding to the next stage of video editing and uploading.
By adding commentary or voiceover to your gaming videos, you bring a personal touch and engage with your audience on a deeper level. Remember to practice your delivery and experiment with different styles to find your unique voice as a content creator. So, grab your phone, find a great screen recording app, and let your commentary skills shine!
Editing and Enhancing the Video
Once you’ve recorded your gaming video on your phone, it’s time to polish it and make it ready for uploading to YouTube. Editing and enhancing the video can help you create a more engaging and professional-looking content. Here are some steps to consider:
1. Transfer the video to your computer: To edit the video, you’ll first need to transfer it from your phone to your computer. You can do this by connecting your phone to your computer using a USB cable or wirelessly using cloud storage services like Google Drive or Dropbox. Make sure you have enough storage space on your computer for the video file.
2. Choose a video editing software: There are several video editing software options available, both free and paid. Some popular choices include Adobe Premiere Pro, Final Cut Pro, iMovie, and Shotcut. Choose a software that suits your skill level and budget.
3. Import the video into the editing software: Once you have chosen your editing software, import the recorded video file into the program. You can usually do this by clicking on the “Import” or “Add Media” button and selecting the video file from your computer.
4. Trim and cut unnecessary parts: Watch the video and identify any parts that you want to remove or trim. This could include any moments of silence, loading screens, or unrelated gameplay. Use the editing software’s trim tool to remove these sections and keep the video focused and engaging.
5. Add transitions and effects: To enhance the visual appeal of your video, you can add transitions between scenes and apply various effects. Transitions help to create a smooth flow between different parts of the video, while effects can add an extra layer of creativity and engagement. Experiment with different options to find the ones that work best for your gaming style.
6. Adjust brightness, contrast, and color: Sometimes, the recorded video might need some adjustments to improve the overall visual quality. Most video editing software provides tools to adjust brightness, contrast, and color saturation. Play around with these settings to make your gameplay footage more vibrant and appealing.
7. Overlay text and graphics: Adding text overlays and graphics can make your gaming video more informative and visually appealing. You can use text to highlight important moments, provide commentary, or display other relevant information. The editing software should have options to add text and graphics to your video timeline.
8. Enhance the audio: Good audio quality is crucial for a captivating gaming video. Use the editing software to adjust the audio levels, remove background noise, and add any additional sound effects or music tracks. Ensure that the commentary or voiceover is clear and balanced with the game audio.
9. Preview and finalize the video: Take some time to preview the edited video to ensure that everything looks and sounds as you intended. Make any necessary tweaks or adjustments before finalizing the video. Pay attention to details like transitions, text placement, and audio sync.
10. Export the video: Once you are satisfied with the editing, export the video in a suitable format. YouTube supports a wide range of video formats, including MP4, AVI, and MOV. Choose a format that provides a good balance between video quality and file size.
By following these steps and putting some effort into editing and enhancing your gaming video, you can create high-quality content that stands out on YouTube. Remember to always save a copy of the original recorded video before making any edits, in case you need to make changes or start over. Happy editing!
Uploading and Sharing the Video on YouTube
Once you have finished editing your gaming video masterpiece, it is time to upload and share it on YouTube. Follow the steps below to ensure your video reaches your eager audience:
1. Sign in to YouTube: Open the YouTube app or visit the YouTube website and sign in to your account. If you don’t have an account, you can create one for free.
2. Click on the Upload button: Look for the upload icon, usually a camera or a video camera symbol, and click on it. This will take you to the upload screen.
3. Select your video: Choose the gaming video you want to upload from your device’s storage or the location where you saved it after editing.
4. Add a title and description: Enter a catchy title that accurately represents your gaming video. Consider using relevant keywords to improve discoverability. Write a compelling description that provides a brief overview of the video and engages potential viewers.
5. Set your privacy settings: Decide whether you want your video to be public, unlisted, or private. Public videos are available for anyone to watch, unlisted videos can only be viewed if someone has the video link, and private videos are only visible to you and the people you choose to share them with.
6. Add relevant tags: Tags help YouTube understand the content of your video and can improve its visibility in search results. Use keywords related to your gaming video to attract the right audience.
7. Choose a thumbnail: Thumbnails are the small images that viewers see before clicking on your video. Select an eye-catching and representative thumbnail to entice viewers to click and watch your gaming video.
8. Add end screens and cards: End screens allow you to promote other videos, playlists, or your YouTube channel. Cards can be used to include interactive elements like polls or links to related content. Utilize these features to keep viewers engaged and encourage them to explore more of your content.
9. Choose the appropriate category: Select the category that best describes your gaming video. This helps YouTube categorize your content and recommend it to viewers interested in similar videos.
10. Set monetization preferences: If you want to monetize your gaming video and earn money from ad revenue, configure the monetization settings. Keep in mind that you’ll need to meet YouTube’s eligibility requirements to participate in the YouTube Partner Program.
11. Choose a distribution option: Decide whether you want your gaming video to be published immediately or scheduled for a later time. You can also choose to enable age restrictions if your video contains mature content.
12. Click on the Publish button: Once you’re satisfied with all the settings and information, click on the Publish button to upload your gaming video to YouTube. The upload time will depend on the size and length of your video, as well as your internet connection speed.
13. Share your video: After the upload is complete, you can share your gaming video with the world. Use the YouTube share button to post it on social media platforms, send it to your friends and subscribers, or embed it on your blog or website.
Remember, promoting your video on various platforms and engaging with your audience through comments and interactions will increase the visibility and reach of your gaming video on YouTube.
Conclusion
Recording gaming videos for YouTube on your phone offers a convenient and accessible way to showcase your gaming skills and entertain your audience. With the right tools and techniques, you can create high-quality content that stands out and captures the attention of viewers.
By following the steps outlined in this article, you can ensure that you have the necessary equipment, settings, and editing software to produce professional-looking gaming videos. Remember to optimize your videos with engaging thumbnails, compelling titles, and relevant tags for improved visibility in search results.
Experiment with different styles, game genres, and video editing techniques to find your unique voice and engage with your audience effectively. With time, practice, and a bit of creativity, you can develop a successful YouTube channel dedicated to gaming and attract a loyal community of followers.
So grab your phone, start recording, and let your gaming prowess shine on YouTube!
FAQs
1. Can I record gaming videos for YouTube using my mobile phone?
Yes, you can record gaming videos for YouTube on your mobile phone. With the advancements in technology, smartphones today come with powerful cameras and video recording capabilities that allow you to capture high-quality footage of your gaming sessions.
2. Which mobile phones are best for recording gaming videos?
There are several mobile phones that are well-suited for recording gaming videos. Some popular options include the iPhone 12, Samsung Galaxy S21, Google Pixel 5, and OnePlus 9. These phones have excellent camera quality and performance, making them ideal choices for capturing gaming content.
3. What are some recommended apps for recording gaming videos on a mobile phone?
There are several apps available for recording gaming videos on mobile phones. Some popular choices include AZ Screen Recorder, Mobizen Screen Recorder, DU Recorder, and Game Screen Recorder. These apps provide features like screen recording, video editing, and live streaming, enhancing your ability to capture and share gaming content.
4. Are there any specific settings I need to adjust on my phone for recording gaming videos?
To optimize the recording of gaming videos on your mobile phone, it is recommended to adjust a few settings. First, make sure your phone is set to its highest resolution and frame rate settings for video recording. Additionally, consider turning off any unnecessary notifications or alerts that may interrupt your recording session.
5. How can I ensure the best audio quality when recording gaming videos on my phone?
To ensure high-quality audio when recording gaming videos on your phone, it is advisable to use an external microphone. There are various microphones available specifically designed for mobile phones that can significantly improve audio capture. Alternatively, you can also explore using wireless headphones with built-in microphones for better audio clarity.