
Is your Mac running out of storage space? One effective way to free up valuable disk space is to empty the trash on your Mac. When you delete files or folders, they are moved to the trash where they stay until you manually empty it. However, simply dragging the trash icon to the dock won’t permanently delete those files, and they will continue to take up space on your Mac’s hard drive.
In this article, we will guide you through the process of emptying the trash on your Mac, ensuring that you reclaim that much-needed storage space. We will cover different methods, including the traditional method of emptying the trash through the Finder, as well as shortcut commands and third-party applications that can assist in streamlining the trash-emptying process. By following these steps, you’ll be able to create more room for essential files and applications, optimizing your Mac’s performance.
Inside This Article
- – Method 1: Empty Trash using Finder
- – Method 2: Empty Trash using Dock
- – Method 3: Empty Trash using Terminal
- – Method 4: Use a Third-Party App to Empty Trash
- Conclusion
- FAQs
– Method 1: Empty Trash using Finder
If you’re looking to free up storage on your Mac and get rid of all those unnecessary files taking up space in your trash, the Finder method is the most straightforward way to go. Here’s how you can empty the trash using Finder:
1. First, open a Finder window by clicking on the Finder icon in your dock or by pressing Command + Space and searching for “Finder.”
2. Once you have a Finder window open, navigate to the “Trash” folder. You can find the “Trash” folder in the sidebar under “Favorites” or by clicking on “Go” in the top menu bar and selecting “Trash.”
3. Once you’re in the “Trash” folder, you’ll be able to see all the files that are stored there. To empty the trash, simply click on the “Empty” button in the top-right corner of the Finder window.
4. A confirmation prompt will appear, asking if you’re sure you want to permanently delete the files. Click on “Empty Trash” to confirm and free up the storage space on your Mac.
5. Depending on the size of your trash folder and the speed of your Mac, it may take a few moments for all the files to be permanently deleted.
That’s it! Your trash is now emptied, and you’ve successfully freed up storage on your Mac. It’s worth noting that once you empty the trash, the files cannot be recovered, so make sure you double-check for any essential files before proceeding.
Emptying your trash regularly is a good practice to maintain the optimal performance of your Mac and ensure you have enough storage for new files and applications.
– Method 2: Empty Trash using Dock
If you prefer a quicker and more convenient way to empty the trash on your Mac, you can use the Dock. The Dock is the row of icons typically located at the bottom of your screen. Follow these steps:
- Locate the Trash icon on your Dock. It is usually represented by a waste bin or a paper bag icon.
- Click on the Trash icon to open it.
- In the top menu bar, click on the “Finder” option.
- A dropdown menu will appear. Select the “Empty Trash” option, and a confirmation dialog box will pop up.
- Click on the “Empty Trash” button in the dialog box to permanently delete the files in your trash folder.
Using the Dock to empty the trash provides a simple and direct method to remove unwanted files from your Mac. It saves you the trouble of opening Finder and manually emptying the trash from there. Additionally, you can easily keep an eye on the amount of space occupied by the trash by glancing at the Trash icon on your Dock.
Remember to exercise caution when emptying the trash using the Dock, as the action is irreversible. Once you empty the trash, the files are permanently deleted from your Mac, and you won’t be able to recover them unless you have a backup.
The Dock also offers a right-click option to empty the trash. Simply right-click on the Trash icon, and a context menu will appear. From the menu, select the “Empty Trash” option to initiate the process. This alternative method provides a convenient way to empty the trash without having to navigate through the Finder menu.
Now that you know how to use the Dock to empty the trash on your Mac, you can easily keep your storage space organized, making your Mac run more efficiently.
– Method 3: Empty Trash using Terminal
If you prefer using the command-line interface and want a faster way to empty the trash on your Mac, you can utilize the Terminal application. Terminal allows you to execute commands directly, giving you more control over your system processes.
Follow these steps to empty your trash using Terminal:
- Launch the Terminal application on your Mac. You can find it in the Utilities folder within the Applications folder or by searching for it in Spotlight.
- Once Terminal is open, type the command sudo rm -rf ~/.Trash/* and press Enter. This command uses the “rm” command to remove files and directories forcefully.
- You will be prompted to enter your administrator password. Type it in and press Enter. Note that your password will not be visible as you type.
- After entering your password correctly, Terminal will start emptying the trash. This process may take a while depending on the number and size of the files in your trash.
- Once the process is complete, you can close Terminal.
It’s important to exercise caution when using Terminal, as the command rm -rf can permanently delete files and folders without any confirmation. Ensure that you double-check the command before running it to avoid accidentally deleting important files.
Using Terminal to empty the trash can be an efficient method, especially for power users who are familiar with command-line operations. However, if you are not comfortable using Terminal or unsure about executing commands, it is recommended to stick with the previous methods using Finder or the Dock.
– Method 4: Use a Third-Party App to Empty Trash
If you’re looking for an alternative solution to emptying your trash on Mac, using a third-party app can simplify the process. These apps are designed to optimize your Mac’s storage and provide additional features for managing your files. Here, we will explore a popular third-party app that can help you efficiently empty your trash.
Step 1: Download and install the third-party app. There are several options available, but one popular choice is “CleanMyMac X” by MacPaw. It offers a range of optimization features, including an easy-to-use trash emptying tool.
Step 2: Launch the app and navigate to the “Trash Bins” section. This feature provides a comprehensive overview of all the trash bins on your Mac, including the main trash bin and trash bins associated with specific applications.
Step 3: Review the files in the trash bin. The app will display a list of the files that are currently in your trash, allowing you to review and select the ones you wish to delete permanently. This gives you the opportunity to double-check and make sure you don’t accidentally delete any important files.
Step 4: Empty the trash. Once you have reviewed the files, you can click on the “Empty” button to permanently delete them. The app will free up the corresponding storage space on your Mac, helping to improve its overall performance.
Step 5: Additional optimization features. The advantage of using a third-party app like CleanMyMac X is that it offers additional optimization features beyond emptying the trash. You can take advantage of tools like system junk removal, malware scanning, and performance monitoring to keep your Mac running smoothly.
Using a third-party app to empty your trash can streamline the process and provide you with more control over the files you delete. Remember to choose a reputable app from a trusted source and always review the files in your trash before deleting them permanently.
Conclusion
The process of emptying the trash on your Mac is a simple yet crucial step in managing your storage space effectively. By regularly emptying the trash, you can free up valuable storage space and ensure smooth performance on your Mac. Whether you choose to use the keyboard shortcut, the right-click menu, or the Finder option, the end result remains the same – reclaiming storage space.
Remember that emptying the trash permanently deletes the files, so double-check that you no longer need them before proceeding. Additionally, be mindful of any external devices or network storage that may be connected, as the trash contents may differ. Taking these precautions will help prevent accidental permanent deletions.
By following the steps outlined in this guide, you can confidently empty the trash on your Mac and enjoy the benefits of a clutter-free storage space. So go ahead, regain control of your Mac’s storage, and keep it running smoothly!
FAQs
1. How do I empty the Trash on my Mac?
Answer: To empty the Trash on your Mac and free up storage space, simply follow these steps:
– Find the Trash icon located at the end of your Dock (usually at the bottom of the screen).
– Right-click on the Trash icon and select “Empty Trash” from the pop-up menu. Alternatively, you can press “Command + Shift + Delete” on your keyboard.
– A confirmation dialog will appear asking if you are sure you want to permanently delete the items in your Trash. Click on “Empty Trash” to proceed.
– Depending on the number and size of the files in your Trash, it may take a moment to complete the process. Once finished, the Trash will be emptied, and the storage space will be freed up on your Mac.
2. What happens when I empty the Trash on my Mac?
Answer: When you empty the Trash on your Mac, any files or folders stored in the Trash will be permanently deleted. This means that you won’t be able to recover them unless you have a backup. Emptying the Trash is a way to free up storage space on your Mac by permanently removing unwanted or unnecessary files.
3. Can I recover files after emptying the Trash on my Mac?
Answer: Generally, once you have emptied the Trash on your Mac, the files and folders within it are permanently deleted and cannot be easily recovered. However, if you have enabled Time Machine or have any other backup system in place, you may be able to restore files from a previous backup. It’s always recommended to regularly backup your important data to prevent data loss.
4. Is it necessary to empty the Trash regularly?
Answer: It is not always necessary to empty the Trash regularly, but doing so can help free up storage space on your Mac. By regularly emptying the Trash, you can ensure that any unwanted or unnecessary files are permanently deleted, helping to optimize your Mac’s performance and storage capacity.
5. Can I selectively empty the Trash on my Mac?
Answer: Yes, you can selectively empty the Trash on your Mac if you only want to remove specific files or folders. To do this, open the Trash by clicking on its icon in the Dock, then review the contents. You can select individual items by holding the Command key and clicking on the desired files, or you can select a group of files by using the Shift key. Once you have made your selection, right-click on the selection and choose “Delete Immediately” to permanently remove the selected files from the Trash.
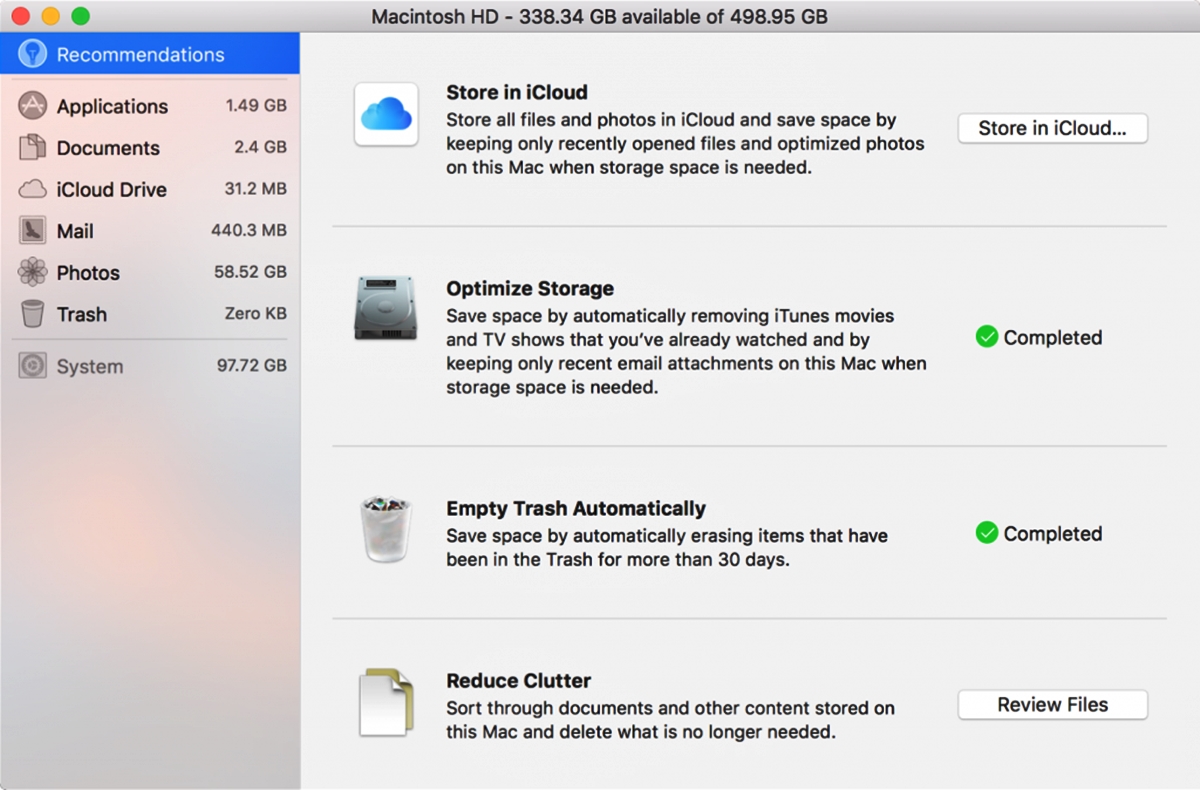
6. Is there a way to automatically empty the Trash on my Mac?
Answer: Yes, you can set your Mac to automatically empty the Trash after a certain period of time. To do this, click on the Apple menu in the top-left corner of the screen, go to “About This Mac,” then click on “Storage.” In the Storage menu, click on the “Manage” button, then select “Empty Trash Automatically.” From there, you can choose the interval at which you want the Trash to be automatically emptied, such as every 30 days or when the Trash reaches a certain size.