
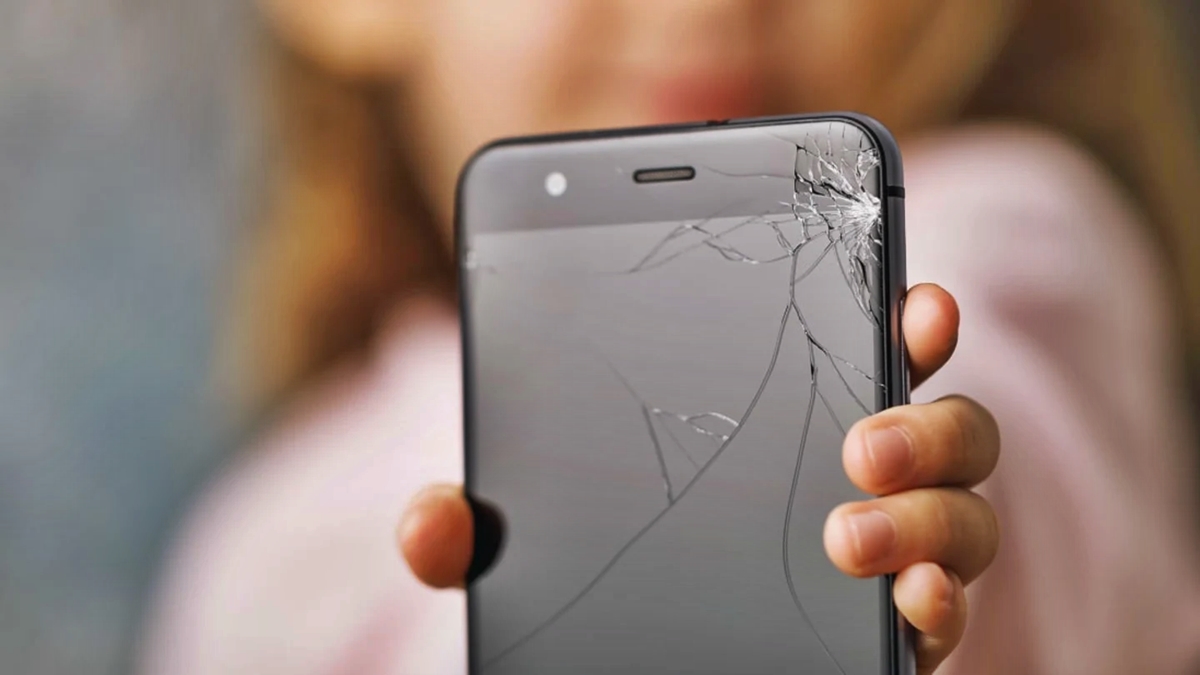
Are you frustrated with the small cracks on your phone screen? Don’t worry, we’ve got you covered! In this article, we will provide you with a comprehensive guide on how to fix those annoying small cracks on your phone screen. Whether it’s a hairline crack or a minor chip, we’ll walk you through the step-by-step process to restore your phone’s display to its former glory. We understand that a cracked screen can be a major inconvenience, affecting both the functionality and aesthetics of your device. With our expert tips and tricks, you’ll be able to tackle this issue head-on and regain full control over your phone’s screen. So, let’s dive in and discover the best methods to fix those small cracks on your phone screen!
Inside This Article
- Materials Needed
- Method 1: Using Toothpaste
- Method 2: Using Baking Soda and Water
- Method 3: Using a Screen Repair Kit
- Method 4: Using Clear Nail Polish
- Conclusion
- FAQs
Materials Needed
When it comes to fixing small cracks in your phone screen, you’ll need a few simple materials to get the job done. Here are the essential items you’ll need:
- A soft, lint-free cloth: This will be used to clean the surface of your phone screen before attempting any repairs.
- Toothpaste: Yes, you read that right! Toothpaste can be used as a simple and effective solution for filling in small cracks in your phone screen.
- Baking soda: If you prefer an alternative to toothpaste, baking soda can also be used as an abrasive substance for gently buffing out minor cracks.
- Water: You’ll need some water to create a paste consistency when using baking soda.
- A screen repair kit: If you’re looking for a more professional approach, investing in a screen repair kit can provide you with all the necessary tools and materials needed to fix small cracks in your phone screen.
- Clear nail polish: In some cases, applying a thin layer of clear nail polish over the crack can help prevent further spreading.
By gathering these materials, you’ll be well-prepared to tackle the task of fixing small cracks in your phone screen, no matter which method you choose to use.
Method 1: Using Toothpaste
If you have a small crack in your phone screen, one method you can try to fix it is by using toothpaste. Toothpaste contains abrasive particles that can help diminish the appearance of small cracks and scratches on the screen. Here’s how you can use toothpaste to potentially repair your phone screen:
1. Clean the screen: Start by thoroughly cleaning your phone screen with a soft cloth and a small amount of water or screen cleaner. Make sure to remove any dirt, dust, or fingerprints from the surface.
2. Apply a small amount of toothpaste: Squeeze a pea-sized amount of toothpaste onto your finger or a cotton swab. Make sure to use a non-gel toothpaste, as the gel variants may not have the same abrasive properties.
3. Gently rub the toothpaste onto the crack: Using a circular motion, gently rub the toothpaste onto the cracked area of the screen. Be careful not to apply too much pressure, as this could potentially cause further damage.
4. Wipe off the excess toothpaste: After rubbing the toothpaste, use a clean, damp cloth to wipe off any excess toothpaste from the screen. Make sure to remove all the toothpaste residue, leaving behind a clean screen.
5. Let it dry: Allow the screen to air dry for at least 10-15 minutes. The toothpaste needs time to settle and potentially fill in the cracks.
6. Check the results: Once the screen is completely dry, inspect it to see if the crack has diminished in appearance. Keep in mind that this method may not completely fix the crack, but it may help make it less noticeable.
7. Repeat if necessary: If the crack is still visible, you can repeat the process a few more times to see if it improves. However, it’s important to note that toothpaste is not a permanent solution and may only provide temporary relief.
It’s worth mentioning that this method is not recommended for large or deep cracks. In such cases, it’s best to seek professional repair services or consider replacing the screen altogether.
Remember, using toothpaste is a DIY solution and may not always yield perfect results. It’s always a good idea to backup your important data before attempting any repairs.
Method 2: Using Baking Soda and Water
If you have a small crack in your phone screen, one effective method for fixing it is by using a mixture of baking soda and water. This DIY solution can help fill in the cracks and make them less noticeable. Here is a step-by-step guide on how to use baking soda and water to fix small cracks in your phone screen:
1. Start by creating a paste using baking soda and water. Mix a small amount of baking soda with a few drops of water until a thick paste forms. Be sure to measure the ingredients carefully to achieve the right consistency.
2. Once you have made the paste, use a clean microfiber cloth to gently clean the screen of your phone. Make sure to remove any dust or debris that may be present on the surface.
3. Apply the baking soda paste directly to the cracked area of your phone screen. Use a clean cotton swab or a soft cloth to spread the paste evenly over the cracks. Make sure to cover the entire cracked area with a thin layer of the paste.
4. Leave the paste on your phone screen for about 15 minutes to allow it to dry. During this time, the baking soda will harden and help fill in the cracks, minimizing their appearance.
5. After the paste has dried, use a clean, damp cloth to carefully wipe away any excess baking soda from the screen. Be gentle when wiping to avoid causing further damage to the screen.
6. Finally, use a dry microfiber cloth to polish the screen and remove any remaining residue. Gently buff the screen in circular motions until it is clean and shiny.
It’s important to note that this method is not a permanent fix for a cracked phone screen. It can help improve the appearance of small cracks and prevent them from spreading. However, for larger or more severe cracks, it’s recommended to seek professional assistance or consider replacing the screen.
Using baking soda and water is a cost-effective and easy DIY solution to minimize the visibility of small cracks in your phone screen. Give this method a try and see the improvement it can make to your damaged screen.
Method 3: Using a Screen Repair Kit
If the cracks on your phone screen are more severe and the previous methods didn’t work, you may need to consider using a screen repair kit. This method is ideal for larger cracks or shattered screens that require a more comprehensive solution.
A screen repair kit typically includes a UV light, adhesive, and a clear adhesive film that helps to seal the cracks. These kits are readily available online or at mobile phone repair shops. Here’s how you can use a screen repair kit to fix small cracks in your phone screen:
- Start by cleaning the surface of the cracked screen. Use a microfiber cloth and a small amount of alcohol to remove any dirt, fingerprints, or debris.
- Next, carefully line up the adhesive film with the cracks on your screen. Trim the film to fit the size of the cracks if necessary.
- Apply the adhesive to the cracks by using the provided applicator or a small brush, making sure to cover the entire crack evenly.
- Place the adhesive film over the cracks and press down firmly to ensure it sticks to the screen. Smooth out any air bubbles or wrinkles using a clean cloth.
- Using the UV light included in the kit, carefully cure the adhesive by holding the light over the cracks for the specified time mentioned in the kit’s instructions.
- After the adhesive has been cured, remove the adhesive film and wipe away any excess adhesive using a soft cloth.
It’s important to note that while a screen repair kit can fix small cracks, it may not provide a perfect solution for larger or more severe damage. In such cases, it may be best to seek professional assistance or consider replacing the screen altogether.
Using a screen repair kit can be an effective way to mend small cracks in your phone screen. However, it’s crucial to follow the instructions provided with the kit and take your time to ensure proper application. With a bit of patience and attention to detail, you can potentially save yourself the hassle and cost of screen replacement.
Method 4: Using Clear Nail Polish
If you have a small crack in your phone screen, one unconventional but effective method to temporarily fix it is by using clear nail polish. While this may sound surprising, clear nail polish can act as a temporary sealant for small cracks, preventing them from spreading further and reducing the risk of damage to your phone. Here’s how you can use clear nail polish to fix a small crack in your phone screen:
1. Clean the screen: Start by cleaning the cracked area of your phone screen using a microfiber cloth or a soft, lint-free cloth. Make sure to remove any dirt, dust, or fingerprints from the surface. This will ensure that the nail polish adheres properly to the screen.
2. Apply a thin layer of clear nail polish: Take a small amount of clear nail polish and carefully apply it over the crack on your screen. Use a small brush or the applicator that comes with the nail polish to ensure precise application. Make sure to apply a thin layer and cover the entire length of the crack.
3. Let it dry: Allow the nail polish to dry completely. This usually takes around 10-15 minutes, but it’s best to wait for at least an hour to ensure that it has fully dried and hardened. Avoid using your phone during this time to prevent any smudging or damage to the nail polish.
4. Reapply if necessary: If the crack is still visible after the first application, you can repeat the process and apply another thin layer of clear nail polish. However, keep in mind that while this method can temporarily fix small cracks, it is not a permanent solution and may not provide the same level of durability as professional screen repairs.
5. Remove the nail polish when necessary: If you decide to get your phone professionally repaired or if you want to remove the nail polish for any other reason, you can use nail polish remover or acetone to dissolve the clear nail polish. Apply a small amount of remover on a cotton swab or cloth and gently rub it over the nail polish until it comes off.
Using clear nail polish as a temporary fix for small cracks in your phone screen can be a quick and inexpensive solution. However, keep in mind that this method may not work for larger or more severe cracks. In those cases, it’s best to consult a professional for proper screen repair or replacement.
Conclusion:
Dealing with small cracks in your phone screen can be a frustrating experience, but with the right approach, you can fix the problem and get your device back to its optimal condition. Whether you opt for a DIY solution or seek professional help, it’s important to consider the severity of the crack and the resources available to you. Remember to prioritize your safety and always exercise caution when attempting any repairs.
By following the steps and tips outlined in this article, you can address small cracks in your phone screen effectively and prevent further damage. Don’t let a small crack ruin your device – take action and restore your phone’s functionality and visual appeal. With the right techniques and a little patience, you’ll have your phone screen looking as good as new in no time. Happy repairing!
FAQs
1. Can I fix small cracks in my phone screen myself?
– Yes, you can attempt to fix small cracks in your phone screen yourself. There are DIY repair kits available in the market that come with all the necessary tools and instructions to help you mend your cracked screen.
2. What are the steps to fix small cracks in a phone screen?
– To fix small cracks in a phone screen, you will need to follow these general steps:
1. Clean the screen: Wipe the surface of the screen with a microfiber cloth to remove any dust or dirt.
2. Apply adhesive: Apply a small amount of clear adhesive or screen repair solution to the cracks using a micro brush or applicator.
3. Spread the adhesive: Use a plastic card or a small brush to evenly spread the adhesive over the cracks, making sure it covers the entire damaged area.
4. Let it dry: Allow the adhesive to dry according to the manufacturer’s instructions, which is typically between 24 to 48 hours.
5. Test the screen: Once the adhesive is completely dry, turn on your phone and check if the screen is functioning properly.
3. Are there any risks involved in fixing a phone screen myself?
– Yes, there are risks involved in fixing a phone screen yourself. If you are not experienced or familiar with phone repairs, you may unintentionally damage the screen further or cause other issues with the phone’s internal components. It is always recommended to proceed with caution or seek professional help if you are unsure.
4. Can I use other household items to fix small cracks in a phone screen?
– While there might be some DIY hacks or unconventional methods suggested online using household items like toothpaste or baking soda, it is advisable to avoid these techniques. They are unlikely to provide a long-lasting or effective solution for fixing the cracks in your phone screen.
5. What should I do if I am not comfortable fixing the phone screen myself?
– If you are not comfortable fixing the phone screen yourself, it is best to seek professional help. There are phone repair shops or authorized service centers that specialize in screen replacements. They have the expertise and necessary tools to safely fix the cracks in your phone screen.