
Are you looking to amplify your smartphone viewing experience and turn your small screen into a larger display? Look no further than the smartphone projector! With this innovative device, you can transform your mobile phone into a portable theater and enjoy your favorite movies, videos, and photos on a big screen, all from the comfort of your own home.
Creating a smartphone projector is a fun and cost-effective DIY project that can be easily done with just a few materials. Whether you want to watch movies with friends, share photos from your recent trips, or even give a presentation, a smartphone projector can provide a larger-than-life experience without the need for expensive equipment.
In this article, we will guide you step-by-step on how to make your own smartphone projector. So, get ready to unleash the full potential of your mobile device and let’s dive into the world of DIY smartphone projectors!
Inside This Article
- Materials Needed
- Step 1: Preparing the Box
- Step 2: Assembling the Focusing Lens
- Step 3: Creating the Smartphone Holder
- Step 4: Mounting the Smartphone
- Step 5: Adjusting the Image
- Step 6: Testing the Smartphone Projector
- Troubleshooting Tips
- Conclusion
- FAQs
Materials Needed
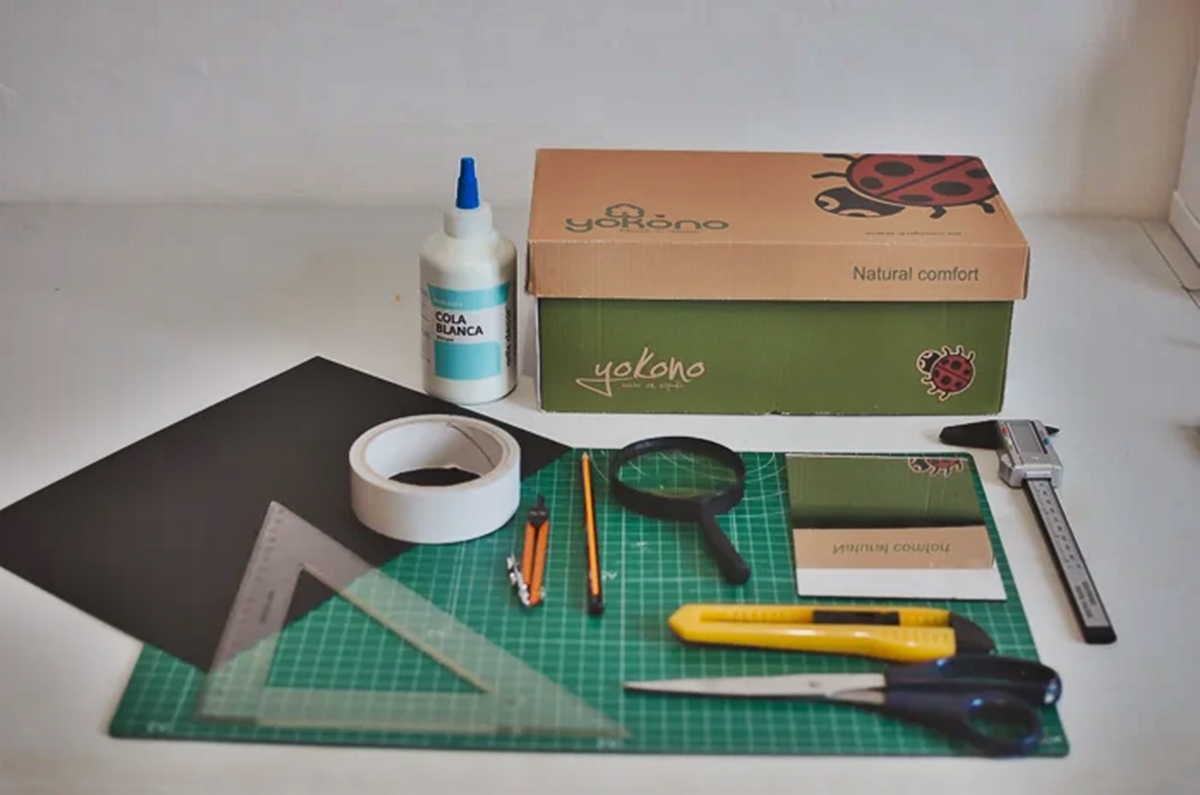
Before you dive into making your own smartphone projector, make sure you have the following materials handy:
- A sturdy cardboard box: Look for a box big enough to fit your smartphone and with at least one side that can be easily cut out.
- A magnifying lens: You can find a magnifying lens at a local store or online. Look for one with a focal length of around 8-10 inches.
- A ruler or measuring tape: This will help you measure and mark the correct dimensions for cutting holes in the box.
- A marker or pen: Use this to mark the spots where you will cut holes in the box.
- A utility knife or scissors: You’ll need these tools to cut out the holes in the box. Be sure to exercise caution and ask for adult supervision if necessary.
- A hot glue gun or double-sided tape: This will be used to secure the magnifying lens and smartphone holder in place.
Once you have gathered these materials, you’re all set to embark on the journey of creating your very own smartphone projector. Let’s move on to the next step!
Step 1: Preparing the Box
Before you can start assembling your smartphone projector, you need to prepare the box that will serve as its main structure. Here’s a step-by-step guide on how to do it:
1. Choose a suitable box: Look for a cardboard box that is spacious enough to accommodate your smartphone and has a flat front surface. This will help ensure a clear and focused projection.
2. Gather the necessary tools: You’ll need a craft knife or scissors, a ruler, a pencil, and some adhesive tape.
3. Measure and mark: On the front surface of the box, measure and mark the dimensions of your smartphone screen. This will help you determine the size of the opening you’ll need to cut out.
4. Cut out the opening: Using a craft knife or scissors, carefully cut along the marked lines to create a rectangular opening on the front of the box. Make sure the opening is large enough to comfortably fit your smartphone.
5. Reinforce the edges: To prevent the edges of the opening from becoming frayed or damaged, reinforce them with adhesive tape. This will help create a neater and more durable projector box.
6. Optional: Paint or decorate the box: If you want to personalize your smartphone projector, you can paint or decorate the box using markers, paint, or colored tape. This step is completely optional but can add a fun and unique touch to your finished projector.
Once you’ve completed these steps, your box will be ready to be transformed into a smartphone projector. Now, it’s time to move on to the next step – assembling the focusing lens.
Note: Always exercise caution when using sharp tools such as craft knives. If you’re uncomfortable or inexperienced with cutting or handling sharp objects, it’s a good idea to seek assistance from someone who can help you safely complete this step.
Step 2: Assembling the Focusing Lens
Now that you have prepared the box for your smartphone projector, it’s time to move on to the next step: assembling the focusing lens. The focusing lens is a crucial component that will help you project a clear image onto the screen.
1. Take the magnifying lens or a biconvex lens and carefully remove any protective film that may be on it. This film is often present to prevent scratches during shipping.
2. Position the lens at the front of the box, where the opening is located. You can use glue or tape to secure it in place. Make sure the lens is aligned with the center of the opening for optimal projection.
3. Double-check that the lens is securely attached and doesn’t wobble or move when touched. A stable focusing lens is essential for maintaining a clear image projection.
4. If you notice any smudges or fingerprints on the lens, gently clean it with a microfiber cloth or lens cleaner. Any dirt or residue on the lens can negatively impact the quality of the projected image.
5. Test the focusing lens by placing your smartphone in the holder and turning on a video or image with bright colors and fine details. Adjust the distance between the smartphone and the lens to achieve the best focus.
6. Play around with the position of the lens to find the sweet spot where the image is sharpest. This might require some trial and error until you find the perfect position.
Remember, the quality and clarity of the projected image depend heavily on the focusing lens. Take your time to ensure it is properly installed and adjust it as needed to achieve the best results.
Step 3: Creating the Smartphone Holder
When it comes to creating your own smartphone projector, having a sturdy and reliable smartphone holder is essential. The holder will keep your smartphone in place, allowing you to position it correctly and achieve a clear and focused image on the screen.
To create a smartphone holder, you have a few options. One simple and effective method is to use a small cardboard box or cereal box. Cut out a rectangular opening on one side of the box, leaving enough space to fit your smartphone snugly.
Next, reinforce the edges of the opening with a strong adhesive tape to ensure durability. This will prevent the box from collapsing or losing its shape while in use.
If you prefer a more customizable approach, you can use a piece of foam or styrofoam. Cut the foam into a rectangular shape, ensuring that its dimensions match the size of your smartphone. Then, create a slot in the foam where you can securely place your device.
Another option is to use a plastic or wooden stand. These holders are adjustable and offer flexibility in terms of positioning your smartphone at various angles. Look for stands that are compatible with the size of your device and allow for easy adjustment.
Once you have chosen your preferred method, place the created holder or stand at the back of the box. Make sure it is secure and that the opening aligns with the lens of the projector. This will allow the light from the smartphone to pass through the lens and create a sharp projection on the screen.
Remember to double-check the positioning of the smartphone holder and lens before proceeding to the next step. This will ensure that everything is aligned properly and that you’ll achieve the best possible results when testing your smartphone projector.
Step 4: Mounting the Smartphone
Once you have prepared the box and assembled the focusing lens, it’s time to mount your smartphone. Follow these steps to ensure the phone is securely attached to the projector:
1. Begin by placing your smartphone on the platform inside the box, with the screen facing the lens. Make sure the phone is centered and aligned with the lens for optimal projection.
2. Use strips of double-sided tape or adhesive putty to secure the phone in place. Apply the tape or putty on the sides and bottom of the phone, ensuring it sticks firmly to the platform. This will prevent the phone from slipping or moving during projection.
3. Alternatively, you can create a customized smartphone holder using cardboard or foam board. Cut out a section that fits the dimensions of your phone, leaving space for the camera lens and other ports. Attach the holder to the platform using glue or tape.
4. Once the smartphone is securely mounted, gently close the box, ensuring that the lens aligns with the screen. The box should be sealed tightly to eliminate any external light sources that could interfere with the projected image.
5. If needed, you can make adjustments to the positioning of the phone or the focusing lens to ensure the best possible projection quality. Take your time to experiment with different angles and distances to achieve the desired image clarity and size.
Remember to avoid touching the lens or screen during this process, as it may distort the projected image or leave fingerprints. If necessary, use a soft cloth or lens cleaning solution to gently clean the lens and screen before securing the smartphone.
With the smartphone securely mounted in the projector, you are one step closer to enjoying your homemade cinema experience. Now, let’s move on to the next step and learn how to adjust the image for optimal viewing.
Step 5: Adjusting the Image
Now that you have assembled the basic components of your smartphone projector, it’s time to fine-tune and adjust the image for optimal viewing quality. Follow these steps to ensure a clear and sharp image:
1. Distance from the wall: Firstly, decide on the desired size of the projected image. Place your smartphone projector box at a suitable distance from the wall or projection surface. The further the box is from the wall, the larger the image will be; conversely, the closer the box, the smaller the image will appear.
2. Focus adjustment: Most smartphone projectors have a focusing knob or lens that allows you to adjust the image’s sharpness. Look for the focus control on your projector box and rotate it until the image becomes clear and well-defined. Depending on your projector, you may need to move the smartphone holder closer to or farther away from the lens to achieve optimal focus.
3. Keystone correction: Keystone distortion occurs when the projected image appears trapezoidal instead of rectangular due to the projector not being perfectly aligned with the wall. Some smartphone projectors have built-in keystone correction features that allow you to digitally adjust the image shape to correct any distortion. Look for keystone correction options in your projector settings or adjust the position and angle of your projector box until the image appears rectangular and proportional.
4. Lighting conditions: The ambient lighting in the room can affect the visibility and clarity of the projected image. For the best results, dim the lights or project the image in a darkened environment. Avoid projecting directly into bright light sources to prevent washed-out images and enhance the overall viewing experience.
5. Image orientation: Depending on how you positioned your smartphone in the projector box, the image may appear flipped horizontally or vertically. If this happens, you can adjust the image orientation in your smartphone’s display settings or by physically rotating your smartphone within the holder to correct the image orientation.
By following these steps and making the necessary adjustments, you can ensure that your smartphone projector delivers a high-quality image that is clear, sharp, and properly aligned. Take your time to fine-tune the settings until you achieve the best possible viewing experience.
Step 6: Testing the Smartphone Projector
Now that you have completed the construction of your DIY smartphone projector, it’s time to put it to the test! Follow these steps to ensure optimal performance:
1. Find a Dark Room: To achieve the best image quality, you’ll need to test the projector in a dark environment. Close the curtains or blinds and turn off any bright lights.
2. Set Up the Projector: Place the DIY smartphone projector on a stable surface, such as a table or tripod. Make sure it is positioned at a suitable distance from the projection surface to obtain a clear and focused image.
3. Align the Smartphone: Place your smartphone in the holder, ensuring it is aligned correctly with the lens. Adjust the angle and placement of the smartphone to achieve the desired image size and position.
4. Turn on the Smartphone: Power up your smartphone and navigate to the content you wish to project, whether it’s a video, photo slideshow, or presentation. Set the brightness to a comfortable level for viewing.
5. Adjust the Focus: Use the focusing mechanism you assembled earlier to fine-tune the focus of the projected image. Rotate or move the lens forward or backward until the image appears sharp and clear.
6. Test Different Distances: Experiment with the distance between the projector and the screen or wall. Move the projector closer or farther away to find the optimal distance for the best image size and quality.
7. Fine-Tune Image Alignment: If necessary, adjust the position of the smartphone and the projector to align the projected image correctly on the surface. Make any necessary adjustments until the image is centered and straight.
8. Check Image Brightness: Take a moment to assess the brightness of the projected image. If it appears dim, try adjusting the smartphone’s brightness settings or consider using the projector in a darker environment for better results.
9. Test Different Content: Don’t limit yourself to just one type of content. Test out different videos, photos, or presentations to see how well your DIY smartphone projector performs with various media.
10. Enjoy the Projection: Once you are satisfied with the image quality and alignment, sit back, relax, and enjoy the experience of watching your favorite content on the big screen!
Remember, the quality of the projected image may vary based on the capabilities of your smartphone’s display, as well as the lens and materials used in the DIY construction. Experimentation and adjustments may be needed to achieve the desired results.
Troubleshooting Tips
While making a smartphone projector can be a fun and rewarding DIY project, it’s not uncommon to encounter some issues along the way. Here are some troubleshooting tips to help you overcome common challenges:
1. Blurry or Distorted Image: If you notice that the image projected by your smartphone projector is blurry or distorted, double-check the alignment of the lens and the smartphone screen. Make sure they are perfectly aligned and centered. Additionally, ensure that the lens is clean and free from any fingerprints or smudges that may affect the image clarity.
2. Dim or Faint Image: If the projected image appears dim or faint, first check the brightness settings on your smartphone. Increase the screen brightness to improve the image quality. If the problem persists, try adjusting the distance between the smartphone and the lens. Moving the smartphone closer to the lens can help amplify the brightness of the projected image.
3. Inconsistent Focus: If you’re having trouble getting a consistent focus on your smartphone projector, try adjusting the distance between the lens and the image projection surface. Moving the lens closer or farther away can help you find the sweet spot for a clear and focused image. Additionally, make sure that the lens is securely held in place and properly aligned with the smartphone screen.
4. Poor Sound Quality: While a smartphone projector is primarily designed to project images, it can still be used to watch videos or movies with sound. However, if you’re experiencing poor sound quality, consider connecting external speakers or using headphones for better audio output. This can significantly enhance your viewing experience.
5. Overheating Issues: In some cases, prolonged use of your smartphone projector can lead to device overheating. If you notice your smartphone getting hot during usage, try reducing the brightness of the screen or taking short breaks between sessions to allow the device to cool down. You can also try using a small cooling fan or positioning the projector in a well-ventilated area.
6. Compatibility Issues: Depending on the design of your smartphone projector and the size of your phone, you may encounter compatibility issues. Ensure that your smartphone fits securely within the holder and that the lens covers the entire screen. If your phone is too large or small, you may need to modify the holder or consider using a different sized lens for optimal projection.
By following these troubleshooting tips, you’ll be well-equipped to overcome any challenges that may arise during the construction and use of your smartphone projector. Remember, it’s all part of the DIY journey, and with a little patience and creativity, you’ll soon be enjoying the immersive experience of your very own homemade projector!
After exploring the world of smartphone projectors, it is clear that creating your own mini cinema experience is within reach. By utilizing basic household items and a smartphone, you can transform your living room into a theater for an immersive movie-watching experience. Not only is it a fun DIY project, but it also allows you to share your favorite videos and presentations with friends and family.
With step-by-step instructions and a little creativity, you can construct a smartphone projector that rivals the big screens at the movie theater. Whether you are looking to entertain guests, enjoy a movie night at home, or make a presentation at work, building a smartphone projector is a cost-effective and enjoyable option.
So, why wait? Grab your smartphone, gather the necessary materials, and start building your very own smartphone projector today!
FAQs
1. Can I use any smartphone to make a smartphone projector?
Yes, you can use any smartphone to make a smartphone projector. Whether you have an iPhone or an Android device, the process remains the same. Just make sure your smartphone has a bright screen and is capable of playing videos or displaying images.
2. Do I need any special equipment to make a smartphone projector?
No, you don’t need any special equipment to make a smartphone projector. It’s a DIY project that can be done with everyday materials. All you need is a magnifying glass or a lens, a shoebox or a cardboard box, and some basic tools like scissors and glue.
3. How does a smartphone projector work?
A smartphone projector works by using the magnifying power of a lens to project the image from your smartphone screen onto a larger surface. The lens acts as a magnifier, focusing the light from the smartphone onto a projector surface. This allows you to watch videos or display images on a bigger screen without the need for a traditional projector.
4. Can I adjust the size of the projected image?
Yes, you can adjust the size of the projected image by moving your smartphone closer or further away from the lens. The distance between the lens and the smartphone screen will determine the size of the projected image. Experiment with different distances to find the perfect size for your viewing experience.
5. Are smartphone projectors as good as regular projectors?
Smartphone projectors are not as powerful or as high-resolution as regular projectors. However, they can still provide a fun and convenient way to watch videos or display images on a larger screen. They are great for casual use, outdoor movie nights, or impromptu presentations. If you require professional or high-quality projection, a regular projector would be a better option.