
In today’s fast-paced and technology-driven world, our smartphones have become an essential part of our lives. From communication and entertainment to productivity and creativity, our phones have transformed into virtual Swiss army knives, serving a multitude of purposes. One fascinating feature that has gained popularity is turning your phone into a projector. This innovative trick allows you to share videos, photos, presentations, and more with friends and colleagues in a larger-than-life format. Whether you’re looking to host a movie night at home, give a stellar presentation at work, or simply amplify your phone’s screen for a better viewing experience, transforming your phone into a projector opens up a whole new realm of possibilities. In this article, we’ll guide you through the step-by-step process of turning your phone into a projector and explore the various methods available. Get ready to unleash the power of your phone and bring your content to life on the big screen!
Inside This Article
- Method 1: Using a Magnifying Glass – Materials needed – Step-by-step instructions
- Method 2: Using a Shoebox- Materials needed- Step-by-step instructions
- Method 3: Using a DIY Cardboard Projector
- Method 4: Using a Smartphone Projector Kit
- Troubleshooting Tips
- Conclusion
- FAQs
Method 1: Using a Magnifying Glass – Materials needed – Step-by-step instructions
If you’re looking for a budget-friendly way to turn your phone into a projector, using a magnifying glass might just be the solution. This simple yet effective method can transform your mobile device into a mini projector, allowing you to enjoy your favorite movies, videos, or presentations on a larger screen.
Here’s what you’ll need to get started:
- A large magnifying glass with a handle
- A sturdy tripod or stand
- A dark room or a dimly lit area
- Your smartphone
Now, let’s get into the step-by-step instructions:
- Begin by finding a suitable location, preferably a dark room or a dimly lit area, as this will enhance the projection quality.
- Set up the tripod or stand on a stable surface, ensuring that it’s at a comfortable height for viewing.
- Place your smartphone on the tripod or stand, securing it in place.
- Adjust the position of the magnifying glass so that it’s centered over the smartphone’s screen.
- Tilt the magnifying glass slightly towards the screen to focus the image.
- Turn on the video or content you want to project on your phone.
- Hold the magnifying glass handle and position it at a distance from the smartphone, allowing the image to be projected onto a nearby wall or surface.
- Adjust the distance between the magnifying glass and the wall to obtain the desired projection size.
- Once you’re satisfied with the image quality and size, sit back, relax, and enjoy your movie or presentation on the enlarged screen.
This method may not provide the same level of brightness and clarity as professional projectors, but it can certainly be a fun and cost-effective option for casual use.
Remember, experiment with different angles, distances, and lighting conditions to optimize the projection quality. Have fun exploring the possibilities of turning your phone into a mini projector with just a magnifying glass!
Method 2: Using a Shoebox- Materials needed- Step-by-step instructions
Turning your phone into a projector using a shoebox is a fun and creative way to enjoy movies, videos, or presentations on a bigger screen. With just a few simple materials, you can transform your shoebox into a makeshift projector that will provide hours of entertainment. Here’s what you’ll need:
Materials needed:
- A shoebox
- A magnifying glass or a lens
- A marker or pencil
- A pair of scissors or a craft knife
- A ruler
- A smartphone or tablet
- Tape or glue
- A dark and quiet room
Once you have gathered all the necessary materials, follow these step-by-step instructions to turn your shoebox into a projector:
- Step 1: Start by tracing the outline of your smartphone or tablet on one end of the shoebox lid. Make sure to center it as accurately as possible.
- Step 2: Using a craft knife or a pair of scissors, carefully cut out the traced rectangle on the shoebox lid. This will be the opening for your smartphone or tablet.
- Step 3: On the opposite end of the shoebox, trace the outline of your magnifying glass or lens. Again, make sure to center it properly.
- Step 4: Cut out the traced circle on the shoebox, creating a hole where the magnifying glass or lens will be inserted.
- Step 5: Place the magnifying glass or lens in the hole you just created, making sure it fits snugly. You can secure it in place with tape or glue if necessary.
- Step 6: Insert your smartphone or tablet into the rectangular opening on the shoebox lid. Make sure the screen is facing towards the inside of the box.
- Step 7: Adjust the position of your device until the image is focused and centered inside the shoebox.
- Step 8: Once you’re satisfied with the positioning, secure your smartphone or tablet in place with tape or any adhesive. Make sure it is firmly attached, but still accessible if you need to make any adjustments.
- Step 9: Find a dark and quiet room where you can project your videos or movies. The darker the room, the clearer and brighter the projected image will be.
- Step 10: Turn on your smartphone or tablet and choose the video or movie you want to project.
- Step 11: Place the shoebox on a flat surface, adjust the angle of the projector by propping it up with books or any other objects if necessary.
- Step 12: Sit back, relax, and enjoy the bigger screen experience as your shoebox projector brings your videos to life!
Remember to experiment with different distances and angles to achieve the best projection quality. The size of the projected image will depend on the distance between the shoebox projector and the screen. Have fun and let your creativity shine with your homemade shoebox projector!
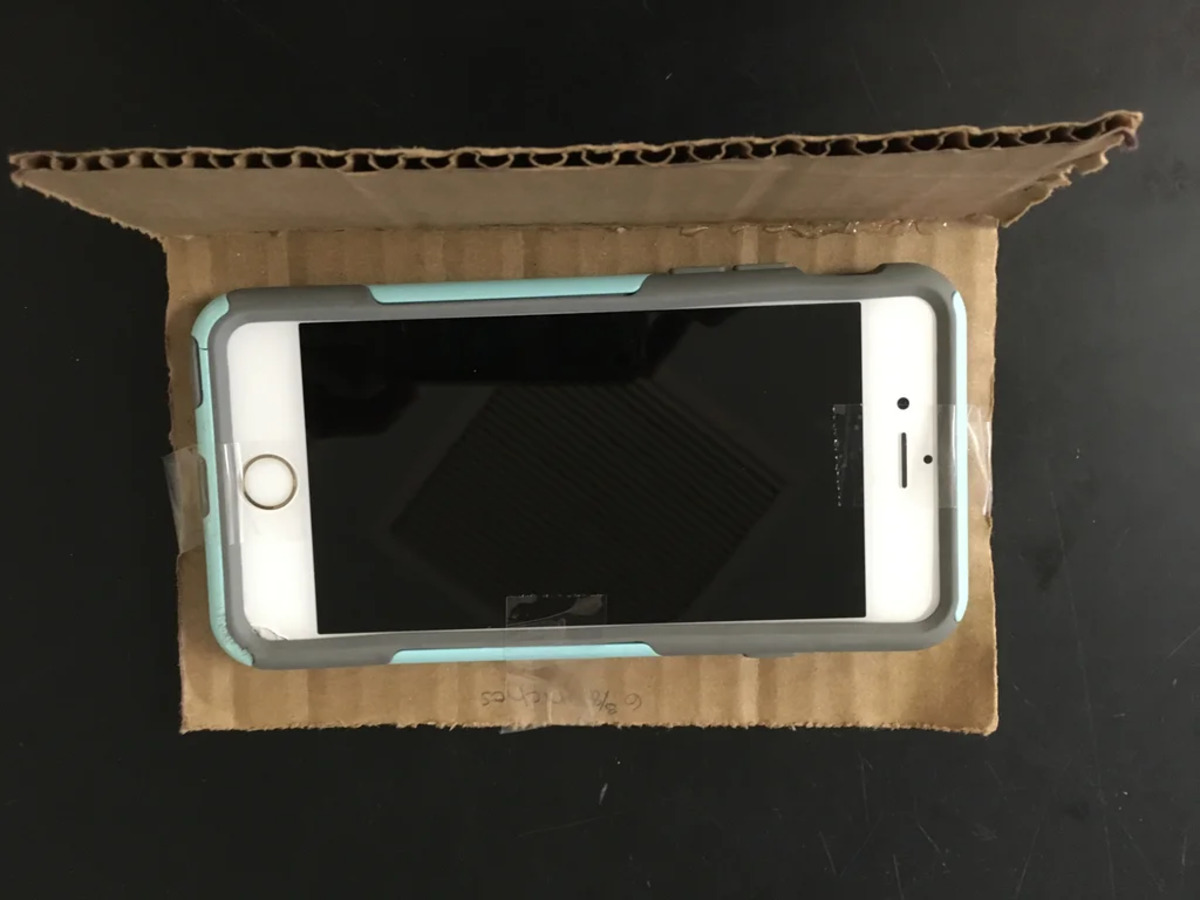
Method 3: Using a DIY Cardboard Projector
If you want to turn your phone into a projector but don’t want to spend a lot of money, you can create your own DIY cardboard projector. This method is perfect for those who enjoy DIY projects and want a budget-friendly solution.
Here are the materials you’ll need:
- A cardboard box
- A magnifying glass
- A knife or scissors
- A ruler
- Black electrical tape
- Marker or pen
- A smartphone or tablet
Now, let’s dive into the step-by-step instructions:
- Start by measuring the size of your phone or tablet on one side of the cardboard box.
- Using the ruler and marker, draw a rectangle on the side of the box according to the measurements of your device. Make sure to leave some space around the edges for stability.
- Carefully cut out the rectangle using a knife or scissors. Take your time and make sure to cut along the lines accurately.
- Place your magnifying glass on the opposite side of the box from the cut-out rectangle. Trace its outline with a marker or pen.
- Cut out the traced circle using a knife or scissors. This will be the lens of your projector.
- Insert your smartphone or tablet into the cut-out rectangle, with the screen facing towards the lens.
- Secure the device in place using black electrical tape. Make sure it is tightly secured to prevent any movement during use.
- Position the DIY cardboard projector towards a blank white wall or screen.
- Turn on your phone or tablet and select a movie or video to project.
- Adjust the distance between the projector and the wall/screen to get the desired image size. You can also adjust the focus by moving the magnifying glass closer or farther from the device.
- Enjoy your homemade projector and have fun watching movies or videos on the big screen!
Remember, this DIY cardboard projector may not provide the same quality and brightness as a commercial projector. However, it’s a fun and inexpensive way to enjoy a movie night with friends or family. So, get creative and start projecting!
Method 4: Using a Smartphone Projector Kit
If you want a hassle-free way to turn your phone into a projector, using a smartphone projector kit is the way to go. These kits are designed specifically for this purpose, and they provide all the necessary materials and instructions to easily create a projector from your smartphone.
Materials Needed:
- A smartphone projector kit (available online or at electronic stores)
- A smartphone
- A dark room or dimly lit environment
Step-by-Step Instructions:
- Start by setting up your smartphone projector kit according to the instructions provided. Most kits will require you to assemble the projector box and attach the lens.
- Ensure that your smartphone is fully charged and that the screen brightness is set to maximum.
- Find a dark room or dimly lit environment where you can use the projector without any interference from ambient light.
- Position the smartphone in the designated slot or holder on the projector box, ensuring that the screen is facing the lens.
- Adjust the focus on the lens to ensure a clear image.
- Turn on the smartphone and open the content you want to project, whether it’s a movie, presentation, or photos.
- Position the projector box at an appropriate distance from the projection surface. The exact distance will depend on the projector kit you are using, so refer to the instructions for guidance.
- Once everything is set up, dim the lights or darken the room to enhance the viewing experience.
- Enjoy your projected content on a larger screen!
Using a smartphone projector kit is a great option if you want a portable and convenient way to turn your phone into a projector. These kits are designed to optimize the projection quality and make the setup process as straightforward as possible.
Keep in mind that the projected image may not match the quality of a professional projector, but it can still provide a fun and enjoyable viewing experience for movies, presentations, or sharing photos with friends and family.
Troubleshooting Tips
While turning your phone into a projector can be a fun and innovative way to enjoy multimedia content, sometimes you may encounter some hiccups along the way. If you’re facing any issues with your makeshift projector, here are some troubleshooting tips to help you out:
1. Poor Image Quality: If the projected image appears blurry or unclear, you might need to adjust the focus. Experiment with the distance between your phone and the projection surface to find the optimal focus point.
2. Dim Projection: If the projected image is too dim, check the brightness settings on your phone. Increase the screen brightness to enhance the projection brightness as well. You can also try using the projector in a dimly lit room for better visibility.
3. Distorted Image: If the image appears distorted or stretched, make sure your phone is properly aligned with the projection surface. Adjust the angle or distance between the phone and the projector to achieve a proportional and rectangular image.
4. Audio Issues: If you’re experiencing problems with audio playback, ensure that the volume on your phone is turned up and not on mute. Also, check the audio connections between your phone and any external audio devices or speakers you may be using.
5. Overheating: Continuous usage of your phone as a projector can cause it to overheat. To prevent overheating, try not to use the projector for extended periods. Consider taking short breaks to allow your phone to cool down if you’re projecting for a longer duration.
6. Battery Drain: Using your phone as a projector can consume a significant amount of battery power. Make sure your phone is fully charged before starting a projection session, or alternatively, keep it connected to a power source to avoid any interruptions due to low battery.
7. Device Compatibility: Not all smartphones may be compatible or provide optimal performance when used as projectors. If you’re facing persistent issues or limitations with your phone as a projector, consider checking for compatibility requirements or exploring dedicated smartphone projector devices.
Remember, troubleshooting tips may vary depending on the method you’re using to turn your phone into a projector. Use these recommendations as a general guide when addressing common issues. If you’re still encountering problems, don’t hesitate to consult online forums or seek assistance from tech-savvy individuals who have experience with DIY phone projectors.
Conclusion
Turning your phone into a projector is an incredible way to share videos, presentations, and photos with a large audience. Not only does it provide convenience and portability, but it also allows you to transform any flat surface into a projection screen.
With the various methods available, such as using a smartphone projector or leveraging apps and accessories, you can easily amplify the capabilities of your device. Whether you’re looking to enjoy a movie night with friends or deliver a captivating presentation at work, transforming your phone into a projector opens up a whole new world of possibilities.
Remember to consider factors like brightness, resolution, and compatibility when choosing your method. Experiment with different techniques and find the one that suits your needs and budget.
So go ahead, unlock the potential of your smartphone and take your entertainment and productivity to the next level by transforming it into a projector. The possibilities are endless!
FAQs
Q: Can I turn my phone into a projector?
A: Yes, it is possible to turn your phone into a projector with the help of a few accessories or using built-in features in some smartphone models.
Q: What accessories do I need to turn my phone into a projector?
A: To turn your phone into a projector, you will need a projector attachment or a portable projector device that can connect to your phone via HDMI or wireless connection. Additionally, you may also need a screen or a plain wall to project onto.
Q: How do I connect my phone to a projector?
A: If you are using a projector attachment, it will typically connect to your phone via the charging port. If you are using a portable projector device, you can connect your phone either wirelessly via Bluetooth or Wi-Fi, or using an HDMI cable.
Q: Are there any apps I need to install on my phone to use it as a projector?
A: Some portable projector devices may require you to install a companion app on your phone to control the projection settings. However, if you are using a projector attachment, you may not need any specific apps as it will utilize the built-in projection capabilities of your phone.
Q: Can I project anything from my phone onto a screen or wall?
A: Yes, you can project various types of content from your phone onto a screen or wall, including photos, videos, presentations, and even streaming services like Netflix or YouTube. However, please note that the quality and brightness of the projection may vary depending on your phone’s specifications and the projector device you are using.