
Are you the proud owner of a Sony Xperia smartphone and want to know how to print directly from your device? Look no further! In this article, we will guide you through the process of printing from your Xperia phone, whether it’s a document, photo, or webpage. Printing on the go has never been easier, thanks to the advancements in mobile technology. With just a few simple steps, you can send your files to a wireless printer and have them in your hands in no time. Say goodbye to the hassle of transferring files to a computer before printing. Get ready to unleash the full potential of your Xperia smartphone by learning how to print from it effortlessly.
Inside This Article
- Step 1: Check Printer Compatibility
- Step 2: Connect Xperia to Wi-Fi Network
- Step 3: Install Printer App on Xperia
- Step 4: Add Printer to Xperia
- Step 5: Print from Xperia
- Conclusion
- FAQs
Step 1: Check Printer Compatibility
Before attempting to print from your Xperia device, it’s essential to ensure that your printer is compatible. Compatibility can vary depending on the make and model of both your Xperia device and the printer. Here are a few steps you can follow to check if your printer is compatible with your Xperia:
1. Research Printer Compatibility: Start by researching the specifications of your printer. Look for any information regarding compatibility with mobile devices, specifically Android devices.
2. Check Manufacturer’s Website: Visit the manufacturer’s website of your printer. Look for a section that provides information about compatibility with different mobile operating systems.
3. Review Printer Documentation: If you still have the documentation or user manual for your printer, it’s worth checking if it mentions compatibility with Android devices or specific apps for printing.
4. Check Google Cloud Print Support: Another way to determine printer compatibility is by checking if it supports Google Cloud Print. This feature allows you to print from your Android device to a compatible printer over the internet.
By following these steps, you can confirm if your printer is compatible with your Xperia device. If you find that your printer is not compatible, you may need to explore alternative options such as using a different printer or utilizing a printing service.
Step 2: Connect Xperia to Wi-Fi Network
Connecting your Xperia phone to a Wi-Fi network is crucial for enabling printing capabilities. Follow these simple steps to establish a seamless connection:
- Open the Settings app on your Xperia phone by accessing the app drawer and tapping on the Settings icon.
- Scroll down and select the “Wi-Fi” option from the list of available settings.
- Toggle the Wi-Fi switch to the “On” position, if it is not already enabled. This will allow your Xperia phone to detect nearby Wi-Fi networks.
- Your Xperia phone will now display a list of available Wi-Fi networks in your vicinity. Select the network you want to connect to by tapping on its name.
- If the selected network is password-protected, a prompt will appear asking for the network password. Enter the correct password using the on-screen keyboard and tap “Connect.
- Your Xperia phone will now attempt to establish a connection with the chosen Wi-Fi network. Wait for a few seconds until the connection is established.
- Once the connection is established, you will see a confirmation message indicating a successful Wi-Fi connection. Your Xperia phone is now connected to the Wi-Fi network, enabling you to proceed with the printing process.
It is important to ensure that your Xperia phone is connected to a stable and reliable Wi-Fi network to facilitate an uninterrupted printing experience. This will ensure that printing commands are transmitted seamlessly to the printer without any interruptions or delays.
Step 3: Install Printer App on Xperia
Installing a printer app on your Xperia smartphone is essential for seamless printing. Follow these steps to install a printer app on your device:
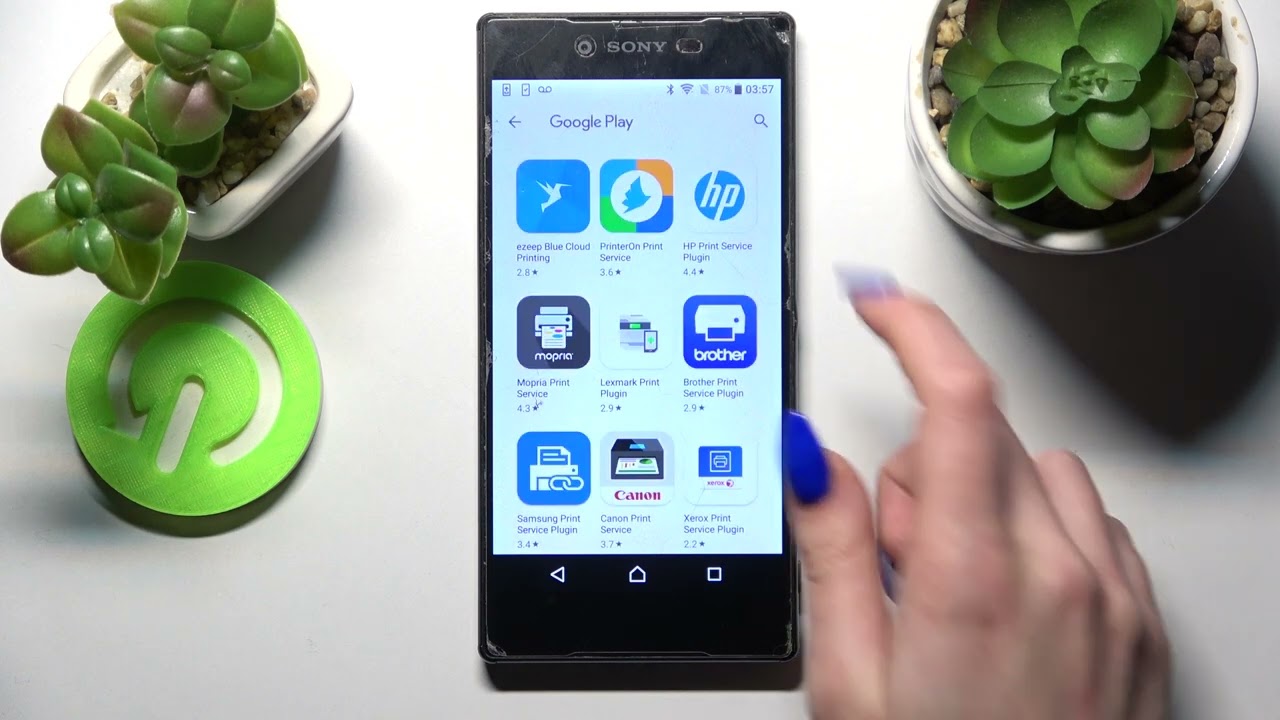
1. Open the Google Play Store on your Xperia device. This is the official app store for Android devices, and it is where you can find a variety of printer apps available for download.
2. Tap on the search bar at the top of the screen and type in the name of your printer brand or a generic printer app keyword, such as “printer app” or “print utility.”
3. Browse through the search results and select the printer app that matches your printer brand or offers the features you need. Look for apps with high ratings and positive reviews from other users.
4. Once you have found the printer app you want to install, tap on the “Install” button next to its name. This will initiate the download and installation process.
5. After the app has finished installing, tap on “Open” to launch the printer app on your Xperia device.
6. Follow the on-screen instructions provided by the printer app to complete the setup process. This may include connecting your Xperia device to the same Wi-Fi network as your printer and granting necessary permissions to the app.
7. Once the setup process is complete, you will be able to access the printer app from your Xperia’s app drawer or home screen.
Installing the printer app on your Xperia device allows you to print documents, photos, and other files directly from your smartphone. It provides you with convenient and efficient printing options, eliminating the need to transfer files to a computer before printing.
Remember to check for app updates regularly to ensure that you have the latest features and compatibility improvements for your printer.
Step 4: Add Printer to Xperia
Adding a printer to your Xperia device is an essential step in the process of printing directly from your phone. Follow these simple instructions to complete this step:
1. Open the settings menu on your Xperia device. You can usually find it in the app drawer or by swiping down from the top of the screen and tapping on the gear icon.
2. In the settings menu, scroll down and tap on the “Connected devices” option.
3. Look for the “Printing” option and tap on it to access the printing settings.
4. In the printing settings, you will see a list of available printers. Tap on the “Add service” button.
5. A list of printer service providers will appear. Select your preferred provider, such as Google Cloud Print or your printer’s proprietary app.
6. If you choose Google Cloud Print, make sure you have a Google account linked to your Xperia device. Sign in if prompted.
7. After selecting the desired printer service, follow the on-screen instructions to complete the setup process. This may involve signing in to your printer account or entering the printer’s IP address.
8. Once the setup is complete, your Xperia device will recognize the printer, and it will be added to the list of available printers in the printing settings.
9. You can now start printing directly from your Xperia device. When you want to print a document or photo, simply select the print option from the app or gallery, choose the desired printer, and adjust any print settings if necessary.
Adding a printer to your Xperia device ensures seamless printing capabilities and allows you to easily print documents and photos on the go.
Step 5: Print from Xperia
Now that you have successfully connected your Xperia to a compatible printer, it’s time to learn how to print from your device. Printing from your Xperia is a straightforward process that can be done in just a few simple steps.
1. Open the document or image you want to print on your Xperia device. It could be a PDF file, a Word document, an email, or even a photo.
2. Once you have the document or image open, tap on the share button. This button is usually represented by an arrow pointing upwards and is located in the top-right corner.
3. A list of options will appear. Look for the “Print” option and tap on it.
4. Your Xperia will now search for available printers. Once it finds your printer, tap on it to select it.
5. You might also have the option to adjust the print settings, such as the number of copies, paper size, and color preferences. Take a moment to review and customize these settings according to your needs.
6. After confirming the print settings, tap on the “Print” button to start the printing process.
7. Depending on the size of the document or image and the capabilities of your printer, the printing process may take a few moments. Be patient and wait for the printer to complete the task.
8. Once the printing is done, you can collect your printed document or image from the printer tray.
And that’s it! You have successfully printed from your Xperia device. Whether you need to print important documents for work or want to preserve special memories by printing photos, your Xperia makes it easy and convenient to do so.
Note: Keep in mind that the steps mentioned above may slightly vary depending on the specific model of your Xperia device and the printer you are using. Make sure to consult the user manual of your device and the printer manufacturer’s instructions for any additional guidance.
The ability to print directly from your Xperia smartphone offers a convenient and efficient way to bring your digital documents into the physical realm. With the right tools and setup, you can easily print photos, emails, web pages, and more, all from the palm of your hand. Whether you’re a student needing hard copies of your study materials, a professional looking to print out important documents on the go, or simply someone who enjoys having physical copies of their memories, printing from your Xperia phone is a practical solution.
By following the steps outlined in this guide, you now have the knowledge and the power to unleash the printing capabilities of your Xperia device. From connecting to a Wi-Fi-enabled printer to utilizing various printing apps, you can customize and optimize your printing experience to suit your needs. No longer do you have to rely on a computer to print out your files; with a few simple taps on your Xperia screen, you can have physical copies of your digital content in hand. Embrace the convenience and flexibility of mobile printing, and make the most out of your Xperia smartphone’s capabilities.
FAQs
1. Can I print from my Xperia smartphone?
Yes, you can print from your Xperia smartphone. While it may not have a built-in printer, there are several ways to easily print documents, photos, and more from your Xperia device.
2. How can I print from my Xperia smartphone?
There are several methods to print from your Xperia smartphone. One option is to connect your phone to a compatible printer using a USB cable. Another option is to use wireless printing technology, such as Wi-Fi or Bluetooth, to send print jobs to a wireless printer. Additionally, you can also utilize cloud-based printing services that allow you to access and print documents from your smartphone.
3. What apps can I use to print from my Xperia smartphone?
There are various apps available on the Google Play Store that you can use to facilitate printing from your Xperia smartphone. Some popular ones include Google Cloud Print, PrinterShare, and PrintHand. These apps provide simple and convenient ways to connect and send print jobs to compatible printers.
4. Can I print wirelessly from my Xperia smartphone?
Yes, you can print wirelessly from your Xperia smartphone. If your printer has built-in Wi-Fi or Bluetooth capabilities, you can connect your phone directly to the printer and send print jobs wirelessly. Another option is to use a Wi-Fi-enabled router that supports mobile printing, allowing you to send print jobs to any printer connected to the network.
5. What types of documents can I print from my Xperia smartphone?
You can print various types of documents from your Xperia smartphone, including Word documents, Excel spreadsheets, PowerPoint presentations, PDF files, images, and web pages. Depending on the printing app or service you use, you may also have the option to print emails, contacts, and other types of content.