
Are you looking for a cost-effective way to get a new phone? Refurbishing a phone might be the answer you’ve been searching for. Refurbished phones not only help you save money, but they also offer the opportunity to own a high-quality device that functions like new. In this comprehensive guide, we will explore the ins and outs of phone refurbishment, discussing the advantages, the process, and some important tips to ensure your refurbished phone delivers optimal performance. Whether you’re a tech-savvy individual aiming to upgrade your current device or simply seeking an affordable option for your first smartphone, this article will provide you with the knowledge you need to confidently embark on your phone refurbishing journey.
Inside This Article
- Overview
- Step 1: Gather Tools and Materials
- Step 2: Back Up Your Data
- Step 3: Disassemble the Phone
- Step 4: Clean and Inspect the Components
- Step 5: Replace Damaged Parts
- Step 6: Reassemble the Phone
- Step 7: Test the Phone
- Step 8: Restore Data and Settings
- Troubleshooting Tips
- Conclusion
- FAQs
Overview
Refurbishing a phone is a great way to give new life to your old device. Whether you want to resell it, pass it on to a family member, or simply enjoy the satisfaction of rejuvenating a piece of technology, the process can be both rewarding and cost-effective. By following a few simple steps, you can refurbish your phone and have it running like new in no time.
The refurbishing process involves disassembling the phone, cleaning and inspecting the components, replacing any damaged parts, and then reassembling and testing the device. With the right tools and materials, along with a little bit of patience, you can successfully refurbish your phone and extend its lifespan.
It’s important to note that refurbishing a phone requires some technical knowledge and skill. If you’re not confident in your abilities, it’s always a good idea to consult a professional or a reputable repair service. However, for those who are up for the challenge, let’s dive into the step-by-step process of refurbishing a phone.
Step 1: Gather Tools and Materials
Before you begin refurbishing your phone, it’s important to gather all the necessary tools and materials. This ensures that you have everything you need to successfully complete the process. Here are the essential tools and materials you’ll need:
1. Screwdriver set: A set of precision screwdrivers will be required to open the phone and access its internal components. Make sure you have both flathead and Phillips head screwdrivers to cover different types of screws.
2. Plastic prying tools: These tools help in safely prying open the phone’s casing without causing any damage. Choose prying tools made of non-conductive plastic to avoid any risk of short-circuiting the phone.
3. Tweezers: Tweezers are handy for handling small components during the refurbishing process. Opt for tweezers with fine tips to easily grasp and manipulate delicate parts.
4. Cleaning supplies: To ensure a thorough cleaning of the phone, gather some cotton swabs or a soft brush to remove dust, debris, and fingerprints. Isopropyl alcohol or a mild cleaning solution can also be used to sanitize the components.
5. Replacement parts: Depending on the condition of your phone, you may need to replace certain damaged components. Research and identify the specific parts you need, such as a new screen, battery, or charging port, and make sure to have them on hand before starting the refurbishing process.
6. Static-free work surface: It’s crucial to work on a static-free surface to prevent any electrostatic discharge that can damage sensitive electronic parts. A grounded work mat or an anti-static wrist strap can help dissipate any static electricity.
7. Adhesive and adhesive remover: If you need to replace any adhesive seals or stickers during the refurbishment, make sure to have an appropriate adhesive and adhesive remover to ensure proper reassembly.
8. Protective gear: To protect yourself from any accidental injury, it’s advisable to wear safety goggles and gloves while working on the phone. This will help prevent any possible harm from sharp edges or chemical exposure.
Once you have gathered all the necessary tools and materials, you’ll be well-prepared to move on to the next steps in refurbishing your phone.
Step 2: Back Up Your Data
Backing up your data before refurbishing your phone is crucial to ensure that you don’t lose any important information. Here are the steps to back up your data:
1. Connect your phone to a computer using a USB cable. Make sure to unlock your phone and grant necessary permissions for file transfer.
2. Open the file explorer on your computer and navigate to the phone’s storage. You should be able to access both internal storage and external SD card if your phone has one.
3. Copy and paste all the important data such as photos, videos, documents, contacts, and any other files that you want to keep onto your computer’s hard drive or an external storage device.
4. Alternatively, you can back up your data to a cloud storage service like Google Drive or Dropbox. Install the corresponding app on your phone and follow the instructions to upload your files to the cloud. Ensure that you have enough storage space and a stable internet connection.
5. Double-check that you have successfully copied or uploaded all your important data before proceeding with the next steps.
By backing up your data, you can have peace of mind even if something goes wrong during the refurbishing process. It allows you to restore your personal files and settings once the phone is up and running again.
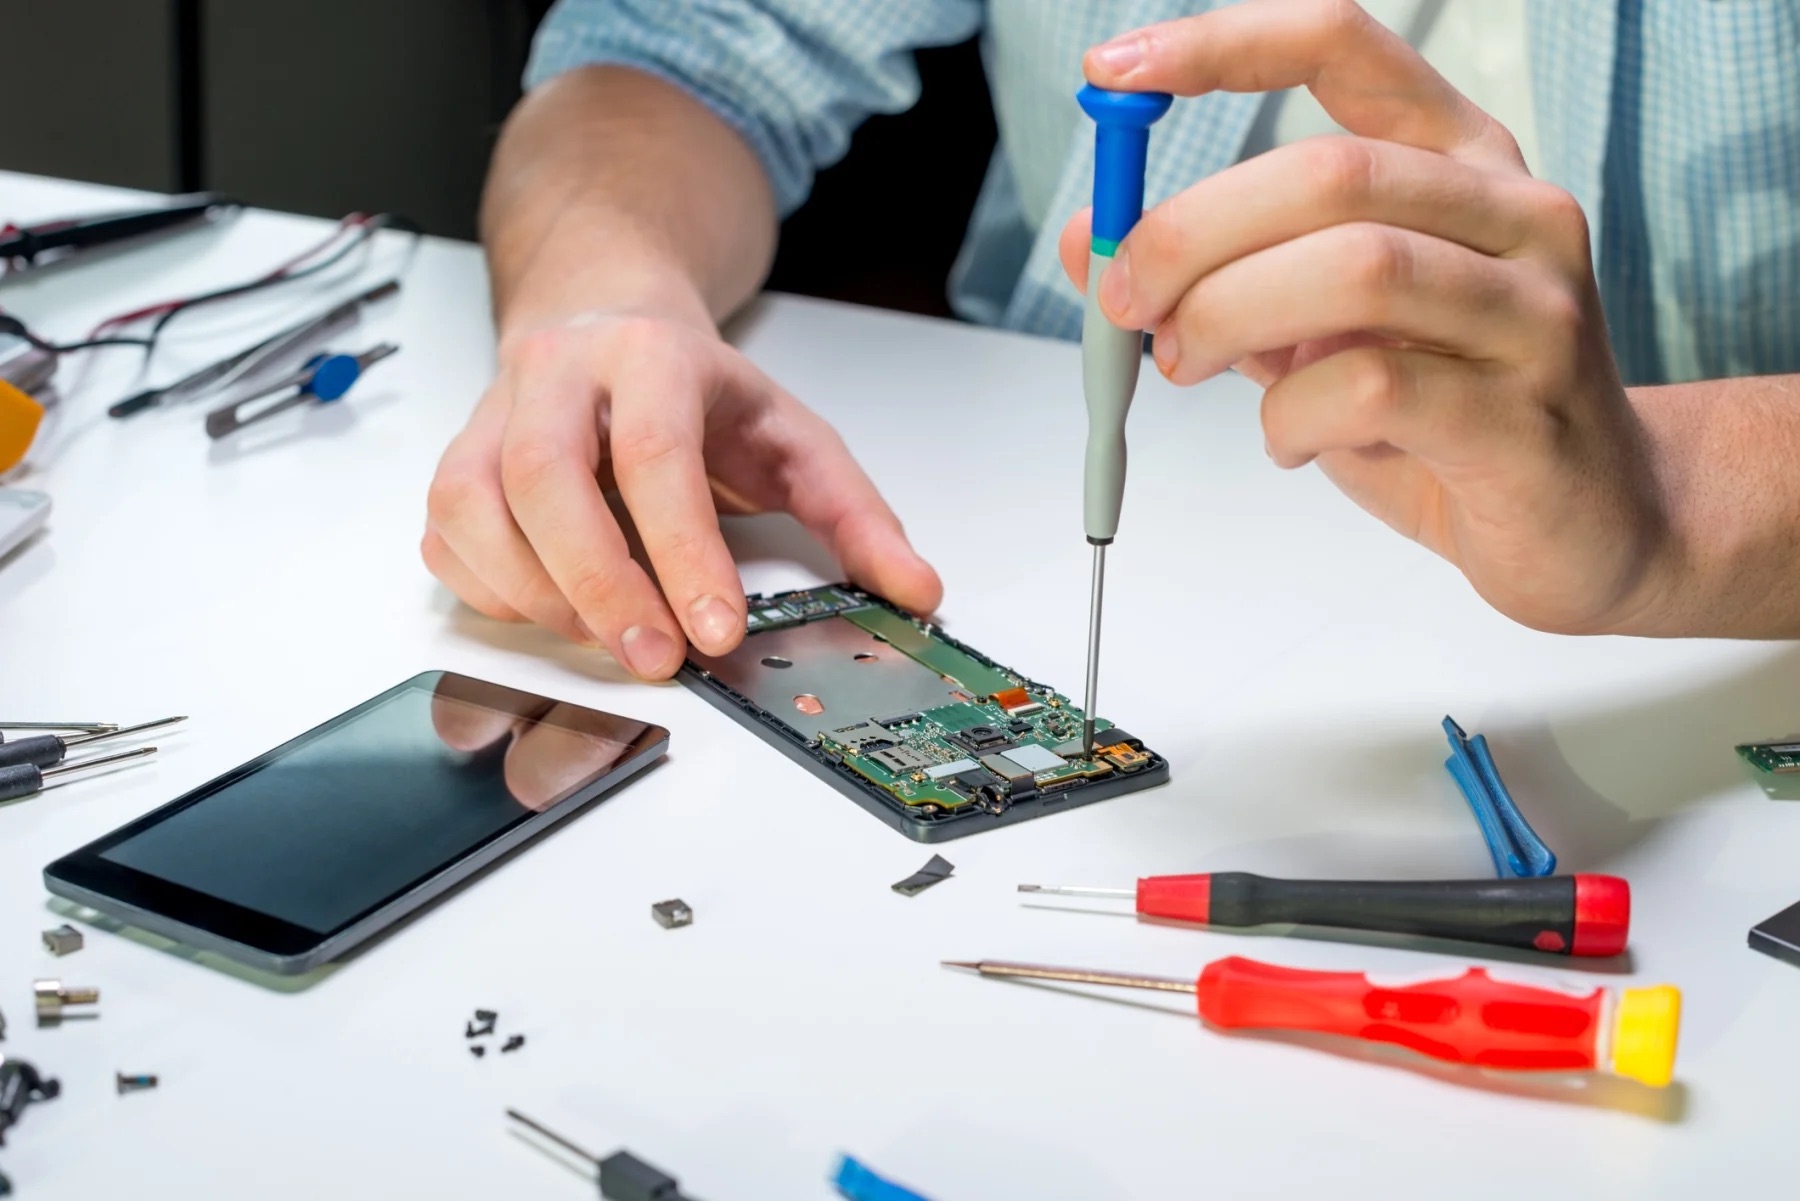
Step 3: Disassemble the Phone
Disassembling the phone is a crucial step in the refurbishing process. It allows you to inspect and clean the internal components thoroughly. Here are the steps to disassemble a phone:
1. Power off the phone: Before you begin the disassembly process, make sure to power off the phone completely. This will prevent any accidental damage to the device or yourself.
2. Remove the back cover: Start by removing the back cover of the phone. Most phones have removable back covers that can be easily pried off with a fingernail or a thin, non-metallic tool. If your phone has a non-removable back cover, you may need to refer to the device’s user manual or seek assistance online to find the appropriate method to access the internal components.
3. Take out the battery: Once the back cover is removed, locate the battery and remove it from the phone. This step may vary depending on the type of phone you are refurbishing. Some phones may have easily accessible batteries that can be popped out, while others may require additional tools or techniques to detach the battery.
4. Unscrew and remove the screws: Look for any screws securing the phone’s internal components. Use a screwdriver that matches the size and type of screws to carefully unscrew and remove them. Keep track of the screws and their respective locations, as this will make reassembly much easier.
5. Disconnect the cables: Inside the phone, there are various cables connecting different components. Gently disconnect these cables using a plastic spudger or a pair of tweezers. Take extra care not to damage the cables or the connectors. It is helpful to take photos or make notes to remember the correct positions and orientations of the cables for reassembly later.
6. Remove any additional components: Depending on the phone model, there may be additional components that need to be removed for a complete disassembly. These may include the SIM card tray, microSD card slot, camera modules, or other modules. Follow the device’s user manual or online tutorials to ensure a thorough disassembly process.
7. Keep the screws and components organized: As you remove screws and components, place them in separate containers or use a magnetic mat to keep them organized. This will prevent any confusion or loss of parts during the reassembly process.
8. Take note of any damaged or worn-out parts: While disassembling, make a note of any damaged or worn-out parts that may need to be replaced. This will help you to ensure that your refurbished phone is in optimal working condition.
By following these steps, you will be able to disassemble the phone safely and efficiently. Remember to handle the phone’s internal components with care and keep track of all the screws and cables for an easier reassembly process.
Step 4: Clean and Inspect the Components
Once you have successfully disassembled your phone, it’s time to clean and inspect the components. This step is crucial in ensuring that your refurbished phone operates at its best. Here’s how you can effectively clean and inspect the various parts of your phone:
1. Screen: Start by gently wiping the screen with a microfiber cloth to remove any smudges or fingerprints. Use a small amount of screen cleaner if needed, but avoid using harsh chemicals that may damage the display. Take a closer look at the screen to check for any scratches or cracks that may require further actions.
2. Buttons and Ports: Use a soft-bristle toothbrush or a clean, dry cloth to remove dirt, dust, and debris from the buttons and ports. Pay extra attention to the charging port, headphone jack, and speaker grill. Inspect for any signs of corrosion or damage that may affect their functionality.
3. Camera Lens: Gently wipe the camera lens with a clean microfiber cloth to remove any smudges or dirt that may affect the image quality. If there are noticeable scratches or cracks on the lens, consider replacing it to ensure optimal performance.
4. Battery: Carefully inspect the battery for any signs of swelling, leakage, or physical damage. If you notice any abnormalities, it’s important to replace the battery with a new and compatible one to ensure safety and proper functionality.
5. Motherboard and Components: Use a can of compressed air to blow away any dust or dirt settled on the motherboard and other internal components. Avoid using excessive force and ensure that the components are dry before reassembling the phone. Inspect for any damaged or loose connections that may affect the phone’s performance.
6. Housing: Clean the phone’s housing with a damp cloth or mild cleaning solution. Be cautious not to get any liquid inside the phone. Inspect the housing for any scratches, dents, or discoloration. If necessary, consider replacing the housing to improve the overall appearance of the refurbished phone.
7. SIM Card and SD Card Slots: Remove the SIM card and SD card from their respective slots and clean them using a soft cloth. Inspect the slots for any dirt or debris that may affect their functionality. Ensure they are properly aligned and securely inserted back into the phone.
8. Speaker and Microphone: Test the speaker and microphone by making a call or playing audio. If the sound quality is distorted or unclear, clean the speaker grille and microphone opening using a small brush or toothpick. Avoid applying excessive pressure to prevent any damage.
9. Sensors: Inspect the sensors, such as the proximity sensor and ambient light sensor, to ensure they are clean and functioning correctly. If needed, use a soft cloth or cotton swab to gently clean the sensors without scratching them.
By thoroughly cleaning and inspecting the components, you can address any issues and ensure that your refurbished phone functions optimally. Take your time during this step to guarantee a high-quality end result.
Step 5: Replace Damaged Parts
One common issue when refurbishing a phone is the need to replace damaged parts. Over time, various components of a mobile phone may become worn out or broken, affecting its performance and functionality. With careful replacement of these parts, you can breathe new life into the device. Here’s how to do it.
The first step is to identify the specific parts that need to be replaced. This could include items such as a cracked screen, malfunctioning buttons, or a faulty battery. Take the time to thoroughly inspect the phone and make a list of the necessary replacements.
Once you have a list of the parts you need, it’s time to source them. You can purchase replacement parts from reputable mobile phone part suppliers online or visit a local electronics store. Make sure to get parts that are compatible with your phone model to ensure a proper fit and optimal performance.
Before you start the replacement process, it’s important to power off the phone and remove any external power sources. This will prevent any accidental damage to the device or yourself during the procedure. You should also make sure you have the necessary tools on hand, such as screwdrivers, pry tools, and adhesive strips.
Begin by carefully removing the old, damaged part. This may involve unscrewing it, disconnecting cables or ribbons, or gently prying it off. Be mindful of any delicate components or cables that may be attached and handle them with care.
Once the old part is removed, take the new replacement part and connect it to the device. Ensure that any cables or ribbons are securely attached and that you align the part correctly. Follow any instructions or guides that may have come with the replacement part to ensure proper installation.
After the replacement part is securely in place, reassemble the phone by reversing the steps you took during disassembly. Make sure to tighten any screws, reconnect any cables, and apply any adhesive as necessary. Take your time and double-check that everything is properly aligned and secured.
Once the phone is reassembled, it’s time to test it. Power on the device and check if the replaced part is functioning correctly. Test all the relevant features and functions to ensure everything is in working order. If any issues persist, double-check the installation or consult professional help if needed.
Replacing damaged parts during the refurbishing process can greatly improve the overall quality and usability of a mobile phone. By following these steps and taking the necessary precautions, you can help extend the lifespan of the device and provide a better experience for its user.
Step 6: Reassemble the Phone
Now that you have successfully cleaned and replaced any damaged parts, it’s time to reassemble the phone. Follow these steps to put all the components back together:
1. Begin by carefully aligning the motherboard and other necessary components back into their designated slots. Be gentle and make sure they fit properly, as any forced installation can cause damage.
2. Once the motherboard is in place, reattach any cables and connectors that were disconnected during the disassembly process. Refer to your notes or photographs for guidance if needed.
3. Next, install the battery back into its compartment. Ensure that the contacts align correctly and that the battery is securely in place. This is an important step as a loose battery can cause various issues.
4. Proceed to reattach the back cover or housing of the phone. Use the appropriate screws or clips to secure it firmly. Take your time and make sure all edges and corners are aligned properly.
5. After securing the back cover or housing, insert the SIM card and SD card (if applicable) into their respective slots. Make sure they are inserted correctly and are seated firmly.
6. Finally, test all the buttons, ports, and features of the phone to ensure everything is functioning as expected. Power on the device and run through a checklist to confirm that all functions are working properly.
Congratulations! You have successfully reassembled your phone. It’s time to move on to the next step and test its functionality.
Step 7: Test the Phone
Once you have successfully reassembled your refurbished phone, the next crucial step is to test it to ensure that everything is working as it should. Testing your phone will help you identify any issues and make any necessary adjustments or repairs before putting it back into regular use.
The first thing you’ll want to do is power on the phone. If it turns on without any problems and you see the familiar home screen, that’s a great sign. However, don’t stop there. It’s important to put the phone through a series of tests to ensure all the functions are working properly.
Start by testing the touch screen responsiveness. Open different applications and navigate through various menus to check if the touch screen is working smoothly and accurately. Pay attention to whether the phone registers your touch input correctly and whether there are any delays or unresponsive areas.
Next, test the phone’s connectivity. Make a test call to ensure that the microphone and speaker are working properly. Try sending a text message or using different internet apps to check the Wi-Fi and cellular data connectivity. Also, test the Bluetooth functionality by pairing the phone with another device.
An important aspect of testing is checking the battery life. Fully charge the phone and observe how long it lasts under normal usage. If the battery drains too quickly or if there are any issues with charging, you may need to replace the battery or investigate further.
Another essential test is the camera. Take pictures and videos using both the front and rear cameras. Check if the image quality is good, if the autofocus works correctly, and if the flash functions properly. Additionally, test any other unique features your phone may have, such as a fingerprint scanner, heart rate monitor, or NFC capabilities.
Don’t forget to test the audio quality. Play music or videos to ensure that the sound is clear and balanced through the speaker. Plug in headphones to check if the audio output is working correctly as well.
Finally, run a comprehensive software test. Download and use different applications to check if the phone can handle multitasking. Additionally, check if there are any software glitches or stability issues that may need further attention.
If all the tests pass successfully, congratulations! You have refurbished your phone and ensured it is in good working condition. However, if you encounter any issues during testing, make note of them and consider troubleshooting or seeking professional assistance to address the problem.
Remember, the goal of testing is to ensure that your refurbished phone functions optimally and delivers a satisfying user experience. Taking the time to thoroughly test your phone will give you peace of mind and help you avoid any disappointments down the line.
Step 8: Restore Data and Settings
After successfully refurbishing your phone and ensuring that all the components are in working order, it’s time to restore your data and settings. This step is crucial to ensure that your phone functions just as it did before the refurbishment process. Follow these steps to restore your data and settings:
1. Connect to a computer: Start by connecting your phone to a computer using the appropriate USB cable. Make sure the computer has the necessary software and drivers for your device.
2. Backup your data: Before starting the restoration process, it is essential to create a backup of your existing data. This ensures that you have a copy of all your important files, contacts, messages, and any other data that you want to keep.
3. Use manufacturer software: Most smartphones come with software provided by the manufacturer to manage device settings and data. Install and open the manufacturer’s software on your computer. This software will guide you through the restoration process.
4. Select restore option: Within the manufacturer’s software, locate the option to restore your data and settings. It may be labeled as “Restore” or “Sync.” Click on the option to proceed.
5. Follow on-screen instructions: The software will then present you with a series of on-screen instructions to follow. These instructions may include selecting the backup file, choosing which types of data to restore, and confirming the restoration process.
6. Wait for the process to complete: Once you have selected the appropriate options, the restoration process will begin. Depending on the amount of data being restored, this process may take some time. Be patient and avoid disconnecting your phone during this time.
7. Verify successful restoration: After the restoration process is complete, double-check that all your data and settings have been properly restored. Go through your contacts, messages, photos, apps, and any other personal information to ensure everything is back to normal.
8. Update software and apps: As a final step, it is important to update your phone’s software and any apps that may have been restored. This will ensure that you have the latest security patches and bug fixes, providing a smoother and more secure user experience.
By following these steps, you can restore your data and settings to their previous state, completing the refurbishment process. Remember to keep regular backups of your data to prevent any future loss or damage to your important files. Enjoy your refreshed and refurbished phone!
Troubleshooting Tips
Even after carefully refurbishing your phone, you may encounter some issues or glitches. Don’t worry; troubleshooting is an essential part of the process. Here are some tips to help you tackle common problems and ensure your refurbished phone functions smoothly.
1. Battery Drain: If you notice that your phone’s battery is draining quickly, check for any apps running in the background. Close unnecessary apps and disable any power-draining features like location services or auto-sync. If the issue persists, consider replacing the battery with a new one.
2. No Signal: If your phone is not getting a signal or experiencing dropped calls, ensure that the SIM card is inserted correctly. Try restarting your phone or toggling the airplane mode on and off to refresh the network connection. If the problem persists, reach out to your service provider for assistance.
3. Overheating: Overheating can be a common problem, especially during heavy usage or while charging the phone. Check if any background apps are using excessive resources and close them. Remove any phone case or cover that may be trapping heat. If the issue continues, consider taking your phone to a professional for further inspection.
4. Touchscreen Responsiveness: If you find that the touchscreen is not as responsive as expected, clean it gently with a microfiber cloth to remove any dirt or smudges. If cleaning doesn’t solve the issue, try calibrating the touchscreen in the device settings. In extreme cases, you may need to replace the touchscreen digitizer.
5. Poor Call Quality: If you are experiencing poor call quality or audio issues, ensure that the microphone and speaker are not obstructed by dirt or debris. Remove any case or cover that may be interfering with the sound. If the problem persists, try using a different headset or contacting your service provider for assistance.
6. App Crashes: If certain apps on your refurbished phone keep crashing, make sure they are up to date. Check for any available updates in the app store and install them. If the problem continues, uninstall the app and reinstall it to see if that resolves the issue.
7. Slow Performance: If your phone is lagging or running slowly, clear the cache and temporary files. Close any unused apps and disable unnecessary widgets or live wallpapers. If the problem persists, consider freeing up storage space or performing a factory reset to restore the phone’s performance.
8. Network Connectivity Issues: If you’re having trouble connecting to Wi-Fi or experiencing slow internet speeds, check if the Wi-Fi network is working correctly. Restart the modem or router, and ensure that your phone’s Wi-Fi settings are correctly configured. If the problem persists, reset the network settings on your device or seek further assistance.
Remember, these troubleshooting tips are general and may not solve all possible issues. If you still encounter problems with your refurbished phone, it’s always a good idea to consult a professional or contact the manufacturer for guidance.
Conclusion
Refurbishing a phone is an excellent way to give new life to your device and save money. By following the steps outlined in this article, you can transform a tired and worn-out phone into one that feels fresh and performs like new. Remember to back up your data, gather the necessary tools, and carefully follow the repair process. Whether it’s replacing a cracked screen, upgrading the battery, or fixing a faulty camera, refurbishing your phone is not only environmentally friendly but also a cost-effective solution. So, roll up your sleeves, unleash your inner technician, and give your beloved phone the makeover it deserves!
FAQs
1. What is phone refurbishment?
Phone refurbishment refers to the process of restoring and renewing a used or pre-owned phone to a like-new condition. This typically involves cleaning, repairing or replacing faulty components, and performing software updates to ensure optimal performance.
2. Why should I consider refurbishing a phone?
Refurbishing a phone is a cost-effective way to own a high-quality device without paying the full price of a brand new one. It also helps reduce electronic waste by extending the lifespan of existing devices, making it an eco-friendly choice.
3. Where can I get my phone refurbished?
There are several options for getting a phone refurbished. You can choose to take it to an authorized service center of the phone manufacturer or visit a reliable third-party repair shop specializing in phone refurbishment. Alternatively, you can even find online platforms that offer refurbished phones with warranty.
4. Is phone refurbishment the same as buying a used phone?
No, phone refurbishment is not the same as buying a used phone. When you buy a used phone, it is sold in the condition it was in when it was traded in or sold by the previous owner. Refurbished phones, on the other hand, have undergone thorough inspection, repairs, and testing to ensure they meet certain quality standards before being put back on the market.
5. Can I trust the quality of refurbished phones?
The quality of refurbished phones can vary depending on where you purchase them. It is important to buy from reputable sources that provide warranties and quality assurances. Authorized service centers and trusted third-party refurbishers often offer reliable refurbished phones that undergo rigorous testing and come with a warranty to give you peace of mind.