
We all encounter situations where we need to replace or remove the battery from our cell phones, and Sony Xperia Mini is no exception. If you’re a proud owner of this compact and powerful device, you may be wondering how to remove the battery when the need arises.
Removing the battery from a Sony Xperia Mini requires a careful and precise approach to prevent any damage to the device. In this article, we will guide you step-by-step on how to safely remove the battery from your Sony Xperia Mini, ensuring a hassle-free experience.
Whether you need to replace an old battery or troubleshoot an issue, understanding the correct procedure will help you avoid any unnecessary mistakes. Read on to discover the simple yet effective technique for removing the battery from your Sony Xperia Mini.
Inside This Article
- Methods to Remove Battery from Sony Xperia Mini
- Method 1: Using the Battery Removal Tool
- Method 2: Removing the Battery Manually
- Method 3: Removing the Battery using Software
- Method 4: Seeking Professional Help
- Conclusion
- FAQs
Methods to Remove Battery from Sony Xperia Mini
The Sony Xperia Mini is a compact and powerful smartphone that is loved by many users. If you are wondering how to remove the battery from your Sony Xperia Mini, you’ve come to the right place. In this article, we will guide you through the steps to safely remove the battery from your device. Whether you want to replace the battery or perform any other maintenance, these methods will help you do it easily and effectively.
Method 1: Power off the Xperia Mini
Before you start removing the battery, it is crucial to power off your Sony Xperia Mini. This will ensure the safety of your device and prevent any damage. To power off the Xperia Mini, press and hold the power button until the options menu appears on the screen. Then, tap on the “Power off” or “Turn off” option. Wait for a few seconds until the device completely shuts down.
Method 2: Locate the battery compartment
Next, you need to locate the battery compartment of your Sony Xperia Mini. The battery is usually located under the back panel of the device. Turn your device upside down and carefully examine the back of your Xperia Mini for any screws or clips that need to be removed in order to access the battery compartment.
Method 3: Remove the back panel
Once you have located the battery compartment, it’s time to remove the back panel. Depending on the model of your Xperia Mini, you may need to use a small screwdriver or a pry tool to gently remove the back panel. Take your time and be careful not to damage the panel or any other components of the device. Slowly and steadily lift the back panel away from the device to reveal the battery.
Method 4: Take out the battery safely
Now that you have successfully removed the back panel, you can access the battery. To remove the battery, carefully lift it using your fingers or a non-metallic tool from the bottom of the compartment. Make sure to apply gentle pressure and avoid pulling or twisting the battery, as this can damage both the battery and the device. Once the battery is loose, gently slide it out of the compartment.
By following these steps, you can easily remove the battery from your Sony Xperia Mini and perform any necessary maintenance. Remember to handle the battery and the device with care to avoid any accidents or damage. If you are unsure about any step, it is always recommended to consult the user manual or seek assistance from a professional.
Now that you know how to remove the battery from your Sony Xperia Mini, you can confidently perform any battery replacement or maintenance tasks without any hassle. Keep your Xperia Mini running smoothly and enjoy uninterrupted usage by taking good care of its battery.
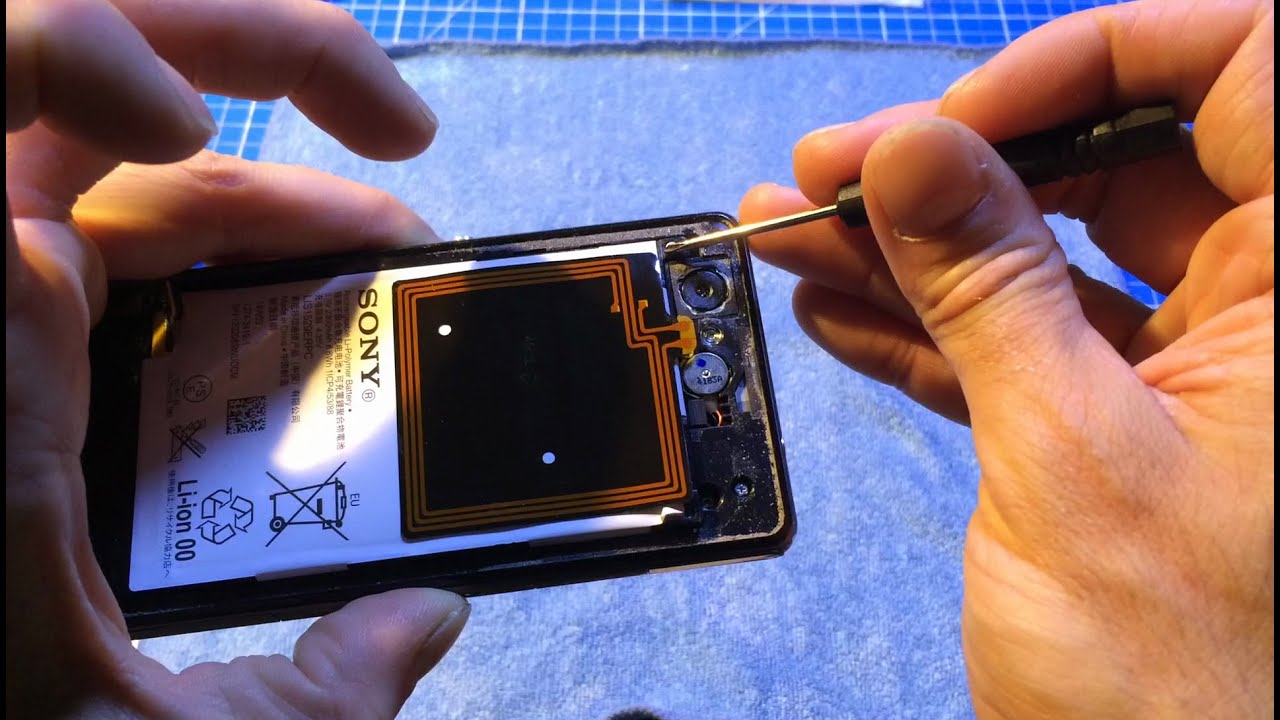
Method 1: Using the Battery Removal Tool
If you own a Sony Xperia Mini and need to remove the battery, don’t worry, it’s a relatively straightforward process. One method to safely remove the battery is by using the battery removal tool that usually comes with your device. This tool is specifically designed to make the battery removal process easier and safer.
To begin, make sure your Xperia Mini is turned off. This is important to prevent any potential damage to both the battery and the device itself. Once the phone is powered off, locate the battery compartment on the back of your Xperia Mini.
Next, take the battery removal tool and locate the small hole or slot in the battery compartment. It is usually at the bottom or side of the compartment. Insert the tip of the tool into the hole or slot and gently apply pressure.
You should feel a slight click or release as the battery is detached from its connectors. Once you hear or feel this click, carefully lift the battery out of the compartment using the tool or your fingers. Do this in a slow and controlled manner to avoid any damage to the battery or the device.
Once the battery is removed, inspect it for any signs of damage or wear. If you notice any bulges, leaks, or other abnormalities, it is recommended to replace the battery with a new one. Reinstalling a damaged battery can lead to further issues and potential safety hazards.
When you’re ready to reassemble your Xperia Mini, simply align the new battery with the connectors in the battery compartment and gently press it down until you feel it securely snap into place. Finally, replace the back panel of your Xperia Mini and power it back on.
Note: If you don’t have the battery removal tool, you can use a small, thin object like a paperclip or the end of a SIM card eject tool to push the battery release button or lever, if your device has one.
Method 2: Removing the Battery Manually
If you’re unable to find a battery removal button or if the Power off option on your Xperia Mini is unresponsive, you can still remove the battery manually. Follow these steps to safely remove the battery without causing any damage to your device.
1. Power off your Xperia Mini by pressing and holding the Power button until you see the Power off menu. Tap on “Power off” to turn off your device.
2. Once your phone is powered off, locate the battery compartment on the back of your Xperia Mini. It is usually at the bottom or back of the device.
3. Carefully slide off the back panel of your phone to reveal the battery. Be gentle while removing the back panel as excessive force can cause damage to the phone or the panel itself.
4. Once the back panel is removed, you’ll see the battery exposed. Check for any tabs or connectors holding the battery in place. Depending on the model, there may be a small tab or a connector that needs to be released before removing the battery.
5. Use your fingers or a small tool, like a plastic pry tool or a spudger, to gently lift the battery out of its compartment. Start from one edge and work your way towards the other, applying even pressure to avoid bending or damaging the battery.
6. Once the battery has been lifted out, inspect it for any signs of damage or wear. If it appears swollen, discolored, or damaged, it’s recommended to replace the battery with a new one.
7. If you need to reinsert the battery, make sure it is properly aligned with the connectors in the compartment. Gently press down on the battery until it sits securely in place.
8. Finally, reattach the back panel by aligning it with the edges of your Xperia Mini and sliding it back into place. Ensure that it is securely attached and there are no gaps or misalignments.
By following these steps, you can manually remove the battery from your Sony Xperia Mini without any hassle. Just remember to be cautious and gentle while handling the battery and other components to prevent any accidental damage.
Method 3: Removing the Battery using Software
If you’re looking for an alternative method to physically removing the battery from your Sony Xperia Mini, you’ll be glad to know that there is actually a software option available to shut down your device and conserve battery life. This method can be particularly useful in situations where the battery is non-removable or if you want to avoid the hassle of physically opening up your phone.
To remove the battery using software, you can follow these simple steps:
- First, ensure that your device is powered on and unlocked.
- Next, navigate to the settings menu on your Xperia Mini. You can do this by swiping down from the top of the screen and tapping on the gear icon.
- In the settings menu, scroll down and locate the “Battery” option. Tap on it to access the battery settings.
- Within the battery settings, you should see an option labeled “Battery saver” or “Power saver.” Tap on it to enable this feature.
- Once enabled, your device will automatically optimize battery usage and reduce power consumption by limiting background processes and app activities.
It’s important to note that while this method can help conserve battery life, it does not actually remove the battery physically. The battery is still housed inside your Xperia Mini; however, this software method helps preserve its power by minimizing unnecessary drain.
By utilizing this software feature, you can extend the battery life of your Sony Xperia Mini without the need for physically removing the battery or powering off your device completely. This can be especially useful in situations where you don’t have immediate access to a charging source or if you simply want to make your battery last longer throughout the day.
Keep in mind that while using the battery saver or power saver mode can significantly prolong your battery life, it may also limit certain functions, such as push notifications or background data syncing. If you rely heavily on these features, you may need to weigh the trade-off between battery life and functionality.
Overall, the software method of removing the battery can be a convenient and effective way to optimize power usage on your Sony Xperia Mini. So, if you’re in a pinch and need to conserve battery life without physically removing the battery, give this option a try!
Method 4: Seeking Professional Help
While it’s always great to have the knowledge and confidence to handle DIY repairs, there may come a time when seeking professional help is the best course of action. Whether it’s due to a complex issue or simply a lack of time, relying on experts can ensure a safe and effective resolution for your Sony Xperia Mini.
When you choose to seek professional help, you can save yourself from potential further damage and unnecessary stress. Skilled technicians who specialize in cell phone repairs will have the necessary tools, expertise, and experience to handle any issues that may arise with your Sony Xperia Mini.
They will be able to diagnose the problem accurately, offer a tailored solution, and provide a warranty for their work. By entrusting your device to professionals, you can have peace of mind knowing that your Sony Xperia Mini is in capable hands.
Additionally, seeking professional help can also save you time and effort. Instead of spending hours trying to troubleshoot and fix the problem yourself, you can simply drop off your device and let the experts handle it. This way, you can have your Sony Xperia Mini back in working condition as quickly as possible.
When opting for professional help, it’s important to choose a reputable repair service provider. Look for reviews and recommendations, check their credentials, and inquire about their warranty and pricing policies. Finding a trusted professional will ensure that you receive quality service and optimal results for your Sony Xperia Mini.
Conclusion
In conclusion, removing the battery from your Sony Xperia Mini is a relatively simple process that can be done with just a few steps. By following the guidelines provided in this article, you can safely remove the battery from your device without causing any damage. Remember to always prioritize safety by turning off your phone and disconnecting any charging cables before attempting to remove the battery. Additionally, be mindful of any warranty or service agreements that may be affected by removing the battery yourself. If you have any concerns or doubts, it is always a good idea to consult the manufacturer or seek professional assistance. With the battery removed, you can now replace it with a new one or perform any necessary maintenance or repairs. Now go ahead and confidently remove the battery from your Sony Xperia Mini!
FAQs
1. How do I remove the battery from my Sony Xperia Mini?
Removing the battery from a Sony Xperia Mini is a straightforward process. First, locate the small notch at the bottom of the back cover. Use your fingernail or a small opening tool to gently pry open the cover. Once the cover is removed, you will see the battery. Simply lift it out from the device using your fingers or a non-metallic tool. Be careful not to damage the battery or any of the internal components while removing it.
2. Why would I need to remove the battery from my Sony Xperia Mini?
There can be several reasons why you might need to remove the battery from your Sony Xperia Mini. Some common scenarios include replacing a faulty or aging battery, performing a hard reset on the device, or troubleshooting hardware issues.
3. Can I remove the battery while the phone is turned on?
It is generally recommended to power off your device before removing or replacing the battery. This helps prevent any potential damage to the phone’s hardware or data loss. Before removing the battery, make sure to save any important files or data and properly shut down your Sony Xperia Mini.
4. Are there any precautions I should take when removing the battery?
Yes, there are a few precautions to keep in mind when removing the battery from your Sony Xperia Mini. First, ensure that the device is powered off to avoid any electrical shock or damage. Additionally, handle the battery and the internal components with care to prevent any accidental damage. Avoid using metal tools, as they can cause short circuits or disrupt the device’s functionality.
5. How often should I replace the battery in my Sony Xperia Mini?
The lifespan of a battery can vary depending on usage patterns and charging habits. Generally, a lithium-ion battery, like the one in the Sony Xperia Mini, can last around 2-3 years before its performance starts to degrade significantly. If you notice a significant decrease in your phone’s battery life or if the battery is not holding a charge as it used to, it might be time to consider replacing it.