
So, you’ve decided that it’s time to remove the glass protector from your phone. Whether you’re looking to replace it with a new one or go back to the original screen, taking off the glass protector can sometimes be a tricky task. But fear not! In this article, we’ll guide you through the process, step by step, to ensure a smooth and safe removal of the glass protector from your phone. We’ll provide you with tips and tricks to avoid any potential damage to your device and leave it looking as good as new. So, grab your phone and let’s get started on this adventure of restoring your phone’s original screen!
Inside This Article
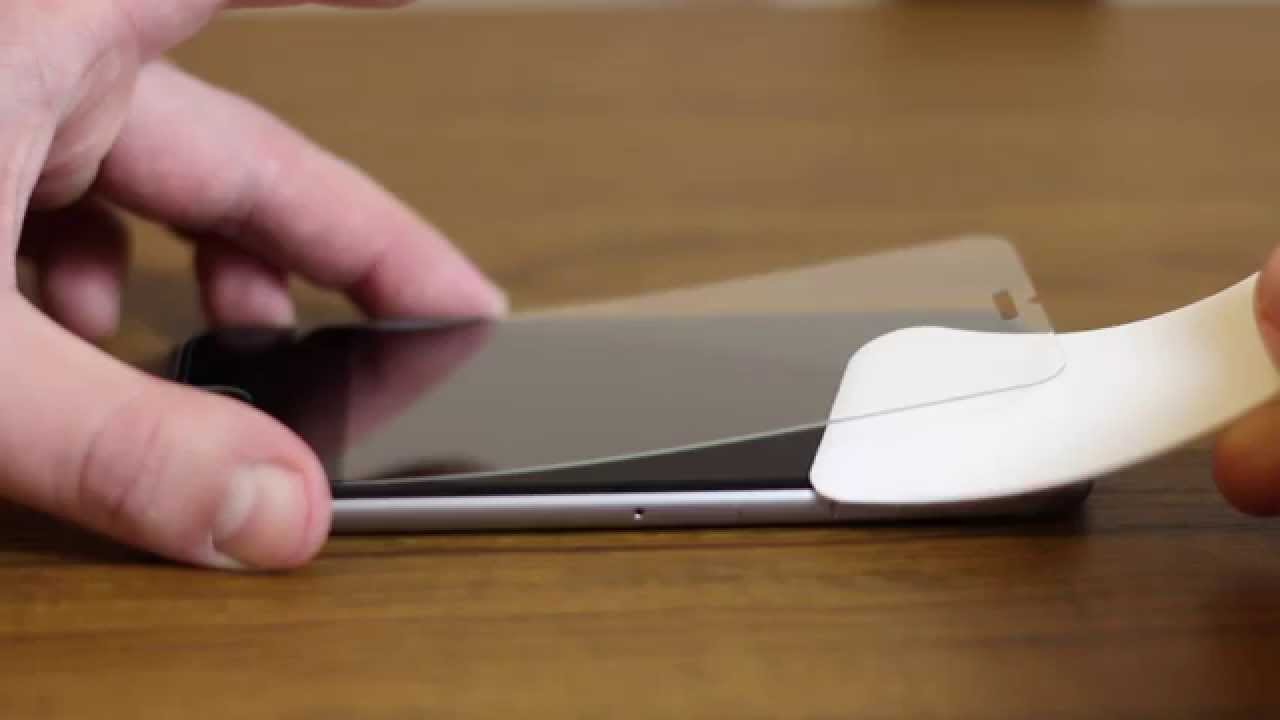
Methods for Removing Glass Protector
Having a glass protector on your phone is a smart move to safeguard the screen from scratches and cracks. However, there may come a time when you need to remove it, whether it’s to replace it with a new one or to clean the screen thoroughly. Here are some methods you can try to safely remove a glass protector from your phone:
-
Fingernail Technique:
If the glass protector has a small lip or corner that is exposed, you can begin by using your fingernail to gently lift up that corner. Be careful not to apply too much pressure, as you don’t want to damage the screen or the protector itself. Once you have lifted the corner, continue to slowly peel the protector off, applying light pressure along the way. This method is best suited for protectors with a partial adhesive layer.
-
Heat and Adhesive Remover:
If the glass protector is firmly adhered to your phone’s screen, you can try using heat to loosen the adhesive. Start by heating the protector with a hairdryer on low heat setting for a few seconds. Be careful not to overheat the phone. Once the adhesive is warm, you can gently use a credit card or a thin plastic tool to slide under the protector and lift it off slowly. If the adhesive residue remains on the screen, you can use a small amount of adhesive remover or isopropyl alcohol on a microfiber cloth to clean it off.
-
Freezing Technique:
For glass protectors with a strong adhesive, the freezing technique can be effective. Place your phone with the protector facing down into a ziplock bag and seal it. Put the bag in the freezer for around 15 to 20 minutes. The cold temperature will cause the adhesive to become brittle, making it easier to remove the protector. Once the time is up, take the phone out of the freezer and use a credit card or a similar thin object to slowly lift the protector off.
-
Professional Assistance:
If you are unsure about removing the glass protector yourself, or if none of the above methods work for you, it is best to seek professional assistance. Visit a reputable phone repair shop or contact the manufacturer of the glass protector for guidance. They have the necessary expertise and tools to safely remove the protector without causing any damage to your phone.
Remember, it is essential to be patient and gentle when removing a glass protector. Rushing the process or applying excessive force can potentially result in scratching or cracking your phone’s screen. Additionally, it is a good idea to clean the phone’s screen thoroughly after removing the protector to remove any residue or debris.
Precautions to Take Before Removal
Before you proceed with removing the glass protector from your phone, it is crucial to take some precautions to ensure the safety of your device and yourself. These precautions will help prevent any accidental damage to the screen and maintain the integrity of your phone:
- Power off your phone: Start by turning off your phone completely. This will minimize the risk of any accidental touches or interactions while removing the glass protector.
- Prepare a clean workspace: Find a tidy and well-lit area to work on. A clean and clutter-free workspace will allow you to focus on the task at hand and reduce the chances of dropping or misplacing any small components.
- Gather necessary tools: Before you begin, gather the tools you will need for the removal process, such as a microfiber cloth, a plastic card or spatula, and a mild cleaning solution. Having these tools at hand will make the process smoother and more efficient.
- Remove any phone case or cover: Take off any protective phone case or cover that may impede the removal process. This will give you better access to the glass protector and prevent any interference while you work.
- Inspect the glass protector: Carefully examine the glass protector for any cracks, chips, or signs of damage. If you notice any defects, exercise caution during the removal process to avoid any potential shards or fragments causing harm.
- Apply gentle heat (if required): In some cases, a glass protector may be adhered firmly to the phone’s screen. If this is the case, you can use a hairdryer on low heat to warm up the protector slightly. This will soften the adhesive and make it easier to remove.
- Follow manufacturer’s instructions: Different types of glass protectors may have specific removal instructions provided by the manufacturer. It is advisable to check the packaging or the manufacturer’s website for any guidance or recommendations before proceeding with the removal process.
- Take your time: Patience is key when removing a glass protector from your phone. Rushing the process can increase the chances of damaging your device or leaving unwanted residue on the screen. Proceed slowly, applying gentle pressure, and take breaks if needed.
By following these precautions, you can ensure a smooth and safe removal process for the glass protector on your phone. Taking these steps will minimize the risk of damaging your device and help preserve its functionality and appearance.
Conclusion
In conclusion, removing a glass protector from your phone can be a tricky task, but with the right method, it can be done easily without causing any damage to your device. Remember to gather all the necessary tools before starting the process to ensure a smooth removal. Take your time and be patient, especially when dealing with stubborn adhesives. Following the steps outlined in this article, you can safely remove the glass protector and have a clean and scratch-free screen once again.
Always remember to exercise caution and gentle handling while removing the glass protector to prevent any accidental damage to your device. If you’re unsure or hesitant, it’s always a good idea to seek professional assistance. Regularly cleaning and replacing your screen protector will help maintain the clarity and usage of your mobile phone, ensuring a long-lasting and enjoyable user experience.
FAQs
1. Why would I need to remove a glass protector from my phone?
There are several reasons why you might need to remove a glass protector from your phone. Over time, the protector can become scratched or cracked, diminishing the visual clarity of your device. Additionally, if you want to apply a new protector or if you are experiencing touch sensitivity issues, removing the existing protector might be necessary.
2. How do I know if my phone has a glass protector?
Glass protectors are typically made from tempered glass and are applied on top of the phone’s screen. To check if your phone has a glass protector, look for a smooth and shiny surface on your screen. If you notice a thin layer that is separate from the phone’s actual display, it is likely a glass protector.
3. What tools do I need to remove a glass protector?
To remove a glass protector from your phone, you will need a few tools. These include a credit card or a thin plastic card, a microfiber cloth, and a hairdryer. The card will help you lift the protector, while the microfiber cloth will clean any residue. The hairdryer will be used to heat the adhesive and make the removal process easier.
4. How do I remove a glass protector?
To remove a glass protector from your phone, follow these steps:
– Start by heating the glass protector with a hairdryer on low heat for about 30 seconds to loosen the adhesive.
– Once heated, use a credit card or a thin plastic card to gently lift one corner of the glass protector.
– Slowly and carefully continue to lift the protector, applying gentle pressure with the card as you go.
– If there is any resistance, use the hairdryer to heat the area again.
– Once the protector is fully lifted, clean any adhesive residue from the screen using a microfiber cloth.
5. Can I reuse a glass protector once it has been removed?
In most cases, it is not recommended to reuse a glass protector once it has been removed. The adhesive on the protector loses its effectiveness after being removed, and attempting to reapply it may result in poor adhesion or bubbles. It is better to invest in a new glass protector for optimal protection and screen clarity.