
Are you wondering how to sync your Oculus Quest 2 videos to your phone? If so, you’ve come to the right place. The Oculus Quest 2 is a popular virtual reality headset that allows users to experience immersive gaming and entertainment. One of its key features is the ability to capture videos of your virtual reality experiences. However, transferring these videos from the headset to your phone can be a bit confusing for some. In this article, we will guide you through the process of syncing Oculus Quest 2 videos to your phone, so you can easily share and enjoy your VR creations on your mobile device. Let’s dive in and discover how to seamlessly transfer your Oculus Quest 2 videos to your phone.
Inside This Article
- How to Sync Oculus Quest 2 Videos to Phone
- – Using Oculus App
- – Using Oculus Link Cable
- Using Third-Party Apps
- – Using Cloud Storage
- Conclusion
- FAQs
How to Sync Oculus Quest 2 Videos to Phone
The Oculus Quest 2 is a powerful virtual reality headset that allows you to experience immersive gaming and entertainment. One of its standout features is the ability to capture and record videos directly from the headset. If you want to share these videos or watch them on your phone, you’ll need to sync them. In this article, we’ll explore different methods to sync Oculus Quest 2 videos to your phone.
Using the Oculus App
The easiest and most straightforward way to sync Oculus Quest 2 videos to your phone is by using the official Oculus app. Follow these steps:
- Install the Oculus app on your phone from the App Store or Google Play Store.
- Open the app and sign in to your Oculus account.
- Make sure your Oculus Quest 2 and phone are connected to the same Wi-Fi network.
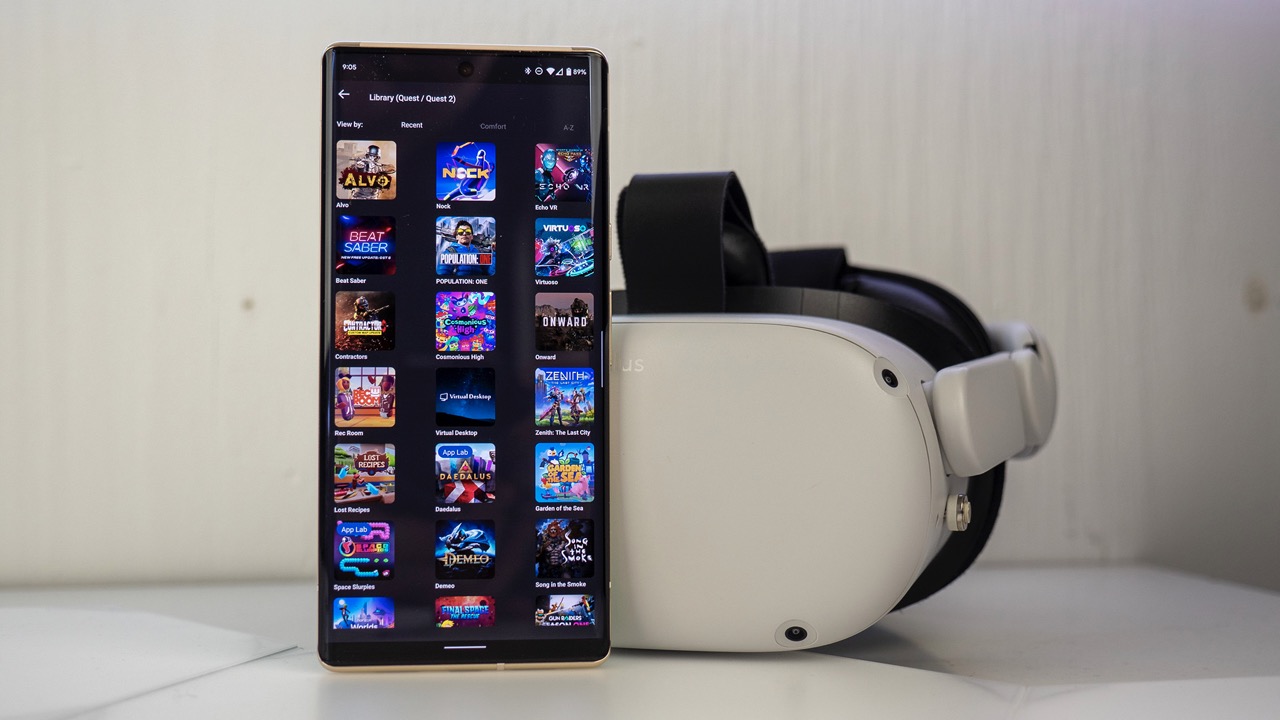
- In the Oculus app, go to the “Library” section.
- Find the video you want to sync and click on the three-dot menu next to it.
- Choose the “Sync to Phone” option.
- Wait for the video to sync to your phone. The time it takes will depend on the size of the video and the speed of your Wi-Fi connection.
- Once synced, you can find the video in the Oculus app’s “Gallery” section.
Using Oculus Link Cable
If you have an Oculus Link cable, you can directly connect your Oculus Quest 2 to your computer and transfer videos to your phone. Here’s how:
- Make sure you have the Oculus Link cable and a compatible USB port on your computer.
- Connect your Oculus Quest 2 to your computer using the Oculus Link cable.
- Put on your Oculus Quest 2 headset and allow it to access your computer.
- On your computer, open the Oculus app or the Oculus Link software.
- In the Oculus app or software, go to the “Device” section and select your Oculus Quest 2.
- Navigate to the “File Manager” or “Explore” section.
- Locate the video you want to transfer to your phone and copy it to your computer’s storage.
- Disconnect your Oculus Quest 2 from the computer and connect your phone to it using a USB cable.
- Transfer the video file from your computer to your phone’s storage.
Using Third-Party Apps
There are third-party apps available on both iOS and Android that allow you to transfer and sync Oculus Quest 2 videos to your phone. Some popular options include VRidge, ALVR, and Virtual Desktop. These apps enable wireless streaming and file transfer between your Oculus Quest 2 and phone.
Using Cloud Storage
If you prefer to have your videos stored in the cloud, you can upload them to cloud storage services like Google Drive, Dropbox, or OneDrive. Once uploaded, you can access and download the videos on your phone using the respective cloud storage app.
By following these methods, you can easily sync Oculus Quest 2 videos to your phone and enjoy them on the go. Whether you choose to use the Oculus app, Oculus Link, third-party apps, or cloud storage, you’ll have the flexibility to watch your Oculus Quest 2 videos wherever and whenever you want.
So go ahead, sync your videos, and immerse yourself in the thrilling world of virtual reality!
– Using Oculus App
The Oculus Quest 2 is a fantastic device for experiencing virtual reality, and it’s even more enjoyable when you can share your VR videos with friends and family. One of the easiest ways to sync Oculus Quest 2 videos to your phone is by using the Oculus app. Here’s how:
1. Install the Oculus app on your phone: Start by downloading and installing the Oculus app on your smartphone. It’s available for both Android and iOS devices, so make sure to choose the version that matches your phone’s operating system.
2. Connect your Oculus Quest 2 to the app: Once you have the app installed, turn on your Oculus Quest 2 headset and put it on. Open the Oculus app on your phone and follow the step-by-step instructions provided to pair your headset with the app.
3. Access your VR videos on the Oculus app: After your Oculus Quest 2 is successfully connected to the app, you can navigate to the “Library” section within the app. Here, you’ll find all the videos and experiences you’ve downloaded or purchased for your Oculus Quest 2.
4. Sync videos to your phone: Select the VR video you want to sync to your phone, and then look for the option to “Sync to Phone” or a similar command. Tap on it, and the Oculus app will begin transferring the video from your Oculus Quest 2 to your phone.
5. Enjoy your synced videos: Once the syncing process is complete, you can open your phone’s media player or your preferred VR video app to access and play the synced videos. Now you can easily share your virtual reality adventures with others or enjoy them whenever and wherever you want.
The Oculus app provides a seamless and convenient method for syncing Oculus Quest 2 videos to your phone. Whether you want to show off your VR experiences or simply have them easily accessible on your mobile device, using the Oculus app ensures a hassle-free process.
– Using Oculus Link Cable
If you’re looking for a reliable and high-quality method to sync Oculus Quest 2 videos to your phone, using the Oculus Link Cable is a great option. This method allows you to connect your Oculus Quest 2 headset to your PC and transfer videos directly from the headset to your phone.
The Oculus Link Cable is an official cable provided by Oculus, specifically designed for connecting your Quest 2 to a PC. It provides a high-speed and stable connection, ensuring smooth data transfer. To use this method, here are the steps you need to follow:
- First, make sure you have the Oculus app installed on your phone, as this is essential for establishing a connection with your Quest 2.
- Connect one end of the Oculus Link Cable to the USB-C port on your Quest 2 headset.
- Connect the other end of the cable to a USB port on your PC.
- Put on your Quest 2 headset and confirm that it’s connected to your PC via the Oculus app.
- On your PC, open the Oculus app and go to the “Device” tab.
- Under the “Device” tab, you’ll see your Quest 2 connected. Click on it to access the device settings.
- In the device settings, enable the “Allow USB debugging” option.
- Once USB debugging is enabled, you can now transfer Oculus Quest 2 videos to your PC.
- Find the videos you want to sync to your phone and copy them to a folder on your PC.
- Connect your phone to your PC using a USB cable.
- On your phone, navigate to the folder where you copied the videos from your Quest 2.
- Select the videos you want to sync to your phone and copy them to a folder on your phone.
By following these steps, you’ll be able to easily transfer Oculus Quest 2 videos to your phone using the Oculus Link Cable. This method ensures a seamless and efficient transfer process, allowing you to enjoy your VR videos wherever you go.
Using Third-Party Apps
Another method to sync Oculus Quest 2 videos to your phone is by using third-party apps. These apps provide additional features and flexibility for transferring and managing your virtual reality content. Here are a few popular options:
1. SideQuest: SideQuest is a popular platform that allows you to install and manage unofficial apps and games on your Oculus Quest 2. It also offers a wireless file transfer feature, allowing you to quickly transfer videos from your headset to your phone. Simply connect your Oculus Quest 2 and your phone to the same Wi-Fi network, open SideQuest, and navigate to the “Files” section to transfer the videos.
2. VRidge: VRidge is an app that enables you to stream PC VR games and experiences to your Oculus Quest 2. It also provides a feature called “Virtual Desktop” that allows you to stream your PC desktop to your Quest 2. You can use this feature to access and transfer videos from your PC to your phone without the need for any cables.
3. Skybox VR Player: Skybox VR Player is a popular video player app for VR headsets, including the Oculus Quest 2. It supports various video formats and offers a user-friendly interface. With Skybox VR Player, you can connect your Oculus Quest 2 to your phone wirelessly and easily transfer videos between the two devices.
4. Virtual Desktop: Virtual Desktop is an app that allows you to wirelessly stream your PC desktop to your Oculus Quest 2. Besides offering a virtual desktop experience, it also allows you to access and transfer files, including videos, between your PC and phone. Virtual Desktop supports drag-and-drop functionality, making it convenient to transfer videos from your PC to your phone.
These are just a few examples of the third-party apps available for syncing Oculus Quest 2 videos to your phone. It’s important to note that each app may have its own set of instructions and requirements, so make sure to follow the app-specific guidelines for transferring videos. With the help of these apps, you can easily and conveniently manage your virtual reality content on your Oculus Quest 2 and phone.
– Using Cloud Storage
Another way to sync Oculus Quest 2 videos to your phone is by utilizing cloud storage services. Cloud storage allows you to store your videos and other files online, making them easily accessible from any device with an internet connection.
To begin, you will need to choose a cloud storage service that suits your needs. Some popular options include Dropbox, Google Drive, and OneDrive. These services offer both free and paid plans, with varying levels of storage capacity.
Once you have selected a cloud storage provider, you will need to sign up for an account and install the corresponding app on your Oculus Quest 2 and your phone. This will allow you to sync your videos seamlessly between the two devices.
To upload your videos to the cloud, simply open the cloud storage app on your Oculus Quest 2, navigate to the video you wish to sync, and choose the option to upload or save it to the cloud. The video will then be uploaded and stored on the cloud storage server.
Next, open the cloud storage app on your phone and navigate to the uploaded video. You can now download the video to your phone’s local storage, making it easily accessible for viewing whenever you want.
It is important to note that using cloud storage to sync Oculus Quest 2 videos to your phone requires an active internet connection. Without an internet connection, you will not be able to access or download the videos from the cloud. Therefore, make sure you have a stable internet connection before attempting to sync your videos.
Furthermore, be mindful of the storage capacity offered by your cloud storage provider. Depending on the size and quantity of your videos, you may need to manage your storage space accordingly or consider upgrading to a higher storage plan.
With cloud storage, you can conveniently access and sync your Oculus Quest 2 videos to your phone anytime and anywhere, as long as you have an internet connection. It provides a secure and reliable way to store and access your videos, making it a convenient option for syncing your Oculus Quest 2 videos to your phone.
Conclusion
In conclusion, syncing Oculus Quest 2 videos to your phone is a convenient way to take your virtual reality experiences on the go. Whether you want to share your adventures with friends, save and edit memorable moments, or simply enjoy your VR content on a larger screen, syncing your videos is a straightforward process. By following the steps outlined in this guide, you can quickly transfer your Oculus Quest 2 videos to your phone and enjoy them anytime, anywhere.
Remember to ensure that your phone has enough storage space and a compatible media player to play the VR videos smoothly. Additionally, it’s important to keep your Oculus Quest 2 and phone software up to date to avoid any compatibility issues. With the advancements in technology, the seamless integration between VR headsets like the Oculus Quest 2 and smartphones allows for more immersive and portable VR experiences.
So, grab your Oculus Quest 2, your phone, and start syncing your videos to augment your VR journey and share the excitement with others. Happy syncing!
FAQs
1. Can I sync Oculus Quest 2 videos to my phone?
Yes, you can sync Oculus Quest 2 videos to your phone. The Oculus Quest 2 has a built-in feature that allows you to transfer videos from the headset to your phone wirelessly. This feature is called Oculus Link and it enables you to experience your VR videos on your phone’s screen.
2. How do I sync Oculus Quest 2 videos to my phone?
To sync Oculus Quest 2 videos to your phone, you’ll need to follow these steps:
- Connect your Oculus Quest 2 to your computer using a USB cable.
- Enable Oculus Link on your Oculus Quest 2 headset.
- Install the Oculus software on your computer.
- Launch the Oculus app on your computer.
- In the Oculus app, click on the “Device” tab and select your Oculus Quest 2.
- Click on the “File” tab and choose “Transfer Files”.
- Select the videos you want to transfer and click on “Transfer”.
- Once the transfer is complete, you can disconnect your Oculus Quest 2 from the computer and access the synced videos on your phone.
3. Can I sync Oculus Quest 2 videos to my iPhone?
Yes, you can sync Oculus Quest 2 videos to your iPhone. The process is the same as syncing videos to any other phone. You’ll need to use Oculus Link and follow the steps mentioned earlier to transfer the videos from your Oculus Quest 2 to your computer. After that, you can use iTunes or other file transfer methods to sync the videos from your computer to your iPhone.
4. Are there any limitations to syncing Oculus Quest 2 videos to a phone?
While you can easily sync Oculus Quest 2 videos to a phone, there are a few limitations to keep in mind. First, the file size of the videos may affect the syncing process. If the videos are too large, it may take longer to transfer them to your phone. Additionally, the storage capacity of your phone may limit the number of videos you can sync. It’s important to ensure that you have enough storage space on your phone before attempting to sync large amounts of video content.
5. Can I watch Oculus Quest 2 videos on my phone without syncing?
Yes, you can watch Oculus Quest 2 videos on your phone without syncing them. The Oculus Quest 2 has a feature called Oculus Cast, which allows you to stream the VR experience from your headset to your phone wirelessly. With Oculus Cast, you can view the videos in real-time on your phone’s screen without the need to transfer them. This is a convenient option if you want to share your VR experience with others or if you prefer to watch the videos directly on your phone.