
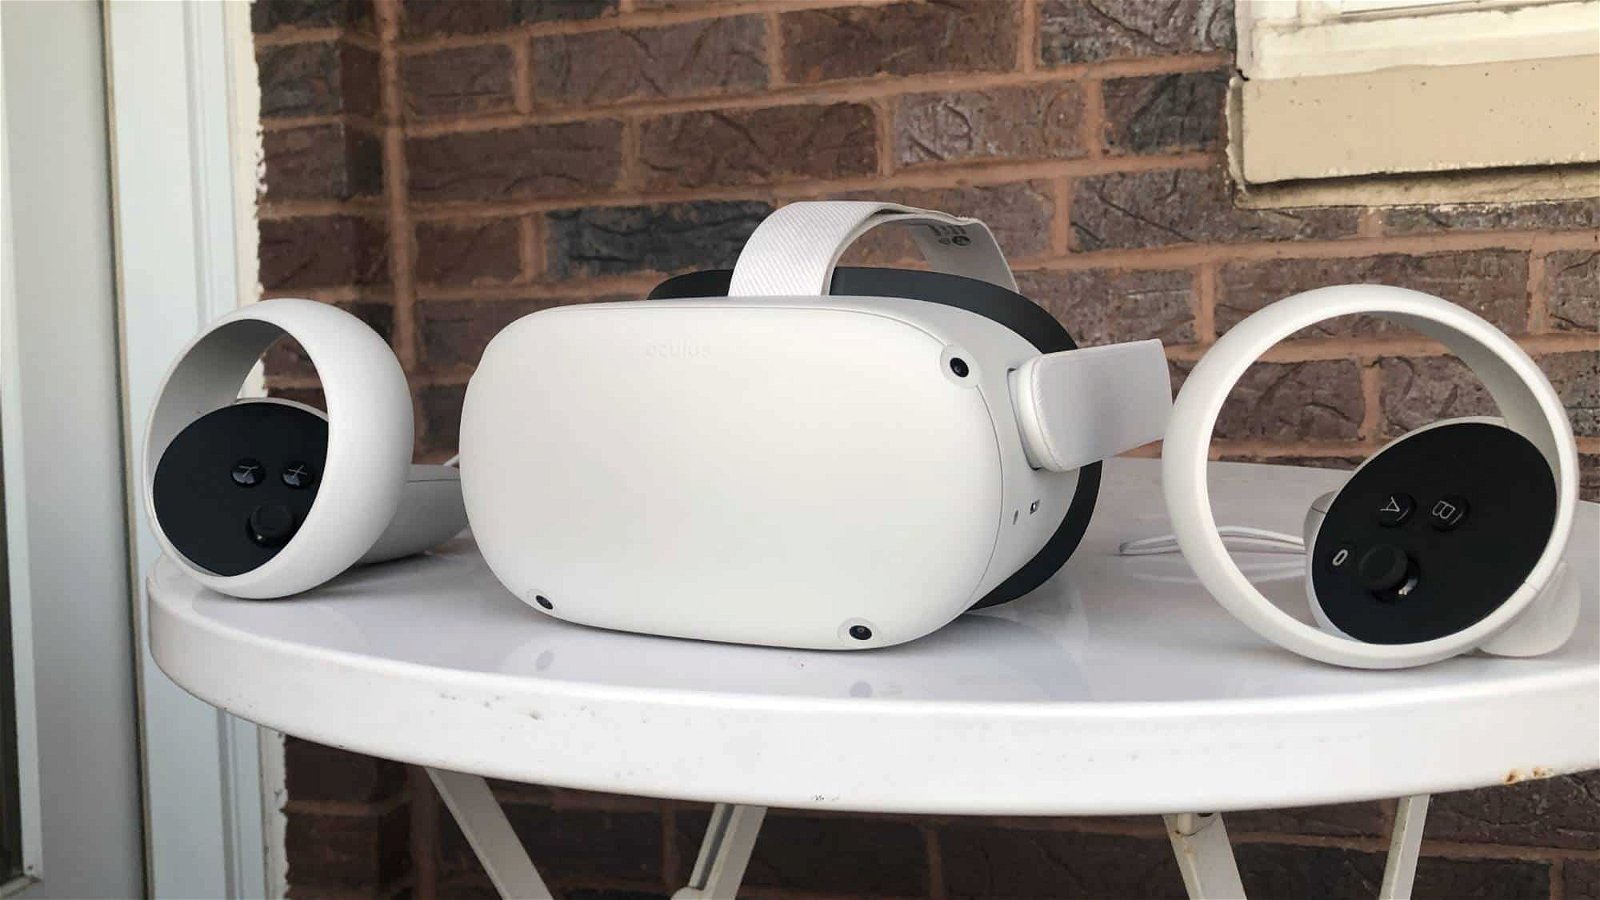
Are you looking for a convenient way to enhance your gaming experience on the Oculus Quest 2? Look no further! In this article, we will guide you through the process of pairing your Meta Quest 2 virtual reality headset with your phone. By connecting your phone to your Meta Quest 2, you can unlock a variety of features and functionalities that will take your gaming adventures to the next level. Whether you want to receive notifications, make in-game purchases, or simply control your headset with ease, connecting your phone is a crucial step. So, let’s dive in and discover how to effortlessly pair your Meta Quest 2 to your phone!
Inside This Article
- Overview
- Step 1: Check Requirements
- Step 2: Enable Bluetooth on Phone
- Step 3: Turn on Oculus Quest 2
- Step 4: Put on Oculus Quest 2
- Step 5: Open Oculus App on Phone
- Step 6: Go to Settings on Oculus App
- Step 7: Tap on Oculus Quest 2 in Devices
- Step 8: Select Pair New Device
- Step 9: Choose Oculus Quest 2 from Phone’s Bluetooth Menu
- Step 10: Confirm Connection on Oculus App
- Troubleshooting Tips
- Conclusion
- FAQs
Overview
Pairing your Meta Quest 2 to your phone is a convenient way to enhance your virtual reality experience. By establishing a Bluetooth connection between your phone and the Meta Quest 2, you can access additional features, notifications, and even control certain aspects of your device using your phone. In this article, we will guide you through the step-by-step process of pairing your Meta Quest 2 to your phone, ensuring a seamless connection between the two devices.
With the Meta Quest 2, you can enjoy virtual reality gaming, immersive experiences, and access a range of applications directly from your device. By connecting your phone, you’ll have the added advantage of easily receiving calls and messages without the need to remove your headset, making your virtual reality journey even more interactive and convenient.
Whether you are a gaming enthusiast, a virtual reality enthusiast, or simply someone who wants to stay connected while enjoying the Meta Quest 2, this guide will help you pair your device with your phone effortlessly.
Let’s dive in and explore the step-by-step process of pairing your Meta Quest 2 to your phone.
Step 1: Check Requirements
Before you begin the process of pairing your Meta Quest 2 to your phone, it’s important to ensure that you have all the necessary requirements in place. This will ensure a seamless and successful pairing experience. Here are the requirements you should check:
1. Make sure that you have a Meta Quest 2 virtual reality headset. The pairing process will not work if you have a different VR headset.
2. Ensure that your phone supports Bluetooth connectivity. Bluetooth is required to establish a connection between the Meta Quest 2 and your phone. Check your phone’s specifications to confirm if it has Bluetooth functionality.
3. Download and install the Oculus app on your phone. The Oculus app is essential for managing and pairing your Meta Quest 2 with your phone. It is available for both iOS and Android devices and can be downloaded from the respective app stores.
4. Ensure that your Meta Quest 2 is fully charged. A low battery level can sometimes disrupt the pairing process or cause intermittent connection issues. Plug in your Meta Quest 2 and allow it to charge fully before attempting to pair it with your phone.
5. Make sure that your phone is connected to a stable internet connection. Some features and updates of the Meta Quest 2 may require an internet connection, so it’s important to have a reliable network connection available.
Once you have checked and confirmed that you meet all the requirements mentioned above, you can proceed to the next step of enabling Bluetooth on your phone.
Step 2: Enable Bluetooth on Phone
Before you can pair your Meta Quest 2 with your phone, you need to ensure that Bluetooth is enabled on your phone. Bluetooth is a wireless technology that allows devices to communicate and connect with each other over short distances. Follow these steps to enable Bluetooth on your phone:
1. Open the settings on your phone. This can usually be done by tapping on the “Settings” app.
2. Look for the “Bluetooth” option in the settings menu. It is usually represented by a small Bluetooth icon.
3. Tap on the “Bluetooth” option to access the Bluetooth settings.
4. Toggle the switch next to “Bluetooth” to turn it on. The switch may appear as a sliding button or a checkbox.
5. Once Bluetooth is enabled, your phone will start scanning for nearby devices.
6. Keep your phone’s Bluetooth settings page open. You will need to access it again in the pairing process.
Enabling Bluetooth on your phone is a crucial step in the process of pairing your Meta Quest 2. It allows your phone to establish a wireless connection with the headset, enabling you to access and control certain features and settings via the Oculus app.
Step 3: Turn on Oculus Quest 2
After ensuring that your phone’s Bluetooth is enabled, it’s time to power on your Oculus Quest 2. This step is essential for establishing a connection between your headset and your phone.
To turn on the Oculus Quest 2, press and hold down the power button located on the right side of the headset. Hold it until you see the Oculus logo appear on the screen, indicating that the device is booting up.
Once the device is powered on, you’ll be greeted with the Oculus home screen in your headset. This is where you’ll access all the VR experiences, games, and applications available on your Oculus Quest 2.
It’s worth noting that the first time you power on your Oculus Quest 2, you might be prompted to go through a setup process, including pairing it with your phone. However, if you’ve already set up your headset, you can skip this step and proceed to the next.
Ensuring that your Oculus Quest 2 is turned on is essential because it allows your phone to recognize and establish a connection with the headset. This connection is crucial for various activities, such as downloading apps, transferring files, and accessing certain features through the Oculus app on your phone.
Once your Oculus Quest 2 is powered on and ready to go, you can move on to the next step of the pairing process, which involves opening the Oculus app on your phone.
Step 4: Put on Oculus Quest 2
Now that you have enabled Bluetooth on your phone and turned on the Oculus Quest 2, it’s time to put on the headset. Putting on the Oculus Quest 2 is a simple process that ensures a comfortable and immersive virtual reality experience.
Begin by holding the Oculus Quest 2 with both hands, positioning it in front of your face. The straps should be facing away from you. Carefully place it over your head and gently adjust the straps to fit securely and comfortably.
Make sure the headset sits snugly on your face, with the lenses aligned properly with your eyes. Adjust the straps and the fit of the headset until it feels just right. The Oculus Quest 2 is designed to distribute weight evenly, so it should feel balanced and comfortable on your head.
Once the Oculus Quest 2 is securely on your head, take a moment to ensure that all the straps are properly tightened and adjusted. This will prevent any unnecessary movement during your VR experience, allowing you to fully immerse yourself in the virtual world.
Remember to take breaks if you start to feel discomfort or fatigue while wearing the Oculus Quest 2. It’s important to prioritize your comfort and well-being while enjoying virtual reality. Adjust the fit and straps as needed throughout your VR session to maintain a comfortable experience.
Now that you have successfully put on the Oculus Quest 2, you are ready to move on to the next step and open the Oculus app on your phone. This will help you proceed with the pairing process and fully unlock the capabilities of your Oculus Quest 2 headset.
Step 5: Open Oculus App on Phone
After putting on your Oculus Quest 2 headset, the next step in the pairing process is to open the Oculus app on your phone. The Oculus app is available for both iOS and Android devices, and it allows you to manage your Oculus Quest 2 settings, browse the Oculus Store, and access other features.
To open the Oculus app, simply locate the app on your phone’s home screen or in your app drawer. Tap on the app icon to launch it. If you haven’t installed the app yet, you can download it from the App Store (for iOS) or the Google Play Store (for Android).
Once the Oculus app is open, you’ll be prompted to sign in with your Oculus account. If you don’t have an account, you can create one by following the on-screen instructions. Having an Oculus account is essential for accessing the full range of features and content on your Oculus Quest 2.
Once you’ve signed in, you’ll be greeted with the Oculus app’s home screen. This screen provides you with quick access to your library of VR games and apps, as well as recommendations and featured content. It’s also where you’ll find settings and options for configuring your Oculus Quest 2.
With the Oculus app now open on your phone, you’re ready to proceed to the next step in pairing your Oculus Quest 2 to your phone. That’s where you’ll find the necessary settings and options to establish a connection between your devices and enjoy the full capabilities of your VR headset.
Step 6: Go to Settings on Oculus App
Once you have successfully connected your Oculus Quest 2 to your mobile phone via Bluetooth, it’s time to navigate to the settings on the Oculus app. The settings menu will allow you to configure various options and personalize your virtual reality experience.
To access the settings, open the Oculus app on your mobile phone. If you haven’t installed it yet, you can download it from the App Store or Google Play Store. Make sure you have the latest version of the app for optimal performance.
Once the app is open, you will see a navigation bar at the bottom of the screen. Tap on the “Settings” tab, which is usually represented by a gear icon. This will take you to the settings menu where you can customize your Oculus Quest 2 headset.
Within the settings menu, you will find a range of options to explore. These options may include adjustments for the display, audio, tracking, and more. Depending on your preferences, you can fine-tune these settings to enhance your virtual reality experience.
For example, you might want to adjust the IPD (interpupillary distance) setting to ensure a comfortable viewing experience. You can also explore the guardian settings to define your play area and set up boundary notifications. Additionally, there may be options to enable or disable certain features and notifications.
Take your time to browse through the different settings and familiarize yourself with the available options. You can always revisit the settings menu whenever you want to make adjustments or explore new features on your Oculus Quest 2.
Remember, the Oculus app acts as a bridge between your phone and the headset. It allows you to control and customize various aspects of your VR experience, making it an essential companion for your Oculus Quest 2.
If you encounter any difficulties navigating the settings menu or have questions about specific options, Oculus provides support resources such as documentation and community forums where you can find assistance.
Now that you have successfully reached the settings menu on the Oculus app, you can proceed to the next step and continue setting up your Oculus Quest 2 for an immersive and tailored virtual reality experience.
Step 7: Tap on Oculus Quest 2 in Devices
After opening the Oculus app on your phone and navigating to the settings, you will see a list of devices. Look for the Oculus Quest 2 in the devices section and tap on it.
By tapping on the Oculus Quest 2, you will initiate the pairing process between your phone and the VR headset. This step is crucial to establish a stable and seamless connection for a smooth user experience.
Make sure to wait for a few seconds after tapping on the Oculus Quest 2. It may take a moment for your phone to establish a connection with the VR headset.
Once the pairing is successful, you will see a confirmation message on your phone, indicating that the Oculus Quest 2 and your phone are now connected via Bluetooth.
Having a reliable Bluetooth connection between your phone and the Oculus Quest 2 is essential for various features like casting gameplay to your phone, transferring media files, or even receiving notifications while in VR.
It’s worth mentioning that if you don’t see the Oculus Quest 2 listed in the devices section of the Oculus app, try refreshing the devices list or restarting both your phone and the VR headset.
Also, ensure that both devices are within the Bluetooth range, as a weak connection can lead to lags or disconnections during usage.
Once you’ve successfully tapped on the Oculus Quest 2 in the devices section of the Oculus app, you’re one step closer to enjoying a fully immersive virtual reality experience.
Step 8: Select Pair New Device
Once you have located your Oculus Quest 2 in the list of devices on the Oculus app, it is time to initiate the pairing process. Follow the steps below to complete the pairing:
- Tap on Oculus Quest 2: On the Oculus app, tap on the name of your Oculus Quest 2 device that you want to pair with your phone. This will bring up the device details page.
- Select Pair New Device: On the device details page, look for the option to pair a new device. This might be located under a menu or settings option.
- Follow the On-screen Instructions: Once you have selected the option to pair a new device, follow the on-screen instructions provided by the app. These instructions will guide you through the pairing process step by step.
- Confirm Pairing: After completing the necessary steps, the Oculus app will attempt to establish a connection between your phone and the Oculus Quest 2. Wait for the pairing process to complete and for the confirmation message to appear on the app.
It is important to note that the exact steps for pairing a new device may vary slightly depending on the version of the Oculus app you are using. However, the general process should remain similar, allowing you to easily pair your phone with your Oculus Quest 2.
Once the pairing process is complete, you can enjoy the enhanced capabilities and features offered by the connection between your Oculus Quest 2 and your phone. This includes the ability to access and control various settings, view notifications, and even use your phone for social interactions while in VR.
If you experience any difficulties during the pairing process or encounter any error messages, please refer to the troubleshooting section for solutions to common issues.
Step 9: Choose Oculus Quest 2 from Phone’s Bluetooth Menu
After enabling Bluetooth on your phone and putting on the Oculus Quest 2 headset, it’s time to establish the connection between the two devices. Follow these steps to choose the Oculus Quest 2 from your phone’s Bluetooth menu:
1.
On your phone, navigate to the Bluetooth settings. The location of this option may vary depending on your phone’s operating system, but you can usually find it in the settings menu.
2.
Once you’re in the Bluetooth settings, scan for available devices. Your phone will search for nearby Bluetooth devices, including the Oculus Quest 2 headset.
3.
Wait for a moment until the Oculus Quest 2 appears in the list of available devices. It should be labeled as “Oculus Quest 2” or something similar.
4.
Tap on the Oculus Quest 2 device in the Bluetooth menu. This will initiate the pairing process between your phone and the headset.
5.
After selecting the Oculus Quest 2, your phone may prompt you to enter a pairing code or confirm the connection. Follow the on-screen instructions to complete the pairing process.
6.
Once the pairing is successful, your phone will establish a Bluetooth connection with the Oculus Quest 2 headset. This connection allows you to control and interact with the headset using your phone.
It’s worth noting that the specific steps for selecting devices from the Bluetooth menu can vary depending on your phone’s operating system and version. If you encounter any issues or difficulties, consult your phone’s user manual or search online for instructions specific to your device.
Remember, establishing a solid Bluetooth connection between your phone and the Oculus Quest 2 is essential for a seamless and immersive virtual reality experience. Take the time to ensure a secure and stable connection before diving into your favorite VR games and apps.
Step 10: Confirm Connection on Oculus App
After successfully pairing your Meta Quest 2 to your phone, the next step is to confirm the connection on the Oculus App. This step ensures that your phone and Meta Quest 2 are synchronized and ready to work together seamlessly.
To confirm the connection, open the Oculus App on your phone. If you haven’t downloaded and installed the app, make sure to do so before proceeding.
Once the app is open, you should see a list of devices on the main screen. Look for your Meta Quest 2 in the device list and tap on it to access its settings.
Within the device settings, you may find an option that says “Confirm Connection” or something similar. Tap on this option to initiate the confirmation process.
At this point, the Oculus App will send a signal to your Meta Quest 2, and you may be prompted to confirm the connection on the headset itself. Look for any onscreen instructions or prompts that appear in your Meta Quest 2’s display and follow them accordingly.
If everything goes smoothly, you should see a confirmation message on both your phone and Meta Quest 2, indicating that the connection has been successfully established.
It’s important to note that the steps for confirming the connection may vary slightly depending on the version of the Oculus App and Meta Quest 2 firmware you are using. However, the general process should remain similar.
If you encounter any issues or have trouble confirming the connection, refer to the troubleshooting tips section for possible solutions or contact the Oculus support team for further assistance.
Once the connection is confirmed, you are ready to enjoy a whole new level of virtual reality experience with your Meta Quest 2.
Troubleshooting Tips
While pairing your Meta Quest 2 to your phone is usually a seamless process, there might be instances where you encounter some challenges. Here are some troubleshooting tips to help you overcome common issues:
1. Ensure that both your phone and Oculus Quest 2 are fully charged. A low battery can sometimes cause connectivity problems.
2. Make sure that Bluetooth is turned on and enabled on both your phone and Oculus Quest 2. Sometimes, a simple toggle of the Bluetooth setting can resolve connection issues.
3. Restart both your phone and Oculus Quest 2. Sometimes, a quick reboot can resolve any software glitches that may be impacting the pairing process.
4. Check if your phone is within the compatible device list for the Oculus app. Some older or incompatible phones may not be able to establish a stable connection with the Oculus Quest 2.
5. Reinstall the Oculus app on your phone. In some cases, a corrupted installation can interfere with the pairing process. Uninstall the app and reinstall it from the official app store to ensure a clean installation.
6. Reset the Bluetooth settings on both your phone and Oculus Quest 2. Sometimes, clearing the existing Bluetooth connections can help establish a fresh and stable connection.
7. Make sure the Oculus Quest 2 is in pairing mode. Refer to the device’s user manual or online documentation to understand how to put it in pairing mode if necessary.
8. Check if there are any pending software updates for both your phone and Oculus Quest 2. Updating to the latest software versions can often resolve compatibility issues.
9. Try pairing with a different phone. If you have access to another compatible phone, attempt to pair your Oculus Quest 2 with it. This can help determine if the issue lies with your current phone or the Oculus Quest 2 itself.
10. If all else fails, reach out to customer support. If you’ve exhausted all troubleshooting options and are still unable to pair your Meta Quest 2 to your phone, it’s best to contact customer support for further assistance. They can provide additional guidance and troubleshooting steps specific to your device.
By following these troubleshooting tips, you can overcome any obstacles that may arise during the pairing process and enjoy a seamless connection between your Meta Quest 2 and phone.
Conclusion
In conclusion, pairing your Meta Quest 2 to your phone can greatly enhance your virtual reality experience. With the ability to use your phone as a remote control, view notifications, and even stream content wirelessly, the possibilities are endless. By following the steps outlined in this article, you can easily connect your Meta Quest 2 to your phone and unlock a new level of convenience and functionality.
Remember to ensure that your phone meets the compatibility requirements and follow the instructions provided by Meta to ensure a successful pairing process. Whether you want to control your virtual reality experience with ease or stay connected to the outside world while immersed in your virtual world, pairing your Meta Quest 2 with your phone is a worthwhile endeavor.
So, what are you waiting for? Grab your Meta Quest 2 and your phone, follow the steps outlined in this article, and enjoy the seamless integration of these two incredible devices. Happy pairing!
FAQs
Q: How do I pair my Meta Quest 2 with my phone?
A: Pairing your Meta Quest 2 with your phone is a simple process. First, make sure that your phone has Bluetooth functionality. Next, navigate to the settings on your Meta Quest 2 and enable Bluetooth. On your phone, go to the Bluetooth settings and search for available devices. Once your Meta Quest 2 appears, select it and follow the on-screen prompts to complete the pairing process.
Q: Why should I pair my Meta Quest 2 with my phone?
A: Pairing your Meta Quest 2 with your phone opens up a world of possibilities. It allows you to remotely control certain aspects of your VR experience, such as navigating menus and launching apps. Additionally, pairing your phone enables you to receive notifications and calls without having to take off your headset. Overall, it enhances the convenience and functionality of your Meta Quest 2.
Q: Can I use any smartphone to pair with my Meta Quest 2?
A: Yes, you can pair your Meta Quest 2 with most smartphones that have Bluetooth capabilities. Whether you have an Android or iOS device, as long as your phone supports Bluetooth, you should be able to establish a connection with your Meta Quest 2.
Q: What are the benefits of pairing my Meta Quest 2 with a phone?
A: Pairing your Meta Quest 2 with a phone offers several advantages. It allows for easier navigation through menus and apps in virtual reality. Notifications and calls can be displayed directly on your headset, eliminating the need to constantly check your phone. Additionally, some VR apps have companion apps on smartphones, providing a more immersive experience.
Q: Are there any limitations to pairing my Meta Quest 2 with a phone?
A: While pairing your Meta Quest 2 with a phone offers numerous benefits, there are a few limitations to be aware of. Firstly, the functionality may vary depending on the compatibility between your phone and the specific VR app you are using. Additionally, while you can control certain aspects of the VR experience, complex actions may still require using the Meta Quest 2 itself. Lastly, keep in mind that using Bluetooth connectivity between your phone and Meta Quest 2 may slightly impact battery life.