
If you’re an Oculus Quest 2 owner, you’ve likely experienced the immersive world of virtual reality (VR) gaming it offers. To fully enhance your gaming experience, using a headset is a must. A headset allows you to immerse yourself in the virtual world with crystal-clear audio and seamless communication. In this article, we will explore how to use a headset with your Oculus Quest 2, so you can take your gaming adventures to the next level. Whether you’re seeking better audio quality, want to communicate with fellow gamers, or simply want a more comfortable fit, using a headset is a game-changer. Let’s dive in and discover how to unlock the full potential of your Oculus Quest 2 by using a headset.
Inside This Article
- Setting up your Oculus Quest 2 headset
- Connecting your headset to a compatible device
- Adjusting the audio settings on your Oculus Quest 2 headset
- Troubleshooting common issues with headset audio
- Conclusion
- FAQs
Setting up your Oculus Quest 2 headset
Setting up your Oculus Quest 2 headset is a straightforward process that allows you to dive into the immersive world of virtual reality. Follow these simple steps to get started with your new headset:
1. Unboxing the headset: Begin by unboxing your Oculus Quest 2 headset and removing all the contents from the box. You will find the headset, controllers, charging cable, and any other accessories included in the package.
2. Charging the headset: Before initiating the setup process, it’s essential to charge your Oculus Quest 2 headset. Connect the charging cable to the headset and plug the other end into a power source. Allow the headset to charge until it reaches full battery capacity.
3. Pairing the controllers: Turn on your Oculus Quest 2 headset and follow the on-screen instructions to pair the controllers. Make sure the controllers are fully charged to ensure a seamless pairing process.
4. Connecting to Wi-Fi: Once the controllers are paired, the next step is connecting your Oculus Quest 2 headset to a Wi-Fi network. Access the settings menu on the headset and select the Wi-Fi option. Follow the prompts to connect to your desired network.
5. Oculus app installation: To unlock the full potential of your Oculus Quest 2 headset, you need to install the Oculus app on your compatible device. Visit the app store on your device, search for the Oculus app, and download and install it. Open the app and follow the instructions to connect your headset.
6. Pairing with your device: Launch the Oculus app on your compatible device and select the “Pair New Device” option. Follow the prompts to connect your Oculus Quest 2 headset to your device. Make sure the headset is powered on and within range of your device’s Bluetooth signal.
7. Completing the setup: Once your Oculus Quest 2 headset is successfully paired with your device, the app will guide you through the final setup steps. This includes configuring the guardian system, updating the firmware, and customizing your VR settings to suit your preferences.
That’s it! You have successfully set up your Oculus Quest 2 headset and are now ready to plunge into the exciting world of virtual reality. Explore a wide range of games, experiences, and apps designed specifically for the Oculus Quest 2 and enjoy the immersive and fantastic journey it offers.
Connecting your headset to a compatible device
One of the great features of the Oculus Quest 2 headset is its ability to connect to compatible devices, allowing you to enjoy an immersive audio experience. Whether you want to use a wired or wireless headset, the process is simple and straightforward. Here’s a step-by-step guide to help you connect your headset to a compatible device:
Step 1: Check headset compatibility
Before connecting your headset to a device, ensure that it is compatible with the Oculus Quest 2. The headset supports a wide range of devices, including smartphones, tablets, and gaming consoles. Make sure your device meets the necessary requirements to ensure a seamless connection.
Step 2: Wired connection
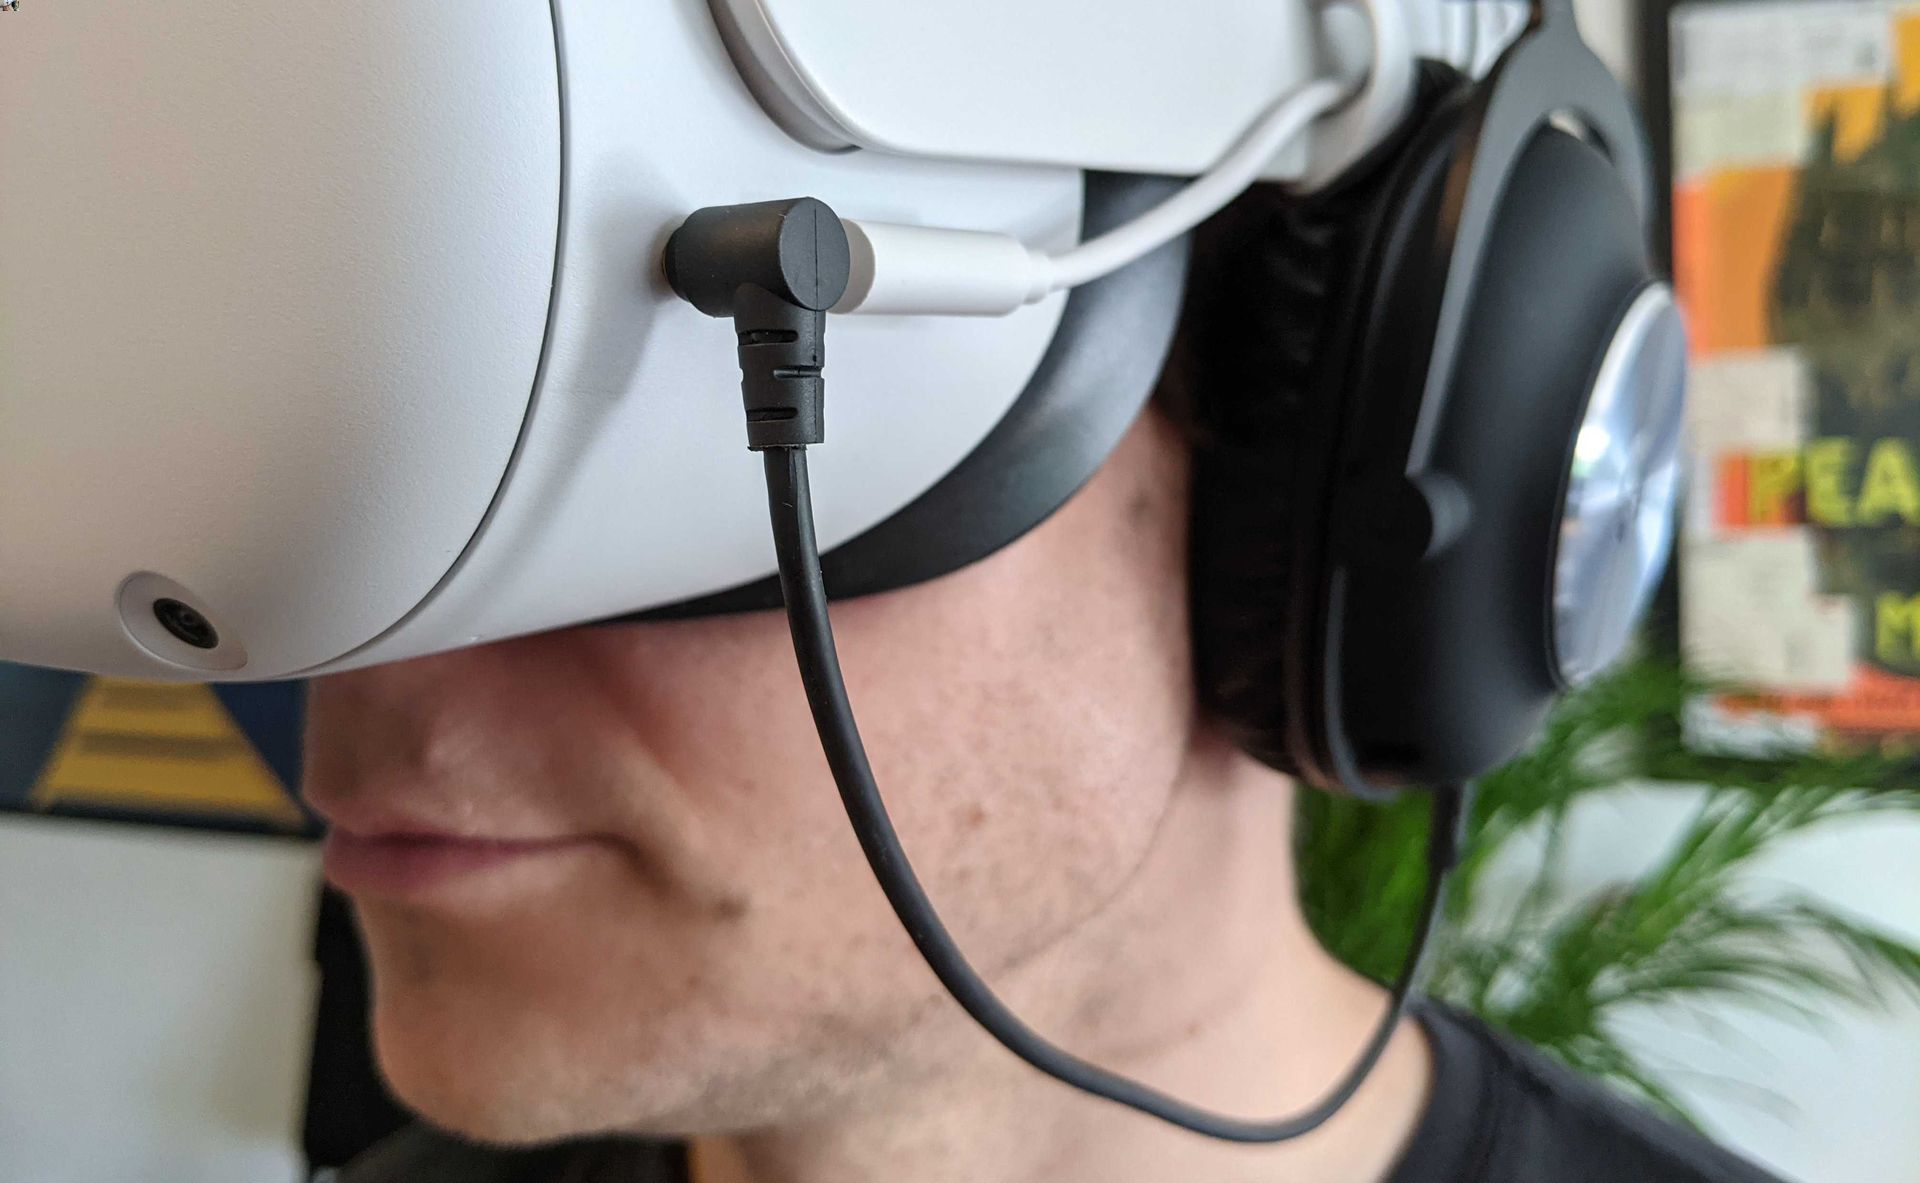
To connect your headset using a wired connection, start by locating the audio jack on your Oculus Quest 2 headset. It is typically located on the left side. Then, take the audio cable of your wired headset and plug it into the audio jack. Once connected, make sure the cable is securely inserted.
Step 3: Wireless connection
If you prefer a wireless connection, the Oculus Quest 2 also supports Bluetooth connectivity. Enable Bluetooth on both your headset and the device you wish to connect to. Then, on your headset, go to the settings menu and select the option to pair a new device. Follow the instructions on the screen to complete the pairing process.
Step 4: Adjust audio settings
Once your headset is connected to a compatible device, you may need to adjust the audio settings to optimize your audio experience. Access the settings menu on your device and look for the audio section. Here, you can adjust the volume, audio balance, and other audio-related settings to your preference.
Step 5: Test the audio
Finally, it’s time to test the audio and ensure everything is working perfectly. Play some audio or a video that has sound on your device and check if the audio is coming through the headset. Adjust the volume as needed and make any additional tweaks to the settings until you are satisfied with the audio quality.
That’s it! You have successfully connected your headset to a compatible device. Whether you’re using a wired or wireless connection, you can now enjoy immersive audio while using your Oculus Quest 2 headset.
Adjusting the audio settings on your Oculus Quest 2 headset
One of the key features of the Oculus Quest 2 headset is its immersive audio experience. By adjusting the audio settings, you can enhance your virtual reality (VR) gaming or movie-watching experience to another level. Here are a few steps to help you adjust the audio settings on your Oculus Quest 2 headset:
1. Put on your Oculus Quest 2 headset and turn it on. Navigate to the main menu and select the “Settings” option. This will open up the settings menu.
2. In the settings menu, scroll down and select the “Devices” option. This will take you to the devices settings.
3. Look for the “Audio Output” option in the devices settings. This is where you can adjust the audio settings on your headset.
4. To adjust the volume, use the volume buttons located on the side of your headset. Press the “+” button to increase the volume and the “-” button to decrease it. You can also adjust the volume level by using the Oculus app on your smartphone.
5. If you want to enable or disable the 3D audio, select the “3D Audio” option in the audio settings. Turning it on will provide a more immersive and realistic audio experience, while turning it off will provide a standard stereo sound.
6. If you prefer to use external headphones or speakers with your Oculus Quest 2 headset, you can connect them via the 3.5mm audio jack located at the bottom of the headset. Once connected, you can adjust the volume of the external audio device separately.
7. Lastly, if you experience any audio-related issues with your Oculus Quest 2 headset, you can try restarting the headset or performing a factory reset. If the problem persists, you may need to contact Oculus support for further assistance.
Remember, adjusting the audio settings on your Oculus Quest 2 headset can greatly enhance your VR experience. Whether you want to immerse yourself in the world of gaming or enjoy a movie like never before, tweaking the audio settings to your preference is essential.
Troubleshooting common issues with headset audio
When using a headset with your Oculus Quest 2, you may encounter various audio issues. These can range from sound distortion to lack of audio altogether. Fortunately, most of these issues can be resolved with a few simple troubleshooting steps. In this section, we will discuss some common problems you may encounter and provide solutions to help you enjoy optimal audio quality with your headset.
1. No sound from the headset: If you’re not getting any audio output from your headset, the first thing to check is the audio settings on your device. Make sure the volume is turned up and that the headset is properly connected. If the issue persists, try disconnecting and reconnecting the headset and restarting your device. If none of these steps work, there may be an issue with the headset itself, and you may need to contact customer support for further assistance.
2. Low volume or distorted sound: If you’re experiencing low volume or distorted sound from your headset, there are a few things you can try. First, check the volume settings on your device and ensure they are turned up. You can also try adjusting the volume directly on the headset, if applicable. If the sound is still not satisfactory, try cleaning the audio jacks or ports on both the headset and the device to remove any dirt or debris that may be affecting the audio quality.
3. Audio in one ear only: If you’re hearing audio only in one ear of your headset, the issue may be with the audio cable or connector. Start by checking the cable connection on both ends, ensuring it is securely plugged in. You can also try using a different cable or adapter to see if the issue persists. If the problem continues, there may be a hardware issue with the headset itself, and you may need to consider getting it repaired or replaced.
4. Bluetooth connectivity issues: Some headsets offer Bluetooth connectivity, allowing you to wirelessly connect to your device. If you’re experiencing issues with Bluetooth connectivity, first make sure that your device’s Bluetooth is turned on and that it is in pairing mode. You should also check if the headset is in pairing mode and try resetting the Bluetooth connection. If the problem persists, try removing and re-pairing the headset with your device.
5. Static or buzzing sound: If you’re hearing static or buzzing sounds coming from your headset, it could be due to interference from other electronic devices. Move away from sources of interference such as Wi-Fi routers, cordless phones, or microwaves. If the issue continues, try using a different USB port or audio jack on your device. Additionally, check if the headset’s audio drivers are up to date and consider updating them if necessary.
By following these troubleshooting steps, you can address common audio issues with your headset and ensure a seamless and immersive audio experience with your Oculus Quest 2. If you are still experiencing difficulties, consider reaching out to customer support or seeking advice from fellow Oculus users in online forums or communities. Remember, a little troubleshooting can go a long way in resolving headset audio issues and enhancing your overall VR experience.
Conclusion
In conclusion, using a headset with Oculus Quest 2 opens up a whole new world of immersive experiences. Whether you’re gaming, watching movies, or exploring virtual reality environments, a headset adds another dimension to your experience. With the easy setup and compatibility options available, it’s simple to connect your favorite headset to the Oculus Quest 2 and enhance your virtual reality adventures.
Remember to choose a headset that fits your preferences and needs, whether it’s a wired or wireless option. Don’t forget to consider the comfort, audio quality, and additional features that can elevate your VR experience. Enjoy the freedom of movement, stunning visuals, and crisp sound that a compatible headset can provide as you dive into the exciting world of virtual reality with Oculus Quest 2.
FAQs
1. Can I use any headset with Oculus Quest 2?
Yes, you can use any compatible headset with Oculus Quest 2. However, it is important to ensure that the headset you choose is compatible with the device and has the necessary connectivity options, such as Bluetooth or USB-C, to establish a connection.
2. How do I connect a headset to Oculus Quest 2?
To connect a headset to Oculus Quest 2, you will first need to make sure that the headset is compatible with the device. If it is, you can follow these steps:
- Turn on your Oculus Quest 2 and put it on.
- Go to the Oculus Home screen by pressing the Oculus button on your controller.
- Select “Settings” from the menu.
- Scroll down and select “Device” from the left-hand side of the screen.
- Select “Pair New Device.”
- Follow the on-screen prompts to complete the pairing process.
3. Can I use a wireless headset with Oculus Quest 2?
Yes, you can use a wireless headset with Oculus Quest 2. The device supports wireless connectivity options such as Bluetooth, allowing you to connect compatible wireless headsets and enjoy a truly immersive experience without being tethered by cables.
4. What are the benefits of using a headset with Oculus Quest 2?
Using a headset with Oculus Quest 2 enhances your virtual reality experience by providing high-quality audio, making the virtual environment more immersive and realistic. It allows you to fully immerse yourself in games, movies, or other virtual reality content with precise audio cues and a more encompassing sense of spatial sound.
5. Can I use my own headphones with Oculus Quest 2?
Yes, you can use your own headphones with Oculus Quest 2. The device has a 3.5mm audio jack, which allows you to connect a wide range of headphones or earphones to enjoy your virtual reality experiences with your preferred audio setup.