
Are you having trouble figuring out how to turn on the camera on your Sony Xperia? Look no further! In this article, we will guide you through the process step by step, so you can capture those precious moments and memories with ease. Whether you’re a seasoned Xperia user or a new owner, we’ve got you covered. From basic camera settings to advanced features, we’ll provide you with all the information you need to utilize your Sony Xperia’s camera to its fullest potential. By the end of this article, you’ll be equipped with the knowledge and skills to snap stunning photos and record high-quality videos on your Sony Xperia device. So, without further ado, let’s dive into the exciting world of Sony Xperia cameras!
Inside This Article
- Enabling Camera Permissions
- Opening the Camera App
- Adjusting Camera Settings
- Taking Photos and Recording Videos – Capturing Photos, Recording Videos, Using Camera Features and Effects
- Conclusion
- FAQs
Enabling Camera Permissions
In order to use the camera on your Sony Xperia device, you need to grant camera permissions to the respective app. This will allow the app to access the camera hardware and capture photos or record videos. Enabling camera permissions is a straightforward process that can be done in a few simple steps.
1.1 Accessing App Permissions
The first step is to access the app permissions settings on your Sony Xperia device. To do this, follow these steps:
- Open the Settings app on your device. You can usually find it in the app drawer or by swiping down from the top of the screen and tapping on the gear icon.
- Scroll down and tap on “Apps & notifications” or a similar option depending on your device model.
- Look for the app you want to enable camera permissions for and tap on it.
- Tap on “Permissions” or a similar option.
1.2 Granting Camera Access
Once you have accessed the app permissions settings, you can proceed to grant camera access to the app. Here’s how:
- Within the app permissions settings, locate the “Camera” option and tap on it.
- Select the option that allows the app to access the camera. This may be labeled as “Allow” or “Grant” depending on your device.
- Exit the settings menu and launch the camera app you granted permissions to.
With camera permissions enabled, you can now use the camera app on your Sony Xperia device to capture photos and record videos. It’s important to note that the steps to enable camera permissions may differ slightly depending on the device model and Android version.
Opening the Camera App
Now that you have enabled camera permissions, it’s time to open the camera app on your Sony Xperia smartphone. Here’s how you can do it:
2.1 Locating the Camera App
The camera app is typically located on the home screen or in the app drawer of your Sony Xperia device. To find it, start by swiping up or down on the home screen to access the app drawer. This is where all the apps installed on your phone are stored in a list or grid format.
Scroll through the app drawer and look for the camera app icon. It usually resembles a small camera lens or may have the word “Camera” written under it. If you have trouble locating it, you can always use the search function within the app drawer to quickly find the camera app by typing “Camera” in the search bar.
2.2 Tapping to Launch the Camera
Once you have found the camera app icon, simply tap on it to launch the camera. The camera app will open, and you will be greeted with the camera interface on your screen.
Depending on your Sony Xperia model and the version of your software, the camera app interface may vary. However, you can typically expect to see a viewfinder displaying what the camera sees, along with icons or buttons for accessing different camera modes, settings, and capturing photos or recording videos.
With the camera app opened, you are now ready to explore its features, adjust settings, and start capturing moments to cherish.
Adjusting Camera Settings
When it comes to capturing the perfect shot on your Sony Xperia, adjusting the camera settings to suit your preferences is essential. By exploring the various camera modes and customizing the photo and video settings, you can enhance your photography experience. Let’s dive into how you can make the most out of your camera settings.
3.1 Exploring Camera Modes
The camera modes on your Sony Xperia offer a range of options for different shooting scenarios. Whether you’re capturing stunning landscapes, photographing fast-moving subjects, or taking selfies, there’s a mode to suit every situation.
To explore the camera modes on your device, follow these steps:
- Open the Camera app on your Sony Xperia.
- Swipe left or right on the screen to browse through the available camera modes.
- Select the mode that best fits your current shooting situation.
Here are some of the common camera modes you may find on your Sony Xperia:
- Auto Mode: This mode allows the camera to automatically adjust settings based on the scene.
- Manual Mode: In this mode, you have full control over settings like ISO, shutter speed, and white balance.
- Portrait Mode: Ideal for capturing beautiful portraits with a blurred background effect.
- Night Mode: Designed to capture clear and detailed photos in low-light environments.
- Panorama Mode: This mode lets you capture wide-angle photos by panning the camera across a scene.
Take the time to experiment with different camera modes and discover the ones that align with your photography style and preferences.
3.2 Customizing Photo and Video Settings
Customizing the photo and video settings on your Sony Xperia allows you to have more control over the outcome of your shots. Here’s how you can personalize these settings:
- Open the Camera app on your Sony Xperia.
- Tap the “Settings” icon (usually represented by a gear or cog symbol).
- Explore the different options available for photo and video settings.
- Adjust settings like resolution, aspect ratio, color filters, and more to your liking.
Some common photo and video settings you may find include:
- Resolution: Choose the desired resolution for your photos and videos.
- Aspect Ratio: Select the aspect ratio that best suits your needs, such as 4:3 or 16:9.
- HDR: Enable or disable HDR (High Dynamic Range) for enhanced dynamic range in your photos.
- Gridlines: Display gridlines on the screen to help with composition.
- Time-lapse: Set up time-lapse photography to capture long periods of time in a compressed video.
By customizing these settings, you can tailor the camera experience to your liking and achieve the desired results in your photos and videos.
Remember, exploring camera modes and customizing photo and video settings on your Sony Xperia will elevate your photography game. Take the time to familiarize yourself with these options and let your creativity soar!
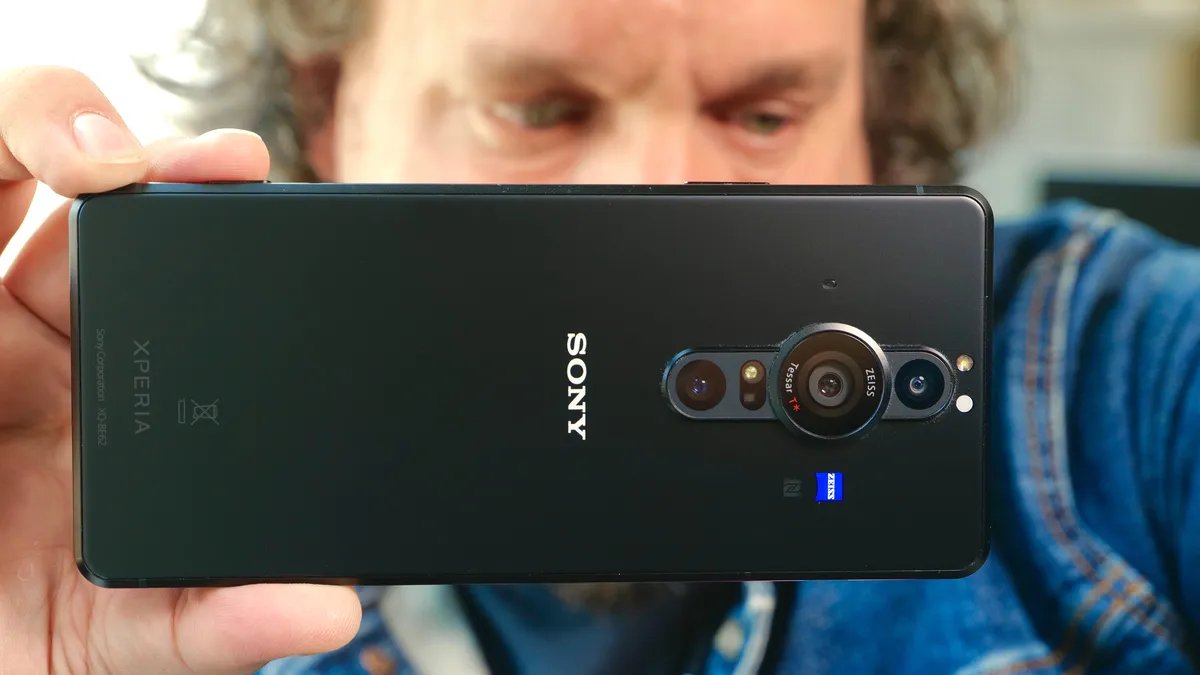
Taking Photos and Recording Videos – Capturing Photos, Recording Videos, Using Camera Features and Effects
One of the most exciting features of a Sony Xperia smartphone is its powerful camera capabilities. With high-quality lenses and advanced imaging technology, capturing stunning photos and recording videos has never been easier. In this section, we will explore how to take photos and record videos on your Sony Xperia device, as well as how to unleash the full potential of your camera with various features and effects.
4.1 Capturing Photos
To capture a photo on your Sony Xperia smartphone, follow these simple steps:
- Open the Camera app by tapping on its icon in the app drawer or on the home screen.
- Ensure that the camera is in photo mode. You can switch between photo and video mode by tapping on the camera icon or using the mode selector on the screen.
- Use the viewfinder to compose your shot. You can tap anywhere on the screen to focus on a specific object or scene.
- When you are ready to take the photo, tap the shutter button. The camera will capture the image, and a thumbnail of the photo will appear at the corner of the screen.
- Tap the thumbnail to view the photo in the gallery app or continue taking more photos.
4.2 Recording Videos
If you want to record videos on your Sony Xperia smartphone, here’s what you need to do:
- Launch the Camera app as mentioned earlier.
- Switch the camera to video mode by tapping on the video camera icon or using the mode selector.
- Adjust any necessary video settings such as resolution, framerate, or stabilization.
- Hold your smartphone steady and frame your shot using the viewfinder.
- To start recording, tap the video record button. The button will change to a stop button, indicating that the recording is in progress.
- To stop recording, tap the stop button. The camera will save the video to your device’s storage, and you can access it in the gallery app.
4.3 Using Camera Features and Effects
The Sony Xperia camera app offers a wide range of features and effects to enhance your photos and videos. Here are some of the key features you can explore:
- HDR (High Dynamic Range): This feature helps you capture photos with a greater range of light and dark areas, resulting in stunning image quality.
- Portrait Mode: Use this mode to capture beautiful portrait shots with a blurred background, emphasizing the subject.
- Panorama: Create breathtaking panoramic shots by capturing a wide field of view, perfect for capturing landscapes or cityscapes.
- Time-lapse: Record a time-lapse video to compress an extended period into a short, visually engaging clip.
- Filters and Effects: Apply various filters and effects to add a creative touch to your photos and videos. Experiment with different styles and moods to make your images stand out.
By exploring these features and effects, you can elevate your photography skills and capture stunning moments with your Sony Xperia smartphone.
With these simple steps and a plethora of exciting features at your disposal, you can now confidently capture photos and record videos with your Sony Xperia smartphone. Whether you’re a photography enthusiast or simply want to preserve your precious memories, your Xperia device is equipped to deliver exceptional image quality and versatile videography capabilities.
Conclusion
Turning the camera on a Sony Xperia device is a simple yet essential task that can unlock a world of photographic possibilities. With just a few taps, you can capture stunning images and record memorable videos. Whether you’re an amateur photographer or a professional, the camera on a Sony Xperia offers a range of features and settings that allow you to unleash your creativity.
From adjusting exposure and focus to experimenting with different shooting modes, the camera on a Sony Xperia device is a powerful tool that can help you capture breathtaking moments. Whether you’re looking to document your travels, snap candid shots of your loved ones, or create stunning visuals for your social media platforms, the camera on a Sony Xperia device is up to the task.
So go ahead, power on your Sony Xperia, navigate to the camera app, and start capturing the beauty of the world around you. With a bit of practice and experimentation, you’ll be snapping incredible photos in no time.
FAQs
1. How do I turn on the camera on my Sony Xperia?
To turn on the camera on your Sony Xperia, simply locate the camera app on your device. It is usually found in the app drawer or on the home screen. Tap on the camera app icon, and the camera interface should open up, ready for you to start capturing photos and videos.
2. Is there a shortcut to quickly access the camera on my Sony Xperia?
Yes, Sony Xperia devices often come with a convenient camera shortcut feature. To quickly access the camera, simply double-press the power button. This gesture will directly open the camera app, allowing you to capture precious moments without any delay.
3. Can I customize camera settings on my Sony Xperia?
Absolutely! Sony Xperia devices offer a variety of camera settings that can be customized according to your preferences. To access the camera settings, open the camera app and tap on the gear icon or the three-dot menu icon, depending on your device. From there, you can adjust parameters such as resolution, exposure, white balance, and many more.
4. How can I switch between the front and rear camera on my Sony Xperia?
Switching between the front and rear camera on your Sony Xperia is simple. While in the camera app, look for the camera switch icon, usually represented by two arrows in a circular motion. Tap on this icon to switch between the front-facing and rear-facing camera. This allows you to capture selfies or switch to the higher-resolution rear camera for regular photos and videos.
5. Can I take photos while recording a video on my Sony Xperia?
Yes, most Sony Xperia devices have the capability to capture photos while recording a video. While recording, you will notice a camera shutter button on the screen. Simply tap on the shutter button to take a photo without interrupting your ongoing video recording. This feature is particularly useful for capturing still moments amidst recording dynamic videos.