
Are you facing the unfortunate situation of having a hard-bricked Android phone? Don’t panic! We understand how frustrating it can be when your beloved device becomes unresponsive and seemingly impossible to revive. However, there is hope! In this article, we will guide you through the process of unbricking a hard-bricked Android phone, step-by-step. Whether your phone is stuck in a boot loop, displaying a black screen, or simply refuses to power on, we’ve got you covered. So, fasten your seatbelt and get ready to breathe new life into your bricked device. Let’s dive in and make your phone functional again!
Inside This Article
- Common Causes of Hard Bricked Android Phones
- Method 1: Use Fastboot to Unbrick Your Android Phone
- Method 2: Use Recovery Mode to Unbrick Your Android Phone
- Method 3: Use ADB (Android Debug Bridge) to Unbrick Your Android Phone
- Method 4: Seek Professional Assistance to Unbrick Your Android Phone
- Conclusion
- FAQs
Common Causes of Hard Bricked Android Phones
When it comes to the world of Android phones, one of the recurring nightmares for users is a hard-bricked device. A hard-bricked Android phone is one that has become completely non-functional, rendering it useless and unresponsive. It’s a situation that can be incredibly frustrating.
There are several common causes that can lead to a hard-bricked Android phone. One of the main culprits is improper firmware flashing. This can occur when attempting to install custom ROMs, rooting the device, or applying system updates incorrectly. If the flash process is interrupted or if incompatible firmware is used, it can result in a hard-bricked device.
Another potential cause of a hard-bricked Android phone is a failed unlock or modification of the bootloader. The bootloader is responsible for initializing the system and loading the operating system. If the bootloader is tampered with or modified incorrectly, it can cause the device to become hard-bricked.
Physical damage to the phone can also be a contributing factor. Dropping the device or exposing it to moisture can lead to internal component failures, causing the phone to become hard-bricked.
Software malfunctions and system errors can be another cause of a hard-bricked Android phone. If critical system files are corrupted or deleted, the device may fail to boot up properly, resulting in a hard-brick.
Lastly, attempting to install modified or incompatible third-party apps can also lead to a hard-bricked Android phone. These apps may contain bugs or malicious code that can interfere with the phone’s operations and potentially render it unresponsive.
Method 1: Use Fastboot to Unbrick Your Android Phone
If your Android phone is hard bricked and unresponsive, using Fastboot can be an effective method to revive it. Fastboot is a command-line tool that allows you to communicate with your device while it’s in bootloader mode.
Before proceeding with the Fastboot method, make sure you have the necessary drivers installed on your computer and enable USB debugging on your Android phone.
Follow these steps to unbrick your Android phone using Fastboot:
- Connect your Android phone to your computer using a USB cable.
- Boot your Android phone into bootloader mode by powering it off, then simultaneously pressing the Volume Down and Power buttons.
- Open the command prompt (Windows) or terminal (Mac/Linux) on your computer.
- Navigate to the directory where you have the Fastboot tool installed.
- Type “fastboot devices” in the command prompt/terminal to check if your device is detected.
- Enter the appropriate Fastboot commands to flash a compatible firmware onto your device. These commands may vary depending on your phone model and the firmware you have downloaded. For example, you can use the “fastboot flash
” command to flash the bootloader, recovery, or system images. - Once the flashing process is complete, reboot your phone using the “fastboot reboot” command.
It’s important to note that the Fastboot method requires technical knowledge and can be risky if not executed properly. Ensure that you follow the instructions carefully and have a backup of your data before attempting to unbrick your Android phone.
If you are not confident in performing these steps on your own, it’s advisable to seek professional assistance or contact the manufacturer’s support team for guidance.
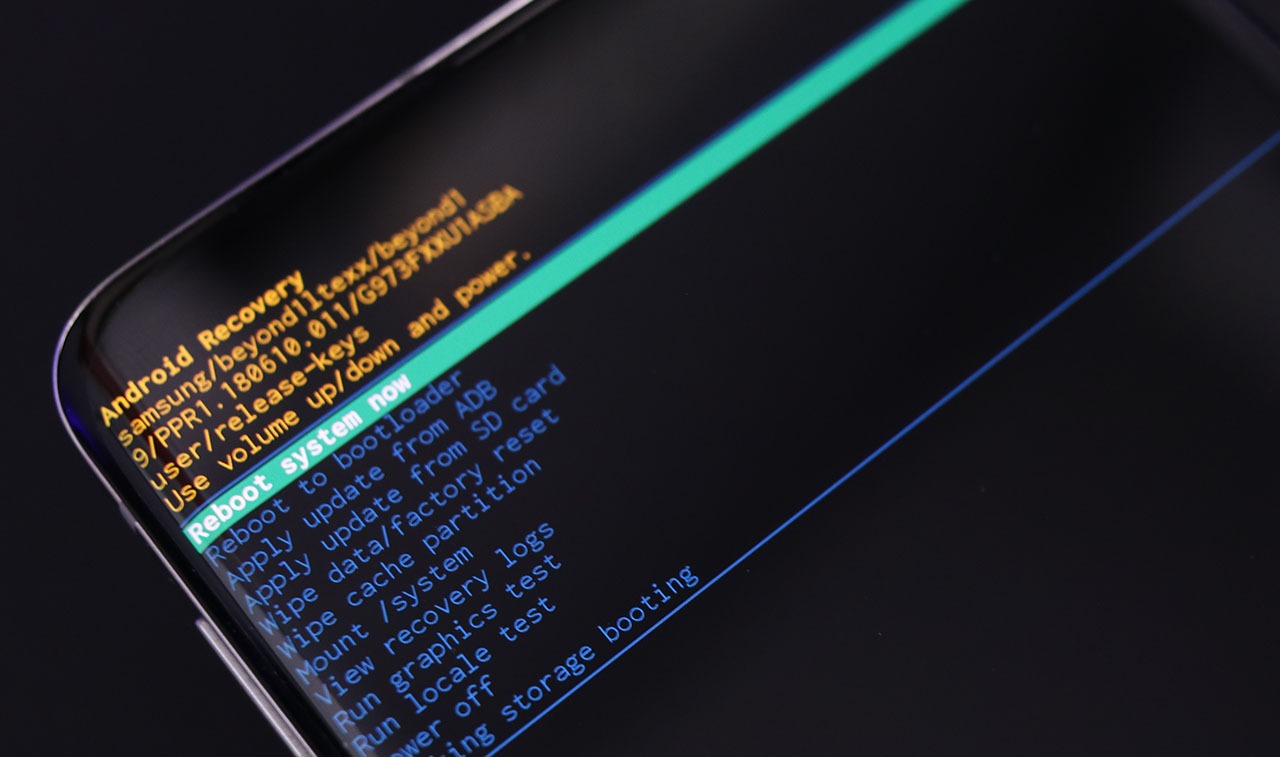
Method 2: Use Recovery Mode to Unbrick Your Android Phone
When an Android phone is hard-bricked, one of the potential solutions is to utilize the recovery mode to restore it. Recovery mode is a built-in feature on Android devices that allows users to perform various system-related tasks, such as wiping cache, factory resetting, and even installing custom ROMs. While it is primarily used for troubleshooting and maintenance, it can also be a useful tool for unbricking your phone.
Here are the steps to unbrick your Android phone using recovery mode:
- First, ensure that your phone is powered off.
- Next, press and hold the specific key combination to boot your phone into recovery mode. The exact key combination may vary depending on the make and model of your device. Typically, it involves holding down the power button and a volume button simultaneously.
- Once you’re in recovery mode, use the volume buttons to navigate through the options and the power button to select them.
- Look for the option that says “Wipe data/factory reset” or something similar. This will erase all the data on your phone, so make sure you have a backup if possible.
- Select the option and confirm your choice by following the on-screen prompts.
- After the reset is complete, navigate to the option that says “Reboot system now” and select it.
Once your phone reboots, it should hopefully come back to life and no longer be hard-bricked. However, please note that this method will erase all the data on your phone, so it’s important to be prepared and have a backup of your valuable files and information.
If your phone is still unresponsive or doesn’t show any signs of improvement after following these steps, it’s recommended to try other methods or seek professional assistance. Sometimes, hard-bricked devices require advanced techniques and specialized tools to be revived.
Overall, using the recovery mode to unbrick your Android phone can be an effective solution. It’s a built-in feature that provides various options for troubleshooting and repairing your device. However, always exercise caution and make sure to have backups of your important data to avoid any potential loss.
Method 3: Use ADB (Android Debug Bridge) to Unbrick Your Android Phone
If your Android phone is hard bricked and you are unable to access the Fastboot or Recovery mode, you can try using ADB (Android Debug Bridge) to unbrick it. ADB is a powerful command-line tool that allows you to communicate with your Android device from a computer.
Here are the steps to unbrick your Android phone using ADB:
- Connect your Android phone to your computer using a USB cable.
- Download and install the ADB drivers for your specific phone model on your computer.
- Open a command prompt window on your computer and navigate to the directory where you have installed the ADB drivers.
- Type “adb devices” in the command prompt and press Enter. This command will list all the connected devices. Make sure your Android phone is listed.
- If your phone is listed, proceed to the next step. If not, double-check the USB connection and driver installation.
- Now, enter the following command: “adb reboot bootloader”. This will reboot your phone into bootloader mode.
- Once your phone is in bootloader mode, execute the command: “fastboot devices”. This will confirm that your phone is connected in the bootloader mode.
- Now, you can use the appropriate fastboot commands to flash firmware, recoveries, or partitions on your phone. Be cautious as executing wrong commands can cause further damage to your device.
- Follow the instructions specific to your phone model and the desired operation (e.g., flashing firmware).
- After the flashing process is complete, execute the command: “fastboot reboot” to reboot your phone.
Note: ADB is a powerful tool that can be risky to use if you are not familiar with it. It is advisable to refer to official guides or seek professional assistance if you are not confident in using ADB.
By following these steps and using ADB, you can attempt to unbrick your Android phone and get it back to working condition. However, keep in mind that this method requires some technical knowledge and proficiency with ADB commands. If you are unsure or uncomfortable with the process, it is recommended to seek professional assistance to avoid further damage to your device.
Method 4: Seek Professional Assistance to Unbrick Your Android Phone
In some cases, unbricking a hard-bricked Android phone can be a complex and challenging task. If you’ve tried the previous methods and still haven’t been able to revive your device, it’s time to consider seeking professional assistance.
There are specialized technicians and repair shops that have the expertise and tools to handle even the most severe cases of hard-bricked phones. They have the knowledge and experience to diagnose the issue accurately and employ advanced techniques to unbrick your device.
When opting for professional assistance, it’s important to research and choose a reputable service provider. Look for reviews or recommendations from other customers to ensure you’re entrusting your phone to skilled professionals.
Upon reaching out to a professional, they will assess the condition of your phone and provide you with an estimate of the cost and time required for the unbricking process. This may involve replacing damaged components, re-flashing the firmware, or using specialized equipment to restore your device to working condition.
While seeking professional help may come with a cost, it can be a worthwhile investment if you value your device or have exhausted all other options. It allows you to have peace of mind, knowing that experts are handling your phone and maximizing the chances of a successful unbricking.
Additionally, professional technicians can offer advice on how to prevent future bricking incidents and recommend software or precautions to safeguard your phone from such issues.
Remember that the decision to seek professional assistance should be based on the severity of the brick, your technical knowledge, and your personal preferences. If you’re not comfortable attempting the unbricking process yourself, or if you want to save time and effort, consulting a professional can be the best course of action.
In conclusion, dealing with a hard-bricked Android phone can be a frustrating experience, but it is not impossible to fix. By following the steps and techniques mentioned in this article, you have learned how to unbrick a hard-bricked Android phone. Whether it was caused by a faulty firmware update, a failed rooting attempt, or any other reason, you can now confidently troubleshoot and revive your device.
Remember to exercise caution and patience throughout the process, as incorrect steps or procedures can further damage your phone. It is always recommended to back up your important data regularly to avoid any potential data loss.
With the information provided in this article, you now have the knowledge and confidence to tackle a hard-bricked Android phone and bring it back to life. Enjoy the rewards of a successfully unbricked device and continue to explore all the features and capabilities that your Android phone has to offer.
FAQs
1. What does it mean when a phone is hard bricked?
When a phone is hard bricked, it means that it has become completely unresponsive and cannot be turned on or accessed in any way. It typically happens due to software issues, such as a failed firmware update or flashing process.
2. How do I know if my phone is hard bricked?
If your phone doesn’t respond to any buttons being pressed, shows no signs of life when plugged into a charger, and cannot be recognized by a computer, it is likely hard bricked.
3. Can a hard bricked phone be fixed?
In most cases, a hard bricked phone can be fixed. However, it requires technical expertise and specific tools for the repair process. It’s recommended to reach out to a professional technician or the phone’s manufacturer for assistance.
4. Can I unbrick my phone myself?
Yes, it is possible to unbrick a phone yourself if you have the necessary technical knowledge and tools. However, attempting to unbrick a phone without proper expertise can potentially cause further damage. It’s important to proceed with caution or seek professional help.
5. How can I prevent my phone from getting hard bricked?
To prevent your phone from getting hard bricked, it’s important to follow recommended guidelines when updating firmware or flashing custom ROMs. Make sure to use official firmware updates and reliable sources for custom ROMs. Additionally, avoid interrupting the flashing process and ensure your phone has sufficient battery life during the update.