
Having a wireless mouse can bring convenience and flexibility to your computer usage. And when it comes to wireless mice, Apple is known for its sleek and stylish design that complements its range of devices. However, one common concern among Apple wireless mouse users is how to effectively charge their device. In this article, we will explore different methods to charge your Apple wireless mouse, whether you have the Magic Mouse or the Magic Mouse 2. Whether you’re a seasoned Apple user or new to the world of wireless mice, we’ve got you covered with step-by-step instructions and helpful tips. So grab your mouse, sit back, and let’s dive into the world of charging your Apple wireless mouse.
Inside This Article
- Pairing the Apple Wireless Mouse
- Connecting the Apple Wireless Mouse to a Power Source
- Monitoring the Battery Level of the Apple Wireless Mouse
- Troubleshooting Common Charging Issues with the Apple Wireless Mouse
- Conclusion
- FAQs
Pairing the Apple Wireless Mouse
The Apple Wireless Mouse is a sleek and innovative device that allows you to navigate your computer without the constraints of a physical connection. To make full use of its wireless capabilities, you need to pair the mouse with your computer. Here’s a step-by-step guide to help you pair your Apple Wireless Mouse:
- First, ensure that your computer’s Bluetooth is turned on. You can usually find this setting in the system preferences or control panel.
- On your Apple Wireless Mouse, press and hold the power button until the LED indicator starts flashing. This indicates that the mouse is in pairing mode.
- On your computer, navigate to the Bluetooth settings and search for available devices. The Apple Wireless Mouse should appear on the list.
- Select the mouse from the list of available devices.
- Your computer might prompt you to enter a pairing code. If so, refer to the documentation that came with your mouse for the code.
- Once successfully paired, the LED indicator on the mouse will stop flashing and remain illuminated, indicating that the mouse is now connected to your computer.
It’s important to note that the pairing process may vary depending on the operating system you are using. However, these steps should provide you with a general guideline to pair your Apple Wireless Mouse.
Now that you have successfully paired your Apple Wireless Mouse, you can enjoy the freedom of wireless navigation and control on your computer.
Connecting the Apple Wireless Mouse to a Power Source
The Apple Wireless Mouse is designed to be conveniently charged to ensure uninterrupted usage. To connect the mouse to a power source, follow these simple steps:
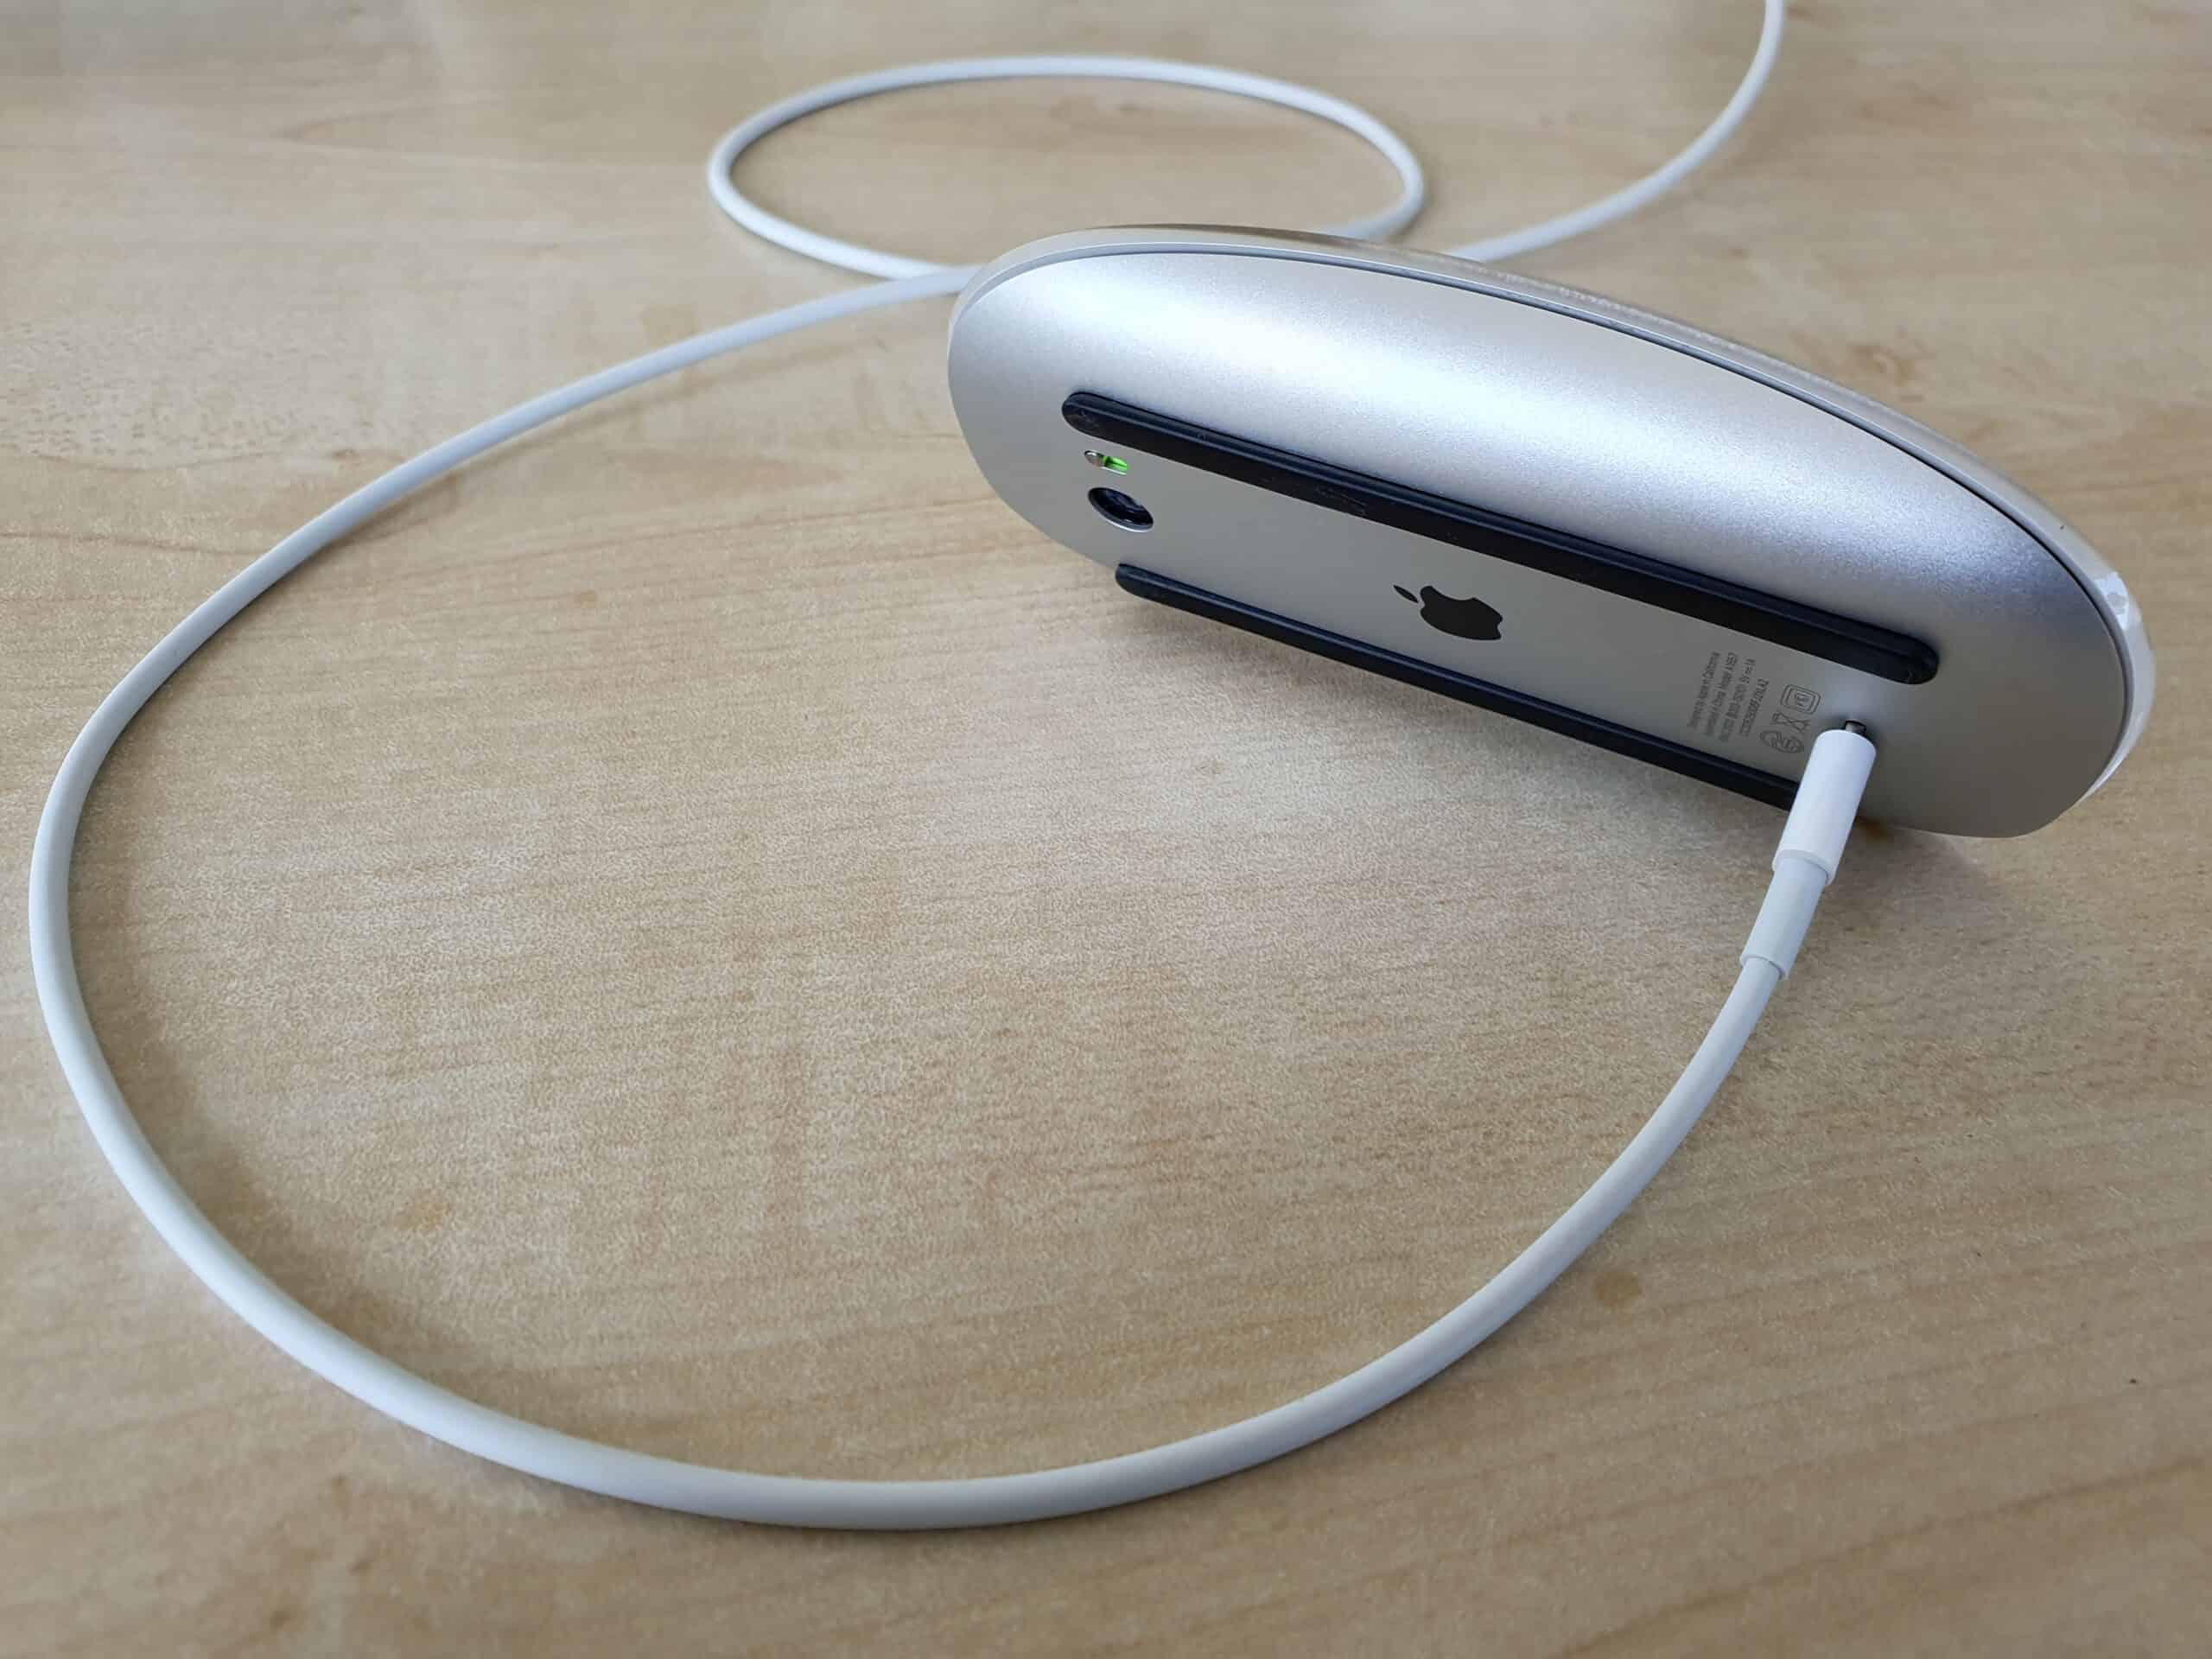
1. Locate the charging port on the underside of the Apple Wireless Mouse. It is usually situated near the front of the mouse.
2. Take the charging cable that came with the mouse and insert the smaller end into the charging port. Ensure a secure connection is made.
3. Connect the other end of the charging cable to a power source. This can be a USB port on your computer, a USB wall adapter, or any other device capable of delivering power to the mouse.
4. Once the mouse is connected to a power source, a small LED indicator light on the mouse will illuminate, indicating that the charging process has begun.
5. Allow the mouse to charge for the recommended amount of time. This can vary depending on the current battery level of the mouse, but it is generally advisable to charge it for at least a few hours to ensure a full charge.
6. While the mouse is charging, avoid using it to prevent any interruption in the charging process. This will help optimize the charging time and ensure a complete charge.
7. Once the mouse has finished charging, the LED indicator light will turn off, indicating that the battery is fully charged and ready for use.
8. Disconnect the charging cable from both the mouse and the power source. Ensure that the cable is properly stored to avoid any damage.
Now that you have successfully connected your Apple Wireless Mouse to a power source and charged it, you can enjoy the freedom of wireless mouse usage once again!
Monitoring the Battery Level of the Apple Wireless Mouse
Keeping track of the battery level of your Apple Wireless Mouse is essential to ensure uninterrupted usage. Fortunately, Apple has made it easy for users to monitor the battery status of their wireless mouse. Here are a few methods to help you keep tabs on your mouse’s power:
1. Battery Indicator: One way to monitor the battery level of your Apple Wireless Mouse is to check the battery indicator on your computer. Simply navigate to the menu bar at the top of your screen and click on the Bluetooth icon. From there, select “Open Bluetooth Preferences” and locate your Apple Wireless Mouse in the Devices list. The battery level should be displayed beside its icon.
2. Bluetooth Preferences: Another option is to access the Bluetooth Preferences directly. Open System Preferences on your Mac, then click on “Bluetooth.” Look for your Apple Wireless Mouse in the list of devices and click on the “Options” button beside it. Here, you will find detailed information about the battery level of your mouse.
3. Battery Widget: If you have a Mac with macOS Big Sur or later installed, you can use the Battery widget to check the battery level of your Apple Wireless Mouse. Simply click on the battery icon in the menu bar and scroll down to find your mouse in the list of connected devices. The battery percentage will be displayed next to its name.
4. Mouse Settings: Additionally, you can also monitor the battery level of your Apple Wireless Mouse by accessing the Mouse settings. Open System Preferences, click on “Mouse,” and navigate to the “Battery” tab. Here, you will find detailed information about the current battery level, as well as an estimate of how much time is remaining before the battery needs to be recharged.
5. Low Battery Notifications: Lastly, Apple has implemented a feature that sends low battery notifications for wireless devices, including the Apple Wireless Mouse. When the battery level of your mouse drops below a certain threshold, a notification will appear on your screen, alerting you to charge the mouse before it runs out of power.
By utilizing these methods, you can easily monitor the battery level of your Apple Wireless Mouse and avoid any inconveniences caused by a depleted battery. Remember to charge your mouse when necessary to ensure uninterrupted usage.
Troubleshooting Common Charging Issues with the Apple Wireless Mouse
Apple’s wireless mouse is a popular choice for many users due to its sleek design and convenience. However, like any electronic device, it may encounter charging issues from time to time. If you’re experiencing problems with charging your Apple wireless mouse, fret not! In this guide, we will explore some common charging issues and provide troubleshooting tips to help you resolve them.
1. No Power Indicator: One of the main issues that users may encounter is a lack of power indicator when attempting to charge the wireless mouse. This can make it difficult to determine whether the mouse is actually receiving a charge or not. To address this issue, try connecting the mouse to a different USB port or using a different USB charging cable to rule out any issues with the connection. Additionally, ensure that both the mouse and the charging cable are clean and free from any debris or dust that may interfere with the charging process.
2. Slow Charging: If you notice that your Apple wireless mouse is taking longer than usual to charge, there could be a few factors at play. Firstly, check if you are using an appropriate power source. Using a low-power USB port or connecting the mouse to a USB hub can result in slower charging. Make sure to connect the mouse directly to a high-power USB port on your computer or use a wall adapter for faster charging. Additionally, restarting your computer or trying a different USB cable can also help resolve slow charging issues.
3. Inconsistent Charging: Some users may experience intermittent issues with charging their Apple wireless mouse. The mouse may start charging, then stop, and then start again, creating an inconsistent charging pattern. In such cases, it is recommended to reset the SMC (System Management Controller) on your Mac. This can help resolve any power-related issues and restore proper charging functionality. To reset the SMC, shut down your Mac, disconnect the power adapter, and remove the battery if possible. Wait for a few seconds, then reconnect the power adapter and turn on your Mac.
4. Mouse Not Recognized: Occasionally, you may encounter a situation where your Apple wireless mouse is not recognized by your computer when connected for charging. This could be due to a software issue or driver conflict. Try restarting your computer and connecting the mouse again to see if it is recognized. If the problem persists, updating the mouse driver or resetting the USB port settings can often resolve the issue.
5. Replace the Battery: If none of the troubleshooting steps mentioned above work, it’s possible that the battery in your Apple wireless mouse needs to be replaced. Rechargeable batteries have a limited lifespan, and after a certain number of charge cycles, they may not hold a charge as efficiently. Contact Apple support or visit an authorized service center to inquire about battery replacement options for your specific wireless mouse model.
By following these troubleshooting tips, you should be able to diagnose and resolve common charging issues with your Apple wireless mouse. Remember to always use genuine charging cables and power sources to ensure optimal performance and longevity of your device. If the problem persists, don’t hesitate to seek assistance from Apple’s support channels, as they will be able to provide you with specific guidance based on your device model and situation.
Conclusion
Charging your Apple wireless mouse is a simple and straightforward process that ensures you can continue to enjoy its seamless functionality without interruption. By following the steps outlined in this guide, you can easily charge your Apple wireless mouse and keep it powered up for extended periods of use. Whether you have a Magic Mouse, Magic Mouse 2, or any other model, the charging process remains consistent.
Remember to always use the provided charging cable and ensure a proper connection to the mouse and power source. It is essential to keep the mouse charged to avoid any inconvenience during your work or leisure activities. So, whenever you notice the battery level dropping, take a few moments to charge your Apple wireless mouse, and you’ll be back to scrolling and clicking in no time!
FAQs
1. Why is my Apple wireless mouse not charging?
2. Can I charge my Apple wireless mouse with a regular USB cable?
3. How long does it take to fully charge an Apple wireless mouse?
4. Does the Apple wireless mouse come with a charging cable?
5. Can I use my Apple wireless mouse while it’s charging?