
The Kindle Fire is a versatile device that allows you to access a wide range of content, from e-books and audiobooks to movies and music. However, to fully enjoy all the features of your Kindle Fire, you need to connect it to a wireless network. Whether you’re at home, in a coffee shop, or on the go, connecting your Kindle Fire to Wi-Fi is essential for downloading new content, streaming media, and accessing online services. In this article, we will guide you step by step on how to connect to a wireless network on your Kindle Fire. By following these instructions, you’ll be able to stay connected and enjoy all the entertainment and functionality your device has to offer.
Inside This Article
- Connecting Kindle Fire to a Wireless Network
- Accessing Network Settings
- Scanning for Available Networks
- Connecting to a Network
- Troubleshooting Connection Issues
- Conclusion
- FAQs
Connecting Kindle Fire to a Wireless Network
One of the key features of the Kindle Fire tablet is its ability to connect to a wireless network, allowing you to access the internet and download books, apps, and more. In this guide, we will walk you through the step-by-step process of connecting your Kindle Fire to a wireless network.
Before getting started, make sure you have the following:
- A working Wi-Fi network with internet access
- Your Wi-Fi network name (also known as SSID) and password
- Your Kindle Fire tablet
Once you have these prerequisites, follow the steps below:
1. Accessing Network Settings
To begin, tap on the “Settings” icon on the home screen of your Kindle Fire. This will open the settings menu for your device.
2. Scanning for Available Networks
In the settings menu, scroll down and tap on the “Wi-Fi” option. Your Kindle Fire will start scanning for available networks in the vicinity.
3. Connecting to a Network
After the scan is complete, a list of available Wi-Fi networks will appear on the screen. Tap on the name of your network to select it.
If your network is password protected, a prompt will appear, asking you to enter the password. Use the on-screen keyboard to input the correct password, and then tap “Connect” or “Join”.
Your Kindle Fire will now attempt to connect to the selected network. Once connected, you will see a confirmation message on the screen.
4. Troubleshooting Connection Issues
If you are unable to connect to your wireless network, there are a few troubleshooting steps you can try:
- Double-check that you have entered the correct password for your Wi-Fi network.
- Make sure your Wi-Fi router is powered on and functioning properly.
- Try resetting your Wi-Fi router by unplugging it from the power source, waiting for a few seconds, and then plugging it back in.
- Restart your Kindle Fire by holding down the power button for a few seconds and then selecting “Restart” from the pop-up menu.
- If the issue persists, you may need to contact your internet service provider or Amazon customer support for further assistance.
By following these steps, you should be able to successfully connect your Kindle Fire to a wireless network. Now you can enjoy all the features and benefits that come with an internet connection on your device.
Accessing Network Settings
Connecting your Kindle Fire to a wireless network is essential for accessing the internet, downloading books, and using apps. To get started, follow these steps to access the network settings:
1. Unlock your Kindle Fire and navigate to the home screen.
2. Swipe down from the top of the screen to open the notifications panel. In the top right corner, you will find the “Settings” icon. Tap on it to proceed.
3. The settings menu will open, displaying various options. Look for “Wireless” or “Wi-Fi” and tap on it.
4. You will now see a list of available Wi-Fi networks. If your Kindle Fire is already connected to a network, it will be shown at the top of the list. Tap on “Wi-Fi Settings” to access more options.
5. The Wi-Fi settings page will open, showing your currently connected network. In the “Networks” section, you can see the network name and the strength of the signal. Tap on the network name to access additional settings or to switch to a different network.
That’s it! You have successfully accessed the network settings on your Kindle Fire. Now, you can scan for available networks and connect to the one of your choice.
Scanning for Available Networks
Once you’ve accessed the network settings on your Kindle Fire, the next step is to scan for available networks. This will allow your device to detect and display the list of networks in your vicinity. Following the steps below:
- Tap on the “Wi-Fi” option in the network settings menu.
- Your Kindle Fire will automatically initiate a scan for available networks. This process may take a few moments.
- A list of detected networks will appear on the screen, displaying the names or SSIDs (Service Set Identifiers) of the networks.
It’s important to note that the list of available networks may vary depending on your location and the range of your wireless router. In some cases, you may see a long list of networks, while in others, there may be only a few options to choose from.
As you scan for networks, keep an eye out for networks that are familiar to you. Look for the network name of your own wireless network or any other trusted networks that you may have access to. This will help you identify and connect to the correct network.
If you don’t see any networks listed, it may be because your Kindle Fire is out of range of any wireless networks or there may be an issue with your device’s Wi-Fi antenna. In such cases, try moving closer to the router or restarting your device and scanning again.
Additionally, you may encounter networks that are secured by a password, indicated by a padlock symbol next to their names. These networks are protected and require a password or passphrase to connect. If you don’t have the necessary credentials, you won’t be able to connect to these networks.
Once you’ve completed the scan and identified the network you wish to connect to, you’re ready to proceed to the next step – connecting to a network.
Connecting to a Network
Once you have accessed the network settings on your Kindle Fire and scanned for available networks, it’s time to connect to a specific network. Follow these steps to establish a connection:
- Select the desired network: From the list of available networks, tap on the name of the network you want to connect to. Make sure to choose the correct network that corresponds to your Wi-Fi network at home or any other preferred location.
- Enter the network password: If the chosen network is password-protected, a screen will prompt you to enter the password. Use the on-screen keyboard to carefully input the password. Double-check for any typing errors, as a single mistake can prevent you from establishing the connection.
- Tap on “Connect”: Once you have entered the correct password, tap on the “Connect” button. The Kindle Fire will now attempt to establish a connection with the selected network.
- Wait for the connection: It might take a few seconds for your Kindle Fire to establish a connection with the network. You will see a loading or connecting symbol during this time. If the connection is successful, you will be notified that the device is connected to the network.
It’s important to note that some networks may have additional security protocols, such as WPS push buttons or MAC address filtering. If you encounter such settings, refer to the network’s documentation or contact your network administrator for assistance in connecting your Kindle Fire.
Once you are successfully connected to a network, your Kindle Fire will remember the network’s details and automatically connect to it whenever it’s in range. This convenience allows for seamless internet access without the need for manual connection each time.
Troubleshooting Connection Issues
If you’re experiencing difficulties connecting your Kindle Fire to a wireless network, follow these troubleshooting steps to resolve the issue:
1. Ensure that your Wi-Fi is turned on: Double-check that your Kindle Fire’s Wi-Fi feature is enabled. You can do this by swiping down from the top of the screen and tapping on the Wi-Fi icon. If it is off, tap to turn it on.
2. Verify your network credentials: Make sure you have entered the correct network name (SSID) and password. Typos and case-sensitive inputs can cause authentication failures. Try retyping the details and double-checking for accuracy. Consider using the “show password” option to verify the correct entry.
3. Move closer to the router: Weak signal strength can lead to connectivity issues. If you are far away from the router, try moving closer to see if the connection improves. Additionally, avoid obstacles such as walls or large objects that may interfere with the signal.
4. Restart your Kindle Fire: Sometimes, a simple restart can fix the connection problem. Press and hold the power button for a few seconds until a menu appears. Then, select “Restart” and wait for the device to reboot. Once it restarts, attempt to connect to the wireless network again.
5. Restart your router: Another troubleshooting step is to restart your wireless router. Unplug the power cable, wait for about 10 seconds, and then plug it back in. Allow the router to fully reboot before attempting to connect your Kindle Fire again.
6. Forget and reconnect to the network: If none of the above steps work, consider forgetting the network on your Kindle Fire and reconnecting to it. Go to Settings, tap on Wi-Fi, and find the network you’re having trouble with. Tap and hold on the network name, then select “Forget.” Afterward, re-enter the network credentials and try connecting once more.
7. Update your Kindle Fire’s software: Outdated software can sometimes interfere with network connectivity. Ensure that your Kindle Fire is running the latest software version by going to Settings, selecting Device Options, and tapping on System Updates. If an update is available, follow the prompts to install it.
8. Reset network settings: If all else fails, you can try resetting your network settings on the Kindle Fire. This will remove any saved networks and restore the device’s network settings to default. To do this, go to Settings, tap on Wi-Fi, and choose “Reset Wi-Fi Settings.” Note that you will need to reconnect to your wireless network after the reset.
If you have followed these troubleshooting tips and are still unable to connect to a wireless network, there may be an issue with your Kindle Fire. In that case, it is recommended to contact Amazon’s customer support for further assistance.
Conclusion
In conclusion, connecting to a wireless network on your Kindle Fire is a simple process that allows you to enjoy all the benefits of the internet on your device. Whether you’re at home, at work, or on the go, being able to connect to a Wi-Fi network ensures that you can access your favorite apps, browse the web, stream movies and music, and stay connected to the digital world.
By following the step-by-step guide provided in this article, you can easily connect your Kindle Fire to a wireless network and start enjoying all the features and services it has to offer. Remember to keep your Wi-Fi passwords handy and ensure that you are within range of a reliable network.
Now that you know how to connect to a wireless network on your Kindle Fire, there’s no limit to what you can do. So go ahead, explore, learn, and have fun with your device!
FAQs
1. How do I connect to a wireless network on Kindle Fire?
Connecting to a wireless network on Kindle Fire is simple and easy. Just follow these steps:
- Swipe down from the top of your Kindle Fire’s screen to access the Quick Settings menu.
- Tap on the Wi-Fi icon to turn it on.
- Wait for your Kindle Fire to scan for available networks.
- Select the desired network from the list of available networks.
- If the network is secured, enter the password when prompted.
- Tap on Connect to establish the connection.
2. What should I do if my Kindle Fire is not detecting any wireless networks?
If your Kindle Fire is not detecting any wireless networks, try these troubleshooting steps:
- Make sure that the Wi-Fi is turned on. Swipe down from the top of the screen and check if the Wi-Fi icon is enabled.
- Restart your Kindle Fire by holding down the Power button and selecting Restart. This can help refresh the device’s network settings.
- Move closer to your wireless router to ensure that you are within range.
- Check if other devices are able to detect and connect to the wireless network. If not, there may be an issue with your router that needs to be addressed.
- Reset your router by unplugging it for a few seconds and then plugging it back in. This can sometimes resolve connectivity issues.
3. Can I connect my Kindle Fire to a hidden wireless network?
Yes, you can connect your Kindle Fire to a hidden wireless network. Here’s how:
- Swipe down from the top of the screen to access the Quick Settings menu.
- Tap on the Wi-Fi icon to turn it on.
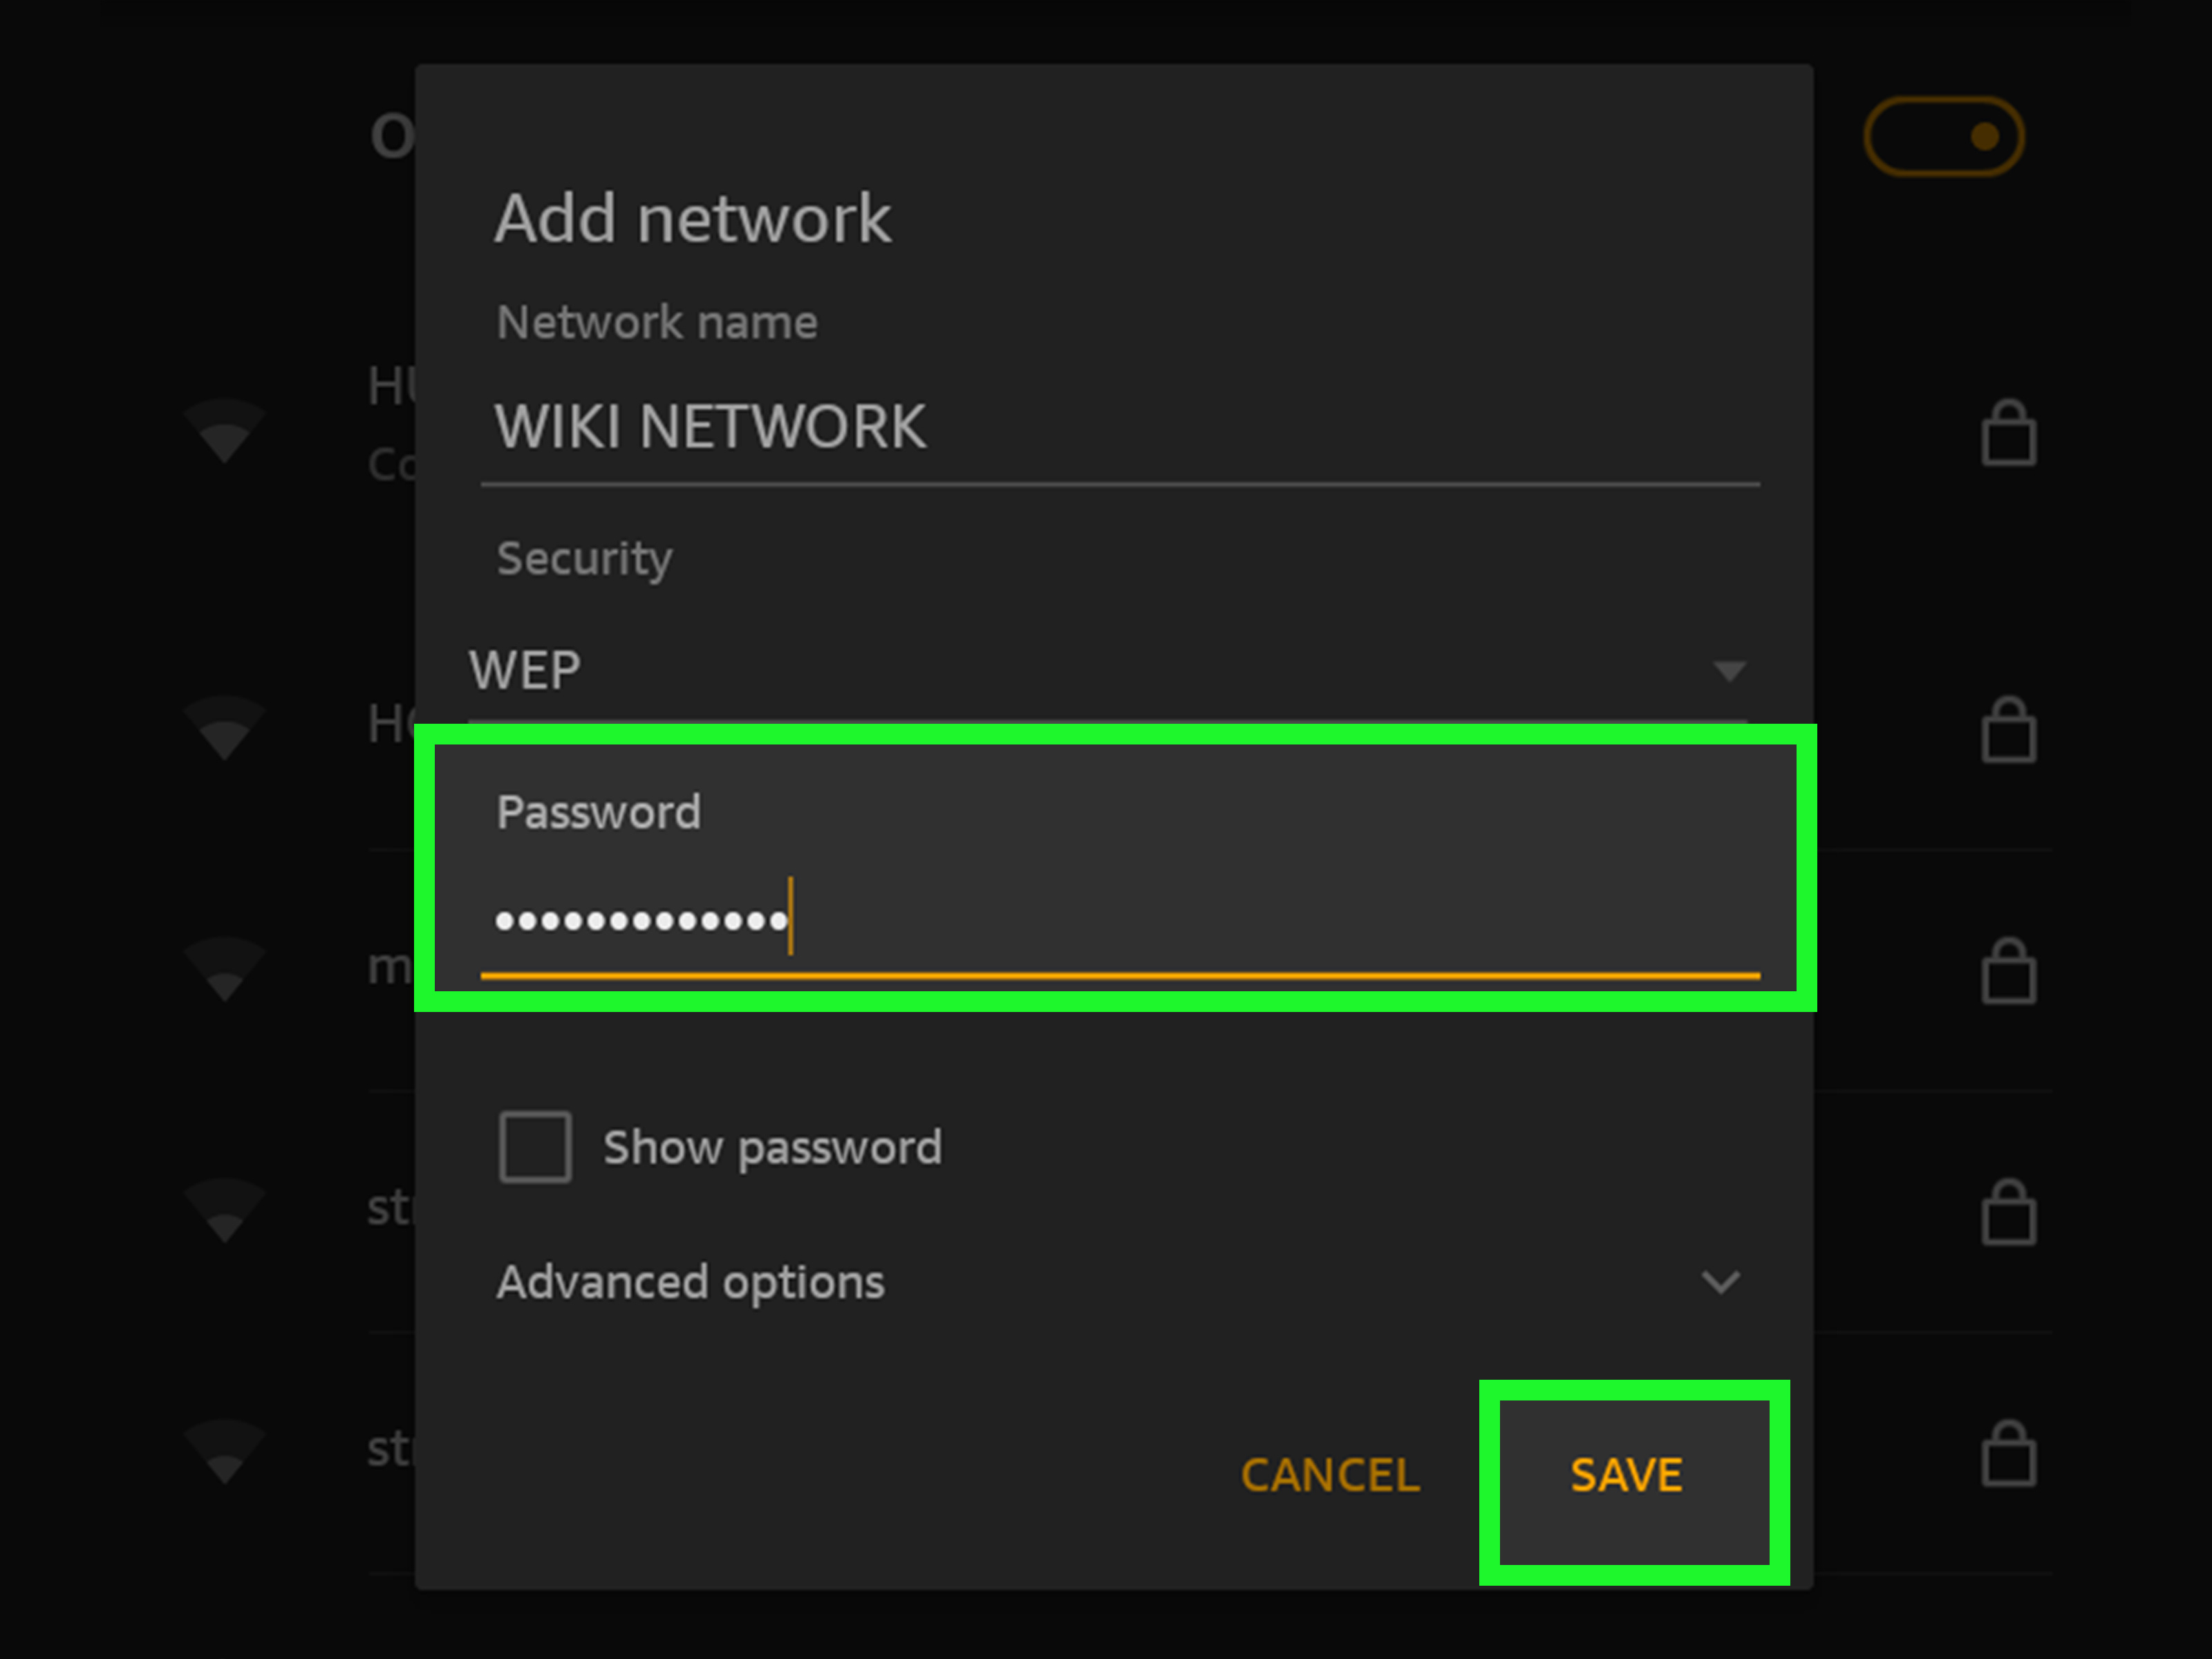
- Scroll down and tap on Add Network.
- Enter the name of the hidden network and select the security type.
- If the network is secured, enter the password when prompted.
- Tap on Connect to establish the connection.
4. How do I forget a wireless network on Kindle Fire?
If you no longer want to connect to a specific wireless network on your Kindle Fire, you can forget it by following these steps:
- Swipe down from the top of the screen to access the Quick Settings menu.
- Tap on the Wi-Fi icon to turn it on.
- Scroll down and tap on the network you want to forget.
- Tap on Forget to remove the network from your saved networks list.
5. Why is my Kindle Fire having trouble staying connected to a wireless network?
If your Kindle Fire is experiencing frequent disconnections or trouble staying connected to a wireless network, try these troubleshooting steps:
- Restart your Kindle Fire by holding down the Power button and selecting Restart. This can help refresh the device’s network settings.
- Move closer to your wireless router to ensure a stronger signal.
- Check if other devices are experiencing similar connectivity issues on the same network. If they are, there may be a problem with the router.
- Reset your router by unplugging it for a few seconds and then plugging it back in.
- Consider updating your Kindle Fire’s software to the latest version.