
Are you looking to connect your Verizon Jetpack to a wireless router? If so, you’ve come to the right place! Connecting your Jetpack to a wireless router can provide you with a more stable and reliable internet connection, allowing you to enjoy seamless browsing, streaming, and online activities. In this article, we will guide you through the process of connecting your Verizon Jetpack to a wireless router step by step. Whether you’re seeking extended range, multiple device connectivity, or simply want to take advantage of the features offered by your wireless router, we have got you covered. So, let’s dive in and get your Verizon Jetpack connected to your wireless router in no time!
Inside This Article
- What is a Verizon Jetpack?
- What is a wireless router?
- Why connect a Verizon Jetpack to a wireless router?
- Step 1: Check compatibility
- Step 2: Gather Necessary Equipment
- Step 3: Connect the Ethernet Cable
- Step 4: Access the Jetpack settings
- Step 5: Configure Jetpack as a modem
- Step 6: Connect Jetpack to the wireless router
- Step 7: Configure wireless router settings
- Step 8: Test the connection
- Troubleshooting tips
- Conclusion
- FAQs
What is a Verizon Jetpack?
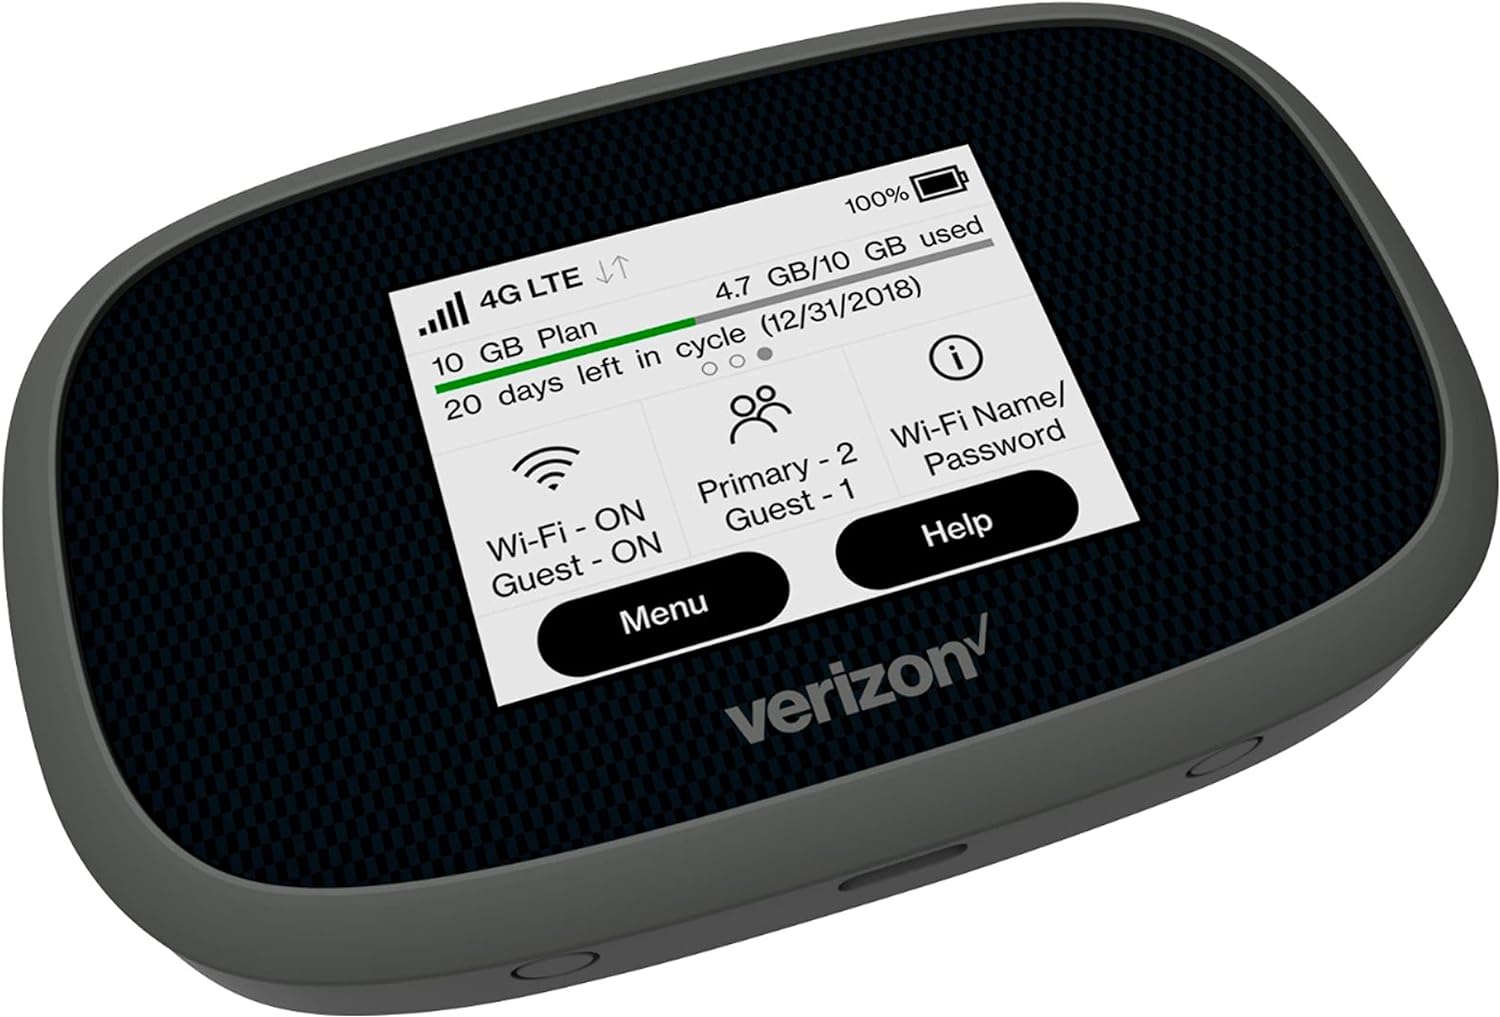
A Verizon Jetpack is a portable wireless hotspot device that allows you to connect to the internet with fast and reliable 4G LTE speeds. It functions as a miniaturized router that creates a Wi-Fi network, enabling multiple devices to connect and access the internet simultaneously.
One of the primary advantages of a Verizon Jetpack is its portability. Unlike traditional routers that require a wired connection, a Jetpack operates on cellular networks, making it ideal for individuals on the go or in areas where traditional internet services are not readily available. Whether you’re traveling, at a remote location, or need temporary internet access, a Jetpack provides a convenient solution.
Verizon offers a range of Jetpack devices, each with its own unique features and capabilities. Some Jetpacks come equipped with touchscreen displays for easy configuration and management, while others offer extended battery life for prolonged use without needing to recharge. Additionally, they provide various connectivity options, such as USB tethering or the ability to connect external antennas for improved signal reception.
Verizon Jetpacks are typically compatible with a wide range of devices, including smartphones, tablets, laptops, and gaming consoles. They provide a secure connection through the use of advanced security protocols, ensuring that your data remains safe and protected while you browse the internet, stream media, or engage in online activities.
Whether you’re a frequent traveler, a digital nomad, or simply in need of a reliable internet connection outside of your home, a Verizon Jetpack offers a flexible and convenient solution to stay connected wherever you go.
What is a wireless router?
A wireless router is a networking device that allows multiple devices to connect to the internet wirelessly. It serves as the central hub for transmitting and receiving data between devices within a local area network (LAN) and also connects the LAN to the internet. Unlike traditional wired routers, a wireless router eliminates the need for physical cables by using radio waves to transmit data.
Wireless routers typically have multiple Ethernet ports to connect devices via wired connections, but their main feature is the ability to create a wireless network. They use Wi-Fi technology to enable devices such as laptops, smartphones, tablets, and smart home devices to connect to the internet without the need for a physical connection.
One of the key components of a wireless router is its antenna. These antennas transmit and receive radio signals, allowing devices within the range of the router to access the internet. The range of a wireless router can vary depending on factors such as the strength of the antenna, the environment, and any potential sources of interference.
Wireless routers also come with a variety of security features to protect the network from unauthorized access. These include the ability to set up a password-protected network, firewall settings, and encryption protocols. These security measures are essential to prevent unauthorized users from accessing sensitive data or causing network disruptions.
In addition to providing internet access to devices, wireless routers often offer additional features such as guest networks, parental controls, and quality of service (QoS) settings. Guest networks allow visitors to connect to the internet without accessing the main network, while parental controls enable the restriction of certain websites or limit internet access for specific devices. QoS settings prioritize certain types of network traffic to ensure a smoother online experience for activities such as streaming or gaming.
Overall, a wireless router is an essential device for creating a wireless network and connecting multiple devices to the internet. Its versatility, security features, and additional functionalities make it a crucial component in today’s connected world.
Why connect a Verizon Jetpack to a wireless router?
Connecting a Verizon Jetpack to a wireless router offers several benefits that can greatly enhance your internet experience. Here’s why you should consider connecting these two devices:
1. Extended Coverage: When you connect your Verizon Jetpack to a wireless router, it acts as a modem, allowing you to extend your Wi-Fi coverage throughout your home or office. This means you can enjoy a stable and reliable internet connection in every corner, even in areas where the Jetpack’s signal might be weak.
2. Multiple Device Connectivity: By connecting your Jetpack to a wireless router, you can connect multiple devices to the same network. This eliminates the need to switch between different Wi-Fi networks or use the limited hotspot capabilities of the Jetpack. Now, you can connect your smartphones, tablets, laptops, smart TVs, and other devices to the wireless router, providing internet access to everyone simultaneously.
3. Increased Internet Speed: Although the Jetpack offers fast 4G LTE speeds, connecting it to a wireless router can further enhance your internet speed. Most routers support higher wireless speeds and offer better network management features, resulting in a more efficient and faster internet connection for all connected devices.
4. Enhanced Security: A wireless router provides additional security features such as a built-in firewall and encryption protocols that can protect your network from potential threats. When your Jetpack is connected to a router, you can take advantage of these security measures, safeguarding your personal data and ensuring a secure internet experience.
5. Seamless Integration: When you connect a Verizon Jetpack to a wireless router, it seamlessly integrates the Jetpack’s cellular network connection with your existing home or office network. This integration ensures a smooth and uninterrupted internet connection, allowing you to stream videos, play online games, and browse the web without any interruptions or buffering.
6. Cost Efficiency: By connecting your Jetpack to a wireless router, you can avoid excessive data charges on the Jetpack itself. Most data plans have limitations, and if you have multiple devices using the Jetpack’s hotspot, you may quickly exceed your monthly data allowance. Utilizing the wireless router’s internet connection reduces the reliance on the Jetpack’s data and can result in cost savings in the long run.
By connecting your Verizon Jetpack to a wireless router, you can enjoy extended coverage, increased internet speed, enhanced security, and seamless integration with your existing network. It’s a simple and effective way to optimize your internet experience and make the most out of your Verizon Jetpack!
Step 1: Check compatibility
Before connecting your Verizon Jetpack to a wireless router, it’s important to ensure that they are compatible with each other. Checking compatibility will help ensure a seamless connection and optimal performance. Here are a few factors to consider:
1. Jetpack Model: Take a look at the model number of your Verizon Jetpack. Different models may have different capabilities and features, so it’s essential to check if yours supports connecting to a wireless router.
2. Wireless Router Compatibility: Verify if your wireless router is compatible with the Jetpack. You can check the router’s specifications or consult the manufacturer’s website for this information. Make sure it supports connecting to a mobile hotspot device like a Jetpack.
3. Network Compatibility: Check if your wireless router and Jetpack are compatible with the same network technology, such as 4G LTE or 5G. This is crucial for ensuring a stable and reliable connection. If they use different network technologies, the connection may not work as expected.
4. Firmware Updates: Ensure that both your Jetpack and wireless router have the latest firmware updates installed. Firmware updates often include performance improvements, bug fixes, and compatibility enhancements, so it’s vital to keep them up to date.
5. Data Plan: Confirm that your data plan allows the Jetpack to be used as a modem for connecting to a wireless router. Some data plans may have specific terms and conditions regarding shared connections, so it’s important to review your plan’s details.
Taking the time to check compatibility will help avoid any potential issues or frustrations during the setup process. Once you have confirmed that your Jetpack and wireless router are compatible, you can proceed to the next step of gathering the necessary equipment.
Step 2: Gather Necessary Equipment
In order to successfully connect your Verizon Jetpack to a wireless router, you will need to gather a few essential items. These include:
- Verizon Jetpack: Ensure that you have a functioning Verizon Jetpack device. This portable hotspot device allows you to connect to the internet through the cellular network.
- Wireless Router: Choose a wireless router that meets your needs. It is recommended to use a router that supports the latest wireless standards, such as 802.11ac, to ensure optimal performance.
- Ethernet Cable: Obtain an Ethernet cable, also known as a LAN cable or network cable. This cable will be used to establish a wired connection between the Jetpack and the router.
- Power Adapters: Make sure you have the appropriate power adapters for both the Jetpack and the wireless router. These will be used to power the devices during the setup process.
It is important to ensure that all the equipment you gather is in good working condition. Check for any visible damage or loose connections that may hinder the setup process. Additionally, make sure you have a stable electrical outlet nearby to power both the Jetpack and the wireless router.
Step 3: Connect the Ethernet Cable
Now that you have gathered all the necessary equipment, it’s time to connect the Ethernet cable. This step is crucial as it establishes a direct connection between the Verizon Jetpack and the wireless router.
First, locate the Ethernet port on your Verizon Jetpack. It is usually located on the side or back of the device. The Ethernet port is similar to the ones found on computers and other networking devices.
Take one end of the Ethernet cable and insert it firmly into the Ethernet port on the Verizon Jetpack. Make sure the connection is secure to ensure a stable and reliable connection.
Next, find the Ethernet port on your wireless router. It is usually labeled as “LAN” or “Ethernet.” The port may be color-coded or marked with a number, depending on the router model.
Take the other end of the Ethernet cable and plug it securely into the Ethernet port on the wireless router. Ensure that the connection is snug to prevent any disconnections or interruptions.
Once the cable is connected to both the Verizon Jetpack and the wireless router, you have successfully established a physical connection between the two devices. This connection will allow the Jetpack to transmit the internet signal to the wireless router.
Remember to double-check the connections and ensure they are secure. Loose connections can cause intermittent internet connectivity or a complete loss of connection.
With the Ethernet cable connected, you are one step closer to enjoying a seamless and reliable internet connection for all your devices. Proceed to the next step to access the Jetpack settings.
Step 4: Access the Jetpack settings
Now that you have gathered all the necessary equipment, it’s time to access the Jetpack settings. This step is crucial as it allows you to configure the Jetpack as a modem and ensure it can connect to the wireless router.
To access the Jetpack settings, follow these simple steps:
- Turn on your Verizon Jetpack and wait for it to boot up.
- Locate the Jetpack’s screen or display panel. It is usually on the front or top of the device.
- Press the power button or unlock the screen if it is locked. You may need to enter the device’s passcode or swipe pattern.
- Navigate to the settings menu. Look for an icon that resembles a gear or an option labeled “Settings”. Tap on it to open the settings menu.
- Within the settings menu, look for an option related to “Connection” or “Network”. This may vary depending on the Jetpack model.
- Tap on the “Connection” or “Network” option.
- Within the connection settings, you should see an option called “Network Mode” or similar.
- Tap on “Network Mode” to access further options.
- Look for an option labeled “Modem” or “Modem Mode”. This is the setting that allows the Jetpack to connect to a wireless router.
- Select the “Modem” or “Modem Mode” option to activate it.
By following these steps, you have successfully accessed the Jetpack settings and configured it as a modem. This is a crucial step in preparing the Jetpack to connect to a wireless router.
Step 5: Configure Jetpack as a modem
Now that you have successfully connected the Verizon Jetpack to your wireless router, it’s time to configure the Jetpack as a modem. This step is crucial for establishing the correct connection between the devices and ensuring smooth data transmission.
Here are the steps to configure the Jetpack as a modem:
- Access the Jetpack settings: Open a web browser on a device connected to the wireless router and enter the Jetpack’s IP address in the address bar. This will take you to the Jetpack’s administration settings.
- Log in to the Jetpack: Enter the login credentials for the Jetpack. These credentials are typically found on the Jetpack’s label or in the user manual.
- Navigate to the modem settings: Once logged in, locate the “Modem Settings” or “Network” section in the Jetpack’s administration interface. This is where you will configure the Jetpack as a modem.
- Select the modem mode: In the modem settings, you will find a drop-down menu or radio buttons to select the modem mode. Choose the appropriate mode, which is usually “Modem Mode” or “Bridge Mode.”
- Save the settings: After selecting the modem mode, click on the “Save” or “Apply” button to save the changes. The Jetpack will then restart with the new modem configuration.
Configuring the Jetpack as a modem ensures that it functions as a gateway for your wireless router, allowing it to establish a stable and secure connection to the internet. This step is vital for optimizing the performance of both the Jetpack and the wireless router.
It’s important to note that the specific steps for configuring the Jetpack as a modem may vary slightly depending on the model you are using. Refer to the Jetpack’s user manual or the manufacturer’s website for detailed instructions if needed.
By following these steps to configure the Jetpack as a modem, you can ensure a seamless and efficient connection between your Verizon Jetpack and wireless router, enabling you to enjoy fast and reliable internet access throughout your home or office.
Step 6: Connect Jetpack to the wireless router
Once you have successfully accessed the settings of your Verizon Jetpack, it’s time to connect it to your wireless router. This step is crucial as it enables you to extend the range of your internet connection and enjoy a seamless browsing experience throughout your entire home or office.
Follow these steps to connect your Jetpack to the wireless router:
- Locate the Ethernet port on the Jetpack. It is usually labeled as “LAN” or “Ethernet.”
- Take the Ethernet cable that you gathered earlier and insert one end into the Ethernet port on your Jetpack.
- Next, locate the WAN or Internet port on your wireless router. It is typically colored differently or labeled specifically.
- Take the other end of the Ethernet cable and insert it into the WAN or Internet port on the wireless router.
- Ensure that the cable is securely connected to both devices to avoid any connectivity issues.
Congratulations! You have now physically connected your Verizon Jetpack to your wireless router. This connection allows the Jetpack to act as a modem while the router handles the wireless transmission of the network signal.
Please Note: Some routers may have additional steps or specific instructions for connecting devices. It’s always a good idea to consult the user manual or the manufacturer’s website for any specific requirements or troubleshooting tips.
Now that the physical connection is established, you can proceed to configure the wireless router settings to enable seamless internet connectivity across your devices. This will ensure that all your devices connected to the router can access the strong and stable internet connection provided by the Verizon Jetpack.
Step 7: Configure wireless router settings
Configuring the settings of your wireless router is an important step in connecting your Verizon Jetpack to it. This will ensure that both devices communicate properly and provide you with a stable and secure internet connection.
Here are the steps to configure the wireless router settings:
1. Connect to the router: To configure the settings, you need to connect to the wireless router. Open a web browser on your computer or device and enter the default IP address of the router in the address bar. Typically, the popular IP addresses used are 192.168.0.1 or 192.168.1.1. Press Enter to access the router’s admin login page.
2. Login to the router: You will be prompted to enter the router’s username and password. If you haven’t changed them, the default credentials can usually be found on the back of the router or in the user manual. Enter the login credentials to access the router’s settings page.
3. Configure the network: Once you have logged in, you will be presented with the router’s settings page. Look for the network or wireless settings option. Here, you can modify the SSID (network name) and password of your wireless network. It is recommended to set a strong and unique password to ensure the security of your network.
4. Enable WPA2 encryption: In the wireless security settings, make sure to enable WPA2 encryption. This will encrypt the data transmitted between your devices and the router, helping to prevent unauthorized access to your network.
5. Set up the DHCP server: DHCP (Dynamic Host Configuration Protocol) allows your wireless router to assign IP addresses automatically to devices on your network. Make sure that the DHCP server is enabled and configure the range of IP addresses that can be assigned.
6. Save the settings: Once you have made the necessary changes, scroll to the bottom of the settings page and click on the “Save” or “Apply” button to save and apply the new settings to your wireless router.
7. Restart the router: After saving the settings, it is recommended to restart the router. This will ensure that the new settings take effect and any previous configurations are cleared.
Once you have configured the wireless router settings, you can proceed to the next step of connecting your Verizon Jetpack to the router.
Step 8: Test the connection
Once you have successfully connected your Verizon Jetpack to the wireless router, it is essential to test the connection to ensure everything is working smoothly. Here are a few steps you can follow to test the connection:
1. First, make sure that all the necessary cables are securely connected, including the Ethernet cable between the Jetpack and the router. This will ensure a stable and reliable connection.
2. Next, power on both the Jetpack and the wireless router. Allow them a few moments to establish a connection and synchronize settings.
3. On a device that is connected to the wireless router, such as a laptop or smartphone, open a web browser.
4. In the address bar, type in a website address, such as www.google.com, and press Enter.
5. If the web page loads successfully, it indicates that the connection between the Jetpack and the wireless router is functioning correctly, and you have internet access through the router.
6. Additionally, you can check the signal strength of the wireless network by looking at the Wi-Fi indicator on your device. A strong signal indicates a good connection, while a weak signal may suggest interference or distance issues between the Jetpack and the router.
7. It is also recommended to perform a speed test to measure the internet speed using an online tool or mobile app. This will give you an idea of the data transfer rates through the wireless router.
8. If you encounter any issues during the testing process, ensure that all cables are properly connected and try restarting both the Jetpack and the wireless router. If the problem persists, consult the user manuals or contact the manufacturer’s customer support for further assistance.
By following these steps and testing the connection, you can ensure that your Verizon Jetpack is successfully connected to the wireless router, providing you with reliable and high-speed internet access for all your devices.
Troubleshooting tips
Even though connecting a Verizon Jetpack to a wireless router is a straightforward process, sometimes issues may arise. If you encounter any difficulties during the setup, we’ve compiled a list of troubleshooting tips to help you resolve common problems and ensure a successful connection.
1. Power cycle your devices: Start by turning off both the Verizon Jetpack and the wireless router. Wait for a few seconds, then turn them back on. This simple step can often resolve connectivity issues.
2. Check the physical connections: Double-check that all the cables, including the Ethernet cable connecting the Jetpack to the router, are securely plugged in. A loose connection can cause a weak or nonexistent signal.
3. Verify compatibility: Make sure that both your Verizon Jetpack and your wireless router are compatible with each other. Check their specifications and any compatibility requirements provided by the manufacturers.
4. Reset your devices: If power cycling didn’t resolve the issue, try resetting both the Jetpack and the router to their factory settings. Keep in mind that this will erase any customized settings, so be prepared to set them up again.
5. Update firmware: Check for any firmware updates for both the Verizon Jetpack and the wireless router. Outdated firmware can lead to compatibility issues or connectivity problems. Consult the user manuals or visit the manufacturers’ websites for instructions on how to update the firmware.
6. Adjust wireless channels: If you’re experiencing interference or a weak signal, try changing the wireless channel on your router. This can help avoid conflicts with other nearby devices or networks that may be causing connectivity issues.
7. Disable firewall or security settings: Sometimes, certain firewall or security settings on your wireless router can interfere with the connection. Temporarily disable them and test the connection to see if the issue is resolved.
8. Contact customer support: If you’ve tried all the troubleshooting steps and still can’t establish a connection between the Jetpack and the router, reach out to the customer support of both Verizon and the router manufacturer. They may have additional suggestions or be able to provide further assistance.
By following these troubleshooting tips, you should be able to overcome any obstacles and successfully connect your Verizon Jetpack to a wireless router. Enjoy seamless internet access and the convenience of a stronger and more reliable network connection!
In conclusion, connecting your Verizon Jetpack to a wireless router is a straightforward process that allows you to enjoy reliable and high-speed internet connectivity on multiple devices. By following the steps outlined in this article, you can easily set up a wireless network in your home or office and experience the convenience of seamless internet access. Whether you’re using the Verizon Jetpack for work, streaming, gaming, or simply staying connected, connecting it to a wireless router ensures a stable and efficient internet connection. Remember to choose a compatible wireless router, secure your network with a strong password, and follow the manufacturer’s instructions for a successful setup. With your Verizon Jetpack connected to a wireless router, you can enjoy the benefits of fast and reliable internet connectivity wherever you go.
FAQs
1. Can I connect my Verizon Jetpack to a wireless router?
Yes, you can connect your Verizon Jetpack to a wireless router to enjoy a broader range of wireless connectivity in your home or office. This allows you to share the internet connection with multiple devices simultaneously.
2. How do I connect my Verizon Jetpack to a wireless router?
To connect your Verizon Jetpack to a wireless router, follow these steps:
– Turn on your Verizon Jetpack and access the settings menu.
– Locate the Wi-Fi settings and enable the Wi-Fi feature on the Jetpack.
– On your wireless router, access the settings menu and navigate to the Wi-Fi settings.
– Look for the option to connect to a Wi-Fi network and search for available networks.
– Select your Verizon Jetpack’s Wi-Fi network from the list of available networks and enter the password if prompted.
– Once the connection is established, your Verizon Jetpack will be connected to the wireless router.
3. What are the benefits of connecting my Verizon Jetpack to a wireless router?
Connecting your Verizon Jetpack to a wireless router offers several advantages, including:
– Extended Wi-Fi coverage: By connecting to a wireless router, you can extend the range of your Verizon Jetpack’s Wi-Fi signal, ensuring reliable and fast internet access throughout your home or office.
– Multiple device connectivity: A wireless router allows you to connect multiple devices to your Verizon Jetpack simultaneously, enabling seamless internet access for all devices.
– Enhanced security: Many wireless routers feature advanced security features, such as encryption and firewall protection, to help secure your internet connection and prevent unauthorized access.
4. Can I use any wireless router to connect to my Verizon Jetpack?
In most cases, you can use any wireless router that supports Wi-Fi connectivity to connect to your Verizon Jetpack. However, it is always recommended to check the compatibility of the router with your Jetpack model for optimal performance.
5. Can I change the Wi-Fi password of my Verizon Jetpack when connected to a wireless router?
Yes, you can change the Wi-Fi password of your Verizon Jetpack when connected to a wireless router. To do this, access the settings menu of your Jetpack and navigate to the Wi-Fi settings. Look for the option to change the password and follow the prompts to set a new password. Keep in mind that you will need to update the password on your connected devices as well.