
Are you looking to elevate your home theater experience by connecting wireless rear speakers to your receiver? Well, you’ve come to the right place! In this article, we will guide you through the process step-by-step, ensuring a seamless setup without the hassle of tangled wires. Wireless rear speakers offer the convenience of flexible placement and eliminate the need for drilling holes or hiding unsightly cables, while still delivering immersive sound quality. Whether you’re a movie enthusiast or a music lover, this guide will help you achieve the enhanced audio experience you deserve. So, let’s dive in and learn how to connect wireless rear speakers to your receiver to create the ultimate home theater setup!
Inside This Article
- Setting up a wireless connection
- Pairing the wireless speakers with the receiver
- Adjusting and testing the audio settings
- Troubleshooting common issues
- Conclusion
- FAQs
Setting up a wireless connection
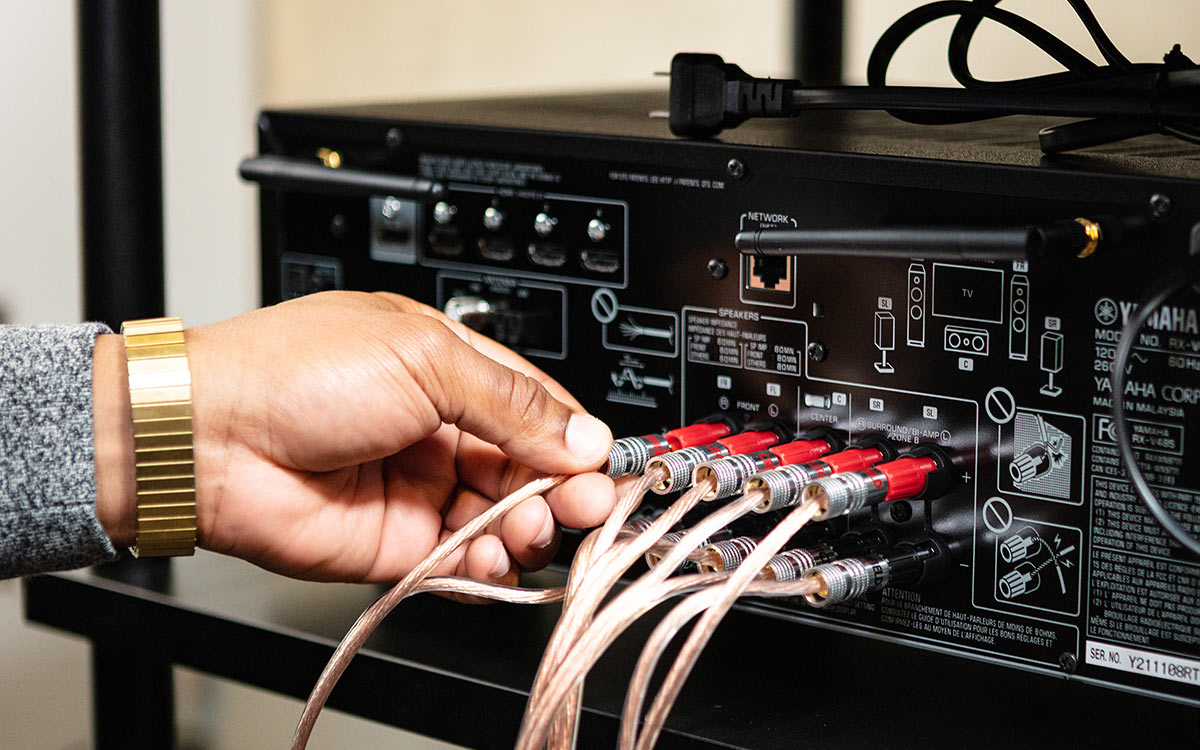
Wireless rear speakers can greatly enhance your home theater experience by providing immersive surround sound without the hassle of running wires across the room. If you have a compatible receiver and wireless speakers, setting up a wireless connection is a straightforward process that can be completed in a few easy steps.
To begin, make sure that you have all the necessary equipment for setting up the wireless connection. This includes a receiver with wireless capability and wireless rear speakers specifically designed to connect wirelessly with the receiver.
Next, carefully read the user manuals for both the receiver and the wireless speakers. The manuals will provide detailed instructions on how to set up the wireless connection and pair the speakers with the receiver. It’s important to familiarize yourself with these instructions before proceeding.
Before you start the setup process, ensure that the receiver and wireless speakers are placed in close proximity to each other. This will help establish a strong and stable wireless connection. Additionally, keep in mind that obstacles such as walls or furniture can interfere with the wireless signal, so try to minimize any potential obstructions.
Now, power on both the receiver and the wireless speakers. You may need to access the receiver’s menu settings to enable the wireless connection feature. Consult the receiver’s manual for specific instructions on how to access the menu settings and enable wireless functionality.
Once the wireless feature is activated on the receiver, it’s time to pair the wireless speakers with the receiver. This usually involves pressing a pairing button or following an on-screen menu prompt. Again, refer to the manuals for detailed instructions on how to complete the pairing process.
After initiating the pairing process, the receiver and wireless speakers will search for each other and establish a connection. This may take a few moments, so be patient. Once the connection is established, you should see a confirmation message on the receiver’s display or hear a tone from the speakers.
Finally, perform a test to ensure that the wireless rear speakers are functioning correctly. Play some audio or a movie with surround sound to verify that sound is indeed coming from the wireless speakers. If everything is working as expected, you’re all set. Enjoy the immersive sound experience provided by your wireless rear speakers!
Remember, every receiver and wireless speaker system is different, so it’s vital to consult the respective user manuals for specific instructions tailored to your equipment. Following the steps outlined here should provide a general guideline for setting up a wireless connection, but always refer to the manuals for accurate and detailed information.
Pairing the wireless speakers with the receiver
Once you have set up the wireless speakers and the receiver in your home theater system, the next step is to pair the speakers with the receiver. This process allows the speakers to receive audio signals wirelessly from the receiver, providing you with a seamless audio experience without the clutter of speaker wires.
To begin the pairing process, make sure that both the wireless speakers and the receiver are powered on and in close proximity to each other. Most wireless speaker systems have a pairing button or a dedicated pairing mode that you will need to activate.
First, locate the pairing button on the wireless speakers. This button is usually indicated by a Bluetooth or wireless symbol. Press and hold the pairing button until the indicator light starts flashing. This indicates that the speakers are in pairing mode and ready to establish a connection with the receiver.
Next, find the pairing button on the receiver. This button is typically located on the front panel or the remote control. Press and hold the pairing button on the receiver until the indicator light starts flashing. This signifies that the receiver is in pairing mode and actively searching for compatible devices.
Once the receiver detects the wireless speakers, it will display the speaker’s name or model number on the TV screen or the receiver’s display panel. Use the remote control or the navigation buttons on the receiver to select the wireless speakers and confirm the pairing process.
After the pairing is successful, the indicator lights on both the wireless speakers and the receiver will stop flashing and remain steady. This indicates that the speakers are now connected to the receiver and ready to play audio wirelessly.
It’s important to note that each wireless speaker system may have specific pairing instructions, so always refer to the manufacturer’s manual for detailed guidance. Additionally, some wireless speakers and receivers use alternative pairing methods such as NFC or Wi-Fi Direct, which may require different steps to establish a connection.
Once the pairing process is complete, you can now enjoy the flexibility of moving the wireless speakers around your room without the constraints of speaker wires. Whether you’re watching a movie, playing your favorite video games, or listening to music, the wireless rear speakers will enhance your audio experience with immersive surround sound.
Adjusting and testing the audio settings
Once you have successfully paired your wireless rear speakers with the receiver, the next step is to adjust and test the audio settings to ensure optimal sound quality and balance. Here are some important steps to follow:
1. Speaker levels: Begin by adjusting the levels of your wireless rear speakers. Most receivers have a speaker level calibration feature that can automatically adjust the speaker levels based on your room’s acoustics. However, it’s always a good idea to manually adjust the speaker levels to fine-tune the sound output. Use the receiver’s settings menu to access the speaker level adjustments and increase or decrease the volume of the rear speakers until they blend seamlessly with the front and center speakers.
2. Audio delay: Wireless speakers may introduce a slight audio delay compared to the front speakers connected directly to the receiver. This delay can cause a noticeable echo effect. To mitigate this, many modern receivers offer an audio delay adjustment option. Access the receiver’s settings menu and look for the audio delay or lip-sync setting. Start with a small delay increment (e.g., 10 milliseconds) and continue adjusting until the audio from the rear speakers matches the front speakers perfectly with no noticeable lag.
3. Equalizer settings: To further enhance the audio performance of your wireless rear speakers, take advantage of the receiver’s equalizer settings. The equalizer allows you to adjust the balance of frequencies, such as bass, mid-range, and treble, to suit your personal preferences. Experiment with different equalizer presets or manually adjust each frequency band to find the perfect balance for your listening experience.
4. Surround sound mode: Most receivers offer various surround sound modes, such as Dolby Digital or DTS. These modes simulate a multi-dimensional audio experience by directing specific sounds to different speakers. Make sure to select the appropriate surround sound mode for your wireless rear speakers to ensure that the audio is properly distributed across all channels. Refer to the receiver’s user manual for instructions on selecting and configuring the surround sound mode.
5. Audio testing: After adjusting the audio settings, it’s essential to conduct a thorough audio testing to ensure everything is working as desired. Play a variety of content, including movies, music, and video games, to evaluate the sound quality and positional audio effects. Pay attention to the rear speakers and their contribution to the overall surround sound experience. If necessary, make further adjustments to the speaker levels, audio delay, or equalizer settings until you achieve the desired audio performance.
By following these steps and carefully adjusting and testing the audio settings, you can fully optimize your wireless rear speakers’ performance and enjoy a truly immersive audio experience.
Troubleshooting common issues
While connecting wireless rear speakers to a receiver can provide a convenient and clutter-free home theater experience, it’s not without its challenges. Here are some common issues you may encounter and some troubleshooting tips to help you resolve them:
No sound from the rear speakers: If you’re not hearing any sound from your wireless rear speakers, first check if they are properly paired with the receiver. Ensure that both the receiver and the speakers are powered on and connected to the same network. If the speakers are still not producing sound, try adjusting the audio settings on the receiver to ensure the rear speakers are activated and set to the correct audio mode.
Interference or dropout: If you experience intermittent signal dropouts or audio interruptions, interference might be the culprit. Make sure there are no obstacles blocking the line of sight between the receiver and the rear speakers. Wireless routers, cordless phones, and other electronic devices in close proximity to the speakers or receiver can also cause interference. Try moving these devices farther away or changing their positions to reduce interference.
Signal range limitations: Depending on the specific wireless technology used by your rear speakers and receiver, there may be limitations on the signal range they can cover. If you notice a weak signal or audio quality degradation when the rear speakers are placed too far from the receiver, try moving the receiver and speakers closer together. You can also consider using a Wi-Fi range extender or a mesh Wi-Fi system to extend the coverage area.
Audio sync issues: Sometimes, you may experience a delay or mismatched audio when the sound from the rear speakers is not synchronized with the video. This can be quite distracting, especially during action-packed scenes or when watching live content. To resolve this, check if your receiver has an audio delay adjustment option. If available, use it to fine-tune the synchronization between the audio and video signals.
Battery or power-related issues: If your wireless rear speakers are powered by batteries, make sure they are fully charged or replace them with fresh batteries if needed. Alternatively, if your speakers are powered by an AC adapter, ensure it is securely connected to a power source. Insufficient power supply can result in poor audio quality or issues with speaker connectivity.
Updating firmware: It’s always a good practice to keep your receiver and wireless speakers updated with the latest firmware. Manufacturers often release firmware updates to address bugs, improve performance, and add new features. Check the manufacturer’s website for firmware updates and follow the instructions to install them if necessary.
If you encounter any other issues or if the troubleshooting steps mentioned above don’t resolve your problem, it’s recommended to consult the user manual of your receiver and wireless speakers or contact the manufacturer’s customer support for further assistance.
In conclusion, connecting wireless rear speakers to a receiver allows you to enjoy a fully immersive audio experience without the hassle of running wires across your living space. With the advancement of technology, wireless technologies have become more reliable and offer high-quality audio transmission. Whether you are watching a movie, playing games, or listening to music, having wireless rear speakers adds depth and realism to your audio setup. By following the steps mentioned in this guide, you can easily connect wireless rear speakers to your receiver and elevate your home entertainment system. So, say goodbye to messy wires and embrace the convenience and versatility of wireless rear speakers!
FAQs
1. How do I connect wireless rear speakers to my receiver?
To connect wireless rear speakers to your receiver, you will need a wireless speaker kit that is compatible with your receiver. Follow these steps:
- Ensure that your receiver and wireless speaker kit are powered off.
- Connect the transmitter of the wireless speaker kit to the rear speaker outputs or the preamp outputs on your receiver.
- Power on the transmitter and receiver, and make sure they are paired or connected according to the instructions provided with the wireless speaker kit.
- Place the wireless rear speakers in their desired locations, ensuring they have a clear line of sight to the transmitter.
- Adjust the settings on your receiver to enable the use of the wireless rear speakers.
2. Can I connect any wireless rear speakers to my receiver?
Not all wireless rear speakers are compatible with all receivers. It is important to check the specifications and compatibility of the wireless speaker kit you plan to use with your receiver. Look for models that are designed to work with your specific receiver, or consult with the manufacturer or a knowledgeable salesperson to ensure compatibility.
3. Are wireless rear speakers as good as wired speakers?
Wireless rear speakers have come a long way in terms of performance and convenience. While they may not provide the exact same audio quality as wired speakers, advancements in technology have greatly improved their sound reproduction. Wireless rear speakers offer more flexibility in terms of placement, as they eliminate the need for long speaker cables. However, it is still important to choose high-quality wireless speaker kits to ensure optimal sound quality.
4. Can I use wireless rear speakers in a multi-room audio setup?
Yes, wireless rear speakers can be used in a multi-room audio setup. Many wireless speaker kits allow for the creation of a multi-room system by pairing multiple speakers and transmitters. You can place wireless rear speakers in different rooms and sync them with the main receiver or audio source. However, ensure that the wireless speaker kit you choose supports multi-room functionality and follow the manufacturer’s instructions for setting up and configuring a multi-room audio system.
5. Can I add wireless rear speakers to an existing wired speaker setup?
Yes, you can add wireless rear speakers to an existing wired speaker setup. The process involves connecting the wireless speaker kit to the rear speaker outputs or preamp outputs of your receiver, as mentioned earlier. This allows you to enjoy the benefits of both wired and wireless speakers, giving you more flexibility in speaker placement. Make sure to set up the wireless speaker system correctly and calibrate the audio settings to ensure proper synchronization between the wired and wireless speakers.