
Are you tired of dealing with tangled printer wires and limited mobility? Well, say goodbye to those days of hassle because today we will show you how to connect your computer to a wireless printer. With the advancements in technology, wireless printers have become a popular choice for home and office use. They offer convenience, flexibility, and the freedom to print from anywhere within the Wi-Fi range. Whether you have a Windows or Mac computer, the process of connecting your computer to a wireless printer is relatively simple. In this article, we will guide you through the step-by-step process, providing you with all the information you need to successfully set up your wireless printer and start printing wirelessly.
Inside This Article
- Step 1: Check compatibility
- Step 2: Set up the wireless printer
- Step 3: Connect the computer to the wireless printer
- Step 4: Test the connection
- Troubleshooting common issues
- Conclusion
- FAQs
Step 1: Check compatibility
Before attempting to connect your computer to a wireless printer, it’s important to ensure compatibility between the two devices. Here are a few key factors to consider:
Operating System: Check if your computer’s operating system supports wireless printing. Most modern operating systems, such as Windows, macOS, and Linux, have built-in support for wireless printing. However, older operating systems may require additional software or drivers.
Printer Compatibility: Confirm that your printer has wireless capabilities. Not all printers are equipped to connect wirelessly. Look for Wi-Fi or wireless networking features in your printer’s specifications to determine if it is compatible.
Network Compatibility: Ensure that your computer and printer are connected to the same Wi-Fi network. If your computer is connected to a different network or via an Ethernet cable, you won’t be able to establish a wireless connection with the printer.
Security Protocols: Verify if your wireless printer supports the same security protocols as your Wi-Fi network. Common security protocols include WEP, WPA, and WPA2. Matching the security settings ensures a secure and seamless connection.
Driver Installation: Check if the necessary printer drivers are installed on your computer. Printer drivers act as translators between your computer and printer, allowing them to communicate effectively. You can usually find the required drivers on the manufacturer’s website.
By addressing these compatibility factors, you can ensure a smooth and trouble-free connection between your computer and wireless printer.
Step 2: Set up the wireless printer
Setting up a wireless printer can seem daunting, but with a few simple steps, you’ll have it up and running in no time. Follow this guide to set up your wireless printer successfully:
1. Unbox the printer: Start by unpacking the printer and removing any protective coverings or tapes. Make sure to remove all the packaging materials from the printer.
2. Find a suitable location: Choose a location for your printer that is within range of your Wi-Fi network. Ideally, it should be placed in an area with minimal obstructions to ensure a strong and stable connection.
3. Power it up: Plug in the printer to a power source and press the power button to turn it on. Allow the printer to initialize and get ready for the setup process.
4. Load paper and ink cartridges: Open the printer’s paper tray and load it with the appropriate type and size of paper. Next, install the ink cartridges according to the manufacturer’s instructions. This ensures that your printer is ready to print when needed.
5. Connect to Wi-Fi: Most wireless printers have a built-in display screen or control panel. Use the printer’s control panel to navigate through the menu and find the Wi-Fi setup option. Select your Wi-Fi network from the available list and enter your network password if prompted. The printer will then establish a connection to your wireless network.
6. Install printer software: To ensure full functionality and compatibility, it’s recommended to install the printer software on your computer. Insert the installation CD provided with the printer or visit the manufacturer’s website to download the latest software and drivers. Follow the on-screen instructions to complete the installation process.
7. Test the connection: Once the printer is set up and the software is installed, it’s time to test the connection. Print a test page from your computer to check if the printer is successfully connected. If the test page prints correctly, then your wireless printer is ready to use!
Remember to keep the printer and computer connected to the same Wi-Fi network for seamless printing experience. In case you encounter any issues during the setup process, don’t hesitate to consult the printer’s manual or contact the manufacturer’s support for assistance.
Step 3: Connect the computer to the wireless printer
Now that you have set up your wireless printer, it’s time to connect your computer to it. Follow these simple steps to establish a seamless connection:
1. Enable Wi-Fi on your computer: Make sure that the Wi-Fi function on your computer is turned on. You can usually find the Wi-Fi icon in the taskbar or in the network settings menu.
2. Locate the wireless printer: On your computer, search for available Wi-Fi networks. Find the name of your wireless printer in the list of available networks and select it. The printer’s name should be displayed on the printer’s control panel or in the printer’s documentation.
3. Enter the printer’s password: If your wireless printer is password-protected, you will need to enter the password on your computer to establish a secure connection. The password can usually be found on the printer’s control panel or in the printer’s documentation.
4. Install the printer driver: After connecting your computer to the wireless printer, you may need to install the printer driver. The printer driver is a software that allows your computer to communicate with the printer. You can usually find the printer driver on the manufacturer’s website or on the installation CD that came with the printer. Follow the on-screen instructions to install the driver.
5. Test the connection: Once the printer driver is installed, it’s time to test the connection. Open a document or image on your computer and select the “Print” option. Choose your wireless printer from the list of available printers and click “Print”. If the printer successfully prints the document or image, it means that the connection has been established successfully.
By following these steps, you can easily connect your computer to a wireless printer and enjoy the convenience of wireless printing. Now you can print documents and images from your computer without the hassle of connecting cables. Happy printing!
Step 4: Test the connection
Once you have successfully connected your computer to the wireless printer, it’s important to test the connection to ensure that everything is working properly. Here are a few simple steps you can follow to test the connection:
- Print a test page: Most wireless printers have a built-in test page function that allows you to check if the printer is properly connected to the computer. Refer to your printer’s user manual or manufacturer’s website for instructions on how to print a test page.
- Send a print job: Open a document or any other file on your computer that you want to print. Click on the “Print” option in the program’s menu and select your wireless printer from the list of available printers. Once you click “Print”, the file should be sent to the printer. Monitor the printer to ensure that it receives the print command and starts printing.
- Check the print quality: Examine the printed document for any issues with the print quality. Look for any smudging, streaks, or missing text. If the print quality is not satisfactory, you may need to troubleshoot the printer or adjust the print settings on your computer.
- Test other functions: Apart from printing, wireless printers often have additional functions such as scanning or copying. Test these functions to ensure that they are functioning properly. Follow the instructions provided in the printer’s user manual to perform these tests.
By following these steps, you can confirm that your computer is successfully connected to the wireless printer and that the printer is functioning as expected. If you encounter any issues during the testing process, refer to the troubleshooting section for common solutions.
Troubleshooting common issues
Connecting your computer to a wireless printer can sometimes come with its fair share of challenges. If you are experiencing any issues during the setup process, don’t worry. You are not alone. Below, we have compiled a list of common problems that you may encounter, along with their respective solutions:
1. Printer not found: If your computer is unable to find the wireless printer, ensure that it is turned on and connected to the same network as your computer. Double-check the wireless settings on your printer to ensure that it is connected to the correct network. Restart both the computer and the printer, and try again.
2. Incorrect driver installation: Make sure you have installed the appropriate printer driver on your computer. Visit the manufacturer’s website and download the latest driver for your printer model. Follow the installation instructions carefully, and ensure that the driver is compatible with your computer’s operating system.
3. Password authentication failure: If you are prompted to enter a password for the wireless printer, ensure that you are entering the correct credentials. Check the printer’s manual or contact the manufacturer for the default password, if you haven’t changed it previously. If you have changed the password, make sure you are entering the updated one.
4. Connectivity issues: If your computer is connected to the same network as the wireless printer, but still unable to establish a connection, try restarting your Wi-Fi router. Sometimes, the router may experience temporary glitches that can interfere with the printer’s connectivity. After restarting the router, attempt the connection again.
5. Firewall and antivirus interference: In some cases, the security settings on your computer may be blocking the connection to the wireless printer. Check your firewall and antivirus settings to ensure that they are not preventing the printer from being detected or accessed. Temporarily disable the firewall and antivirus software, and attempt the connection once more.
6. Outdated firmware: If your printer has outdated firmware, it may cause compatibility issues with your computer. Visit the manufacturer’s website and search for firmware updates for your printer model. Download and install the updates as instructed, which can often resolve connectivity problems.
7. Network interference: Other devices or appliances in close proximity to your wireless printer may cause signal interference. Keep your printer away from cordless phones, microwave ovens, or other wireless devices that may disrupt the Wi-Fi connection. Additionally, try relocating the printer to a different area to improve signal strength.
8. Printer driver conflicts: Sometimes, incompatible or conflicting printer drivers on your computer can hinder the connection to the wireless printer. Uninstall any previously installed printer drivers and software from your computer and reinstall the correct driver for your printer model.
9. Printer offline status: If your printer appears as “offline” on your computer, check the printer’s display panel to ensure that it is powered on and ready to print. If the printer is online but still shows as offline on your computer, remove the printer from your computer’s list of devices and add it again. This can often reestablish the connection.
10. Printer not responding: If your computer sends a print command to the wireless printer but it does not respond, restart both the computer and the printer. Additionally, ensure that there are no paper jams or other mechanical issues with the printer that could be causing it to be unresponsive.
By troubleshooting these common issues, you should be able to successfully connect your computer to a wireless printer. If you continue to experience problems, consider reaching out to the printer manufacturer’s technical support for further assistance.
In conclusion, connecting your computer to a wireless printer is a simple and convenient process that allows for seamless printing without the need for both devices to be physically connected. With the advancements in technology, wireless printing has become a standard feature for most printers, making it easy to print documents and photos from anywhere within your network. Whether you’re at home, in the office, or even on the go, wireless printing offers flexibility and convenience.
FAQs
1. How do I connect my computer to a wireless printer?
To connect your computer to a wireless printer, follow these steps:
- Make sure your computer and printer are both connected to the same Wi-Fi network.
- Turn on your wireless printer and ensure it is properly set up and ready to connect.
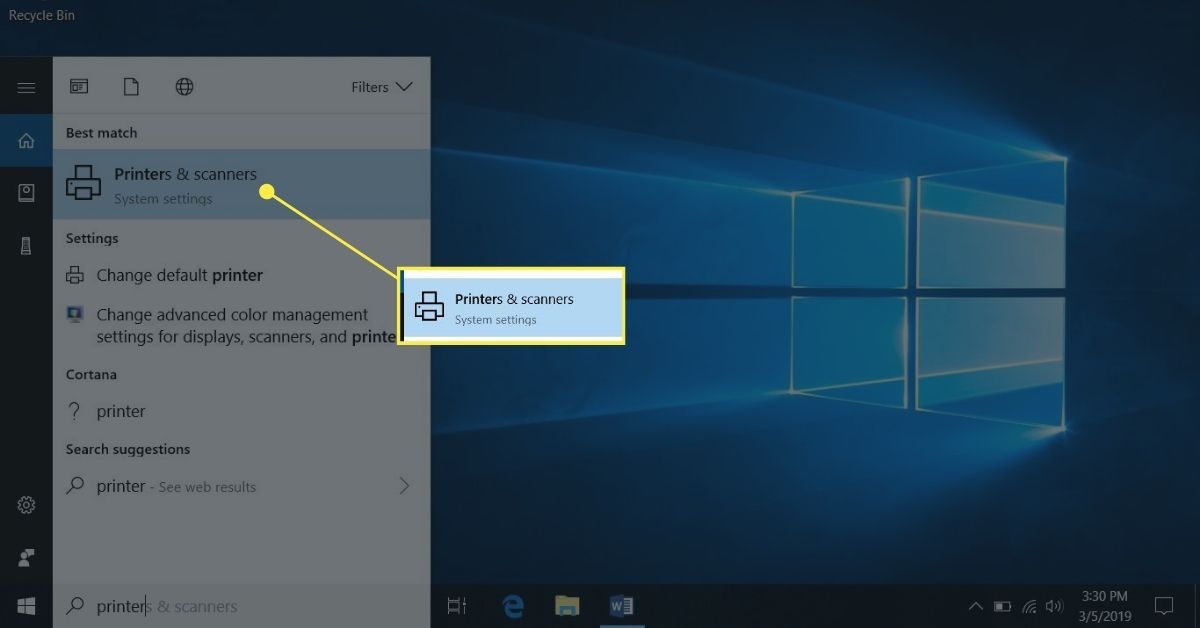
- On your computer, go to the “Settings” or “Control Panel” menu and click on “Devices” or “Printers & Scanners.”
- Select the option to add a printer and it should automatically detect the available wireless printers on your network.
- Choose your printer from the list and click on the “Connect” or “Add” button.
- Wait for your computer to install the necessary drivers and establish the connection with the wireless printer.
- Once the connection is established, you can start printing wirelessly from your computer.
2. What if my computer doesn’t find the wireless printer?
If your computer doesn’t find the wireless printer during the setup process, try the following:
- Make sure your printer is turned on and connected to the same Wi-Fi network as your computer.
- Check that your wireless printer is within range of your Wi-Fi router.
- Restart your computer and printer to refresh the connection.
- Ensure that your printer is properly set up and ready to connect.
- Check if there are any software or driver updates available for your printer.
- If all else fails, consult the user manual or contact the manufacturer’s customer support for further assistance.
3. Can I connect multiple computers to a single wireless printer?
Yes, you can connect multiple computers to a single wireless printer as long as they are all connected to the same Wi-Fi network. Each computer will need to install the necessary print drivers and establish a connection with the wireless printer in order to print.
4. What if I change my Wi-Fi network or router?
If you change your Wi-Fi network or router, you will need to reconnect your computer to the new network and then connect the wireless printer again. Follow the same steps as mentioned in the first question to connect your computer to the wireless printer on the new network.
5. Can I print from my smartphone or tablet to a wireless printer?
Yes, you can print from your smartphone or tablet to a wireless printer as long as your mobile device is connected to the same Wi-Fi network as the printer. Most modern printers offer mobile printing options, such as AirPrint for iOS devices or Google Cloud Print for Android devices. Install the printer’s compatible app or enable mobile printing features on your device to easily print documents and photos from your smartphone or tablet.