
Are you tired of dealing with the hassle of connecting wires and cables just to scan your documents? Luckily, with advancements in technology, you can now easily scan from your printer to your computer wirelessly. Say goodbye to the tangle of cords and say hello to convenience and efficiency!
Wireless scanning allows you to seamlessly transfer your documents from the printer to your computer without the need for any physical connections. With just a few simple steps, you can scan important papers, photos, or other documents directly to your computer, saving time and effort.
In this article, we will guide you through the process of scanning from your printer to your computer wirelessly. Whether you are using a Windows or Mac computer, we’ve got you covered. So, let’s dive in and discover the convenient world of wireless scanning!
Inside This Article
- Benefits of Wireless Scanning
- Setting Up Wireless Scanning
- Scanning Documents Wirelessly using Printer Software
- Scanning Documents Wirelessly using Windows Fax and Scan
- Troubleshooting Wireless Scanning Issues
- Conclusion
- FAQs
Benefits of Wireless Scanning
Wireless scanning brings a range of benefits that make the whole process of scanning documents quicker and more convenient. Here are some of the key advantages of wireless scanning:
- Flexibility: With wireless scanning, you can scan documents from anywhere within the range of your printer’s Wi-Fi network. This means you don’t have to worry about connecting your computer directly to the printer or dealing with tangled cables.
- Convenience: Wireless scanning eliminates the need to physically transfer your documents to the printer. You can simply place your documents in the scanner and initiate the scan from your computer or mobile device. This saves time and effort, particularly when dealing with large volumes of documents.
- Multi-device compatibility: Wireless scanning allows you to scan documents directly to multiple devices simultaneously. Whether you’re using a laptop, smartphone, or tablet, as long as you’re connected to the same Wi-Fi network as the printer, you can initiate scans and receive the scanned documents on any of your devices.
- Enhanced productivity: Wireless scanning enables you to digitize documents and save them directly to your preferred location, such as your computer, cloud storage, or email. This can significantly streamline your workflow and make it easier to organize, share, and access your scanned files.
- No additional hardware required: Unlike traditional scanning methods that may require specific cables or adapters, wireless scanning utilizes your existing Wi-Fi network. This means you don’t need to invest in any additional hardware to enjoy the convenience of wireless scanning.
- Reduced clutter: Say goodbye to the clutter of cables and wires on your desk. Wireless scanning eliminates the need for physical connections between your computer and the printer, freeing up space and creating a cleaner, more organized work environment.
Overall, wireless scanning offers a multitude of benefits that enhance convenience, flexibility, and productivity. It simplifies the scanning process, increases workflow efficiency, and eliminates the hassle of dealing with cables and physical connections.
Setting Up Wireless Scanning
Setting up wireless scanning on your printer and computer can save you time and hassle by eliminating the need for cables and allowing you to scan documents from anywhere within the range of your network. Follow these simple steps to get started with wireless scanning:
- Ensure that your printer is compatible with wireless scanning. Most modern printers have this feature, but it’s always a good idea to check the printer’s specifications or manual to confirm.
- Connect your printer to your wireless network. This can usually be done through the printer’s control panel or settings menu. If you are unsure how to connect your printer to the network, refer to the printer’s manual or visit the manufacturer’s website for detailed instructions.
- Install the necessary software on your computer. Depending on your printer model, you may need to install printer-specific software or drivers to enable wireless scanning. This software can usually be downloaded from the manufacturer’s website or included in the printer’s installation CD.
- Once the software is installed, open it and select the option to set up wireless scanning. The steps may vary depending on the software, but generally, you will need to navigate through the menu or settings to find the wireless scanning setup option.
- Follow the on-screen instructions to complete the wireless scanning setup. This may involve selecting your wireless network from a list, entering the network password, or configuring other network settings.
- After the setup is complete, test the wireless scanning functionality. Place a document on the printer’s scanner bed, open the scanning software on your computer, and select the option to scan wirelessly. You should be able to see the scanned document on your computer screen.
- Adjust the scanning settings as needed. Depending on your preferences and requirements, you may want to change the file format, resolution, or other settings before scanning documents wirelessly. These options can usually be accessed through the scanning software.
With wireless scanning set up, you can enjoy the convenience and flexibility of scanning documents directly to your computer without the hassle of connecting cables. Whether you need to digitize important paperwork or save receipts for your records, wireless scanning provides an efficient solution.
Scanning Documents Wirelessly using Printer Software
Scanning documents wirelessly using printer software is a convenient and efficient way to digitize your files without the need for any physical connections. This method allows you to scan directly from your printer to your computer over a wireless network. Here’s a step-by-step guide on how to scan documents wirelessly using printer software.
Step 1: Install Printer Software
The first step is to install the printer software on your computer. This software typically comes with the printer and can be installed using the installation CD or by downloading it from the manufacturer’s website. Follow the on-screen instructions to complete the installation process.
Step 2: Connect to the Wireless Network
Make sure your printer is connected to the same wireless network as your computer. This can usually be done by accessing the printer’s settings or network menu on the control panel. Select your wireless network from the available options and enter the network password if prompted.
Step 3: Open the Printer Software
Once your printer is connected to the wireless network, open the printer software on your computer. This can usually be found under the “Printers” or “Devices and Printers” section in the Control Panel or by searching for the printer software in the Start menu.
Step 4: Select the Scanning Option
In the printer software, locate the scanning option. This may be labeled as “Scan” or “Scan to Computer”. Click on this option to open the scanning settings.
Step 5: Adjust Scanning Settings
Before scanning, you may need to adjust certain settings such as the scan resolution, file format, and destination folder. These settings can usually be accessed through the scanning settings window. Choose the desired settings based on your preferences.
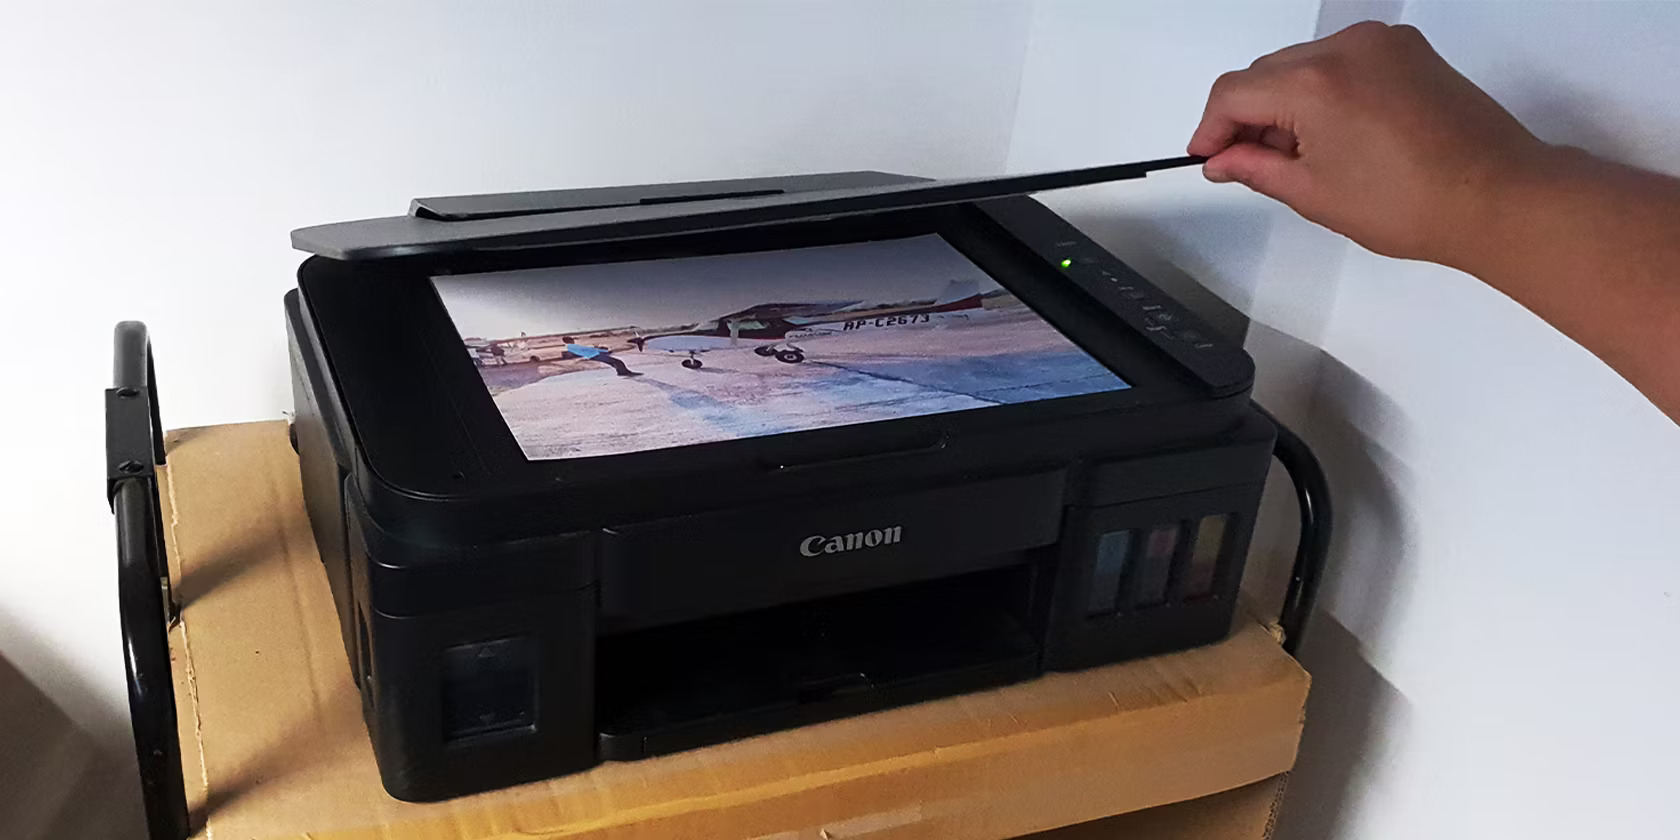
Step 6: Position the Document
Place the document you want to scan on the printer’s scanner glass or into the automatic document feeder if your printer has one. Make sure the document is aligned properly and positioned correctly before proceeding.
Step 7: Start the Scan
Once everything is set up, click on the “Scan” or “Start Scan” button in the printer software. The software will communicate with the printer and initiate the scanning process. Wait for the scan to complete.
Step 8: Save or Share the Scanned Document
After the scan is complete, you will be prompted to save the scanned document. Choose a name and location for the file and select the desired file format (such as PDF or JPEG). You can also choose to share the scanned document directly to email or cloud storage options if available.
Step 9: Review and Edit (Optional)
If needed, you can review and edit the scanned document using appropriate software. This will allow you to make any necessary adjustments, crop the image, or enhance the overall quality of the document.
Step 10: Repeat the Process
You can repeat the above process to scan multiple documents wirelessly using the printer software. Simply load the next document and follow the same steps to scan and save it.
By following these steps, you can easily scan documents wirelessly using the printer software. This method provides a convenient way to digitize your documents and eliminates the need for any physical connections between your printer and computer.
Scanning Documents Wirelessly using Windows Fax and Scan
Windows Fax and Scan is a built-in feature on Windows operating systems that allows you to scan documents and send faxes using your wireless printer. It provides a simple and convenient way to digitize your physical documents without the need for any additional software or applications.
To get started with wireless scanning using Windows Fax and Scan, follow these steps:
- Ensure Printer Compatibility: Make sure that your wireless printer supports scanning and is connected to your computer. Most modern wireless printers have scanning capabilities, but it’s always good to double-check the manufacturer’s specifications.
- Open Windows Fax and Scan: Click on the “Start” button on your computer’s taskbar, type “Windows Fax and Scan” in the search bar, and select the application from the search results.
- Click on “New Scan”: In the Windows Fax and Scan window, click on the “New Scan” button in the toolbar. This will open a new scanning window where you can configure the scan settings.
- Select the Scanner: If you have multiple scanners connected to your computer, choose the one you want to use from the “Scanner” drop-down menu. If your wireless printer is already selected, you can proceed to the next step.
- Configure Scan Settings: In the scanning window, you can adjust various settings, such as the paper size, resolution, color mode, and file format. Choose the appropriate settings based on your preferences and the type of document you’re scanning.
- Preview and Adjust: Before scanning the entire document, you can click on the “Preview” button to get a glimpse of how the scanned document will look. If necessary, you can make any adjustments to ensure optimal scan quality.
- Scan the Document: Once you’re satisfied with the settings and preview, click on the “Scan” button to initiate the scan process. Windows Fax and Scan will communicate with your wireless printer to scan the document wirelessly and save it to your computer.
- Save and Manage Scanned Documents: After the scan is complete, you’ll be prompted to save the scanned document. Choose a location on your computer where you want to save the file and give it a descriptive name. You can also choose to save the document as a PDF or image file, depending on your preference.
That’s it! You’ve successfully scanned a document wirelessly using Windows Fax and Scan. Now you can easily access and share your digitized documents without the hassle of physical copies.
Note: The steps mentioned above may vary slightly depending on the version of Windows you are using. However, the general process remains the same across different versions.
Troubleshooting Wireless Scanning Issues
Wireless scanning can be a convenient and efficient way to scan documents directly from your printer to your computer. However, like any technology, it is not without its challenges. If you are experiencing issues with wireless scanning, the following troubleshooting steps can help you resolve them and get back to scanning effortlessly.
1. Check Printer and Computer Connections: Ensure that both your printer and computer are properly connected to the same wireless network. Make sure the printer’s Wi-Fi is turned on and that you have a stable wireless internet connection on your computer.
2. Restart and Reset: Sometimes, a simple restart can resolve connectivity issues. Power off your printer and computer, wait a few seconds, and then turn them back on. Additionally, you may also try resetting the printer’s network settings to their default state.
3. Update Printer Software: Outdated printer software can often cause compatibility issues. Check the manufacturer’s website for any available updates for your printer’s software and firmware. Download and install the latest versions to ensure smooth wireless scanning.
4. Scan Using Printer Software: Many printers come with dedicated software that allows you to scan wirelessly. Ensure that you have installed the necessary software on your computer and that it is up to date. Launch the software and follow the on-screen instructions to initiate the scanning process.
5. Check Firewall and Security Settings: Sometimes, the built-in firewall or security settings on your computer can interfere with the wireless scanning process. Temporarily disable any firewall or security software and check if the issue persists. If the scanning works without the security software, adjust the settings to allow the scanning function.
6. Check Signal Strength: A weak Wi-Fi signal can cause scanning issues. Move your printer and computer closer to the Wi-Fi router to improve the signal strength. Alternatively, you can consider using a Wi-Fi range extender to enhance the coverage in the scanning area.
7. Verify Network Credentials: If you have recently changed your wireless network password, make sure to update the credentials on your printer as well. Incorrect network credentials can prevent the printer from connecting to the network and hinder wireless scanning.
8. Use Wired Connection: If all else fails, you can try using a wired connection to scan documents. Connect your printer to your computer using a USB cable and follow the manufacturer’s instructions for scanning via a USB connection.
By following these troubleshooting steps, you should be able to overcome common wireless scanning issues and enjoy seamless scanning from your printer to your computer. Remember to consult the printer’s user manual or contact the manufacturer’s support if you continue to experience problems.
Conclusion
In conclusion, scanning from a wireless printer to a computer has become much easier and more convenient with the advancements in technology. The ability to scan documents wirelessly eliminates the hassle of dealing with cables and cords, allowing for a seamless and efficient scanning experience.
Whether you are scanning important documents, family photos, or any other kind of media, wireless scanning provides a user-friendly and time-saving solution. With the right printer and software setup, you can effortlessly scan directly to your computer without any physical connection.
By following the steps outlined in this guide, you can set up and perform wireless scanning from your printer to your computer in no time. Remember to ensure that your devices are connected to the same Wi-Fi network, and keep an eye out for any software updates or printer firmware upgrades that may enhance your scanning experience.
Scanning from a wireless printer to a computer opens up a world of possibilities for document management, archiving, and digitalization. Embrace the convenience and flexibility that wireless scanning brings, and take advantage of the plethora of features and functionalities available to you. Happy scanning!
FAQs
1. How do I scan from a wireless printer to my computer?
To scan from a wireless printer to your computer, follow these steps:
- Make sure your printer and computer are connected to the same Wi-Fi network.
- Place the document you want to scan on the scanner bed.
- Open the scanning software or application on your computer.
- Select the option to start a new scan.
- Choose the scan settings, such as file format and resolution.
- Click on the scan button to initiate the scanning process.
- Once the scan is complete, you can save the scanned document to your desired location on your computer.
2. Can I scan wirelessly without installing any additional software?
In most cases, you will need to install the scanning software or application provided by the manufacturer to scan wirelessly. This software enables your computer to communicate with the printer and initiate the scanning process. However, some modern operating systems may have built-in scanning functionality that allows you to scan without additional software. Check your computer’s operating system documentation or the printer manufacturer’s website for more information.
3. What file formats are commonly used for scanned documents?
The commonly used file formats for scanned documents are PDF (Portable Document Format), JPEG (Joint Photographic Experts Group), and TIFF (Tagged Image File Format). PDF is widely accepted and maintains the original formatting of the document, while JPEG is commonly used for images. TIFF is typically used when preserving high-quality images or when specialized applications require it.
4. How can I improve the quality of scanned documents?
To improve the quality of scanned documents, consider the following tips:
- Ensure the document is placed flat on the scanner bed without any folds or creases.
- Adjust the scanner settings to increase the resolution for sharper and more detailed scans.
- Ensure the scanner glass is clean to avoid any smudges or residue affecting the quality.
- Use the appropriate file format and compression settings based on the intended use of the scanned document.
- If available, use any built-in image enhancement features provided by the scanning software.
5. What should I do if my wireless printer is not scanning to my computer?
If your wireless printer is not scanning to your computer, try the following troubleshooting steps:
- Ensure that the printer and computer are connected to the same Wi-Fi network.
- Check if the printer’s scanning functionality is enabled and properly configured.
- Restart both the printer and computer to refresh their connections.
- Update the printer’s firmware and software to the latest version available.
- If possible, try scanning from a different computer or device to determine if the issue is specific to your computer.
- Consult the printer’s user manual or the manufacturer’s support website for further troubleshooting steps.