
The Xbox One is a versatile gaming console that offers a wide range of gaming experiences. One of the key features of the Xbox One is the ability to connect a wireless controller to it. While using the controller with the Xbox One console is straightforward, you may be wondering how to set up a wireless Xbox One controller for your PC. Whether you’re looking to play games on your PC or simply want the convenience of using the Xbox One controller for PC gaming, this article will guide you through the steps to set up your wireless Xbox One controller on your PC. From installing the necessary drivers to connecting your controller via Bluetooth or using a wireless adapter, we’ll cover it all to ensure that you can enjoy your gaming experience on your PC with ease.
Inside This Article
- Xbox One Controller Compatibility with PC
- Step 1: Installing the Required Software
- Step 2: Connecting the Xbox One Controller
- Step 3: Pairing the Controller with your PC
- Troubleshooting Tips and Common Issues
- Conclusion
- FAQs
Xbox One Controller Compatibility with PC
The Xbox One controller is widely recognized as one of the best controllers for gaming. While primarily designed for use with the Xbox One console, it is also compatible with PC gaming. This compatibility allows PC gamers to enjoy the precision and comfort provided by the Xbox One controller while playing their favorite games.
Thanks to Microsoft’s efforts, connecting and using the Xbox One controller with a PC is a seamless experience. Whether you’re playing games on Steam or using game streaming services, setting up your wireless Xbox One controller for PC gaming is a straightforward process.
Here are the steps you need to follow to set up your wireless Xbox One controller for PC:
Step 1: Installing the Required Software
The first thing you need to do is ensure that you have the necessary software to use the Xbox One controller with your PC. Microsoft provides an official driver package called “Xbox Accessories” that you can download from the Microsoft website. Simply visit the website, search for “Xbox Accessories,” and download the driver package for your specific version of Windows.
Step 2: Connecting the Xbox One Controller
Once you have downloaded the Xbox Accessories driver package, follow these steps to connect your Xbox One controller to your PC:
- Use a micro-USB cable to connect your Xbox One controller to your PC.
- Windows will automatically detect the controller and install the necessary drivers.
- If prompted, follow the on-screen instructions to complete the driver installation process.
- After the driver installation is complete, disconnect the micro-USB cable from the controller.
Step 3: Pairing the Controller with your PC
Now that you have connected the Xbox One controller to your PC, you can pair it wirelessly for a more comfortable gaming experience. Here’s how:
- Press and hold the Xbox button on the controller to turn it on.
- On your PC, open the Start menu and go to “Settings.”
- Click on “Devices,” then select “Bluetooth & other devices.”
- Click on the “+ Add Bluetooth or other device” option.
- Select “Bluetooth” and wait for your PC to detect the Xbox One controller.
- Select the controller when it appears on the list of available devices.
- Your Xbox One controller is now paired with your PC.
Troubleshooting Tips and Common Issues
If you encounter any issues while setting up your wireless Xbox One controller for PC, here are a few troubleshooting tips:
- Make sure your PC has Bluetooth capabilities or use a wireless adapter.
- Ensure that the Xbox Accessories driver package is installed correctly.
- Try restarting your PC and reconnecting the controller.
- Disconnect any other Bluetooth devices that might be interfering with the connection.
- Update your PC’s Bluetooth drivers to the latest version.
By following these steps and troubleshooting tips, you can easily set up and enjoy gaming with your wireless Xbox One controller on your PC. Say goodbye to clunky keyboard and mouse controls and immerse yourself in the world of gaming with the comfort and precision of the Xbox One controller.
Step 1: Installing the Required Software
Before you can start using your Xbox One controller with your PC, you’ll need to install the required software. The software is known as the “Xbox Accessories” app, and it allows you to customize your controller and update its firmware.
To install the Xbox Accessories app, follow these steps:
- Open your web browser and visit the Microsoft Store page for the Xbox Accessories app.
- Click on the “Get” or “Install” button to download and install the app on your PC.
Once the app is installed, you can find it in your Start menu or by searching for “Xbox Accessories” in the search bar.
It’s important to note that the Xbox Accessories app is only available for Windows 10. If you’re using an older version of Windows, you won’t be able to install the app. However, there are alternative software options available for older versions of Windows that will still allow you to use your Xbox One controller with your PC.
With the Xbox Accessories app installed, you’re one step closer to enjoying your Xbox One controller on your PC. In the next step, we’ll guide you through the process of connecting your controller to your PC.
Step 2: Connecting the Xbox One Controller
Once you have installed the necessary software on your PC, it’s time to connect your Xbox One controller. Follow these steps to establish a wireless connection:
1. Turn on the Xbox One controller: Press and hold the Xbox button at the center of the controller to power it on. The Xbox button will start flashing, indicating that the controller is in pairing mode.
2. Activate the Bluetooth function on your PC: Open the settings menu on your PC and navigate to the Bluetooth settings. Ensure that Bluetooth is turned on and your PC is discoverable.
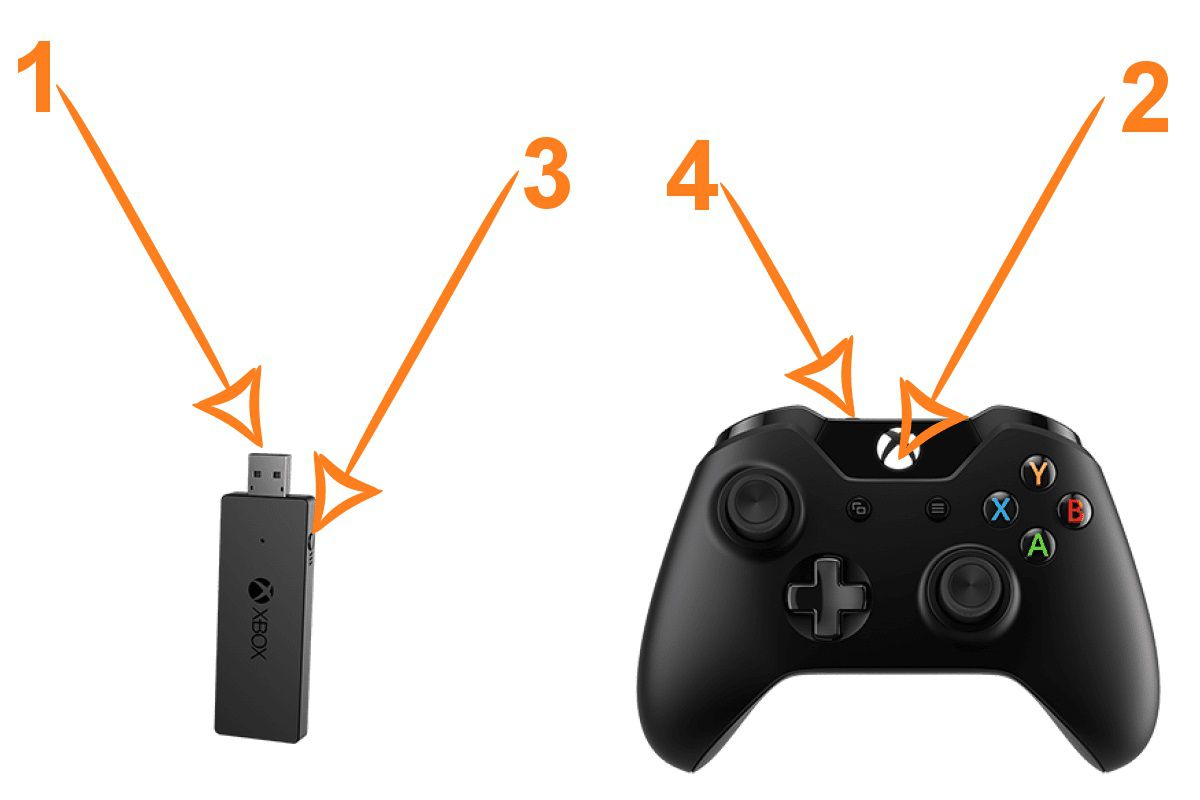
3. Put the Xbox One controller in pairing mode: Press and hold the small button located on the top edge of the controller, near the USB port. The Xbox button will start flashing more rapidly, indicating that the controller is ready to pair.
4. Pair the Xbox One controller with your PC: On your PC’s Bluetooth settings, click on the option to discover new devices. After a few seconds, you should see the Xbox Wireless Controller listed. Click on it to initiate the pairing process.
5. Confirm the connection: Once the pairing process is complete, your PC will display a message confirming the successful connection to the Xbox One controller. At this point, your controller is ready to use.
It’s important to note that the Xbox One controller can only be connected to one device at a time. If it’s already connected to your Xbox console, you’ll need to disconnect it before attempting to connect it to your PC.
Now that you’ve successfully connected your Xbox One controller to your PC, you can start enjoying your favorite games with enhanced control and precision.
Step 3: Pairing the Controller with your PC
In this step, we will guide you through the process of pairing your Xbox One controller with your PC. Once paired, you’ll be able to use your controller wirelessly to play games on your computer. Follow these simple steps to get started.
1. Turn on your Xbox One controller by pressing the Xbox button in the center. The light on the controller will start flashing.
2. On your PC, navigate to the Start menu and search for “Bluetooth settings.” Open the Bluetooth settings and make sure the Bluetooth toggle is set to “On.”
3. On the back of your Xbox One controller, locate the small circular button near the top. This is the Sync button.
4. Press and hold the Sync button on your Xbox One controller until the Xbox logo starts flashing rapidly. This means the controller is in pairing mode.
5. On your PC, click on the “Add Bluetooth or other device” button in the Bluetooth settings. Select the option for “Bluetooth” from the list of available devices.
6. Your PC will start searching for nearby Bluetooth devices. Wait for the Xbox One controller to appear on the list of available devices.
7. Once the Xbox One controller is displayed, click on it to start the pairing process. Your PC will now establish a connection with the controller.
8. After successful pairing, the Xbox One controller will be labeled as “Connected” in the Bluetooth settings on your PC.
9. Now, you can test the controller by launching a game or application that supports gamepads. The controller should be recognized and ready to use.
10. If the controller doesn’t work as expected, try updating the controller’s firmware and drivers. You can do this by going to the manufacturer’s website and searching for the latest updates.
That’s it! You have successfully paired your Xbox One controller with your PC. Enjoy the freedom of wireless gaming on your computer. Happy gaming!
Troubleshooting Tips and Common Issues
Despite the seamless compatibility between Xbox One controllers and PCs, you may encounter some common issues during the setup process. Here are some troubleshooting tips to help you resolve them:
1. Controller Not Recognized: If your PC fails to recognize the Xbox One controller, make sure you have installed the necessary software. If the problem persists, try connecting the controller using a different USB port or using a different USB cable.
2. Driver Issues: In some cases, you may need to update the controller drivers to ensure proper functionality. To do this, go to the official Microsoft website or use a driver update tool to download and install the latest drivers for your controller.
3. Controller Disconnecting: If your Xbox One controller keeps disconnecting from the PC, it might be a power-saving feature issue. To fix this, go to the Device Manager, find the Xbox One controller in the list of devices, and disable the “Allow the computer to turn off this device to save power” option.
4. Bluetooth Connection Problems: If you are pairing the Xbox One controller with your PC using Bluetooth, ensure that your PC has built-in Bluetooth capability. If not, you may need to purchase a Bluetooth adapter. Additionally, make sure that the controller and PC are within range and that there are no other Bluetooth devices causing interference.
5. Controller Input Lag: If you experience input lag while playing games with the Xbox One controller, it could be due to various factors such as outdated drivers, system performance issues, or interference from other devices. To reduce input lag, make sure your drivers are up to date, close any unnecessary background applications, and minimize wireless interference.
6. Controller Not Powering On: If your Xbox One controller does not power on, try replacing the batteries or rechargeable battery pack. If the problem persists, reset the controller by pressing the small reset button located on the back near the charging port.
7. Compatibility Issues: It’s important to note that not all PC games are compatible with Xbox One controllers. Check the game’s system requirements or support documentation to ensure that it supports controller input. If the game does not offer native controller support, you may need to use third-party software such as JoyToKey or Xpadder to map controller inputs to keyboard and mouse actions.
Remember, troubleshooting can be a trial-and-error process, so don’t get discouraged if the first solution doesn’t work. With patience and persistence, you’ll be able to resolve any issues and start enjoying your Xbox One controller on your PC.
Conclusion
Setting up a wireless Xbox One controller for PC can be a game-changer for gaming enthusiasts. Not only does it provide a more comfortable and convenient gaming experience, but it also opens up a world of possibilities for playing a wide range of games on your computer. By following the simple steps outlined in this article, you can easily connect your Xbox One controller wirelessly to your PC and enjoy seamless gameplay.
Whether you’re playing action-packed games, racing simulators, or even classic arcade titles, the wireless Xbox One controller brings precision and reliability to your gaming sessions. So, don’t limit yourself to a traditional mouse and keyboard when you can take your gaming to the next level with a wireless controller. Remember, it’s all about having fun and immersing yourself in the virtual world, so go ahead and set up your wireless Xbox One controller for PC today!
FAQs
1. Can I use a wireless Xbox One controller on my PC?
Yes, you can use a wireless Xbox One controller on your PC by connecting it via Bluetooth or using a wireless adapter.
2. How do I connect a wireless Xbox One controller to my PC?
To connect a wireless Xbox One controller to your PC, you can either:
– Connect it via Bluetooth: Make sure your PC has built-in Bluetooth or a Bluetooth adapter. Press and hold the Xbox button on the controller to turn it on and put it into pairing mode. Open the Bluetooth settings on your PC and select the Xbox One controller from the list of available devices.
– Use a wireless adapter: Purchase the Xbox Wireless Adapter and connect it to your PC. Press and hold the Pair button on the adapter until it starts flashing. Then, press and hold the Xbox button on the controller to turn it on and put it into pairing mode. Press the Pair button on the controller until the light on the adapter stops flashing.
3. How can I check if my PC has Bluetooth?
To check if your PC has Bluetooth, follow these steps:
– Windows 10: Go to Settings > Devices > Bluetooth & other devices and check if Bluetooth is listed.
– Windows 8/8.1: Swipe in from the right edge of the screen, tap Settings > Change PC settings > PC and devices > Bluetooth, and check if Bluetooth is listed.
– Windows 7: Click on the Start menu, then Control Panel > Hardware and Sound > Devices and Printers. If you see the Bluetooth icon, your PC has Bluetooth.
4. Can I use a wired Xbox One controller on my PC?
Yes, you can use a wired Xbox One controller on your PC by simply plugging it into a USB port. This provides a reliable and lag-free connection.
5. Do I need to install any drivers to use an Xbox One controller on my PC?
For Windows 10, the drivers for Xbox One controllers are automatically installed when you connect the controller via Bluetooth or the wireless adapter. For previous versions of Windows, you may need to download and install the drivers manually from the Microsoft website.