
Sure, here's the introduction in HTML format:
html
So, you’ve just got your hands on the latest iPhone 12, and now you’re eager to set it up and start using it. One of the first things you’ll need to do is insert your SIM card. Whether you’re upgrading from an older iPhone or switching from a different device, knowing how to put in the SIM card on your iPhone 12 is crucial. In this article, we’ll walk you through the simple steps to insert your SIM card, ensuring that you can start making calls, sending texts, and accessing mobile data with your new iPhone 12 in no time.
Inside This Article
- Checking SIM Card Compatibility- Ensuring the SIM card is compatible with the iPhone 12- Understanding the different types of SIM cards and their compatibility with the device
- Locating the SIM Card Tray- Identifying the location of the SIM card tray on the iPhone 12- Understanding the specific tools or methods required to access the SIM card tray
- Inserting the SIM Card- Step-by-step guide on how to properly insert the SIM card into the iPhone 12- Tips for ensuring the SIM card is securely placed in the device
- Activating the SIM Card: Instructions for Activating the SIM Card Once Inserted into the iPhone 12 – Troubleshooting Common Issues During the Activation Process
- Conclusion
- FAQs
Checking SIM Card Compatibility- Ensuring the SIM card is compatible with the iPhone 12- Understanding the different types of SIM cards and their compatibility with the device
Before inserting a SIM card into your iPhone 12, it’s crucial to ensure that the card is compatible with the device. The iPhone 12 requires a nano-SIM card, which is the smallest SIM card size currently available. It’s essential to check whether your existing SIM card is a nano-SIM or if you need to obtain one from your mobile service provider.
When it comes to compatibility, it’s important to understand that the iPhone 12 is also compatible with eSIM, a digital SIM card that eliminates the need for a physical SIM card. This allows for greater flexibility and the option to use dual SIMs on the device. If your mobile carrier supports eSIM, you have the option to use it as an alternative to the traditional nano-SIM card.
Sure, here's the content with the requested HTML tags:
html
Locating the SIM Card Tray- Identifying the location of the SIM card tray on the iPhone 12- Understanding the specific tools or methods required to access the SIM card tray
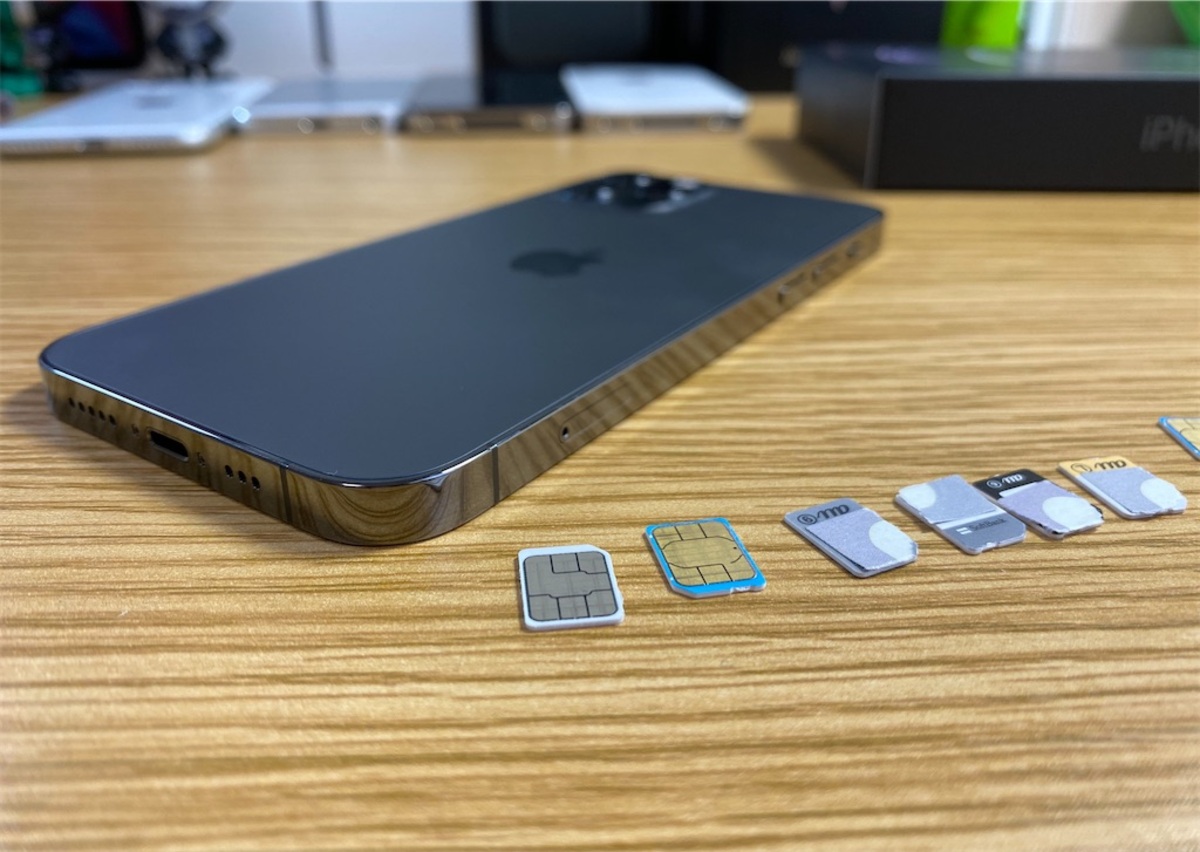
Locating the SIM card tray on your iPhone 12 is essential for inserting or removing the SIM card. On the iPhone 12, the SIM card tray is typically located on the right-hand side of the device. It is important to note that the exact placement may vary slightly depending on the specific model of the iPhone 12.
To access the SIM card tray, you will need a SIM eject tool or a paperclip. The SIM eject tool is usually provided by Apple in the iPhone packaging. If you don’t have a SIM eject tool, a small paperclip can be used as an alternative. These tools are necessary for safely and easily opening the SIM card tray without causing any damage to the device.
This content provides a clear understanding of locating the SIM card tray on the iPhone 12 and the tools required to access it.
Inserting the SIM Card- Step-by-step guide on how to properly insert the SIM card into the iPhone 12- Tips for ensuring the SIM card is securely placed in the device
Inserting a SIM card into your iPhone 12 is a straightforward process that ensures you can make calls, send messages, and connect to a mobile network. Here’s a step-by-step guide to help you insert your SIM card correctly and securely.
Before you begin, ensure that your iPhone 12 is powered off. This will prevent any potential damage to the device or the SIM card during the insertion process.
Locate the SIM card tray on your iPhone 12. It is usually found on the right side of the device, near the bottom. You will need a SIM eject tool or a paperclip to open the tray. Gently insert the tool into the small pinhole next to the tray to release it.
Once the SIM card tray is accessible, carefully remove it from the iPhone 12. Take note of the orientation of the tray and the position of the SIM card slot. Most SIM trays have a diagram showing the correct position for the SIM card.
Place your SIM card into the slot on the tray, ensuring that it aligns with the shape of the slot. The card should fit snugly without any force. Avoid touching the gold contacts on the SIM card to prevent any damage due to static electricity.
After placing the SIM card in the tray, gently slide it back into the iPhone 12. Ensure that the tray is inserted in the correct orientation and that it sits flush with the device. Applying gentle pressure will secure the tray in place.
Once the SIM card tray is back in the iPhone 12, power on the device. Wait for a few moments to allow the phone to recognize the SIM card and establish a connection to the mobile network. You should see a signal indicator once the SIM card is activated.
It’s essential to make sure that the SIM card is securely placed in the device to prevent any connectivity issues. Regularly check the SIM card tray to ensure it remains intact and that the SIM card is properly seated. This will help maintain a stable connection and prevent any interruptions in your mobile service.
Activating the SIM Card: Instructions for Activating the SIM Card Once Inserted into the iPhone 12 – Troubleshooting Common Issues During the Activation Process
After successfully inserting the SIM card into your iPhone 12, the next crucial step is to activate it. Activation is essential to ensure that your device can connect to your mobile network and make calls, send messages, and access cellular data. Here’s a comprehensive guide to help you through the activation process and troubleshoot any common issues that may arise.
1. Connect to Wi-Fi: Before activating your SIM card, ensure that your iPhone 12 is connected to a Wi-Fi network. This is important as it allows the device to communicate with the carrier’s activation servers and complete the activation process seamlessly.
2. Restart Your iPhone: Sometimes, a simple restart can resolve activation issues. Power off your iPhone 12, wait for a few seconds, and then power it back on. This can help refresh the device’s settings and establish a stable connection with the carrier’s network.
3. Check Carrier Compatibility: Verify that the SIM card you’ve inserted is compatible with your iPhone 12 and is supported by your chosen carrier. Some SIM cards may not be compatible with certain carriers, leading to activation failures.
4. Contact Your Carrier: If you encounter persistent activation issues, it’s advisable to reach out to your carrier’s customer support. They can provide specific instructions and troubleshoot any network-related issues that may be preventing the activation of your SIM card.
5. Update iOS: Ensure that your iPhone 12 is running the latest version of iOS. Software updates often include bug fixes and improvements that can address activation issues. Go to Settings > General > Software Update to check for and install any available updates.
6. Eject and Reinsert the SIM Card: In some cases, reseating the SIM card can resolve activation problems. Turn off your iPhone, use the SIM eject tool to remove the SIM card, then reinsert it carefully and power on the device to see if the activation process progresses.
7. Verify Account Status: If your SIM card is associated with a new or recently upgraded account, ensure that all necessary account setup procedures have been completed with your carrier. Sometimes, incomplete account setup can hinder the activation process.
8. Check for Carrier Settings Updates: Go to Settings > General > About. If there are carrier settings updates available, you’ll be prompted to install them. These updates can include important configurations for your carrier’s network, which may help resolve activation issues.
9. Reset Network Settings: If all else fails, you can try resetting your iPhone’s network settings. Go to Settings > General > Reset > Reset Network Settings. This will erase saved Wi-Fi passwords and Bluetooth connections, so ensure you have this information handy before proceeding.
By following these instructions and troubleshooting steps, you can effectively activate your SIM card on the iPhone 12 and address common issues that may arise during the activation process.
In conclusion, inserting a SIM card into your iPhone 12 is a simple process that allows you to enjoy the full functionality of your device. By following the step-by-step guide outlined in this article, you can seamlessly install your SIM card and begin using your iPhone 12 for calls, texts, and data. Whether you're upgrading to a new device or replacing a SIM card, this essential task can be easily accomplished with a few simple tools and a little patience. With the ability to stay connected on the go, you can make the most of your iPhone 12's impressive features and stay in touch with friends, family, and colleagues. Embrace the convenience and power of your iPhone 12 by ensuring that your SIM card is properly installed and ready to use.
html
In conclusion, inserting a SIM card into your iPhone 12 is a simple process that allows you to enjoy the full functionality of your device. By following the step-by-step guide outlined in this article, you can seamlessly install your SIM card and begin using your iPhone 12 for calls, texts, and data. Whether you’re upgrading to a new device or replacing a SIM card, this essential task can be easily accomplished with a few simple tools and a little patience. With the ability to stay connected on the go, you can make the most of your iPhone 12’s impressive features and stay in touch with friends, family, and colleagues. Embrace the convenience and power of your iPhone 12 by ensuring that your SIM card is properly installed and ready to use.
FAQs
Q: How do I insert a SIM card into my iPhone 12?
A: To insert a SIM card into your iPhone 12, you can follow the steps outlined in the article above. It’s a straightforward process that involves locating the SIM card tray, ejecting it using a SIM eject tool, placing the SIM card in the tray, and reinserting it into the device.
Q: What type of SIM card does the iPhone 12 use?
A: The iPhone 12 uses a nano-SIM card, which is the smallest SIM card size available. It’s essential to ensure that your SIM card is compatible with the nano-SIM standard before attempting to insert it into your iPhone 12.
Q: Can I use an eSIM instead of a physical SIM card in my iPhone 12?
A: Yes, the iPhone 12 supports eSIM technology, allowing you to use a digital SIM card instead of a physical one. You can set up an eSIM with your carrier, and it offers the flexibility of having multiple cellular plans on your device without needing to swap physical SIM cards.
Q: Do I need to power off my iPhone 12 before inserting or removing the SIM card?
A: It’s generally recommended to power off your iPhone 12 before inserting or removing the SIM card to prevent any potential damage to the device or the SIM card itself. However, if you’re unable to power off your device, you can proceed with caution while following the proper insertion or removal steps.
Q: What should I do if my iPhone 12 doesn’t recognize the SIM card after insertion?
A: If your iPhone 12 doesn’t recognize the SIM card after insertion, you can try the following steps:
- Ensure that the SIM card is inserted correctly and securely in the SIM card tray.
- Restart your iPhone 12 to see if it detects the SIM card upon reboot.
- If the issue persists, contact your carrier to verify if the SIM card is activated and compatible with your iPhone 12.