
Sure, I can help with that. Here's the introduction wrapped in the
tag:
Are you wondering how to capture a screenshot on your Galaxy Z Fold 3? Whether you want to save a memorable conversation, capture an interesting article, or simply share a funny meme with friends, taking a screenshot is a handy feature. The Galaxy Z Fold 3 offers several ways to accomplish this task, ensuring that you can capture your screen effortlessly. In this article, we’ll explore the various methods for taking a screenshot on the Galaxy Z Fold 3, providing you with step-by-step instructions and valuable tips to make the process a breeze.
Inside This Article
- Method 1: Using Physical Buttons
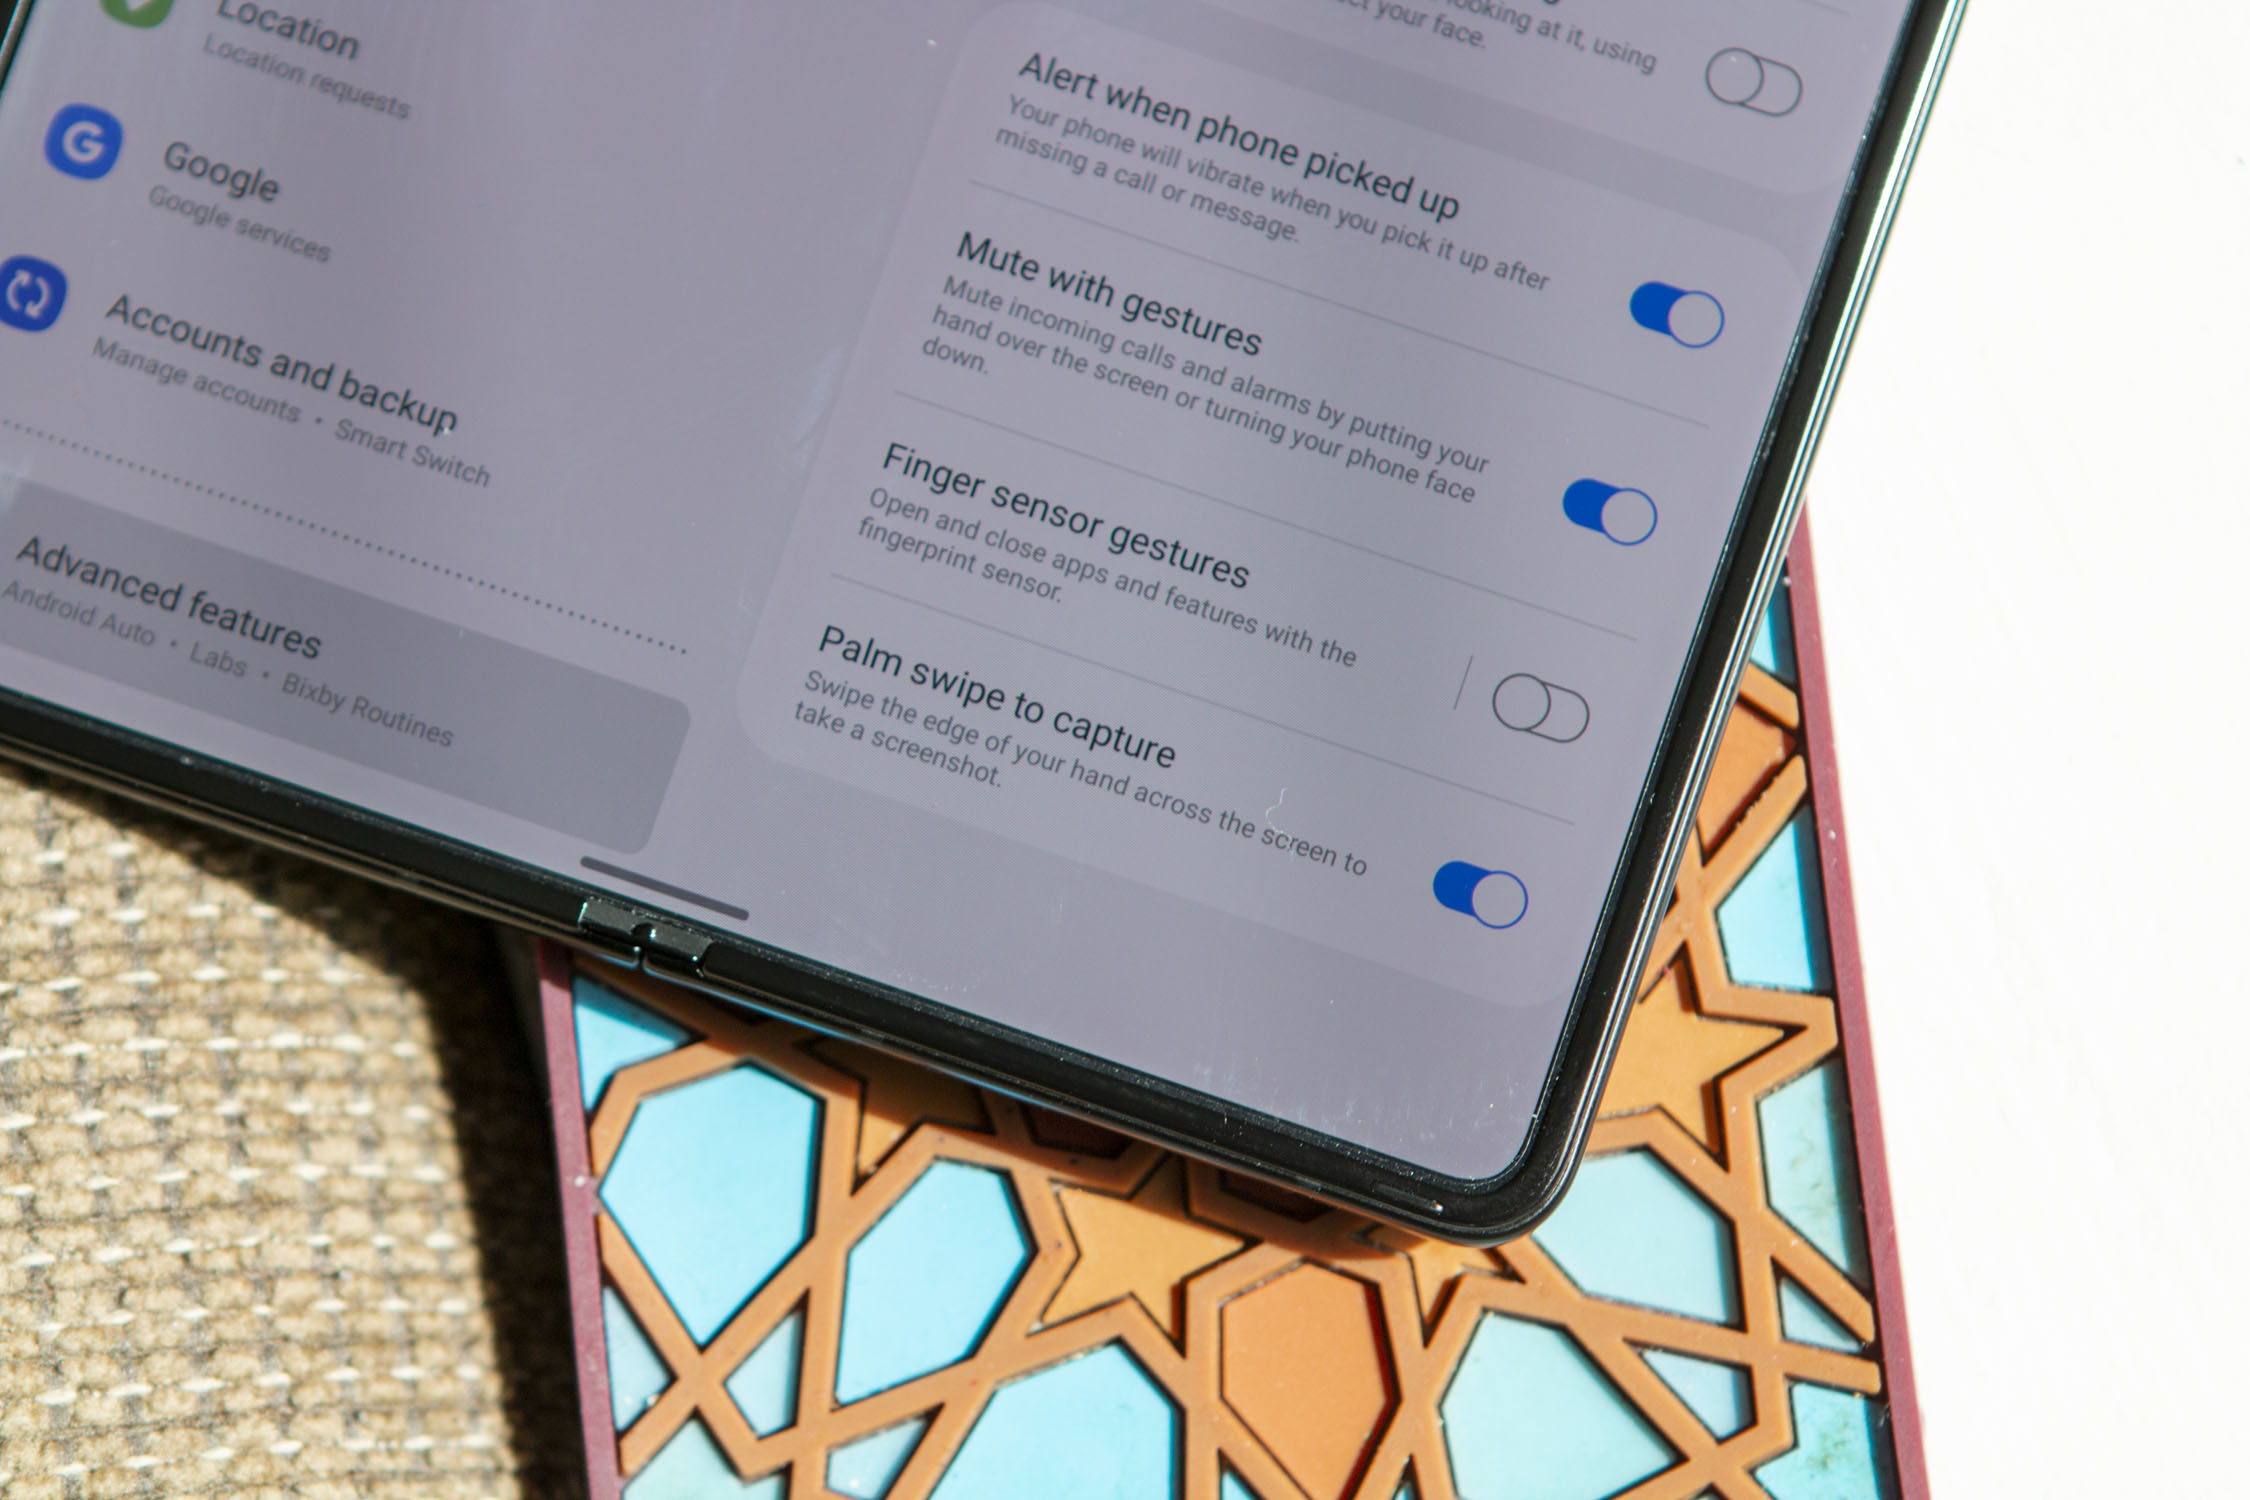
- Method 2: Using Palm Swipe Gesture- Step 1: Enable Palm Swipe feature- Step 2: Open the screen or app you want to capture- Step 3: Swipe your palm across the screen- Step 4: Access and edit the captured screenshot
- Method 3: Using S Pen
- Method 4: Using Assistant Menu- Step 1: Enable the Assistant Menu- Step 2: Open the screen or app you want to capture- Step 3: Tap the Assistant Menu icon and select “Screenshot”- Step 4: Manage the captured screenshot through the Assistant Menu
- Conclusion
- FAQs
Method 1: Using Physical Buttons
One of the most straightforward ways to capture a screenshot on your Galaxy Z Fold 3 is by utilizing the physical buttons on the device. This method offers a quick and convenient approach to capturing images of your screen.
To begin, open the screen or app that you wish to capture. Ensure that the content you want to screenshot is displayed on the screen, allowing for an accurate capture of the desired information.
Next, locate the Volume Down and Power buttons on your Galaxy Z Fold 3. These buttons are typically situated along the sides of the device, easily accessible for seamless operation.
Once you have identified the Volume Down and Power buttons, simultaneously press both buttons. This action will prompt the device to capture a screenshot of the current screen or app, preserving the displayed content for future reference.
After capturing the screenshot, you can view and edit the image as needed. The screenshot can be accessed through the device’s gallery or notification panel, enabling you to make any necessary adjustments or share the captured content with ease.
**
Method 2: Using Palm Swipe Gesture- Step 1: Enable Palm Swipe feature- Step 2: Open the screen or app you want to capture- Step 3: Swipe your palm across the screen- Step 4: Access and edit the captured screenshot
**
One of the convenient ways to take a screenshot on your Galaxy Z Fold 3 is by using the Palm Swipe Gesture feature. To get started, you’ll need to enable this feature on your device. Once enabled, you can effortlessly capture your screen by swiping your palm across it, making the process quick and intuitive.
After enabling the Palm Swipe feature, navigate to the screen or app you wish to capture. Whether it’s a memorable conversation, an inspiring quote, or a captivating image, ensure that the content you want to screenshot is displayed on your screen.
Now comes the fun part – using the Palm Swipe Gesture to capture the screen. With a swift motion, swipe the edge of your hand horizontally across the screen of your Galaxy Z Fold 3. This action will prompt the device to capture a screenshot, allowing you to freeze the moment with a simple and natural gesture.
Once the screenshot is taken, you can easily access and edit it. Simply head to your device’s gallery or notification panel to view the captured screenshot. From there, you can edit, annotate, or share the screenshot as desired, ensuring that you can customize and distribute the captured content to suit your needs.
Method 3: Using S Pen
When you want to capture a screenshot on your Galaxy Z Fold 3 using the S Pen, the first step is to open the screen or app you want to capture. Whether it’s a memorable conversation, a crucial piece of information, or a stunning image, ensure that it’s displayed on your screen before proceeding.
Next, delicately remove the S Pen from its dedicated slot. The S Pen offers precision and control, making it an ideal tool for capturing specific areas of your screen with ease.
After removing the S Pen, tap the Air command menu, which appears automatically when you remove the S Pen, and select “Screen Write.” This action triggers the device to capture the current screen and open it in the editing interface, allowing you to add annotations, crop the image, or make any necessary adjustments before saving or sharing the screenshot.
Once you have customized the screenshot to your liking, you can effortlessly save it to your device or share it with friends, family, or colleagues directly from the editing interface. The S Pen functionality provides a seamless and intuitive way to capture, personalize, and distribute screenshots on your Galaxy Z Fold 3.
Method 4: Using Assistant Menu- Step 1: Enable the Assistant Menu- Step 2: Open the screen or app you want to capture- Step 3: Tap the Assistant Menu icon and select “Screenshot”- Step 4: Manage the captured screenshot through the Assistant Menu
Method 4 offers an alternative way to capture screenshots on your Galaxy Z Fold 3 by using the Assistant Menu. This method can be particularly useful for individuals who prefer a more accessible and customizable approach to taking screenshots.
To begin, you’ll need to enable the Assistant Menu on your device. This feature provides a floating menu that offers quick access to various functions, including capturing screenshots.
Once the Assistant Menu is enabled, open the screen or app that you want to capture. This could be a webpage, a chat conversation, or any content displayed on your device’s screen.
Next, locate the Assistant Menu icon, typically represented by a floating circular icon on the screen. Tap on the icon to open the Assistant Menu, and then select the “Screenshot” option from the menu.
After capturing the screenshot, you can conveniently manage it through the Assistant Menu. This may include options to edit, share, or delete the screenshot directly from the floating menu, providing a seamless and efficient way to handle your captured images.
Mastering the art of taking a screenshot on your Galaxy Z Fold 3 enhances your overall user experience and allows you to effortlessly capture and share important information. Whether you prefer using the side button shortcut or the edge panel, the process is simple and intuitive, reflecting the innovative design and user-friendly interface of the device. With the ability to capture both standard and long screenshots, the Galaxy Z Fold 3 empowers you to preserve and share memorable moments, vital information, and captivating content with ease. By leveraging the diverse screenshot functionalities, you can seamlessly communicate, collaborate, and preserve valuable content, elevating your productivity and enjoyment of this cutting-edge smartphone.
FAQs
**Q: How do I take a screenshot on the Galaxy Z Fold 3?**
To take a screenshot on the Galaxy Z Fold 3, simply press the volume down and power buttons simultaneously. This will capture whatever is currently displayed on the screen.
Q: Where are the screenshots saved on the Galaxy Z Fold 3?
By default, screenshots taken on the Galaxy Z Fold 3 are saved in the "Screenshots" folder within the Gallery app.
Q: Can I take a screenshot of a specific section of the screen on the Galaxy Z Fold 3?
Yes, the Galaxy Z Fold 3 offers a feature called "Smart select" that allows you to capture a specific section of the screen as a screenshot.
Q: Can I capture a scrolling screenshot on the Galaxy Z Fold 3?
Yes, the Galaxy Z Fold 3 supports the "Scroll capture" feature, which enables you to capture an entire webpage or a long conversation by scrolling and capturing multiple screenshots.
Q: Is there a way to take a screenshot using gestures on the Galaxy Z Fold 3?
The Galaxy Z Fold 3 offers the option to take a screenshot using gestures. You can enable this feature in the settings under "Advanced features" and "Motions and gestures."