
Have you ever experienced some instances when your smartphone slows down or freezes the more apps you have active or running in the background? If yes, one of the possible reasons behind it is that your device is running low on RAM. In this guide, we’ll teach you the easiest ways on how to upgrade your Android phone’s RAM.
What is RAM?
Before we proceed on how to upgrade RAM, let’s first try to understand the term. If you have a computer, you might already be familiar with it for it has the same function as a smartphone.
RAM stands for Random Access Memory. It is your smartphone’s temporary data storage for current and future running programs including apps, browsers, and games. Moreover, RAM is known to have higher reading and writing speeds than a smartphone’s internal memory, as well as hard and solid-state drives. It is one of the reasons why your device can run efficiently.
Read more: Why is my phone so slow and how to fix it?
How Much RAM Does a Smartphone Needs?
The standard RAM of Android phones has increased through the years since modern devices keep on acquiring new features and more apps become available. For instance, many smartphones back in 2019 had 4GB RAM but this year, 6 and 8GB or more is the norm.
With these, you might be wondering how much RAM does a smartphone really requires. The answer depends on your device usage. To provide a concrete answer, 4GB is decent to run a smartphone’s system and few essential apps while 6 or 8GB RAM on mid-to-high-end devices are enough for smooth device performance and plenty of apps, including graphics-intensive games and heavy programs.
Why is there a need for more RAM? If you know how to upgrade the RAM of your Android phone, you can have free space, more apps running at once, and a faster or snappier device. This know-how is perfect for multitaskers. Also, if you own a smartphone with 6GB or less RAM, it can be boosted to keep up with what some of the latest devices can handle.
How to Upgrade RAM for Android?
Upgrading RAM does not mean changing the official phone storage specifications for there is no built-in setting to do so. It refers to increasing the phone’s free or useable space.
Doing it has great benefits, but also comes with some risks. This is because there are methods that may require you to root your Android phone which can lead to file damage or data leakage via the rooting apps or tools used. For this guide, let’s focus on the easiest ways on how to upgrade the RAM of an Android phone without rooting.
Upgrade RAM via mobile apps
Nowadays, there are no-root apps you can download on the Google Play Store for upgrading RAM. Among the widely-used ones are RAM Booster (Memory Cleaner), Smart Booster – Free Cleaner, and Norton Clean. These three apps are free but may offer digital purchases. Users can also upgrade to the paid pro or premium version of the apps.
1. RAM Booster
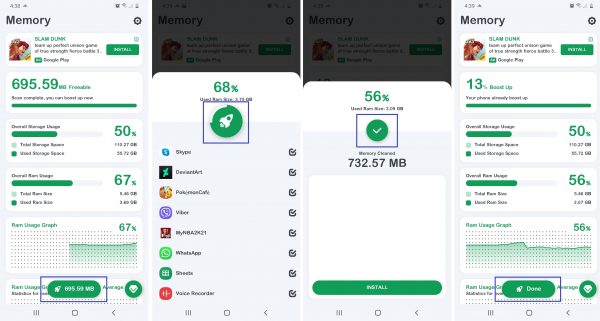
How to upgrade RAM using the RAM Booster app? First, you have to install and launch it. When the Memory interface shows up, you’ll be able to see how much RAM can be freed. Second, swipe up then down to go from the bottom to the top of the page for the clickable oval green button to appear. Third, tap on the button to go to the list of the apps that will be suspended or closed by RAM Booster to increase your RAM. Lastly, click the rocket symbol above the list. Once finished, the checkmark and Done button will show up on the next page and home screen, respectively.
What is good about the RAM Booster app? It is simple to use and takes less than five steps to get the job done. Moreover, it lets you see how much RAM is used by your Android phone. Data is presented in readable figures and there are a list and graph on a neat user interface. This helps inform you if you have useless or heavy apps eating up your storage.
2. Smart Booster
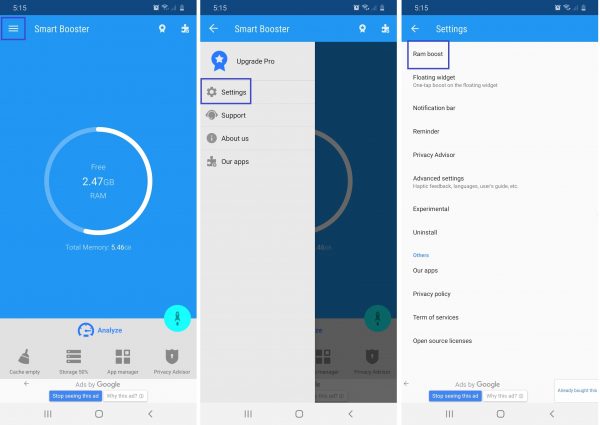
Smart Booster is another mobile app that could potentially improve your Android phone’s RAM. To start, you should install and launch the app on your smartphone. Next, tap the three-line icon on the upper-left part of the homepage and Settings on the sidebar that will appear. Click Ram boost.
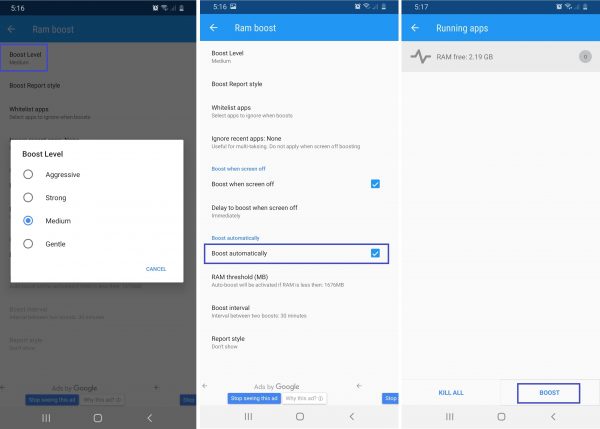
Next, tap Boost level. You will be asked to choose from Aggressive, Strong, Medium, and Gentle. After selecting your preferred level, close the pop-up and swipe up to be able to tap Boost automatically. Lastly, go back to the homepage to click on the Free RAM circle and the BOOST button.
You will be able to successfully increase the useable RAM on your Android phone after the said steps. It takes a few more clicks compared to RAM Booster, but the process can still be considered easy even if you are not that tech-savvy.
3. Norton Clean
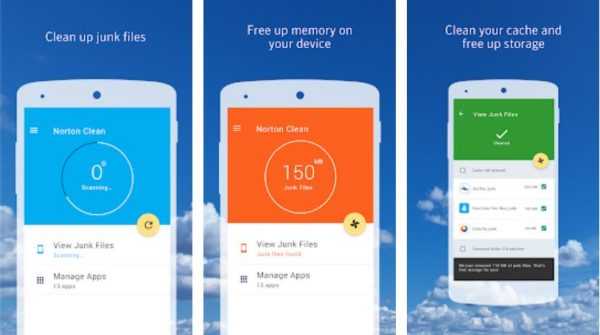
Norton Clean is another user-friendly memory booster or cleaner app for Android phones. It is from Norton Labs, a big name in the antivirus software industry.
How to upgrade RAM using the Norton Clean app? To begin freeing up memory, install and open the app after downloading it from the Google Play Store. Next, click on the round refresh or fan icon for Norton Clean to start scanning and automatically removing unnecessary programs. Wait for it to finish. Once done, the total size of junk files will be shown in the center circle. You can then tap View Junk Files to see the specific app list.
Upgrade RAM via a Micro-SD Card
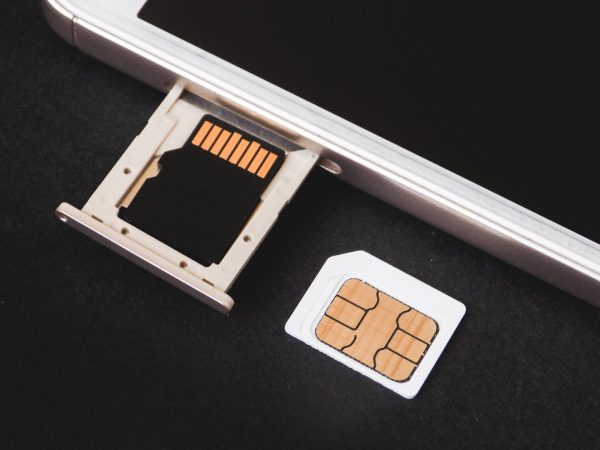
A micro-SD card is not RAM per se but having one is the most basic way to expand your Android phone’s storage. Just switch your device off then insert the card. A micro-SD card is usually placed in one of the slots of the SIM card tray.
Micro-SD cards are not created equal, having different storage capacities and classes. While it is already sufficient if you have a 4 or 8GB variant, it’ll never hurt to have extra space so feel free to select the size depending on your needs. When it comes to class, though, it is recommended that you use the ones with a Class 10 rating.
The micro-SD card class is indicated by the encircled number printed on the card’s surface. Class 4 to 10 versions are known to work well. It will also benefit you if you use a micro-SD card from a reputable brand to avoid data corruption and other issues.
Transfer Apps to the Micro-SD Card
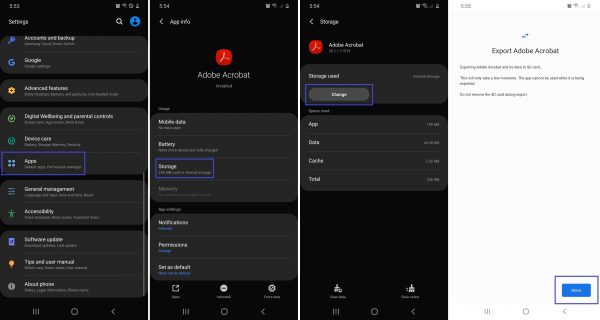
Once you have the micro-SD card inserted in your Android phone, you can transfer data per app to it from internal storage. This is only possible if your Android phone supports this. To try it, navigate to your device’s Settings. Look for and click on Apps. Choose what app from the list you want to transfer. On the next two app pages, tap Storage and followed by the Change button. You will have to click Move on the export app page and wait for the data to be transferred.
Read more: How to move apps to an SD card
Set Micro-SD Card as Default Storage
Alternatively, you can also make the micro-SD card the default storage of your Android phone if you prefer not to transfer apps one by one. Only Android 6.0 and newer smartphones likely have this function.
To set a micro-SD card as internal storage, first, make sure you have emptied it of files you do not want to lose because it will be reformatted by the smartphone. Once the card is inserted into the device, look for the Storage option in your Android phone’s Settings menu. In that menu, click SD card. See if your phone will show you a “Format as Internal” or equivalent button. Tap on it to finish.
Restart your smartphone after formatting for the settings to work. Note that these instructions are not universal since the steps vary per device model. With these, though, you might get a lead on where to locate the feature.
Other Ways to Maximize RAM
If you do not prefer any of the methods discussed above, the best thing you can do is to maximize RAM even in the simplest ways. You won’t even need to download mobile apps or use a micro-SD card.
Say Goodbye to Unnecessary Apps

Close and uninstall unused apps and bloatware manually on your Android phone. Bloatware, in case you are not familiar with the term, refers to unwanted apps that take up so much space and drain a smartphone’s battery. Some are pre-installed on the device. Music players and multimedia editors are examples.
To take action against the said apps, look for your smartphone’s Settings menu, and go to Applications. Once you see the list of apps currently installed and running on your device, select one that you want to remove or suspend. Clicking on the app from there will show you the app details and the Force stop and Uninstall buttons. Choose whichever is possible or what you prefer to do.
Avoid Widget Overload
Widgets are typically shortcuts to programs or functions that are already on your Android phone.
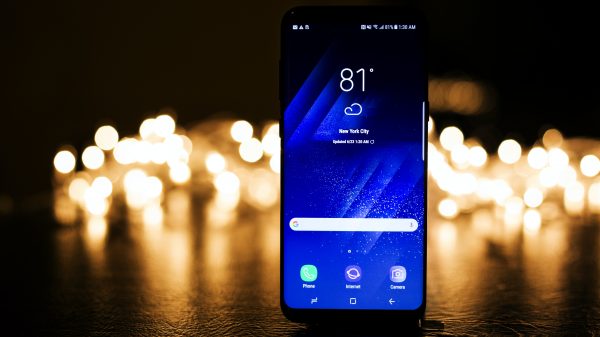
There are many kinds of widgets, weather shortcut being one of the most common. The widget shows the weather based on the information the original weather app provides. This is if your phone, like many models, has a weather-checking function or app.
Another popular widget is the music player. It looks like a simplified version of your media player app with just the play, stop, pause, and forward buttons. Some even display album arts. Even if widgets act as good shortcuts for many functions, having too many of those can drag your smartphone’s performance down because they also take up a considerable amount of RAM.
Switch Off Display Effects

Deactivate live wallpapers and animations if you can do without those. Yes, those display features make a smartphone attractive but may render your device slow.
Wallpapers and animations can be vibrant and bright and may run even when your Android phone’s home screen is on standby. However, those eat up RAM and cause the device battery power to drain fast. How to disable live wallpapers and animations depends on the smartphone you are using, but you can usually find the Reduce Animations option within the Advanced Features on your smartphone’s Settings menu.
There are still many ways on how to upgrade RAM or free up space on Android devices so feel free to explore more options.
Takeaway
Smartphones need to dedicate more space to apps and programs to accomplish more tasks efficiently. This is why learning how to upgrade RAM or free up storage is a good practice for Android device care. It is up to you to choose the method that is the most convenient. If you regularly check on your apps and settings, then saving up RAM is as easy as keeping what you only need. If not, then that is when third-party apps and micro-SD cards will be handy.