
If you’re a gamer who prefers using a gamepad for a more immersive gaming experience on your Windows 10 computer, you may occasionally find yourself in a situation where you can’t seem to locate your gamepad. It can be frustrating when you’re ready to dive into your favorite game, only to realize that you can’t find your trusty controller. But don’t worry, we’re here to guide you on how to find your gamepad in Windows 10. In this article, we’ll explore different methods to help you locate your gamepad, whether it’s a wired or wireless device. So, let’s dive in and get your gamepad back in action.
Inside This Article
- Method 1: Use Device Manager
- Method 2: Check the Settings App
- Method 3: Use the Game Controllers Panel
- Method 4: Update Gamepad Drivers
- Conclusion
- FAQs
Method 1: Use Device Manager
If you’re wondering how to find your gamepad in Windows 10, one of the simplest ways is to utilize the Device Manager. This powerful tool allows you to manage all the hardware devices connected to your computer, including gamepads.
To access the Device Manager, follow these steps:
- Press the Windows key + X on your keyboard to open the Power User menu.
- Click on “Device Manager” from the list of options. This will launch the Device Manager window.
- In the Device Manager window, look for the “Human Interface Devices” category and expand it by clicking the arrow next to it.
- Scroll through the list and locate your gamepad. It might be listed as “Gamepad,” “Joystick,” or under the manufacturer’s name.
- Right-click on the gamepad and select “Properties” from the context menu.
In the gamepad’s properties window, you can access various settings and options. Make sure to check the “Device status” section to ensure the gamepad is working properly without any conflicts. If there is a problem, you can troubleshoot it by updating the drivers or reinstalling them.
Using Device Manager is an effective method to find your gamepad in Windows 10, as it provides a detailed overview of all your connected devices and allows you to manage their settings easily.
Method 2: Check the Settings App
If your gamepad is not being recognized by Windows 10, another way to troubleshoot the issue is by checking the Settings app. This method allows you to verify if the gamepad is properly configured within the operating system.
Here are the steps to check the Settings app:
- Open the Start menu by clicking on the Windows icon in the bottom left corner of the screen.
- Click on the gear-shaped icon to open the Settings app.
- In the Settings app, click on the “Devices” option.
- From the left side menu, click on the “Bluetooth & other devices” option.
- Scroll down to the “Other devices” section and check if your gamepad is listed there.
If you see your gamepad listed under “Other devices,” it means that Windows 10 has detected the gamepad but hasn’t installed the necessary drivers for it. In this case, you will need to manually install the drivers.
On the other hand, if your gamepad is not listed under “Other devices,” it could indicate that the gamepad is not properly connected to your computer. Make sure that the gamepad is properly connected via USB or Bluetooth and try again.
Checking the Settings app is a quick and simple way to determine if your gamepad is recognized by Windows 10. By following these steps, you can easily identify any connectivity issues and take the necessary actions to resolve them.
Method 3: Use the Game Controllers Panel
If you’re still having trouble finding your gamepad in Windows 10, another method you can try is using the Game Controllers panel. This panel allows you to manage and configure your game controllers, including your gamepad.
To access the Game Controllers panel, follow these steps:
- Open the Control Panel by searching for it in the Windows search bar or locating it in the Start menu.
- In the Control Panel, make sure the “View by” option is set to “Small icons” or “Large icons” for easier navigation.
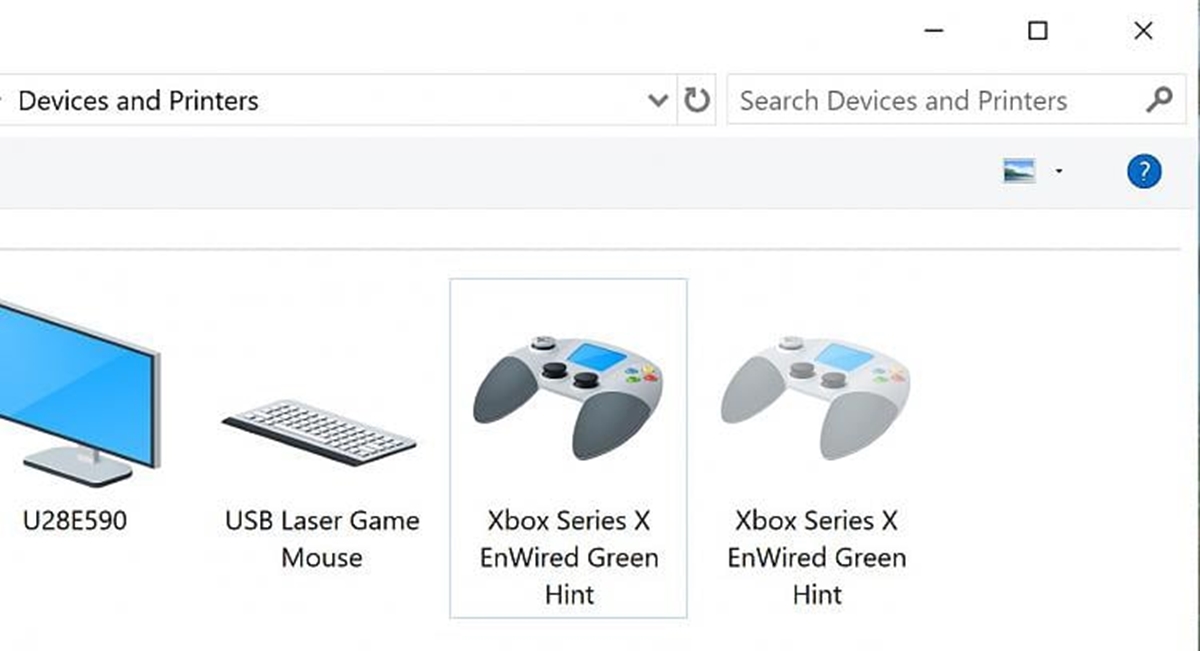
- Locate and click on the “Game Controllers” or “Devices and Printers” option. The name may vary depending on your version of Windows.
- In the Game Controllers panel, you should see a list of available game controllers connected to your computer. Look for your gamepad in the list.
- If your gamepad is listed, right-click on it and select “Properties” to access the configuration settings. From here, you can customize various aspects of your gamepad, such as button assignments and sensitivity.
- If your gamepad is not listed, click on the “Add” or “Install” button to add or install the necessary drivers for your gamepad.
The Game Controllers panel provides you with a centralized location to manage and troubleshoot your gamepads in Windows 10. It allows you to calibrate the gamepad, test its functionality, and configure it to suit your gaming preferences.
By utilizing the Game Controllers panel, you can ensure that your gamepad is recognized and functioning correctly in Windows 10, providing you with an optimal gaming experience.
Method 4: Update Gamepad Drivers
If you’re experiencing issues with your gamepad in Windows 10, updating the gamepad drivers might be the solution. Outdated or incompatible drivers can cause functionality problems and prevent your gamepad from being recognized by your system. Here’s how you can update your gamepad drivers:
1. Open the Device Manager by pressing the Windows key + X on your keyboard and selecting “Device Manager” from the menu.
2. In the Device Manager window, locate the “Human Interface Devices” category and expand it by clicking on the arrow next to it.
3. Look for your gamepad in the list of devices. It might be listed under a generic name like “USB Input Device” or “HID-compliant game controller.”
4. Right-click on your gamepad and select “Update driver” from the context menu.
5. In the next window, choose the option to automatically search for updated driver software.
6. Windows will now search for the latest driver software for your gamepad online and install it if available.
7. Once the driver update is complete, restart your computer to apply the changes.
If Windows doesn’t find an updated driver for your gamepad, you can try visiting the manufacturer’s website and downloading the latest driver manually. Look for the support section or downloads page on the manufacturer’s website, enter your gamepad’s model number or name, and download the appropriate driver for your Windows 10 version.
Updating your gamepad drivers can help resolve compatibility issues and ensure optimal performance. It’s an important step in troubleshooting gamepad connectivity problems and ensuring that you can enjoy your favorite games without any interruptions.
Conclusion
In conclusion, finding your gamepad in Windows 10 is a breeze with the right knowledge and tools. Whether you’re using a wired or wireless controller, the steps to locate and connect your gamepad are easily accessible. By following the instructions outlined in this article, you can ensure a smooth gaming experience on your PC.
Remember to always keep your gamepad drivers up to date to avoid compatibility issues and maximize performance. Additionally, consider investing in a high-quality gamepad and mobile accessories to enhance your gaming sessions and make the most out of your PC gaming experience.
So, don’t let any technical hiccups hinder your gaming fun. Take the time to properly set up and connect your gamepad in Windows 10, and immerse yourself in the world of gaming like never before!
FAQs
1. How do I connect my gamepad to Windows 10?
To connect your gamepad to Windows 10, follow these steps:
- Ensure that your gamepad is powered on and in pairing mode.
- Go to the Windows Start menu and open the Settings app.
- Click on the “Devices” option.
- Select the “Bluetooth & other devices” tab.
- Click on the “Add Bluetooth or other device” button.
- Choose the “Bluetooth” option.
- Windows will start searching for available devices. When your gamepad appears in the list, click on it to connect.
- Follow any additional on-screen prompts, if necessary, to complete the pairing process.
- Once paired, your gamepad should now be connected and ready to use with Windows 10.
2. My gamepad is not recognized by Windows 10. What should I do?
If your gamepad is not being recognized by Windows 10, there are a few troubleshooting steps you can try:
- Make sure your gamepad is properly connected to your computer via USB or Bluetooth.
- Ensure that your gamepad is compatible with Windows 10. Check the manufacturer’s website for any necessary drivers or updates.
- Try connecting your gamepad to a different USB port on your computer.
- Restart your computer and try again.
- If none of the above steps work, you may need to contact the manufacturer for further assistance or consider replacing your gamepad.
3. How can I calibrate my gamepad in Windows 10?
To calibrate your gamepad in Windows 10, follow these steps:
- Go to the Windows Start menu and open the Settings app.
- Click on the “Devices” option.
- Select the “Connected devices” tab.
- Under “Devices,” find and click on your gamepad.
- Click on the “Game controller settings” link.
- In the “Properties” window that appears, click on the “Settings” tab.
- Click on the “Calibrate” button.
- Follow the on-screen instructions to calibrate your gamepad.
- Once the calibration process is complete, your gamepad should be ready to use.
4. Can I use a PlayStation or Xbox gamepad with Windows 10?
Yes, you can use both PlayStation and Xbox gamepads with Windows 10. However, you may need to install additional drivers or software depending on the specific controller model.
For PlayStation gamepads, you can connect them to your computer using a USB cable or via Bluetooth if the controller supports it. Xbox gamepads, on the other hand, can be connected wirelessly using the Xbox Wireless Adapter or through a USB cable.
5. How do I test my gamepad in Windows 10?
To test your gamepad in Windows 10, you can use the built-in “Game Controllers” settings:
- Go to the Windows Start menu and open the Settings app.
- Click on the “Devices” option.
- Select the “Connected devices” tab.
- Under “Devices,” find and click on your gamepad.
- Click on the “Game controller settings” link.
- In the “Properties” window that appears, you can test the different buttons and axes of your gamepad.
This allows you to ensure that all the buttons, triggers, and analog sticks are functioning correctly.