
Are you wondering how to get a hotspot on your Chromebook? Look no further! In this article, we’ll walk you through the step-by-step process of setting up a hotspot on your Chromebook, enabling you to connect your other devices to the internet wherever you are.
Having a hotspot on your Chromebook can be incredibly convenient, especially when you’re on the go or in an area where Wi-Fi access is limited. Whether you need to finish an important work task, stream your favorite shows, or simply stay connected with friends and family, creating a hotspot on your Chromebook will allow you to do it all.
By following our easy-to-understand instructions, you’ll be able to share your Chromebook’s internet connection with your smartphone, tablet, or any other Wi-Fi enabled device. Get ready to transform your Chromebook into a portable Wi-Fi hub in just a few simple steps!
Inside This Article
- Enable Hotspot on a Chromebook
- Connect to a Wi-Fi Network
- Access Chromebook Settings
- Turn on the Mobile Hotspot
- Conclusion
- FAQs
Enable Hotspot on a Chromebook
Using your Chromebook as a mobile hotspot can come in handy when you need to connect other devices to the internet while on the go. Whether you are traveling or in an area with no Wi-Fi, enabling the hotspot feature on your Chromebook allows you to share your internet connection with other devices such as smartphones, tablets, and laptops.
To enable the hotspot feature on your Chromebook, follow these simple steps:
- Connect to a Wi-Fi network: Before you can enable the hotspot, you need to ensure that your Chromebook is connected to a Wi-Fi network. This is essential as the hotspot uses your existing internet connection to provide internet access to other devices.
- Access Chromebook settings: Once connected to a Wi-Fi network, locate the settings menu on your Chromebook. You can do this by clicking on the system tray at the bottom-right corner of the screen and then clicking on the gear icon to open the settings menu.
- Turn on the mobile hotspot: In the settings menu, you will find various options. Look for the “Network” section and click on “Internet connection”. Here, you will see the option to enable the mobile hotspot. Simply toggle the switch to turn on the hotspot.
Once the hotspot is enabled, you can customize the hotspot name and password to secure your connection. It is recommended to choose a strong password to prevent unauthorized access to your network.
Now that you have successfully enabled the hotspot on your Chromebook, you can start connecting your other devices to it. Simply search for available Wi-Fi networks on your device and select the name of your Chromebook’s hotspot. Enter the password you’ve set up, and you’ll be connected to the internet!
Remember that using the hotspot feature on your Chromebook may consume data from your mobile data plan if you do not have a Wi-Fi network connected. It is advisable to keep track of your data usage and only use the hotspot when you have sufficient data available or connect to a Wi-Fi network whenever possible to avoid exceeding your data allowance.
Connect to a Wi-Fi Network
When it comes to using a Chromebook, connecting to a Wi-Fi network is a crucial step to gain access to the internet and make the most of your device. Whether you are setting up your Chromebook for the first time or need to connect to a different Wi-Fi network, here’s a step-by-step guide to help you get connected.
1. Begin by clicking on the network icon located in the bottom right corner of your Chromebook’s screen. This icon resembles the signal bars of a Wi-Fi connection.
2. A list of available Wi-Fi networks will appear. Locate the network you want to connect to and click on it. If the network is secured with a password, you will be prompted to enter it. Remember to double-check the password to ensure accuracy.
3. After entering the password, click on the “Connect” button. Your Chromebook will then attempt to establish a connection with the selected Wi-Fi network.
4. Once the connection is established, the network icon will display the signal strength, and you can start browsing the internet or accessing other online services.
5. In some cases, you may encounter network connectivity issues or find that the desired Wi-Fi network is not showing up on the list. Here are a few troubleshooting steps you can try:
• Make sure the Wi-Fi network is within range and operational. Check if other devices can connect to the network successfully.
• Restart your Chromebook to refresh the connection and eliminate any temporary glitches.
• Verify that the Wi-Fi network is not set to “hidden.” Hidden networks require manual entry of network details such as SSID (network name) and password.
• Reset your network settings if you continue to face connectivity issues. This action will remove saved Wi-Fi networks, and you will need to reconnect to them.
• If none of the above steps work, reach out to your network administrator or internet service provider for further assistance.
Connecting your Chromebook to a Wi-Fi network is a straightforward process that enables you to stay connected and enjoy everything the internet has to offer. Follow these steps, and you’ll be browsing, streaming, and working online in no time.
Access Chromebook Settings
Accessing the settings on your Chromebook is a straightforward process that allows you to customize various aspects of your device. By accessing the Chromebook settings, you can adjust system preferences, manage accounts, network settings, and much more. Here are the steps to access the settings on your Chromebook:
- Step 1: Click on the time and date display located in the bottom-right corner of your screen.
- Step 2: In the pop-up menu that appears, click on the gear icon labeled “Settings.”
- Step 3: The Settings page will open in a new tab, where you can explore various options to customize your Chromebook.
Once you have accessed the Chromebook settings, you will find a plethora of options to tweak your device to suit your preferences. Let’s take a closer look at some of the settings you can access:
- Display Settings: Adjust the brightness, screen resolution, and orientation to optimize your display experience.
- Sound Settings: Customize the volume, sound output, and notifications to enhance your audio experience.
- Network Settings: Manage Wi-Fi connections, set up VPNs, and configure proxy settings to ensure seamless internet connectivity.
- Keyboard Settings: Customize language preferences, keyboard shortcuts, and input methods to personalize your typing experience.
- Account Settings: Add or remove user accounts, manage syncing options, and adjust privacy settings for a personalized browsing experience.
- System Settings: Control power management, storage, and device updates to keep your Chromebook running smoothly.
Exploring the Chromebook settings allows you to tailor your device to your specific needs, whether you’re a student, professional, or casual user. Remember to save any changes you make by clicking the “OK” or “Apply” button in each corresponding settings section.
Now that you know how to access the Chromebook settings, go ahead and start customizing your device to enhance your overall user experience!
Turn on the Mobile Hotspot
Turning on the mobile hotspot feature on your Chromebook allows you to share your internet connection with other devices. Whether you’re on the go or need to provide internet access to multiple devices in your home, setting up a mobile hotspot on your Chromebook is quick and easy. Here’s how you can do it:
1. Start by opening the settings menu on your Chromebook. You can do this by clicking on the time in the bottom right corner of the screen and then selecting the gear icon for settings.
2. In the settings menu, navigate to the “Network” section. Here, you will find a variety of network-related options.
3. Look for the “Mobile data” option. This is where you can access and control your Chromebook’s mobile hotspot feature.
4. Toggle the switch next to “Mobile data” to turn on the mobile hotspot. Once enabled, you’ll see additional options to configure your hotspot settings.
5. Customize your hotspot settings to suit your preferences. You can change the network name (SSID) and password, as well as adjust the visibility of your hotspot.
6. Once you have configured your hotspot settings, you’re ready to connect other devices. Simply search for available Wi-Fi networks on the device you wish to connect, and your Chromebook’s hotspot should appear in the list.
7. Select your Chromebook’s hotspot, enter the password if prompted, and the device will connect to the internet through your Chromebook’s mobile data connection.
8. To disable the mobile hotspot, simply revisit the settings menu on your Chromebook, navigate to the “Mobile data” section, and toggle the switch off.
By turning on the mobile hotspot on your Chromebook, you can conveniently share your internet connection with other devices, ensuring that you stay connected wherever you go.
Conclusion
In conclusion, getting a hotspot on a Chromebook is a convenient and efficient way to stay connected on the go. With the ability to turn your Chromebook into a hotspot, you can easily share your internet connection with other devices, ensuring that you never miss a beat. Whether you’re traveling, working remotely, or simply in an area with limited or no Wi-Fi access, having a hotspot on your Chromebook provides you with the flexibility to stay connected and productive. Remember to check with your service provider for data plan and hotspot capabilities, and follow the step-by-step process outlined in this article to set up a hotspot on your Chromebook.
FAQs
1. Can I get a hotspot on a Chromebook?
Yes, you can use your Chromebook as a hotspot to share your internet connection with other devices. Chrome OS has a built-in feature called “Instant Tethering” that allows you to turn your Chromebook into a hotspot.
2. How do I enable Instant Tethering on my Chromebook?
To enable Instant Tethering on your Chromebook, follow these steps:
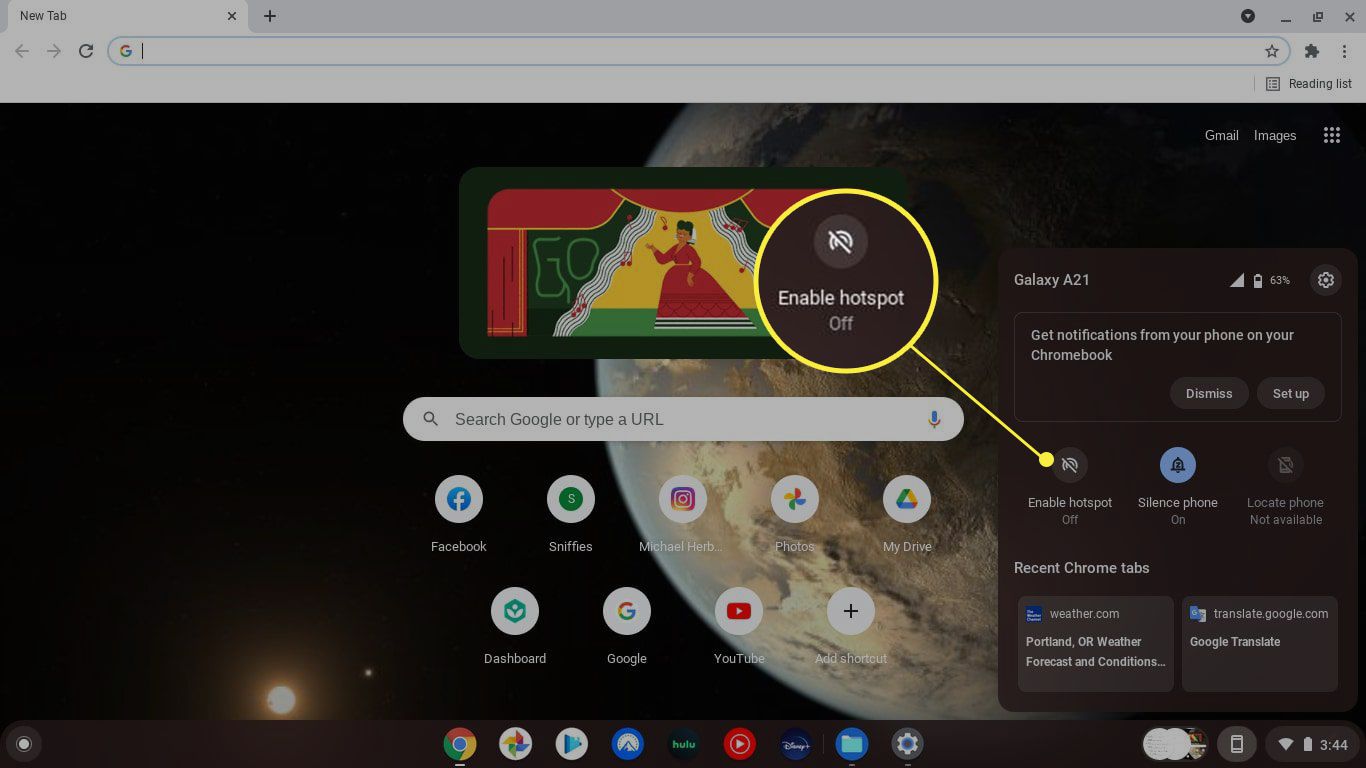
– Click on the network icon in the bottom right corner of the screen.
– Click on “Mobile data” and enable “Tethering”.
– Follow the on-screen instructions to set up your hotspot.
3. Can I connect multiple devices to my Chromebook hotspot?
Yes, you can connect multiple devices to your Chromebook hotspot. Once you have set up the hotspot, other devices can discover and connect to it just like they would connect to any other Wi-Fi network.
4. Does using my Chromebook as a hotspot consume a lot of data?
Yes, using your Chromebook as a hotspot will consume your mobile data. The amount of data consumed will depend on the number of devices connected to the hotspot and their usage. It is recommended to monitor your data usage and ensure you have a sufficient data plan.
5. Can I set a password for my Chromebook hotspot?
Yes, you have the option to set a password for your Chromebook hotspot to secure your connection. During the Instant Tethering setup process, you will be prompted to choose a password for your hotspot. It is recommended to use a strong password to protect your network.