
Are you looking for a fun and stylish way to carry your keys or identification card? Look no further than making a lanyard with three strings. Lanyards are practical accessories that are not only useful, but they can also be customized to suit your personal style. Whether you want to make a lanyard for yourself or as a gift for a friend, this step-by-step guide will walk you through the process of creating a stylish and functional lanyard using three strings. From choosing the right materials to mastering the different techniques, you’ll be able to create your very own unique lanyard in no time. So, let’s dive in and discover how to make a lanyard with three strings!
Inside This Article
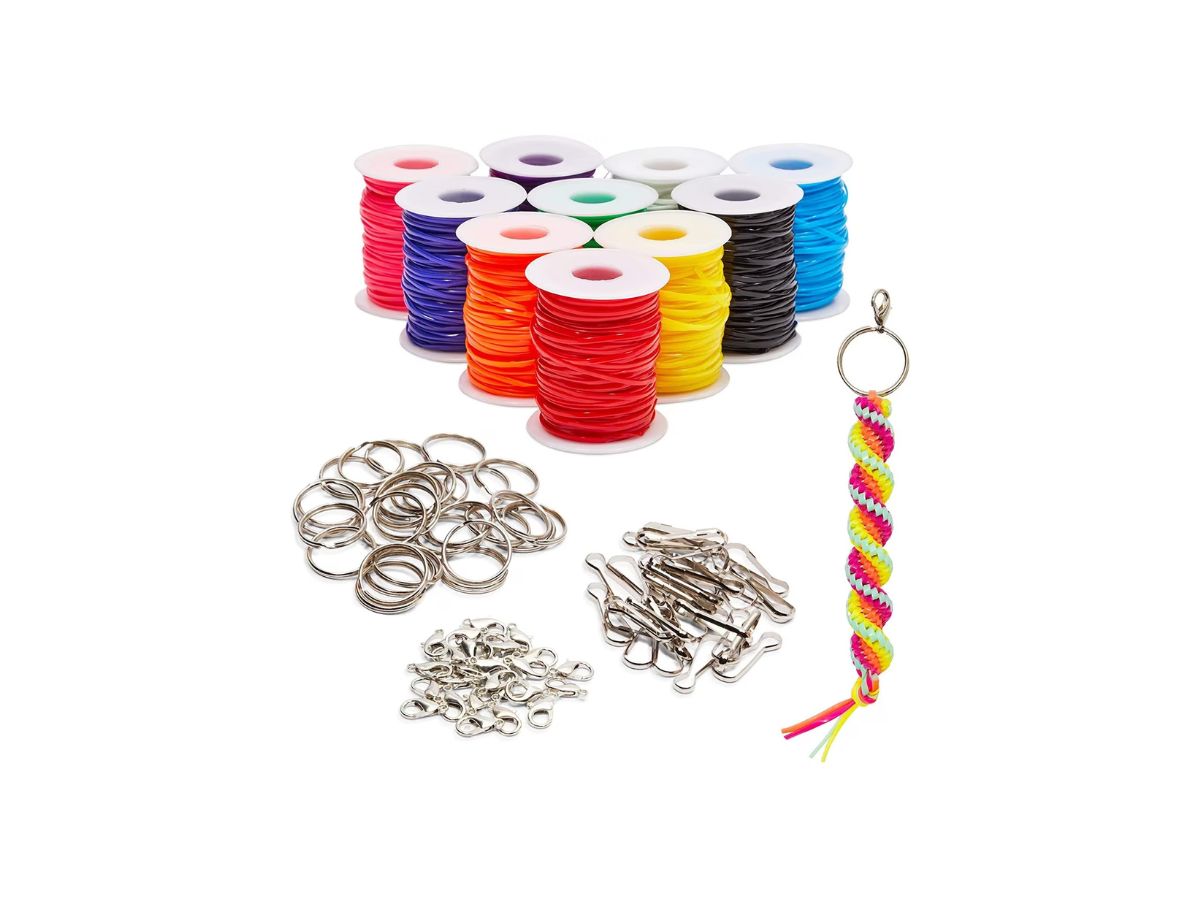
- Materials Needed: 3 strings of different colors, Scissors, Lanyard clip
- Step 1: Measure and Cut the Strings
- Step 2: Securing the Strings Together – Take the 3 strings and tie a knot at one end to secure them together.
- Step 3: Starting the Weaving Process- Separate the strings into 3 groups, with 1 string in each group. Hold them together firmly.
- Step 4: Weaving the Lanyard – Start by taking the leftmost string and crossing it over the middle string, creating a loop.
- Step 5: Continue Weaving – Repeat the weaving process, alternating between the leftmost and rightmost strings.
- Step 6: Finishing the Lanyard – Once the desired length is reached, tie a knot at the end to secure the weaving.
- Step 7: Attaching the Lanyard Clip – Attach the lanyard clip to the end of the lanyard by tying it securely.
- Conclusion
- FAQs
Materials Needed: 3 strings of different colors, Scissors, Lanyard clip
In order to make a lanyard with three strings, you will need a few materials to get started. Here’s what you’ll need:
- 3 strings of different colors: Choose three strings in different colors to add variety and make your lanyard more visually appealing. You can use strings made of nylon, polyester, or even embroidery floss.
- Scissors: You’ll need a pair of scissors to cut the strings to the desired length and trim any excess.
- Lanyard clip: To complete your lanyard, you’ll need a lanyard clip. This will be used to attach your finished lanyard to a keyring, ID card holder, or other items.
Once you have gathered these materials, you’re ready to start making your lanyard!
Step 1: Measure and Cut the Strings
One of the essential steps in making a lanyard is to measure and cut the strings to the desired length. This will ensure that you have enough material to work with and create a lanyard of the appropriate size. Typically, a length of around 2 feet is ideal for each string.
Here’s how to measure and cut the strings:
- Start by selecting the type of string you want to use for your lanyard. There are various options available, such as nylon, polyester, or cotton.
- Once you have chosen your preferred material, take a measuring tape or ruler and cut three pieces of string to the desired length. Each piece should be around 2 feet long.
- Make sure to use sharp scissors to get clean-cut ends. This will make it easier to work with the strings during the lanyard-making process.
- Double-check the length of each string to ensure they are all equal. Consistency in length will result in a more balanced and visually appealing lanyard.
- Once you have cut the strings, you are ready to move on to the next step of creating your lanyard.
Remember to take your time when measuring and cutting the strings, as accuracy is key to achieving a well-crafted lanyard. It’s always helpful to have extra string on hand, just in case you need it for any adjustments or modifications later on in the process.
Step 2: Securing the Strings Together – Take the 3 strings and tie a knot at one end to secure them together.
Now that you have gathered your three strings, it’s time to secure them together. This step is crucial as it forms the foundation of your lanyard. By tying a knot at one end, you ensure that the strings stay in place as you work on creating the lanyard pattern.
To begin, hold the three strings tightly together, making sure they are aligned. This will give you a firm grip as you tie the knot. Start by creating a loop with the strings about two inches from the end.
Next, take the loose ends of the strings and pass them through the loop. Pull them tight to secure the knot. You can double or triple knot for added security, especially if you plan on using the lanyard for heavy items.
Make sure the knot is tight and secure, and the strings are evenly aligned. This will ensure that your lanyard maintains its shape and is sturdy enough to hold your belongings.
Once the knot is tied and secured, you can trim the excess string if desired, leaving a short tail. This will prevent the strings from getting tangled or interfering with the lanyard’s functionality.
With the strings securely fastened together, you are now ready to move on to the next step of creating the lanyard pattern. This knot acts as the starting point and sets the stage for the intricate design that will unfold as you progress.
Step 3: Starting the Weaving Process- Separate the strings into 3 groups, with 1 string in each group. Hold them together firmly.
Now that you have gathered the materials and made the starting knot, it’s time to begin the weaving process. For this step, you will need to separate the strings into three groups, with one string in each group. This will form the foundation for your lanyard.
Start by holding the three strings together firmly, ensuring that they are aligned at one end. The strings should be parallel to each other, with the knots you made at the top.
Next, carefully separate the strings into three equal-sized groups, ensuring that there is one string in each group. Take one string from the left side, one from the middle, and one from the right side.
Hold each group firmly to prevent any tangling or twisting of the strings. This will make the weaving process smoother and easier to handle.
Once you have separated the strings into three groups and held them firmly, you are ready to move on to the next step of creating the lanyard pattern.
Step 4: Weaving the Lanyard – Start by taking the leftmost string and crossing it over the middle string, creating a loop.
Once you have completed the previous steps and have a solid base for your lanyard, it’s time to start weaving the pattern. This step involves taking the leftmost string and crossing it over the middle string, creating a loop.
To begin, identify the string on the left side of your lanyard. Lift it up and bring it over the top of the middle string. The left string should now be crossing over the middle string, forming a loop or arc shape.
Next, take the rightmost string and place it over the top of the left string, pulling it through the loop that was created. Make sure the right string goes under the middle string as you pull it through the loop.
Once you have pulled the right string through the loop, gently tighten the knot by pulling both ends of the strings. This will secure the first knot in your lanyard pattern.
Continue this weaving process, alternating between the left and right strings, until you reach the desired length for your lanyard. Remember to always start by crossing the leftmost string over the middle string and then pulling the right string through the loop.
As you progress through the weaving process, you’ll start to see the lanyard pattern take shape. It may seem a bit intricate at first, but with practice, you’ll quickly get the hang of it.
Remember to keep your strings taut and the knots tight as you weave. This will ensure that your lanyard is sturdy and secure.
It’s important to take your time and be patient while weaving the lanyard. Don’t rush the process, as it requires precision and attention to detail.
Once you have completed weaving the lanyard to the desired length, you can finish it off by following the next step in the process.
Step 5: Continue Weaving – Repeat the weaving process, alternating between the leftmost and rightmost strings.
Now that you have completed the initial weaving pattern, it’s time to continue weaving your lanyard. This step involves repeating the weaving process, but with a slight twist. Instead of always starting with the leftmost string, you will alternate between the leftmost and rightmost strings.
To begin, take the leftmost string and pass it over the two middle strings, but under the rightmost string. Then, take the rightmost string and pass it under the two middle strings and over the leftmost string. This creates a crisscross pattern with the strings.
Next, pull the outermost strings tight, making sure to keep the lanyard flat and even. This will secure the previous rows and create a neat woven pattern. You should now have two rows of weaving completed.
Continue this crisscross weaving pattern, alternating between the leftmost and rightmost strings. Each time you weave, the pattern will shift, creating a visually appealing design. Remember to pull the strings tight after each weave to maintain tension and keep the lanyard uniform.
As you progress and add more rows, you’ll notice the lanyard taking shape and becoming longer. The weaving process can be repetitive, but it’s also quite meditative and relaxing. Allow yourself to enjoy the rhythm of the weaving and appreciate the progress you’re making.
Continue weaving until you reach your desired length for the lanyard. You can periodically measure it against your desired length or a reference lanyard to ensure you’re on track. Once you’re satisfied with the length, move on to the next step.
Remember that practice makes perfect when it comes to weaving lanyards. It may take a few tries to get the hang of the weaving technique and maintain a consistent pattern. Don’t be discouraged if your first few attempts aren’t perfect. With time and practice, you’ll develop the skill and create beautiful lanyards.
Step 6: Finishing the Lanyard – Once the desired length is reached, tie a knot at the end to secure the weaving.
After diligently weaving your lanyard using the three strings, you will eventually reach the desired length. At this point, it is essential to finish off the lanyard by tying a knot at the end. This final step ensures that your weaving remains intact and the lanyard stays securely in place.
To tie the finishing knot, separate the three strings slightly, providing enough space to work with. Take the end of the lanyard and bring it over the other two strings.
Next, pass the end of the lanyard under the two strings and pull it through the loop created. This will create a simple overhand knot. Pull the knot tightly to secure it in place.
Once the knot is tightened, make sure to trim any excess string if necessary. You can use a pair of scissors to carefully cut off any extra length.
By tying a knot at the end of your lanyard, you are not only adding a finishing touch but also ensuring that the weaving remains secure. This knot will prevent the lanyard from unraveling and provide added durability.
Now that you have completed all the steps, your lanyard is ready to be used! Whether you want to attach it to your keys, ID badge, or any other item, your handmade lanyard will serve as a practical and stylish accessory.
Remember to practice patience and precision throughout the process, as it may take a few attempts to achieve the desired results. With practice, you will become more skilled in creating different patterns and designs.
So gather your materials, follow each step carefully, and enjoy the satisfaction of creating your very own lanyard with three strings!
Step 7: Attaching the Lanyard Clip – Attach the lanyard clip to the end of the lanyard by tying it securely.
After completing the lanyard pattern, it’s time to add the finishing touch by attaching the lanyard clip. The lanyard clip provides a convenient way to attach keys, ID badges, or other accessories. Here’s how you can securely attach the lanyard clip:
1. Take the end of the lanyard and fold it in half to create a loop. The loop should be large enough to fit the lanyard clip through.
2. Insert the lanyard clip through the loop, making sure that the clip’s opening is facing upwards.
3. Take one of the loose ends of the lanyard and pass it through the loop, going over the clip’s body and under the loop itself.
4. Pull the loose end tight, ensuring that the loop and the lanyard clip are securely connected.
5. Repeat the same process with the other loose end of the lanyard. Pass it through the loop, going over the clip’s body and under the loop.
6. Pull the loose end tight, making sure that both ends of the lanyard are securely tied to the lanyard clip.
7. Once the lanyard clip is securely attached, give the lanyard a gentle tug to test its durability. It should hold the clip firmly in place without any slippage.
8. Trim any excess length from the loose ends of the lanyard, leaving a small tail to prevent unraveling.
9. Congratulations! You have successfully attached the lanyard clip to your handmade lanyard.
Remember, it’s important to tie the lanyard clip securely to ensure that it doesn’t come loose and risk losing your keys or other attached items. Take your time when securing the clip and double-check that the knot is tight and secure.
Conclusion
Learning how to make a lanyard with 3 strings is a fun and rewarding craft project. Whether you’re a beginner or an experienced crafter, you can create unique and personalized lanyards with just a few simple steps. By following the techniques outlined in this article, you’ll be able to weave together three strings to create a sturdy and stylish lanyard that can be used for holding keys, ID cards, or other small items.
Remember to experiment with different color combinations and patterns to add your own personal touch to the lanyards. You can also try incorporating beads or charms to make them even more eye-catching. The possibilities are endless!
So, grab your strings and get creative with making your own lanyards. It’s a fantastic way to express your creativity and have a practical accessory at the same time. Happy crafting!
FAQs
1. Can I make a lanyard with just 3 strings?
Absolutely! Making a lanyard with 3 strings is a common and easy method. It’s a great project for beginners or anyone looking to create a simple and stylish lanyard.
2. What materials do I need to make a lanyard with 3 strings?
To make a lanyard with 3 strings, you will need three pieces of string or cord of your choice, each measuring around 36 inches in length. You can use materials like nylon, paracord, or even embroidery floss for a colorful design.
3. How do I start making a lanyard with 3 strings?
To begin making a lanyard with 3 strings, gather your three strings and fold them in half to find the center point. Place the center point of the strings securely, such as by clamping it down or attaching it to a safety pin.
4. What knots can I use to make a lanyard with 3 strings?
There are several knots you can use to make a lanyard with 3 strings. The most common knot used is the square knot. This knot creates a flat, woven design that looks great on lanyards.
5. Are there any tips for making a lanyard with 3 strings?
Here are a few tips to help you make a lanyard with 3 strings:
- Make sure to keep the tension on your strings consistent while knotting.
- Take your time and double-check your knots to ensure they are secure.
- Experiment with different colors and patterns to create unique and personalized lanyards.
- If using slippery materials like nylon, consider using a knotting tool or a small clip to hold the strings in place while you work.