
Welcome to this comprehensive guide on how to start a lanyard with two strings! Lanyards have become increasingly popular as functional and stylish accessories for carrying IDs, keys, and other small items. Whether you’re a beginner or an experienced crafter, learning how to start a lanyard with two strings is a useful skill that opens up endless possibilities for creating unique and personalized designs. In this article, we will walk you through the step-by-step process of starting a lanyard with two strings, providing detailed instructions and helpful tips along the way. So, grab your favorite strands of lanyard cord and let’s get started on this exciting crafting adventure!
Inside This Article
- Choosing the Right Strings
- Preparing the Strings
- Starting the Lanyard
- Creating the First Knot
- Conclusion
- FAQs
Choosing the Right Strings
When it comes to starting a lanyard with two strings, choosing the right strings is crucial. The quality and type of strings you select will determine the durability and overall appearance of your lanyard. Here are some factors to consider when choosing the right strings:
Material: The material of the strings plays a significant role in the lanyard’s strength and appearance. Common materials for lanyard strings include nylon, polyester, cotton, and paracord. Nylon and polyester are known for their durability and resistance to fraying, while cotton offers a softer, more comfortable feel. Paracord, with its versatile nature and high strength, is an excellent choice for those seeking a rugged lanyard.
Thickness: The thickness of the strings impacts the overall look and feel of the lanyard. Thicker strings tend to create a more substantial and robust lanyard, while thinner strings result in a more delicate and intricate design. Consider the purpose and strength requirements of your lanyard when deciding on the thickness of the strings. Too thin of a string may compromise the lanyard’s durability, while too thick of a string might hinder flexibility and ease of use.
Color and Design: The color and design of the strings allow you to personalize your lanyard and make it stand out. Choose strings in colors that align with your style, or select a combination of colors to create patterns or designs. Some strings even come with unique patterns or prints, adding an extra touch of creativity to your lanyard.
Availability: Depending on your location and specific requirements, the availability of certain string types and colors may vary. Ensure that the strings you choose are readily accessible, either online or in local stores, to avoid any delays or inconvenience in starting your lanyard.
Take the time to consider these factors and explore different options before making your final decision. By choosing the right strings, you can create a lanyard that not only serves its purpose but also reflects your personal style and preferences.
Preparing the Strings
Before starting the lanyard with 2 strings, you need to make sure that the strings are prepared and ready for the knotting process. Here are the steps to prepare the strings:
- Choose the right strings: Select two strings of equal length and thickness. You can use different colors to make your lanyard more visually appealing.
- Measure and cut the strings: Decide on the desired length of your lanyard and add a few extra inches for allowance. Use sharp scissors to cut the strings to the desired length.
- Seal the ends: To prevent fraying, lightly melt or burn the ends of the strings using a lighter. Be careful not to overheat the strings as it can cause them to shrink.
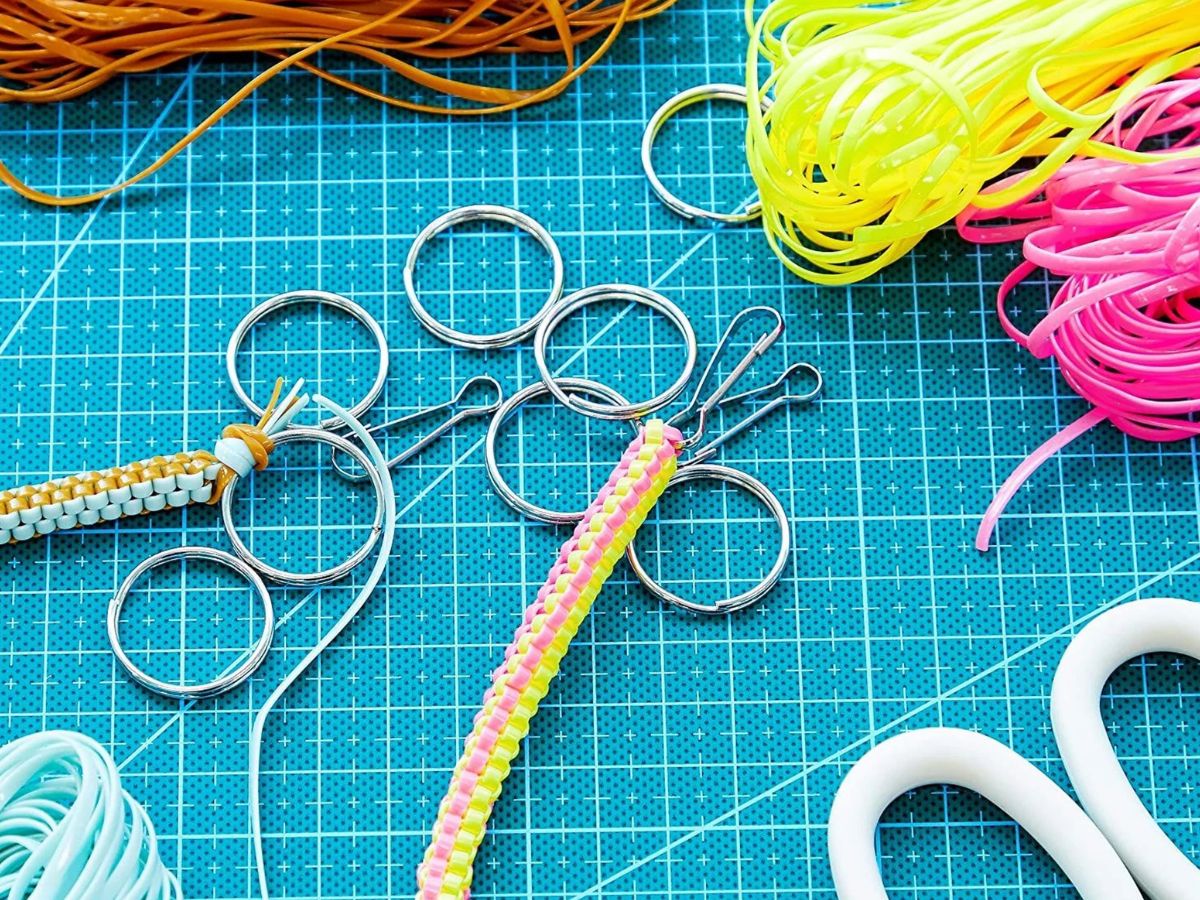
- Optional: Attach a lanyard hook: If you plan to attach the lanyard to a keyring or a badge holder, consider attaching a lanyard hook to one end of the strings. This will make it easier to secure the lanyard when you’re finished.
By preparing the strings properly, you set yourself up for a smoother and more successful lanyard-making process. Make sure to take your time and pay attention to detail during this step to ensure the best results.
Starting the Lanyard
When it comes to crafting lanyards, starting with just two strings can seem intimidating at first. However, with the right materials and a basic understanding of knots, you’ll be able to master this skill in no time.
To begin, gather the materials needed for this project. You’ll require two strings of equal length, preferably made of durable material such as paracord or nylon. These materials are not only sturdy but also come in a wide range of colors, allowing you to create personalized lanyards for various purposes.
Before delving into the process, familiarize yourself with a few basic knots that will be essential in starting the lanyard. The most common knots used are the square knot and the half-hitch knot. These knots provide stability and ensure that your lanyard will remain secure.
Square Knot: To create a square knot, cross the left string over the right string. Loop the left string under the right string and then pull it through the space created. Repeat this process by crossing the right string over the left string and looping it under. Pull both strings tightly to complete the square knot.
Half-Hitch Knot: Begin by folding the two strings in half to find the midpoint. Place the midpoint of the strings under a sturdy surface or hold it securely. Take the left string and create a loop around the right string, passing it through the loop and tightening it. Repeat this process with the right string, creating a loop around the left string and passing it through. Make sure to tighten both loops to secure the half-hitch knot.
Now that you have a grasp of the basic knots, let’s move on to the step-by-step instructions for starting the lanyard.
- Step 1: Find the midpoint of the two strings and fold them in half. This will create a loop with four strands.
- Step 2: Take the left string and bring it over the two middle strands, forming a loop on the right side.
- Step 3: Pass the right string over the end of the left string and then under the two middle strands, coming out from the left side.
- Step 4: Pull both strings tight to secure the starting knot. This resembles a half-square knot with the two middle strands in the center.
- Step 5: Congratulations! You have successfully started the lanyard with two strings. From here, you can continue adding more knots to create a longer lanyard or explore different variations and designs.
Remember, practice makes perfect, so keep experimenting with different color combinations and knot patterns to unleash your creativity. With each lanyard you create, you’ll gain more confidence and refine your skills.
Starting a lanyard with just two strings may seem daunting initially, but with patience and practice, you’ll be able to tackle more complex projects in the future. So, grab your materials, learn the basic knots, and embark on this enjoyable crafting journey!
Creating the First Knot
Creating the first knot is the starting point for making a lanyard with two strings. This knot, also known as the “foundation knot,” sets the initial structure and secures the strings in place.
To create the first knot, follow these steps:
- Begin by placing the two strings next to each other, ensuring that they are parallel and evenly aligned.
- Take the left string and cross it over the right string, forming an “X” shape.
- Next, take the left string and loop it under the right string. Then, pass it through the opening created by the “X” shape.
- Pull both ends of the left string upwards to tighten the knot.
- Repeat the same steps with the right string. Cross it over the left string, loop it under, and pass it through the opening.
- Tighten the knot by pulling both ends of the right string upwards.
Once you have completed these steps, you have successfully created the first knot for your lanyard with two strings. This knot will serve as the base for the following knots and weaving techniques.
Starting a lanyard with 2 strings may seem daunting at first, but with the right technique and a bit of practice, it becomes an enjoyable and rewarding craft. By following the steps outlined in this article, you now have the knowledge and skills to create beautiful lanyards using just two strings. Whether you’re making them for yourself or as gifts for others, the possibilities are endless.
Remember to have fun and experiment with different patterns, colors, and textures to make your lanyards truly unique. As you gain more experience, you’ll discover new techniques and develop your own style. So grab your strings, embrace your creative side, and get started on your lanyard-making journey today!
FAQs
Q: What is a lanyard?
A: A lanyard is a cord or strap worn around the neck or wrist to hold items such as keys, ID cards, or other small objects. It is a popular accessory used for convenience and security purposes.
Q: How do I start a lanyard with two strings?
A: To start a lanyard with two strings, follow these steps:
- Hold both strings together and fold them in half to create a loop.
- Secure the loop by tying a knot at the end, leaving a small tail.
- Arrange the strings so that two strings are on the left side and two on the right side.
- Take the leftmost string and cross it over the two middle strings, then bring it under the rightmost string.
- Take the rightmost string, cross it over the two middle strings, and bring it under the leftmost string.
- Repeat this weaving pattern until you reach the desired length.
- Tie a knot at the end to secure the lanyard.
Q: What materials can I use to make a lanyard?
A: Lanyards can be made from various materials such as nylon, polyester, cotton, and paracord. The choice of material depends on the desired strength, durability, and aesthetic appeal of the lanyard.
Q: Can I customize my lanyard?
A: Yes, you can customize your lanyard according to your preferences. You can choose the color, width, and material of the lanyard. Additionally, you can add custom logos, text, or designs through printing or embroidery.
Q: Where can I buy lanyards and lanyard accessories?
A: Lanyards and lanyard accessories can be purchased from various sources. Some popular options include online marketplaces, specialty stores, stationery shops, and promotional product suppliers. It is advisable to compare prices, quality, and customization options before making a purchase decision.