
The Fitbit Ionic is an innovative and feature-packed wearable device that can greatly enhance your fitness and health tracking. However, to unlock its full potential, you need to pair it with your phone. Pairing your Fitbit Ionic with your phone allows you to receive notifications, track your workout data in real-time, and even control your music playback right from your wrist.
In this article, we will guide you through the step-by-step process of pairing your Fitbit Ionic with your phone, regardless of whether you have an iPhone or an Android device. We will also address some common questions and concerns you may have about the pairing process. So, let’s get started and make the most of your Fitbit Ionic by seamlessly connecting it to your phone.
Inside This Article
- Overview of Fitbit Ionic
- Preparing Your Phone for Pairing
- Steps to Pair Fitbit Ionic with iPhone
- Steps to Pair Fitbit Ionic with Android Phone
- Conclusion
- FAQs
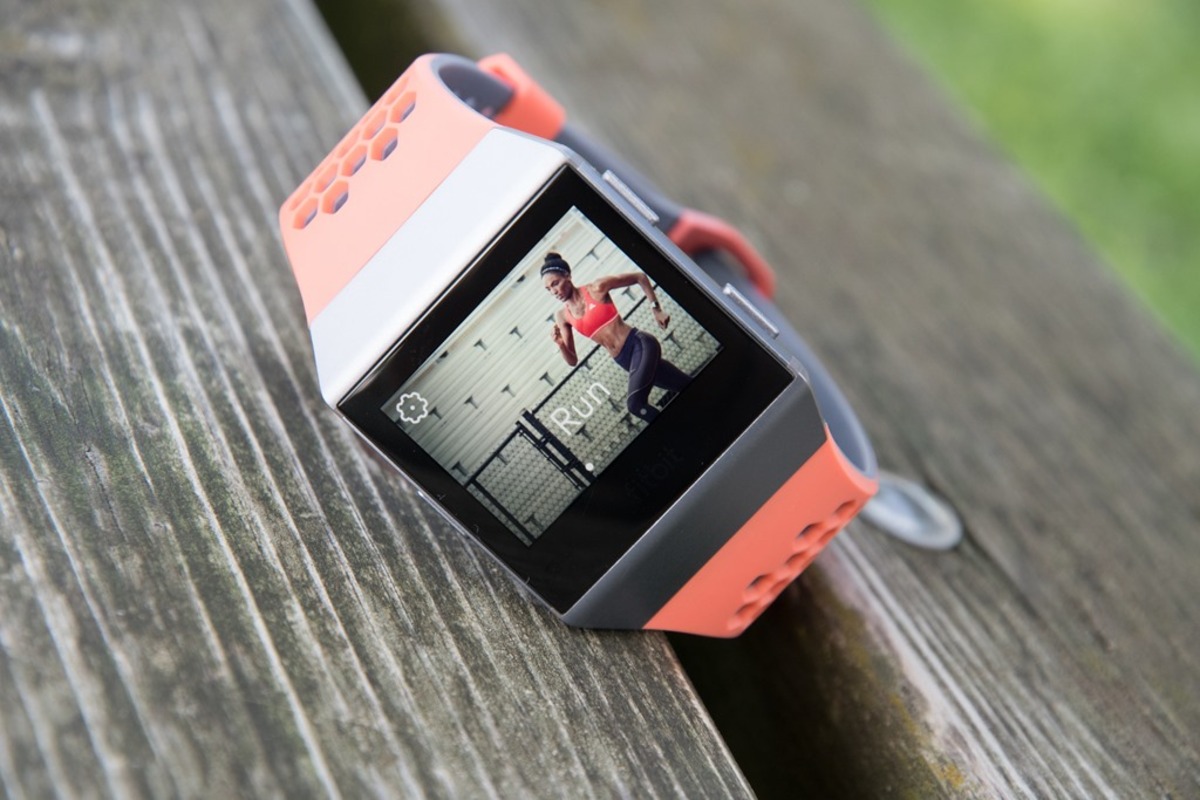
Overview of Fitbit Ionic
The Fitbit Ionic is a versatile and stylish smartwatch that offers a wide range of features to help you track your fitness and stay connected on the go. With its sleek design and customizable watch faces, the Ionic is not only a great fitness tracker but also a fashionable accessory.
One of the standout features of the Fitbit Ionic is its built-in GPS, which allows you to accurately track your outdoor runs, hikes, and bike rides without needing to carry your phone. This makes it a perfect companion for those who love to engage in outdoor activities.
In addition to GPS, the Fitbit Ionic also offers a heart rate monitor, sleep tracking, and personalized guided workouts. These features not only help you monitor your overall health and fitness but also provide insights and recommendations to help you reach your goals more effectively.
With its water-resistant design, the Fitbit Ionic is also suitable for swimming and can track your laps, duration, and calories burned in the pool. This makes it a fantastic option for those who like to incorporate swimming into their fitness routine.
When it comes to staying connected, the Fitbit Ionic has you covered. You can receive notifications for calls, texts, and calendar alerts right on your wrist, so you can stay in the loop even when your phone is out of reach. Additionally, the Ionic supports music streaming and onboard storage, allowing you to listen to your favorite tunes or podcasts during your workouts, without needing to carry your phone.
With its long battery life, the Fitbit Ionic can accompany you throughout the day, and even into the night, without needing frequent recharging. This is especially handy for those who lead an active lifestyle or travel frequently, as you won’t have to worry about running out of power when you need it most.
Overall, the Fitbit Ionic is a top-notch smartwatch that blends style, functionality, and convenience. Whether you’re a fitness enthusiast, a busy professional, or someone who simply values staying connected, the Fitbit Ionic has something to offer. Its impressive features and sleek design make it a standout choice in the wearable tech market.
Preparing Your Phone for Pairing
Before you can pair your Fitbit Ionic with your phone, you need to make sure your phone is ready for the pairing process. Follow these steps to ensure that your phone is properly prepared:
- Charge your phone: It is important to ensure that your phone has sufficient battery life before initiating the pairing process. Connect your phone to a charger and let it charge for a while to avoid any interruptions during the pairing process.
- Update your phone’s operating system: Keeping your phone’s operating system up to date is crucial for ensuring a smooth and seamless pairing experience. Open the Settings app on your phone and check for any available updates. If there are updates available, download and install them before proceeding.
- Enable Bluetooth: Bluetooth is the technology that allows your Fitbit Ionic to connect to your phone. Make sure that Bluetooth is enabled on your phone by going to the Settings app and navigating to the Bluetooth settings. Toggle the Bluetooth switch to the “On” position if it is not already enabled.
- Clear cache and restart your phone: Clearing the cache on your phone can help resolve any potential conflicts or issues that may arise during the pairing process. Go to the Settings app, find the Storage or Apps section, and clear the cache for any relevant apps. Once you have cleared the cache, restart your phone to ensure that any changes take effect.
- Remove any existing Fitbit devices: If you have previously paired a Fitbit device with your phone, it is recommended to remove it before attempting to pair the Fitbit Ionic. Open the Fitbit app on your phone, go to the Devices section, and remove any existing devices associated with your account.
By following these steps, you can ensure that your phone is properly prepared for pairing with the Fitbit Ionic. Taking the time to prepare your phone beforehand will help optimize the pairing process and enable a seamless connection between your Fitbit Ionic and your phone.
Steps to Pair Fitbit Ionic with iPhone
If you are the proud owner of a Fitbit Ionic and an iPhone, you’ll be pleased to know that setting up the pairing between the two devices is a breeze. By following just a few simple steps, you’ll have your Fitbit Ionic connected to your iPhone in no time. Here’s a step-by-step guide to help you get started:
1. Start by ensuring that your iPhone is running on the latest version of iOS. This is important as compatibility issues may arise if your iPhone is not up to date.
2. Next, open the App Store on your iPhone and search for the Fitbit app. Once you find it, tap on “Get” to download and install the app on your device.
3. Once the Fitbit app is installed, open it and tap on “Join Fitbit” to create a new account. If you already have a Fitbit account, simply log in using your existing credentials.
4. Follow the on-screen instructions to set up your Fitbit Ionic. Make sure to grant the necessary permissions for the app to access your location, notifications, and health data.
5. On your Fitbit Ionic, swipe down from the top of the screen and tap on the gear icon to enter the Settings menu.
6. In the Settings menu, scroll down and tap on “Bluetooth” to access the Bluetooth settings.
7. On your iPhone, go to the Settings app and tap on “Bluetooth.” Make sure that Bluetooth is turned on.
8. On your Fitbit Ionic, tap on “Pair” to initiate the pairing process. Your Fitbit Ionic will search for nearby devices.
9. On your iPhone, under the list of available devices, you should see your Fitbit Ionic. Tap on it to start the pairing process.
10. Follow the on-screen instructions on both your iPhone and Fitbit Ionic to complete the pairing process.
11. Once the pairing is successful, you’ll see a confirmation message on both devices.
Congratulations! Your Fitbit Ionic is now successfully paired with your iPhone. You can now enjoy the full functionality of your Fitbit Ionic and track your activities, monitor your sleep, receive notifications, and more, all from your iPhone.
Steps to Pair Fitbit Ionic with Android Phone
If you are an Android user and have recently purchased a Fitbit Ionic, you’ll be delighted to know that syncing it with your Android phone is a straightforward process. By following a few simple steps, you’ll have your Fitbit Ionic connected to your Android device in no time. Here’s how:
Step 1: Make sure that your Fitbit Ionic and your Android phone are both charged. It’s always a good idea to have enough battery power before starting the pairing process.
Step 2: Open the Google Play Store on your Android phone and search for “Fitbit.” Once you find the Fitbit app, click on the “Install” button to download and install it on your device. Alternatively, you can use this link to directly access the Fitbit app page on the Google Play Store.
Step 3: Launch the Fitbit app on your Android phone. Make sure that Bluetooth is enabled on your device by going to the Settings menu and toggling Bluetooth on.
Step 4: Follow the on-screen instructions in the Fitbit app to create a new account or log in to your existing account. If you’re setting up a new account, you’ll need to provide some basic information and agree to the terms and conditions.
Step 5: Once you’re logged in, tap on the “Account” icon in the bottom right corner of the app. This will take you to the account settings page.
Step 6: On the account settings page, select the option “Set Up a Device.” The app will then guide you through the process of setting up your Fitbit Ionic.
Step 7: Follow the on-screen instructions to choose your Fitbit device (in this case, the Fitbit Ionic) and make sure that it is set to “New.” The app will then start searching for nearby Fitbit devices to pair with.
Step 8: On your Fitbit Ionic, tap on the “Menu” button. Then, swipe left until you find the “Settings” option. Tap on “Settings” and then select “Bluetooth.” Make sure that Bluetooth is turned on.
Step 9: The Fitbit app will display a list of nearby Fitbit devices. Tap on your Fitbit Ionic when it appears on the list.
Step 10: The Fitbit app will now attempt to pair your Fitbit Ionic with your Android phone. Follow any additional on-screen prompts or instructions that may appear.
Step 11: Once the pairing process is complete, you’ll see a confirmation message on both your Fitbit Ionic and your Android phone.
Step 12: Congratulations! Your Fitbit Ionic is now successfully paired with your Android phone. You can now start tracking your activities, monitoring your fitness goals, and receiving notifications on your wrist.
Remember to keep your Fitbit Ionic and your Android phone in close proximity to maintain a stable connection. If you ever need to unpair or re-pair your Fitbit Ionic, you can do so through the Fitbit app settings.
Now that you know how to pair your Fitbit Ionic with your Android phone, you can make the most out of your fitness tracking device. Enjoy the seamless integration and take your fitness journey to the next level!
Conclusion
Pairing your Fitbit Ionic with your phone is a simple process that allows you to unlock the full potential of your fitness tracker. By connecting to your phone, you can easily track your activities, receive notifications, and access additional features and apps.
Remember to ensure that your Fitbit and phone are compatible, have the latest software updates, and are within close proximity to each other. Follow the step-by-step instructions provided by Fitbit to pair your devices successfully.
Once your Fitbit Ionic is paired with your phone, you can enjoy the convenience and functionality that comes with it. Stay motivated, stay connected, and make the most out of your fitness journey with the seamless integration between your Fitbit Ionic and your phone.
So, what are you waiting for? Take the first step towards a healthier and more active lifestyle by pairing your Fitbit Ionic with your phone today!
FAQs
1. How do I pair the Fitbit Ionic with my phone?
To pair your Fitbit Ionic with your phone, follow these steps:
- Ensure that your phone’s Bluetooth is turned on.
- Download and install the Fitbit app on your phone from the App Store (for iOS) or Google Play Store (for Android).
- Open the Fitbit app and create a new account or log in to your existing one.
- Tap on the “Account” icon at the bottom right of the app’s home screen.
- Select the option to “Set up a Device” and choose “Fitbit Ionic” from the list of Fitbit devices.
- Follow the on-screen instructions to pair your Fitbit Ionic with your phone. This typically involves entering a code that appears on the watch into the app.
- Once the pairing process is complete, your Fitbit Ionic will be connected to your phone, and you can start using it to track your fitness and receive notifications.
2. Can I pair my Fitbit Ionic with multiple phones?
Yes, you can pair your Fitbit Ionic with multiple phones. However, you can only have an active Bluetooth connection with one phone at a time. To switch the connection to a different phone, you will need to unpair the Fitbit Ionic from the current phone and follow the pairing process with the new phone.
3. Can I pair my Fitbit Ionic with both an iPhone and an Android phone?
Yes, the Fitbit Ionic is compatible with both iPhone and Android phones. You can pair and use the Fitbit Ionic with either operating system. Simply follow the steps mentioned in the first FAQ to pair your Fitbit Ionic with your phone, regardless of whether it is an iPhone or an Android phone.
4. Does the Fitbit Ionic require an internet connection to pair with my phone?
No, the Fitbit Ionic does not require an internet connection to pair with your phone. The pairing process is done solely via Bluetooth. However, to access additional features and sync your data, an internet connection is necessary. This can be either through Wi-Fi or your phone’s mobile data connection.
5. I’m having trouble pairing my Fitbit Ionic with my phone. What should I do?
If you’re encountering difficulties while pairing your Fitbit Ionic with your phone, here are a few troubleshooting steps you can try:
- Ensure that your phone’s Bluetooth is turned on and that your Fitbit Ionic is in pairing mode.
- Restart your phone and Fitbit Ionic.
- Make sure you have the latest version of the Fitbit app installed on your phone.
- Reset your Fitbit Ionic to factory settings and try pairing again.
- If the problem persists, consult the official Fitbit website or contact Fitbit customer support for further assistance.