
Convenience and fast transactions are all the rage these days, which is why we see more and more businesses embracing contactless payments. With the release of Fitbit Pay in 2017, Fitbit joined the ranks of tech companies that are helping to build a cashless society. If you have a Fitbit wearable (or if you’re planning to get one), Fitbit Pay is definitely something you should check out.
In this guide, we’ll discuss everything you need to know about Fitbit Pay, including how to set it up using Fitbit Wallet, how it works, where you can use it, and many more.
Also read: Best Money Transfer Apps With Low Exchange Fees
What Is Fitbit Pay?

Fitbit Pay is the mobile payment platform from Fitbit, one of the world’s leading wearable tech companies. It lets you pay on the go with just a tap of your Fitbit smartwatch or fitness band. Like all other contactless payment apps, Fitbit Pay uses near-field communication (NFC) to process payments without the need for cash.
What Devices Support Fitbit Pay?
A major difference between Fitbit Pay and other mobile payment apps is that you can’t download the former on your smartphone; it’s only compatible with Fitbit’s fitness bands and smartwatches.
When it launched in 2017, Fitbit was only available on the Fitbit Ionic, but the company has expanded its compatibility since then. Now, the app also works on all Fitbit wearables that have a built-in NFC chip. These include the Fitbit Versa 2, Fitbit Versa 3, Fitbit Sense, Fitbit Charge 4, and some Fitbit Versa and Fitbit Charge 3 smartwatches. You’ll know that your Versa watch is compatible with Fitbit Pay if you flip your watch over and see “Fitbit Pay” in the text around the heart rate sensor.
As for the Fitbit Charge 3, take off the bottom band, and see if the end of the tracker has “Fitbit Pay” printed on it. If it does, then it has support for the payment app.
Also read: Fitbit Sense vs Apple Watch 6: The Best Smartwatches Compared
Which Cards Does Fitbit Pay Accept?
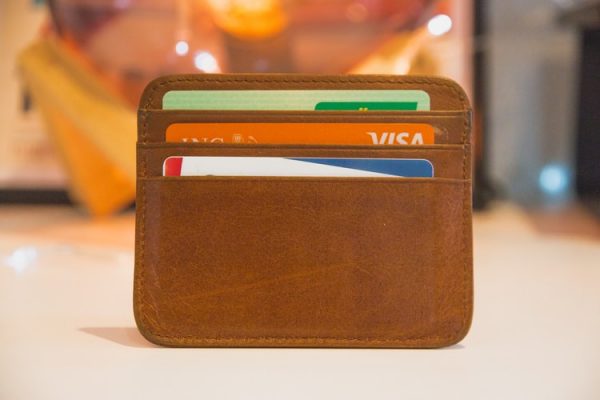
You can add Visa and Mastercard credit and debit cards to your Fitbit Pay account, but keep in mind that your bank has to be supported before you can do so. The platform lets you add up to six cards and choose a default card to use for payments. However, if you’re using Fitbit Charge 3 or Charge 4, you can only add up to five cards. Here are some of the banks whose cards you can use with the mobile payment app:
- AlaTrust Credit Union (Visa)
- Alliance Bank (Visa)
- American Express
- Bancorp Bank (Mastercard)
- Bank of America
- Bank of Southern California (Mastercard)
- Capital One (Credit)
- Chase Bank (Visa)
- Citizens Commerce National Bank (Visa)
- CNB Bank & Trust (Mastercard)
- Commerce Bank
- Family Savings Credit Union (Visa)
- First Bank Hampton (Mastercard)
- First State Bank & Trust
- FNB Bank (Visa)
- FOCUS Bank (Visa)
- Freedom Bank (Visa)
- Goodfield State Bank (Mastercard)
- Homestead Bank – Debit (Visa)
- Horizon Bank, SSB (Visa)
- International Bank of Commerce (with Prepaid) (Visa)
- Latino Community Credit Union (Visa)
- Local Government Federal Credit Union (Visa)
- Marine Bank (Visa)
- Monterey Credit Union (Visa)
- National Bank (Visa)
- North Central Bank
- Pathway Bank (Visa)
- Peoples Bank (Mastercard)
- People’s Bank of Commerce
- PNC (Visa)
- Progressive National Bank (Visa)
- Providence Bank (Visa)
- RBFCU (Mastercard)
- River Bank & Trust (Visa)
- Studio Bank (Visa)
- SunTrust (Mastercard)
- Triad Bank (Mastercard)
- US Bank
- United Community Bank (Visa)
- United Educators Credit Union (Mastercard)
- VACU (Mastercard)
- Wells Fargo
- West Community
- Independent Bank (Visa)
Check out Fitbit’s website for a full list of supported banks, which the company updates every now and then. If you don’t see your bank on the list yet, check back again after a few weeks or months.
Where Can You Use Fitbit Pay?
Payments through Fitbit Pay are accepted in the following countries:
- United States
- Australia
- Austria
- Belarus
- Belgium
- Bulgaria
- Canada
- Chile
- Costa Rica
- Croatia
- Czech Republic
- Denmark
- Dominican Republic
- El Salvador
- Estonia
- Finland
- France
- Germany
- Greece
- Guatemala
- Honduras
- Hungary
- Iceland
- Ireland
- Italy
- Japan
- Kuwait
- Latvia
- Liechtenstein
- Lithuania
- Luxembourg
- Malta
- Mexico
- Netherlands
- New Zealand
- Nicaragua
- Norway
- Poland
- Portugal
- Qatar
- Republic of Cyprus
- Romania
- Saudi Arabia
- Singapore
- Slovakia
- Slovenia
- South Africa
- Spain
- Sweden
- Switzerland
- Taiwan
- Thailand
- United Arab Emirates
- United Kingdom
Not all banks in these countries have support for the app, and others (like Costa Rica and Dominican Republic) only have one bank that you can use the contactless payment app with. Thus, check the full list of supported banks first before going through with transactions.
You can also use Fitbit Pay to pay for transit in some of these countries. If you’re in the US, you can use it to pay on New York MTA’s One Metro New York, Florida Miami-Dade Transit’s Metrorail service, Chicago Transit Authority buses and trains, or on Portland’s TriMet, C-TRAN, and Portland Streetcar.
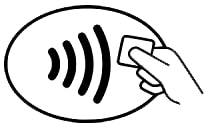
Various merchants also accept payments through the app. Though there isn’t an official list of supported retailers, pretty much any store that accepts contactless payments also accepts Fitbit Pay. You’ll know if a store accepts contactless payments when you see this symbol on the point-of-sale (POS) terminal:
How to Set Up Fitbit Pay
To set up Fitbit Pay, you’ll need to download the Fitbit app on your smartphone. Then, in the Wallet section of the app, add at least one debit or credit card from an eligible bank. Here’s how:
- On your phone, launch the Fitbit app. Make sure that your smartwatch is nearby when you do so.
- Select the Fitbit device that you’d like to use with Fitbit Pay, and then tap on the Fitbit Wallet tile.
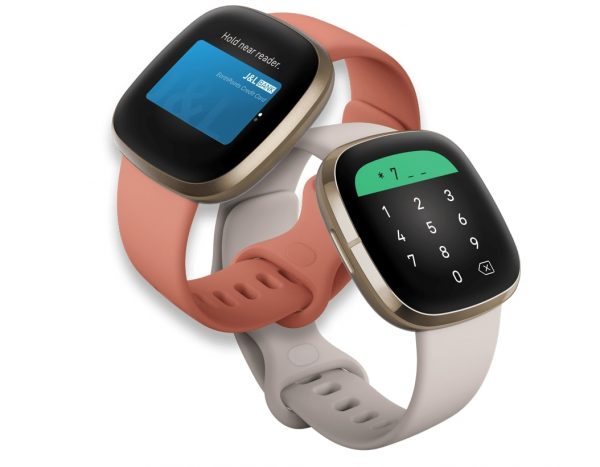
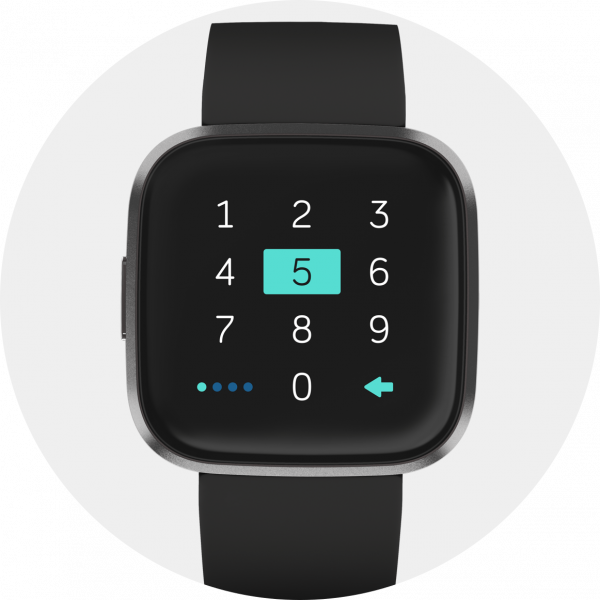
- If you haven’t yet, set up a four-digit PIN to authorize payments on your smartwatch. Then, set up a Fitbit Pay passcode or touch ID for the phone you’ve paired with your wearable.
- Enter your credit or debit card’s number, expiration date, and security code to add it to your account. Afterward, you’ll be asked to provide your name and address as well.
- Tap on the “Agree” button after reading the terms and conditions to continue with the setup process. Note that some banks might ask for additional verification before you can connect your card to your account. Don’t worry, though, as these usually only take a couple of minutes. Most of the time, banks will simply ask you to send a short verification code through text.
- Turn on Fitbit Pay notifications for your phone by following the on-screen instructions.
And there you have it! You’ve added a payment card and completed the setup process. Now, you can use the app on your smartwatch when making purchases.
Download the Fitbit app on Android
Download the Fitbit app on iOS
How to Pay With Fitbit Pay

To make a payment using the platform, simply follow these steps:
1. Launch the Fitbit Pay screen on your wearable.
How you launch the Fitbit Pay screen will depend on the Fitbit device you have:
- For Fitbit Ionic, Fitbit Versa, and Fitbit Versa 2: If you have Fitbit Pay as a button shortcut, activate the app by tapping on and holding the button for two seconds. If you don’t have it as a button shortcut, access the notifications panel by swiping down the top of your screen. After that, open the Control Center by swiping down once more. Tap on the Fitbit Pay icon.
- For Fitbit Sense and Fitbit Versa 3: Tap on the Wallet app to launch it. If you want quicker access to your Fitbit Pay app, you can set it as a button shortcut on your watch. You can do so by opening the Settings app, going to the Shortcuts tab, then adding Fitbit Pay as a button shortcut.
- For other Fitbit watches and bands: Launch the Fitbit Pay app by pressing and holding the left button for two seconds.
2. Enter your PIN.
If prompted, type in your four-digit Fitbit PIN to authorize the payment. You usually have to enter your PIN if a full day has passed since you last used Fitbit Pay or if you’re using the platform for the first time since putting your smartwatch back on. Otherwise, you might not have to do this step.
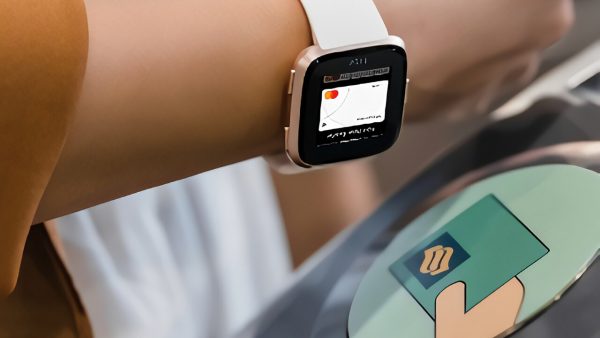
3. Hold your wrist near the POS system to make a payment.
If you’re going to use your default card to pay, simply hold your smartwatch near the POS system. Remember to place the watch face towards the reader.
You can also use a different card if you’ve connected multiple ones to your Fitbit Pay account. Here’s how:
- For Fitbit Ionic, Fitbit Versa, and Fitbit Versa 2: Swipe up until you find the card you want to use. Then, place your device near the POS terminal to process the payment.
- For Fitbit Sense and Fitbit Versa 3: Swipe up, and when you see the card you want to use, tap on it. Place your device near the POS terminal.
- For Fitbit Charge 3 and Fitbit Charge 4: Tap on your screen until you find the card you want to use. Then, place your device near the POS terminal.
Your Fitbit watch will vibrate, and you’ll see a confirmation message on your screen once payment has been done.
If you’re in Australia (or if you’re using a card from an Australian bank), you can just skip the first three steps. Instead, simply hold your Fitbit watch near the POS terminal to make a payment. Again, depending on your watch’s settings, you might have to enter your four-digit Fitbit PIN to authorize the payment. If your purchase amounts to more than 100 AUD, the cashier might ask you to enter your card’s PIN on the POS terminal.
Checking Your Fitbit Pay Transactions
If your bank allows it, you can also check your three most recent Fitbit Pay transactions on the Fitbit app. To do so, follow these steps:
- Launch the Fitbit app on your phone.
- Tap on the Today icon, and then on your profile photo.
- Select your device image in the upper-left corner of the screen.
- Go to the Wallet section by tapping on the Wallet tile.
- Select a card you connected to your Fitbit wearable.
- Swipe up, and the app will show you the three latest transactions you’ve made using Fitbit Pay.
Is Fitbit Pay Free?
Together with the Fitbit Wallet, Fitbit Pay is free to use. You don’t have to pay any fee to link your debit and credit cards to your account. The platform also won’t charge you anything for using the platform to pay with your cards. That said, it’s still best to check whether your bank charges a fee for using contactless payment methods. Also, depending on your bank’s policy, you might have to pay foreign transaction fees when you use the app internationally.
While paying with Fitbit Pay usually won’t cost you anything, keep in mind that there are still limits to using this mobile payment app. In the US, some banks limit the amount you can pay through Fitbit Pay (and other contactless payment apps) to 50 USD. In the UK, it’s set to 45 GBP regardless of the bank.
Is Fitbit Pay Secure?
With phishing and other money scams being rampant nowadays, security is a top concern when it comes to mobile payment apps. After all, no one wants their hard-earned money stolen from them, right? Luckily, Fitbit Pay uses multiple security features to keep your money safe from all sorts of scams.
For starters, the app uses an industry-standard tokenization platform that hides your card details from retailers and even from Fitbit. With this technology, a one-time, randomized code is sent to the POS system every time you make a transaction. That way, the app can ensure that your debit or credit card’s real number is masked and kept safe. On top of that, you also need to set up a four-digit PIN to authorize payments using Fitbit Pay.
Should you lose your Fitbit device, you don’t need to worry about strangers getting ahold of the accounts you’ve linked to your account. You can just remove or deactivate the cards through the Fitbit app. To do so, go to the Wallet section of the app, select a card, and tap on Remove Card.
But what if you lose both your Fitbit watch and your phone? In that case, you can access your Fitbit dashboard by visiting fitbit.com through a web browser. Click on the gear icon then on your device image. Then, select Fitbit Pay, and click on Deactivate Fitbit Pay. This deletes all the cards you’ve linked to your account.
You also have the option to suspend your cards if you only misplaced your Fitbit watch. This doesn’t delete your cards from your Fitbit Wallet, but it prohibits anyone from using them to make payments.
What People Are Saying About Fitbit Pay
The customer reviews for Fitbit Pay are generally good. Most users agree that it’s a much more convenient way to pay for your purchases, especially if you don’t have your phone or wallet with you. It’s also much faster than paying with a mobile payment app on your phone since it doesn’t require much fumbling with a device. For the most part, you just need to wave your smartwatch over a POS terminal, and you’re good to go.
That said, user experience differs per country, but it’s mostly because of a lack of supported banks in some places. Customers in the US find Fitbit Pay more useful since the platform supports significantly more US banks. In other countries, however, fewer customers find a use for the app since only a handful of banks is supported. That said, most users who manage to find a supported bank have reported that the payment app works seamlessly and that they rarely, if at all, experience issues. And most importantly, there are no reports of users getting scammed because of this mobile payment app.
An issue that some users encounter, though, is that terminals reject their payments when they use Fitbit Pay. If you encounter this, try deactivating and reactivating your card through the app to resolve the issue.
Fitbit Pay Alternatives
If you’re looking for a mobile payment app that’s compatible with a wider range of devices, then Fitbit Pay might not be the best choice. Luckily, there are similar apps that you can use on both smartphones and smartwatches. Here are some of the best Fitbit Pay alternatives:
1. Samsung Pay
Compared to Fitbit Pay, Samsung Pay boasts a much longer list of supported banks — both in the US and abroad. It’s compatible with American Express, Mastercard, Visa, and Discover cards, so you’ll likely be able to use Samsung Pay whatever your bank is. Plus, not only does it support NFC payments, but it also works for MST payments.
Currently, Samsung Pay is only compatible with Samsung’s flagship, mid-range, and budget phones. You can also download the app on a non-Samsung phone, but it has to be running on Android 6.0 or higher and paired with a Samsung smartwatch.
To get started with Samsung Pay, you first need to set up your preferred verification method. You can use the iris scanner (if you have a Galaxy Note9, S9, S9+, Note8, S8, or S8+), fingerprint reader, or simply set up a PIN. Once that’s done, you can then add up to 10 credit and/or debit cards to your account.
Samsung Pay is also free of charge. Plus, you earn rewards every time you use Samsung Pay for your transactions.
Download Samsung Pay on Android
2. Apple Pay
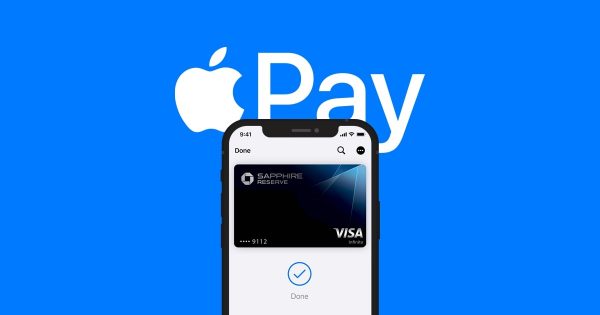
If you’re an iOS user, then you might want to try out Apple Pay. It’s supported in over 40 countries and is compatible with pretty much any bank in the US. With Apple Pay, you can add up to 12 debit and credit cards if you have an Apple Watch Series 3 or later and iPhone 8/8 Plus or later. If you have an earlier Apple Watch or iPhone, you can link up to eight cards. You can also use Apple Pay on a Mac or an iPad.
You can’t download Apple Pay from the Apple App Store since it’s already pre-installed on compatible devices. To get started, simply open the Wallet app and tap on the “+” icon. Then, add a card by following the on-screen instructions, and wait for your bank or issuer to verify your card information. After that, tap on Next, and you can start paying with Apple Pay.
Also read: Samsung Pay vs Apple Pay: Which is Better?
3. Google Pay
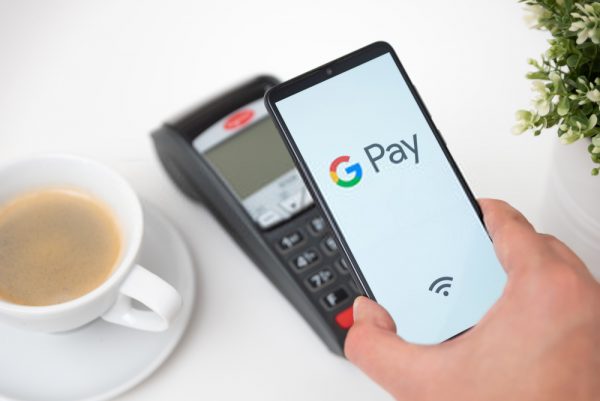
Unlike with Samsung Pay and Apple Pay, you can use Google Pay whether you have an Android or an iOS phone, provided that it’s running on Android 5.0 or later and iOS 11 or later. It’s also compatible with any smartwatch that’s running on Wear OS. Besides making contactless payments, you can also use Google Pay to shop online, purchase Google products, send money to friends and family in the US, and automatically fill in forms on Chrome. However, if you’re using an iOS device, you can’t use Google Pay for transactions in physical stores.
What’s great about Google Pay is that you can link as many cards as you want to your account. It’s also compatible with almost any bank in the US and is available in 40 countries. To set it up, you only need to sign in to pay.google.com and add a payment method. Make sure that you’ve enabled NFC on your phone before you make transactions using Google Pay.
Also read: Samsung Pay vs Google Pay: Which Is Better?
Download Google Pay on Android
Final Thoughts
If you have a Fitbit device that has a built-in NFC, then you should definitely consider using Fitbit Pay. It’s fast, convenient, and—most importantly—secure. One gripe, though, is that because it’s a relatively new platform, it isn’t as widely available as other mobile payment apps, like Samsung Pay, Apple Pay, and Google Pay. However, the company is working towards expanding its list of supported banks. So if you’re itching to try out Fitbit Pay but your bank isn’t supported yet, you can expect that it will be soon.