
Are you experiencing issues with your wiring harness connector? Don’t worry, you’re not alone. A faulty wiring harness connector can cause a myriad of problems, from intermittent electrical issues to complete system failures. Fortunately, with a bit of guidance and some basic tools, you can repair a wiring harness connector on your own. In this article, we will guide you through the process, step by step, ensuring that you are equipped with the knowledge and skills needed to tackle this task. Whether you’re a seasoned DIY enthusiast or a beginner with little experience in automotive repairs, our comprehensive guide will help you troubleshoot and fix your wiring harness connector, restoring your vehicle’s electrical system to full functionality in no time.
Inside This Article
- Understanding Wiring Harness Connectors
- Common Issues with Wiring Harness Connectors
- Tools and Materials Needed for Repair
- Step-by-Step Guide to Repairing a Wiring Harness Connector
- Final Thoughts and Tips
- Conclusion
- FAQs
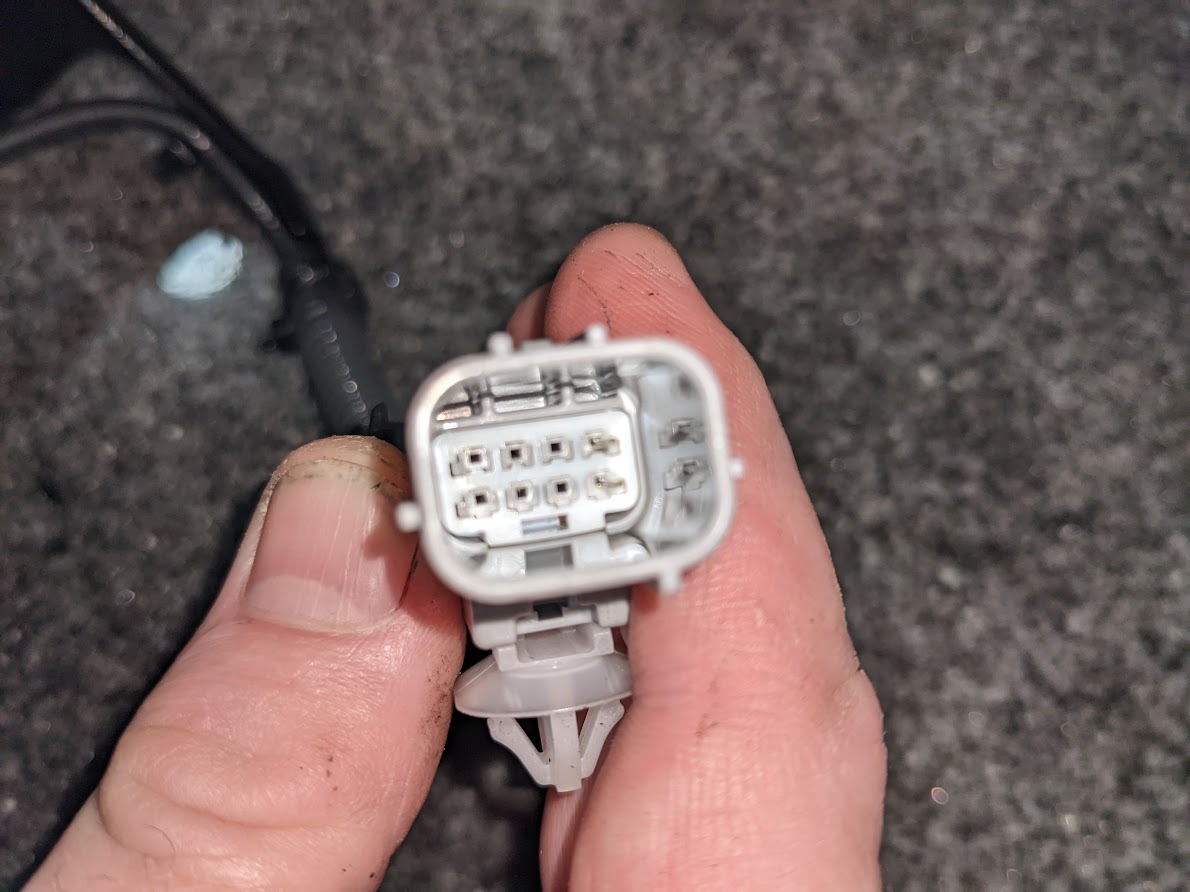
Understanding Wiring Harness Connectors
Wiring harness connectors are essential components in modern electrical systems, effectively connecting various electrical components and devices within a vehicle or electronic device. These connectors act as a link between wires, allowing for the transmission of electrical signals and power.
Wiring harness connectors come in a variety of shapes, sizes, and configurations, depending on the specific application and requirements. They are commonly made from durable materials such as plastic or metal, ensuring reliable and secure connections.
One of the key purposes of wiring harness connectors is to simplify the installation and maintenance of electrical systems. Rather than directly soldering wires together, connectors allow for a more modular and accessible approach, making it easier to replace or repair individual components without affecting the entire system.
Wiring harness connectors also provide important features for efficient and safe electrical connections. These features include locking mechanisms to prevent accidental disconnections, waterproof or weatherproof seals to protect against moisture and corrosion, and proper insulation to prevent short circuits or electrical hazards.
Understanding the different types of wiring harness connectors is essential for efficient repairs or modifications to electrical systems. Connectors can vary in terms of their pin count, shape, and specific application. For example, some connectors are designed for power transmission, while others are specialized for audio or data signals.
Some common types of wiring harness connectors include blade connectors, bullet connectors, pin connectors, and Deutsch connectors. Each type has its own unique design and functionality, catering to specific electrical needs.
It’s important to note that wiring harness connectors are not limited to automotive applications. They are also commonly used in various industries such as aerospace, telecommunications, and consumer electronics.
Common Issues with Wiring Harness Connectors
Wiring harness connectors play a crucial role in the electrical system of a vehicle by connecting various wires and components. However, like any other part of the vehicle, these connectors can develop issues over time. It’s important to be aware of these common issues so that you can address them promptly and prevent further damage. Here are some of the most common problems you might encounter with wiring harness connectors:
1. Corrosion: One of the most prevalent issues with wiring harness connectors is corrosion. Moisture, dirt, and other contaminants can enter the connector housing, causing the metal contacts to corrode. Corrosion can disrupt the flow of electrical current, leading to poor connectivity and even complete failure of the circuit.
2. Loose or Damaged Pins: Another common problem is loose or damaged connector pins. Pins can become loose due to vibration or improper installation, resulting in poor contact. Additionally, pins can get bent, broken, or corroded, causing intermittent or no electrical connection at all.
3. Frayed or Broken Wires: Wiring harness connectors often have multiple wires connected to them. Over time, these wires can become frayed, damaged or broken due to wear and tear, heat, or incorrect handling. This can lead to loss of electrical connectivity and even short circuits.
4. Connector Housing Damage: The connector housing, which protects the internal components, can also get damaged. It can crack, break, or deform due to accidents, rough handling, or extreme temperatures. A damaged housing can expose the wires and pins to further damage and increase the risk of electrical issues.
5. Poor Crimping or Soldering: Sometimes, poor crimping or soldering of the wires within the connector can cause problems. Insufficient crimping or soldering can lead to weak connections, intermittent connectivity, and even overheating. This issue is more common in aftermarket or poorly manufactured connectors.
6. Incompatible Connectors: When replacing a wiring harness connector, it’s important to use a compatible connector that matches the specifications of the original. Using an incompatible connector can lead to mismatched wiring, improper connectivity, and potential damage to the electrical system.
It is important to address these common issues with wiring harness connectors promptly to avoid further complications and ensure the smooth functioning of the vehicle’s electrical system. Regular inspection and maintenance can help detect and resolve these problems in a timely manner. If you’re unsure about tackling these issues yourself, it’s always best to consult a professional automotive electrician or mechanic to ensure proper repair and prevent any potential damage.
Tools and Materials Needed for Repair
When it comes to repairing a wiring harness connector, having the right tools and materials is crucial. Here is a list of the essential items you will need to successfully complete the repair:
- Screwdriver set: A set of screwdrivers with various sizes and types will be necessary for removing screws and accessing the connector.
- Wire cutters or strippers: These tools are used to cut and strip the wire insulation, allowing you to make clean connections.
- Electrical tape: This is an essential item for insulating and protecting the repaired wire connections.
- Heat shrink tubing: Heat shrink tubing provides additional protection for repaired wires. When heated, it shrinks and forms a tight seal around the wire, preventing moisture and other contaminants from entering.
- Soldering iron: If the wiring harness connector requires soldering, a soldering iron will be needed to melt solder and create a secure connection.
- Solder wire: This is the metal alloy used for soldering. Make sure to use a solder wire with a suitable flux core for better conductivity and stability.
- Wire connectors: Depending on the nature of the repair, you may need wire connectors such as butt connectors, crimp connectors, or bullet connectors. These connectors are used to join wires together securely.
- Multimeter: A multimeter is a versatile tool that can help you troubleshoot electrical issues and test for continuity, voltage, and resistance.
- Heat gun: If you’re using heat shrink tubing, a heat gun helps in shrinking the tubing evenly and quickly.
- Electrical contact cleaner: Sometimes, the issue with a wiring harness connector can be caused by dirt, dust, or corrosion. Electrical contact cleaner can help remove any residue and improve the connection.
Having these tools and materials readily available will ensure that you have everything you need to successfully repair a wiring harness connector. It’s always a good idea to familiarize yourself with the specific requirements of your repair before starting, as some repairs may require additional or specialized tools.
Step-by-Step Guide to Repairing a Wiring Harness Connector
When it comes to troubleshooting electrical issues in your vehicle, a faulty wiring harness connector can be a common culprit. Fortunately, repairing a wiring harness connector is a task that can be accomplished with some basic tools and a little patience. In this step-by-step guide, we will walk you through the process of repairing a wiring harness connector.
1. Identify the Problem: The first step is to identify which specific connector in the wiring harness is causing the issue. This can usually be determined by the symptoms you are experiencing or a visual inspection of the connectors.
2. Gather the Necessary Tools and Materials: Before you begin the repair, it’s important to gather all the tools and materials you will need. This may include wire cutters, wire strippers, soldering iron, solder, heat shrink tubing, electrical tape, and a multimeter for testing.
3. Disconnect the Battery: To ensure your safety and prevent any potential electrical damage, it’s essential to disconnect the vehicle’s battery before working on the wiring harness connector. This will prevent any accidental short circuits or electrical shocks.
4. Cut and Strip the Wires: Once the battery is disconnected, carefully cut the wires on either side of the damaged connector. Use wire strippers to remove the insulation from the newly exposed wire ends, ensuring a clean and smooth surface for the repair.
5. Prepare the Repair Materials: If the wires are in good condition, you may only need to solder them together. However, if the wires are damaged or corroded, you may need to strip off a longer section and use heat shrink tubing or electrical tape for added protection.
6. Solder the Wires: Heat up your soldering iron and apply solder to the exposed wire ends. Make sure the wires are securely joined, and the solder has completely melted and formed a strong bond. Avoid using excessive heat, as it can damage the wires or surrounding components.
7. Insulate the Connection: After soldering, slide heat shrink tubing over the repaired connection. Use a heat gun or lighter to apply heat evenly, causing the tubing to shrink and create a tight seal. If heat shrink tubing is not available, you can wrap the connection with electrical tape for insulation.
8. Test the Repair: Once the repair is complete, it’s important to test the connection to ensure it is functioning correctly. Use a multimeter to check for continuity and confirm that electrical signals are properly transmitted.
9. Reconnect the Battery: With the repair successfully tested, it’s time to reconnect the vehicle’s battery. Ensure all wires are securely connected and double-check that no other electrical components were affected during the repair process.
10. Perform a Final Inspection: Once the battery is connected, perform a thorough inspection of the repaired wiring harness connector. Look for any signs of loose connections, exposed wires, or other potential issues. Address any problems immediately to prevent further complications or electrical malfunctions.
By following this step-by-step guide, you can tackle the task of repairing a wiring harness connector with confidence. However, if you are unsure of your repair skills or the extent of the damage, it’s always best to consult a professional automotive electrician for assistance.
Final Thoughts and Tips
Repairing a wiring harness connector can be a complex task, but with the right tools and know-how, it is definitely doable. Here are some final thoughts and tips to keep in mind:
1. Take your time: Rushing through the repair process can lead to mistakes. Make sure to double-check your work at each step and take your time to ensure everything is properly connected and secured.
2. Practice proper safety precautions: When working with electrical components, it’s important to prioritize safety. Always disconnect the power source before working on a wiring harness connector to avoid any risk of electric shock.
3. Use the correct tools: Investing in a quality set of electrical tools is essential for a successful repair. Make sure you have wire strippers, crimping pliers, heat shrink tubing, and a multimeter to accurately test the connections.
4. Test your repairs: After completing the repair, it’s crucial to test the wiring harness connector to ensure everything is functioning properly. Use a multimeter or test light to check for continuity and proper voltage.
5. Maintain good documentation: Keep a record of any repairs you make on the wiring harness connector. This will help you track any recurring issues and identify patterns over time.
6. Seek professional help if needed: If you encounter difficulties during the repair process or if the issue persists even after your repair attempts, it’s always a good idea to seek the assistance of a professional. They have the expertise and knowledge to diagnose and fix more complex wiring problems.
Remember, every wiring harness connector repair may present unique challenges, so it’s important to approach each task with patience and careful attention to detail. By following the proper guidelines and taking the necessary precautions, you can successfully repair a wiring harness connector and ensure the optimal functioning of your electronic devices.
Conclusion
In conclusion, understanding how to repair a wiring harness connector is a valuable skill that can save you time and money. By following the steps outlined in this article, you can easily identify and fix any issues with your wiring harness connector. Remember to assess the damage, gather the necessary tools, remove the damaged connector, and install a new one properly. Additionally, always prioritize safety by disconnecting the power source before starting any repair work.
By mastering this process, you can confidently tackle any wiring harness connector repair in the future. Whether it’s a loose connection, damage due to wear and tear, or a faulty connector, you now have the knowledge to address the issue effectively. Taking the time to repair your wiring harness connector not only ensures the proper functioning of your electrical systems, but also prolongs the lifespan of your devices or equipment. So don’t hesitate to get started on repairing your wiring harness connector today!
FAQs
1. Can I repair a wiring harness connector myself?
Yes, it is possible to repair a wiring harness connector yourself. However, it requires some knowledge and experience in handling electrical connections. If you are not confident in your abilities, it is best to consult a professional to avoid causing further damage.
2. What tools do I need to repair a wiring harness connector?
To repair a wiring harness connector, you will need a few basic tools such as wire cutters, wire strippers, crimping tool, heat shrink tubing, electrical tape, and a soldering iron. These tools will help you properly cut, strip, and connect the wires in the connector.
3. How do I identify a damaged wiring harness connector?
There are a few signs that indicate a damaged wiring harness connector. These include intermittent issues with the electrical system, flickering lights, loose connection, or physical damage to the connector itself. If you notice any of these signs, it is essential to inspect and repair the connector promptly.
4. Can I replace a connector in a wiring harness?
Yes, it is possible to replace a connector in a wiring harness. This can be done by carefully removing the damaged connector from the wires and attaching a new connector using appropriate tools and techniques. It is crucial to make sure the replacement connector is compatible with the wiring harness and properly secured to ensure a reliable connection.
5. When should I consider replacing the entire wiring harness instead of repairing a connector?
In some cases, it may be more practical to replace the entire wiring harness instead of repairing a single connector. This is usually recommended if the wiring harness is old, worn out, or damaged in multiple areas. It is best to consult a professional to assess the overall condition of the wiring harness and determine the most suitable course of action.