
Are you someone who constantly forgets important tasks or events? Don’t worry, your iPhone and iPad have got your back! With their built-in reminder feature, you can easily set reminders for anything and everything. Whether it’s a project deadline, a doctor’s appointment, or simply picking up groceries, setting reminders on your iPhone and iPad is quick and hassle-free.
In this article, we will guide you through the simple steps to set reminders on your iPhone and iPad. We’ll cover everything from accessing the reminders app, setting due dates and times, and even adding notes and alerts to ensure you never miss a thing. So, grab your iPhone or iPad, and let’s dive right in to maximize your productivity and stay on top of your schedule!
Inside This Article
- Setting Up Reminders – Enabling Reminders on iPhone – Enabling Reminders on iPad
- Creating Reminders- Adding a Reminder- Setting the Date and Time for Reminders
- Organizing Reminders: Creating Reminders Lists, Adding Subtasks to Reminders
- Managing Reminders- Marking Reminders as Complete- Editing or Deleting Reminders
- Conclusion
- FAQs
Setting Up Reminders – Enabling Reminders on iPhone – Enabling Reminders on iPad
Reminders are a useful feature on your iPhone and iPad that help you stay organized and remember important tasks. Whether it’s a simple to-do list or a reminder to pick up groceries, setting up reminders ensures that you won’t forget anything important. Here’s how you can enable and set up reminders on your iPhone and iPad.
Enabling Reminders on iPhone:
To start using reminders on your iPhone, make sure the Reminders app is enabled. Follow these simple steps:
- Open the Settings app on your iPhone.
- Scroll down and tap on “Reminders.”
- Toggle the switch next to “Allow Notifications” to enable reminders.
- Optionally, you can also customize the notification settings by tapping on “Show Previews” and selecting your preferred options.
Once you have enabled reminders on your iPhone, you can proceed to set up individual reminders using the Reminders app or through Siri.
Enabling Reminders on iPad:
Enabling reminders on your iPad is similar to the process on the iPhone. Here’s how you can do it:
- Open the Settings app on your iPad.
- Scroll down and tap on “Reminders.”
- Toggle the switch next to “Allow Notifications” to enable reminders.
- Just like on the iPhone, you can customize your notification preferences by tapping on “Show Previews.”
Once you have enabled reminders on your iPad, you’ll be able to make use of reminders to stay organized and on top of your tasks.
Now that you have enabled reminders on both your iPhone and iPad, let’s proceed to learn how to set up reminders using the Reminders app or Siri.
Creating Reminders- Adding a Reminder- Setting the Date and Time for Reminders
Setting reminders on your iPhone or iPad is a handy way to stay organized and make sure you don’t forget important tasks or events. Whether you need to remember to pick up groceries, pay bills, or attend a meeting, the reminders feature allows you to stay on top of your schedule. In this article, we will guide you through the process of creating reminders, adding specific tasks, and setting the date and time for your reminders.
To create a new reminder, you have a couple of options. One way is to use Siri, your virtual assistant. Simply activate Siri by holding down the home button or saying “Hey Siri,” and then say something like, “Create a reminder.” Siri will prompt you to specify the task and will automatically add it to your reminders list.
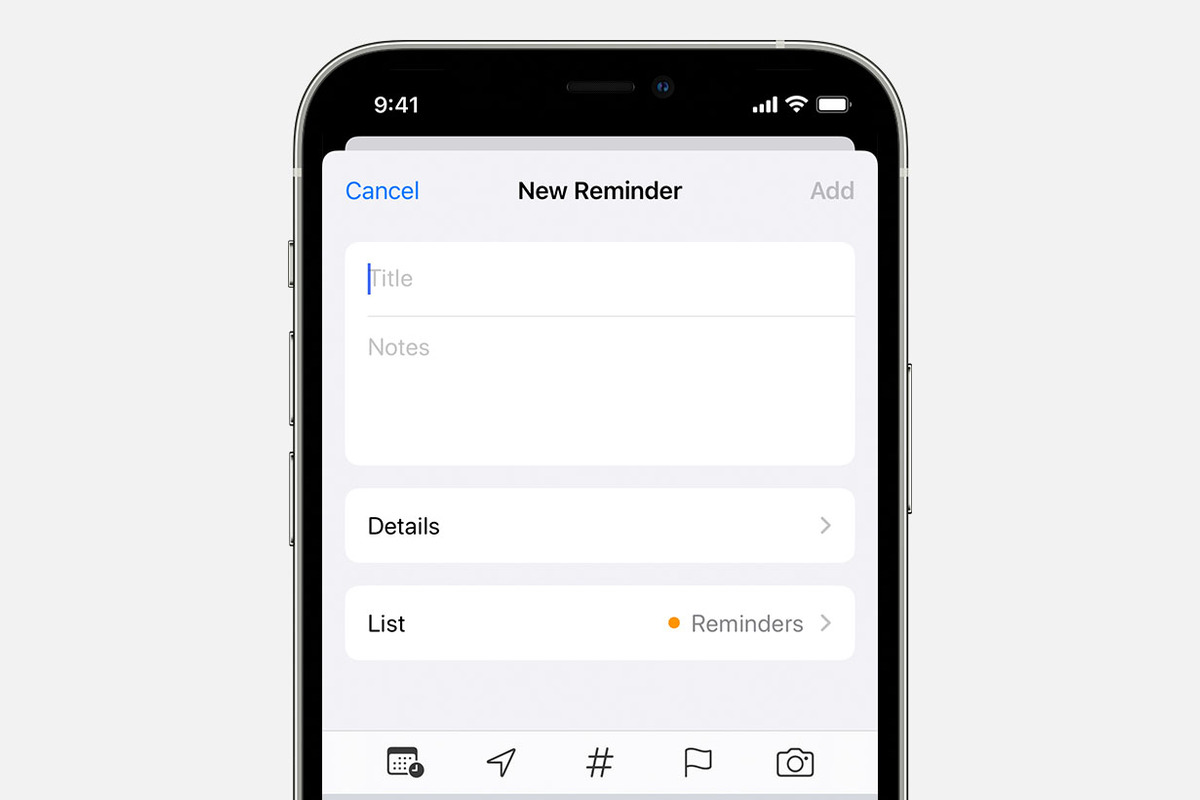
An alternative way to create reminders is by using the built-in Reminders app. Open the app, and you’ll see a list of your existing reminders. To add a new reminder, tap on the “+” button at the top right corner of the screen. A blank text field will appear, allowing you to enter the task you want to be reminded about.
Once you’ve added a reminder, the next step is to set the date and time for it. To do this, tap on the reminder you just created. You’ll be taken to a screen where you can see all the details of the reminder. Look for the section that says “Remind Me On a Day.” Tap on it, and a menu will appear where you can choose the date and time for your reminder.
There are different options to set the date and time. For instance, you can select a specific date by tapping on the calendar icon and choosing the desired date. If you want to set a specific time, you can tap on the clock icon and select the hour and minute for your reminder.
In addition to setting reminders for a specific day and time, you can also choose other options. For example, you can set a reminder to repeat daily, weekly, or monthly if it’s a task you need to do on a regular basis. You can also set a reminder to remind you at a specific location by tapping on the “Remind Me at a Location” option and selecting a designated place.
Once you’ve set the date, time, and preferences for your reminder, simply tap “Done.” Your reminder will be saved, and you will receive a notification at the specified time and date. If you need to edit the reminder or make any changes, you can always go back to the Reminders app, find the reminder, and modify it as needed.
Now that you know how to create reminders, add tasks, and set the date and time, you can start using this feature to stay organized and never forget important appointments, events, or to-do items on your iPhone or iPad. Take advantage of the reminders feature, and let your device help you stay on top of your busy schedule.
Organizing Reminders: Creating Reminders Lists, Adding Subtasks to Reminders
Keeping your reminders organized is essential for staying on top of your tasks and deadlines. With your iPhone or iPad, you have the flexibility to create reminders lists and add subtasks to existing reminders. This allows you to categorize your tasks and break them down into smaller, manageable steps. Let’s explore how to effectively organize your reminders.
Creating Reminders Lists
Creating separate reminders lists is a great way to group related tasks together. Whether it’s a personal to-do list, work-related tasks, or a shopping list, having different lists helps you keep your tasks organized and easily accessible. Here’s how to create a new reminders list:
- Open the Reminders app on your iPhone or iPad.
- Tap on the “Add List” button at the bottom of the screen.
- Enter a name for your new reminders list.
- Tap “Done” to finish creating the list.
Now, you have a dedicated list where you can add reminders specific to that category.
Adding Subtasks to Reminders
If you have a complex task that requires multiple steps, you can add subtasks to a reminder. This allows you to break down the task into smaller, more manageable parts, making it easier to track your progress. Here’s how to add subtasks:
- Open the Reminders app and navigate to the relevant reminders list.
- Tap on the reminder you want to add subtasks to.
- Tap on the “i” icon to access the details of the reminder.
- Scroll down and tap “Subtasks.”
- Tap the “+” button to add a subtask.
- Enter the details for the subtask and tap “Done.”
You can add as many subtasks as needed to fully outline the steps required for your task. This feature is particularly useful for project planning or when you have sequential tasks that need to be completed.
By organizing your reminders into lists and adding subtasks, you can effectively manage your tasks and stay organized. This way, you won’t miss any deadlines or forget important tasks. Make the most out of the Reminders app on your iPhone or iPad and stay on top of your responsibilities.
Managing Reminders- Marking Reminders as Complete- Editing or Deleting Reminders
Managing your reminders is an important aspect of staying organized and on top of your tasks. Whether you have completed a reminder or need to make changes to it, your iPhone and iPad offer convenient options for managing your reminders.
To mark a reminder as complete, you can simply swipe right on the reminder in the Reminders app and tap the “Mark as Completed” option. This will move the reminder to the completed section, allowing you to keep track of your accomplishments.
If you want to edit a reminder, you can tap on it to open the details view. From there, you can make changes to the reminder’s title, due date, priority, and other details. Once you have updated the reminder, simply tap “Done” to save your changes.
In case you no longer need a reminder, you can delete it easily. Swipe right on the reminder and tap the “Delete” option. Alternatively, you can tap on the reminder to open the details view and then tap the “Delete” button at the bottom.
It is worth noting that if a reminder is part of a shared list, deleting it will remove it for all participants. Make sure to communicate with others before deleting shared reminders.
In addition to these basic management actions, the Reminders app offers advanced features. For instance, you can create reminder lists to help organize your tasks into different categories or projects. You can also add notes and attachments to reminders for additional context and information.
By effectively managing your reminders on your iPhone or iPad, you can stay organized and ensure that you complete your tasks on time. Whether you mark a reminder as complete, edit it, or delete it, the Reminders app provides the flexibility and convenience you need to stay on top of your to-dos.
Conclusion
In conclusion, setting reminders on your iPhone and iPad is a convenient and efficient way to stay organized and manage your tasks. The built-in Reminders app offers a range of features that make it easy to create, manage, and receive reminders on your devices. Whether you need to remember an important meeting, a grocery list, or a deadline, taking advantage of the reminder functionality on your iPhone and iPad can help you stay on top of your schedule.
With a few simple steps, you can customize reminders to suit your needs, set alerts, and prioritize tasks. By utilizing the Reminders app and taking advantage of its features, you can streamline your daily routine and ensure that you never miss an important event or task again.
So why wait? Start setting reminders on your iPhone and iPad today and experience the convenience and peace of mind that comes with a well-organized schedule.
FAQs
Q: Can I set multiple reminders on my iPhone or iPad?
A: Yes, you can set multiple reminders on your iPhone or iPad. The Reminder app allows you to create multiple reminders for different tasks or events. Simply open the app, tap the “+” icon to create a new reminder, and repeat the process for each reminder you want to set.
Q: Can I customize the alert sound for my reminders?
A: Yes, you can customize the alert sound for your reminders on your iPhone or iPad. Go to the Settings app, tap on “Sounds & Haptics,” and scroll down to the “Sounds and Vibration Patterns” section. From there, you can choose a different sound for your reminders by tapping on “Reminders” under the “SOUNDS AND VIBRATION PATTERNS” section.
Q: Can I set recurring reminders on my iPhone or iPad?
A: Absolutely! The Reminder app on your iPhone or iPad allows you to set recurring reminders for tasks or events that happen regularly. When creating a new reminder, tap on the “i” icon next to the reminder, scroll down, and select “Repeat.” You can then choose the frequency and interval for the recurring reminder.
Q: Can I share reminders with others?
A: Yes, you can share reminders with others using the Reminders app on your iPhone or iPad. To share a reminder, open the Reminder app, tap on the reminder you want to share, and tap on the “i” icon next to the reminder. From there, scroll down and select “Add People.” You can then choose whether to invite people via Messages, Email, or AirDrop.
Q: Can I set location-based reminders on my iPhone or iPad?
A: Absolutely! With the Reminders app on your iPhone or iPad, you can set location-based reminders. This feature allows you to receive a reminder when you arrive at or leave a specific location. When creating a new reminder, tap on the “i” icon next to the reminder, scroll down, and select “Remind me at a location.” You can then enter the desired location for the reminder.