
In today’s fast-paced world, staying connected is more important than ever. Whether you’re on the go or working remotely, having access to a reliable internet connection is crucial. One way to ensure you stay connected is by using a mobile hotspot. Alcatel Linkzone 2 is a popular choice when it comes to mobile hotspots, offering fast and secure internet access. In this article, we will guide you through the step-by-step process of setting up your Alcatel Linkzone 2 hotspot, allowing you to enjoy seamless connectivity on your devices. From activating your device to connecting to the internet, we’ve got you covered. So, let’s dive in and get your Alcatel Linkzone 2 hotspot up and running!
Inside This Article
- Step 1: Unboxing the Alcatel Linkzone 2 Hotspot
- Step 2: Inserting the SIM card and battery
- Step 3: Powering on and connecting to the hotspot
- Step 4: Accessing the hotspot settings
- Step 5: Configuring the Wi-Fi network settings
- Step 6: Connecting devices to the hotspot
- Step 7: Managing connected devices
- Step 8: Customizing advanced settings
- Step 9: Monitoring data usage
- Step 10: Troubleshooting common issues
- Conclusion
- FAQs
Step 1: Unboxing the Alcatel Linkzone 2 Hotspot
When you first get your hands on the Alcatel Linkzone 2 Hotspot, the first step is to unbox it and familiarize yourself with its contents. The box should include the hotspot device, a battery, a USB cable, and an instruction manual. Take a moment to carefully unpack all the items.
Inspect the hotspot device for any signs of damage during shipping. It’s important to ensure that the device is in good condition before proceeding with the setup process. If you notice any physical damage, contact the retailer or the manufacturer for further assistance.
Next, locate the battery that comes with the Alcatel Linkzone 2 Hotspot. The battery is essential for providing power to the device. It is usually packaged separately or may already be inserted into the hotspot. If the battery is not inserted, gently insert it into the designated slot until it clicks into place.
Along with the battery, you should find a USB cable. This cable is used for charging the hotspot. Connect one end of the USB cable to the hotspot device and the other end to a power source, such as a wall adapter or a computer’s USB port. Make sure the device is securely connected to the power source.
Lastly, don’t forget to look for the instruction manual that accompanies the Alcatel Linkzone 2 Hotspot. The manual provides detailed information on how to set up and use the hotspot effectively. It also includes troubleshooting tips and guidelines for resolving common issues.
By following these steps and unboxing the Alcatel Linkzone 2 Hotspot correctly, you can ensure a smooth setup process and get ready to enjoy the benefits of a reliable and convenient mobile hotspot.
Step 2: Inserting the SIM card and battery
Once you have unboxed your Alcatel Linkzone 2 hotspot, the next step is to insert the SIM card and battery. Follow these simple instructions to ensure a smooth setup process:
-
Locate the SIM card slot on the back or bottom of the hotspot. It is usually marked with an icon or labeled “SIM.”
-
Using your fingertips or a small tool, gently push the SIM card into the slot until it clicks into place. Make sure the gold contacts on the SIM card are facing downwards and align with the contacts in the slot.
-
If your Alcatel Linkzone 2 hotspot has a removable battery, locate the battery compartment near the SIM card slot. To open the battery compartment, slide the latch or press the designated release button.
-
Insert the battery into the compartment, aligning the metal contacts on the battery with the corresponding contacts inside the compartment.
-
Close the battery compartment by sliding the latch back into place or pressing it until it clicks. Ensure that the battery is securely fitted and the compartment is properly closed.
-
If your Alcatel Linkzone 2 hotspot does not have a removable battery, skip this step as the battery is usually built-in.
That’s it! You have successfully inserted the SIM card and battery into your Alcatel Linkzone 2 hotspot. Proceed to the next step to power on the hotspot and connect to it.
Step 3: Powering on and connecting to the hotspot
After successfully inserting the SIM card and battery into your Alcatel Linkzone 2 Hotspot, it’s time to power it on and connect to the internet. Follow these simple steps to get started:
1. Locate the power button on the hotspot. It is usually located on the side or the top of the device. Press and hold the power button until you see the indicator lights turn on. This indicates that the hotspot is powering up.
2. Once the hotspot is turned on, it will take a few moments to initialize and establish a network connection. You will notice the indicator lights blinking or steady, depending on the model. Consult the user manual for specific light indicators on your Alcatel Linkzone 2 Hotspot.
3. On your mobile device or computer, navigate to the Wi-Fi settings and enable Wi-Fi. You should see a list of available networks, and one of them should be the name of your hotspot, typically labeled as “Alcatel Linkzone 2” followed by a combination of numbers or characters.
4. Select your hotspot’s network from the list. If prompted, enter the password for the hotspot. The default password is usually printed on the back of the hotspot or provided in the user manual. Once connected, you will see the Wi-Fi symbol or icon on your device’s screen to indicate a successful connection.
5. Congratulations! You are now connected to the internet through your Alcatel Linkzone 2 Hotspot. You can start browsing, streaming, and using your favorite apps and services on your connected devices. Keep in mind that the hotspot’s performance and internet speed may vary depending on your network provider and signal strength.
Remember to adjust your hotspot settings, such as changing the Wi-Fi network name and password for added security. You can find detailed instructions in the user manual or by accessing the hotspot’s settings through the web-based interface.
If you encounter any difficulties during the powering on or connection process, refer to the troubleshooting section of the user manual or reach out to Alcatel’s customer support for assistance.
Pro tip: It is recommended to keep your hotspot in an area with good signal reception for optimal performance. Walls and other obstacles can weaken the Wi-Fi signal, so placing your hotspot in a central location can help improve connectivity throughout your house or office.
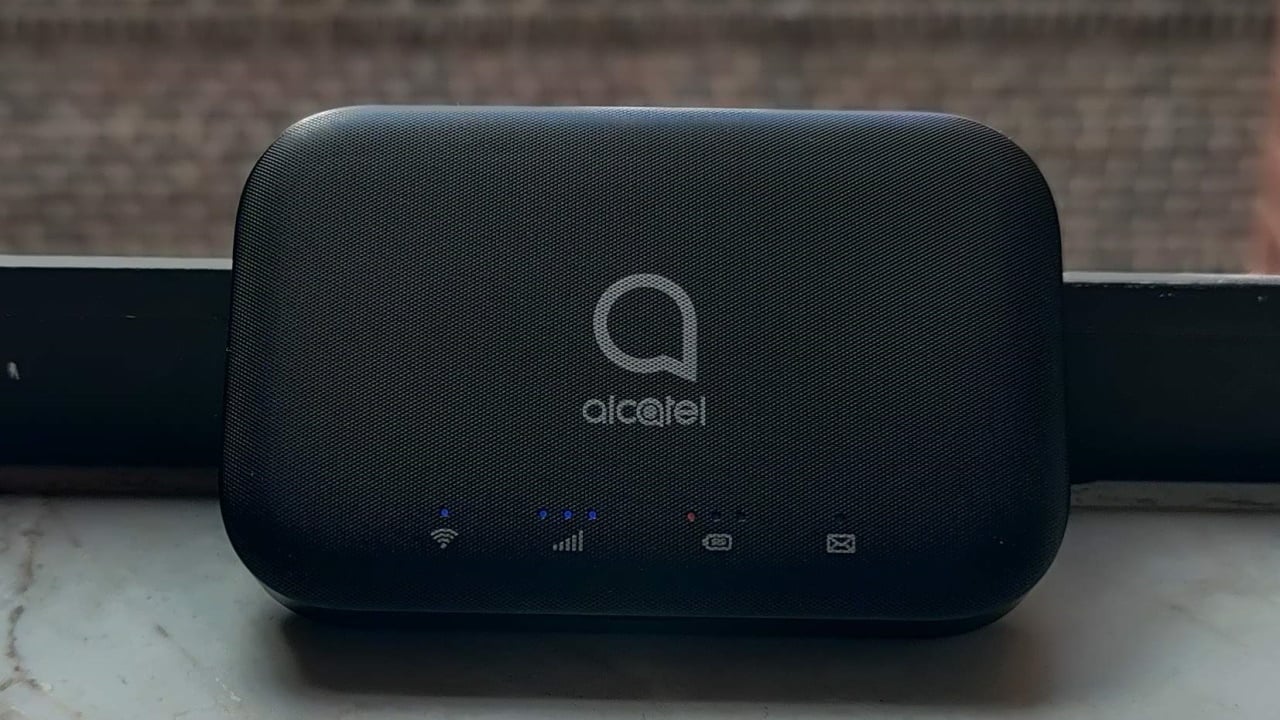
Step 4: Accessing the hotspot settings
Once you have powered on your Alcatel Linkzone 2 Hotspot, the next step is to access the hotspot settings. These settings allow you to customize and manage various aspects of your hotspot, ensuring a seamless and personalized user experience.
To access the hotspot settings, you will need to connect your device to the hotspot’s Wi-Fi network. This can be done by going into the Wi-Fi settings on your device and selecting the network name (SSID) of the hotspot.
After connecting to the hotspot’s Wi-Fi network, open a web browser and enter the hotspot’s IP address in the address bar. The IP address is usually indicated on the hotspot’s display or mentioned in the user manual. Once entered, press Enter to access the hotspot’s administration page.
On the administration page, you will be prompted to enter a username and password. These details are also provided in the user manual or can often be found on the bottom of the hotspot device.
After entering the username and password, click on the “Login” or “Submit” button to proceed. Once authenticated, you will gain access to the hotspot settings dashboard.
The hotspot settings dashboard provides you with a range of options to configure your hotspot according to your preferences. You can modify the Wi-Fi network name (SSID), set a password for the network, adjust the security settings, and control the maximum number of connected devices.
In addition to basic network settings, you may also have the option to customize advanced settings such as port forwarding, firewall configurations, and network protocols. These advanced settings allow you to optimize your hotspot’s performance and tailor it to your specific needs.
Take your time to explore the different options available in the hotspot settings dashboard. Familiarize yourself with the settings and make any necessary adjustments to meet your requirements.
Remember to save any changes you make in the hotspot settings dashboard. This will ensure that the modifications take effect and are applied to your hotspot’s configuration.
Accessing the hotspot settings gives you the power to personalize your device, enhance security, and manage your network effectively. By making the most of these settings, you can create a seamless and reliable connection for all your connected devices.
Step 5: Configuring the Wi-Fi network settings
Once you have successfully powered on your Alcatel Linkzone 2 hotspot and connected to it, it’s time to configure the Wi-Fi network settings. This will allow you to customize your network name (SSID), set a secure password, and adjust other important Wi-Fi settings.
Here is how you can configure the Wi-Fi network settings on your Alcatel Linkzone 2 hotspot:
- Access the hotspot settings by opening a web browser and typing in the default gateway IP address. Typically, this is 192.168.1.1, but it may vary. If you’re unsure, check the user manual or contact your service provider.
- You will be prompted to enter a username and password. By default, both the username and password are usually “admin”. Enter these details to log in to the hotspot’s settings page.
- Once logged in, locate the “Wi-Fi Settings” or “Wireless Settings” section. This is where you can configure the Wi-Fi network settings.
- Change the SSID (Wi-Fi network name) to something unique and easily recognizable. Avoid using personal information or sensitive data in the network name for security reasons.
- Set a strong and secure Wi-Fi password. Choose a password that is a combination of letters, numbers, and special characters. Make sure it is at least eight characters long and avoid using common passwords.
- Choose the appropriate Wi-Fi security protocol. It is recommended to use WPA2 (Wi-Fi Protected Access 2) for enhanced security. Avoid using open (unsecured) or outdated security protocols.
- Save the changes you have made to the Wi-Fi network settings.
Once you have configured the Wi-Fi network settings, make sure to reconnect your devices using the new network name (SSID) and password. This will allow your devices to connect securely to the Alcatel Linkzone 2 hotspot.
Remember, it is essential to regularly update your Wi-Fi password and ensure your network is secure to prevent unauthorized access. Additionally, avoid sharing your Wi-Fi password with unknown individuals to protect your network’s integrity.
By following these simple steps, you can easily configure the Wi-Fi network settings on your Alcatel Linkzone 2 hotspot and enjoy fast and reliable internet connectivity on your connected devices.
Step 6: Connecting devices to the hotspot
Once you have set up your Alcatel Linkzone 2 hotspot and configured the Wi-Fi network settings, it’s time to connect your devices. Whether you’re using a smartphone, tablet, laptop, or any other Wi-Fi enabled device, the process is straightforward and quick. Here’s how to do it:
1. On your device, navigate to the list of available Wi-Fi networks. This can usually be found in the settings menu, under the Wi-Fi or network connections section.
2. Look for the network name (SSID) of your Alcatel Linkzone 2 hotspot. It will typically be identified as “Alcatel Linkzone 2” or something similar.
3. Select the network name to connect to the hotspot. Your device may prompt you to enter a password.
4. Enter the Wi-Fi password for your Alcatel Linkzone 2 hotspot. By default, the password can be found on the back cover of the device or in the hotspot settings.
5. Once you have entered the password, click or tap on the “Connect” or “Join” button. Your device will establish a connection with the Alcatel Linkzone 2 hotspot.
6. Once connected, you will see a Wi-Fi symbol or indicator on your device’s screen, indicating that you are successfully connected to the hotspot network.
Congratulations! You have successfully connected your device to the Alcatel Linkzone 2 hotspot. Now you can enjoy fast and reliable internet access on your device, wherever you go.
Note that the Alcatel Linkzone 2 hotspot can support multiple devices simultaneously. This means that you can connect multiple devices to the hotspot and share the internet connection with friends, family, or colleagues.
Step 7: Managing connected devices
After successfully connecting your devices to the Alcatel Linkzone 2 Hotspot, you may want to manage and monitor the devices that are currently connected. This allows you to have control over your network and ensure optimal performance. Here are some important tips for managing connected devices:
1. View connected devices: Access the hotspot’s settings interface through your device’s web browser or the accompanying mobile app. From there, you should be able to see a list of currently connected devices, including their IP addresses and MAC addresses.
2. Device prioritization: If you have multiple devices connected and want to allocate bandwidth to specific devices, you can prioritize them. This means giving certain devices preferential treatment when it comes to network resources. This feature can come in handy if you have a device that requires a stable and consistent internet connection, such as a gaming console or a smart TV.
3. Device blocking: In the event that you want to prevent certain devices from accessing your hotspot, you can utilize the device blocking feature. This can be useful if you suspect an unauthorized device is connected to your network or if you simply want to control who can use your hotspot.
4. Set data limits: Some hotspots allow you to set data limits for each connected device. This can be helpful if you have a limited data plan and want to ensure that no single device consumes excessive data. By setting data limits, you can prevent one device from hogging all the bandwidth.
5. Enable parental controls: If you want to ensure a safe browsing experience for your children, enable parental controls on your hotspot. This feature allows you to restrict access to certain websites or types of content, providing a safer internet environment for young users.
6. Manage connected devices remotely: Many hotspot devices offer remote management options, allowing you to control and monitor connected devices even if you are not physically near the hotspot. This can be convenient if you want to check on your network while you’re away from home or if you need to make changes on the go.
By effectively managing your connected devices, you can optimize your hotspot’s performance, ensure network security, and create a customized internet experience for you and your users. Take advantage of the various features and settings available on your Alcatel Linkzone 2 Hotspot to fully control and monitor your network.
Step 8: Customizing advanced settings
Once you have successfully set up your Alcatel Linkzone 2 Hotspot, you can further personalize your experience by customizing the advanced settings. These settings allow you to optimize the performance, security, and accessibility of your hotspot.
To access the advanced settings, open the web interface on your connected device by typing in the IP address provided in the user manual. This will take you to the administration panel where you can make changes to various configurations.
1. Change the SSID and Wi-Fi password: By default, the Alcatel Linkzone 2 Hotspot comes with a predefined SSID and Wi-Fi password. To enhance security and make it easier to identify your network, consider changing these settings. Choose a unique SSID (Service Set Identifier) that reflects your personality or organization and set a strong alphanumeric password. This will help prevent unauthorized access to your hotspot.
2. Adjust the Wi-Fi channel: Wi-Fi channels are like lanes on a highway, and choosing the right channel can improve your connection speed. By default, your hotspot will automatically select the channel with the least interference. However, you can manually change the Wi-Fi channel to avoid congestion and optimize performance. Experiment with different channels to find the one that works best for you.
3. Enable guest Wi-Fi access: If you frequently have guests visiting your location, enabling a guest Wi-Fi network can be beneficial. This allows your visitors to connect to the internet without accessing your main network, ensuring their privacy and preventing them from using excessive bandwidth. Set a separate SSID and password for your guest network to keep things organized.
4. Configure MAC filtering: MAC (Media Access Control) filtering adds an extra layer of security to your hotspot by restricting access to specific devices. You can manually enter the MAC addresses of devices that are allowed to connect to your hotspot. This prevents unauthorized devices from accessing your network, even if they have the correct SSID and password.
5. Enable port forwarding: Port forwarding allows you to direct incoming internet traffic to a specific device or service on your network. This is useful if you are hosting a server or running applications that require incoming connections. By configuring port forwarding, you can ensure that the necessary traffic is directed to the right device, enhancing accessibility.
Remember to save your changes after customizing the advanced settings to ensure they take effect. It’s also a good idea to keep a record of any changes you make, as this will be helpful if you need to troubleshoot or revert back to the default settings in the future.
By customizing the advanced settings of your Alcatel Linkzone 2 Hotspot, you can tailor it to your specific needs and enhance the overall performance, security, and accessibility of your Wi-Fi network. Take some time to explore the different options and configurations available to make the most out of your hotspot experience.
Step 9: Monitoring data usage
One of the important aspects of using a hotspot is keeping track of your data usage. Monitoring your data usage on the Alcatel Linkzone 2 hotspot is a straightforward process that allows you to stay within your data plan and avoid any unexpected charges. Here are some steps to monitor your data usage:
- Access the hotspot settings: To begin monitoring your data usage, first access the settings menu on your Alcatel Linkzone 2 hotspot. You can do this by connecting a device to the hotspot’s Wi-Fi network and opening a web browser. Enter the default gateway address, which is usually “192.168.1.1”, into the browser’s address bar. This will take you to the hotspot’s web-based management interface.
- Navigate to the data usage section: Once you have accessed the hotspot’s settings, navigate to the data usage section. This section may be labeled as “Data Usage” or “Statistics” depending on the firmware version of your hotspot. Look for a tab or menu option that allows you to view your data usage details.
- Check your current data usage: In the data usage section, you will find information about your current data consumption. This will typically include the total amount of data used, both upload and download, since the last reset or billing cycle. Take note of this information as it gives you an overview of your data usage up until now.
- Monitor data usage by device: Some hotspot models, including the Alcatel Linkzone 2, allow you to monitor data usage by individual connected devices. This feature can be particularly useful if you want to keep track of how much data each device is consuming. Look for an option that lets you view data usage on a per-device basis and analyze the data usage patterns accordingly.
- Set data usage alerts: To ensure you don’t exceed your data limit, consider setting up data usage alerts on your hotspot. These alerts will notify you when you are approaching a certain data threshold, allowing you to adjust your usage or purchase additional data if necessary. Look for an option to configure data usage alerts in the hotspot settings menu.
- Reset data usage: If you want to start monitoring your data usage from scratch, you can reset the data usage statistics on your Alcatel Linkzone 2 hotspot. This will clear all previous data usage information and give you a fresh start. The option to reset data usage is typically found in the data usage or statistics section of the hotspot’s settings menu.
By following these steps, you can effectively monitor your data usage on the Alcatel Linkzone 2 hotspot. Keeping track of your data consumption will help you stay within your allotted data limit and avoid any unwanted charges. Remember to regularly check your data usage to ensure a seamless and stress-free internet experience with your hotspot.
Step 10: Troubleshooting common issues
While the Alcatel Linkzone 2 Hotspot offers reliable connectivity, it’s not uncommon to encounter certain issues. But worry not! In this step, we’ll address some common problems and guide you through the troubleshooting process.
1. No internet connection: If you’re unable to connect to the internet through your hotspot, start by checking the device’s signal strength. Ensure that you’re in an area with proper network coverage. If the signal is weak, try moving closer to a window or consider repositioning the hotspot.
2. Slow internet speed: If you’re experiencing slow internet speed, first confirm that you have a good signal. If the signal strength is excellent but the speed is still slow, try reconnecting your devices to the hotspot. If the issue persists, power cycle both the hotspot and your connected devices.
3. Inaccurate data usage information: If the hotspot’s data usage information doesn’t align with your actual usage, it could be a synchronization issue. Restart the hotspot and allow it to reconnect to the network, then check if the data usage information updates correctly.
4. Unresponsive hotspot: If your Alcatel Linkzone 2 Hotspot becomes unresponsive, press and hold the power button for about 10 seconds to force a restart. If it still doesn’t respond, perform a factory reset by navigating to the hotspot settings and selecting the appropriate option.
5. Device compatibility issues: If certain devices have trouble connecting to the hotspot, ensure that they support the Wi-Fi standard compatible with your Linkzone 2 (e.g., 802.11ac). Additionally, check if there are any firmware updates available for the devices in question.
6. Connection drops frequently: If your devices frequently lose connection to the hotspot, check if there are any physical obstructions or electrical appliances nearby that could interfere with the Wi-Fi signal. If so, try repositioning the hotspot or moving the obstructions out of the way.
7. Device overheating: If the hotspot feels excessively hot to the touch, it may be overheating. To prevent any potential damage, turn off the hotspot and allow it to cool down for a few minutes before using it again. Avoid using the hotspot while it is charging, as this can contribute to overheating.
8. Network connectivity issues with specific websites: If you’re experiencing connectivity issues with certain websites or services, try accessing them from another device to determine if the problem lies with the hotspot or the specific device. If other devices can access those websites without any issues, you may need to contact your service provider for further assistance.
If you’ve followed the troubleshooting steps and are still encountering problems, it’s a good idea to reach out to the Alcatel support team or consult the user manual for more specific solutions related to your hotspot model.
By addressing these common issues, you’ll be well-equipped to handle any obstacles that may arise while using your Alcatel Linkzone 2 Hotspot.
Conclusion
Setting up your Alcatel Linkzone 2 hotspot is a straightforward process that allows you to stay connected wherever you go. By following the simple steps outlined in this article, you can quickly and easily configure your hotspot to provide reliable internet access to all your devices.
Remember to choose a secure password to protect your hotspot from unauthorized access and take advantage of the advanced settings to customize your hotspot according to your preferences. With its compact and portable design, the Alcatel Linkzone 2 hotspot is the perfect companion for travelers, students, and anyone in need of a reliable internet connection on the go.
Don’t miss out on the convenience and freedom that the Alcatel Linkzone 2 hotspot offers. Get yours today and experience seamless and fast internet connectivity wherever you are!
FAQs
Here are some frequently asked questions about setting up the Alcatel Linkzone 2 hotspot:
- Q: How do I set up the Alcatel Linkzone 2 hotspot?
- Q: Can I change the Wi-Fi password for the Alcatel Linkzone 2 hotspot?
- Q: How many devices can connect to the Alcatel Linkzone 2 hotspot at the same time?
- Q: Does the Alcatel Linkzone 2 hotspot support 5G connectivity?
- Q: What is the range of the Alcatel Linkzone 2 hotspot?
To set up the Alcatel Linkzone 2 hotspot, follow these steps:
1. Insert a compatible SIM card into the device.
2. Turn on the hotspot by pressing and holding the power button until the indicator lights up.
3. Use your mobile device or computer to search for Wi-Fi networks and connect to the network name that matches the hotspot’s SSID (Service Set Identifier).
4. Enter the hotspot’s default password when prompted. The default password can usually be found on a sticker attached to the hotspot.
Yes, you can change the Wi-Fi password for the Alcatel Linkzone 2 hotspot to enhance its security. To do this, follow these steps:
1. Connect your device to the hotspot using the default Wi-Fi password.
2. Open a web browser on your connected device and enter “192.168.0.1” in the address bar to access the hotspot’s web interface.
3. Enter the default username and password (usually “admin” for both) to log in.
4. Navigate to the Wi-Fi settings section and look for the option to change the password. Enter a new password and save the changes.
The Alcatel Linkzone 2 hotspot supports connectivity for up to 16 devices simultaneously. This means that you can connect multiple smartphones, tablets, laptops, and other Wi-Fi-enabled devices to the hotspot without any issues.
No, the Alcatel Linkzone 2 hotspot does not support 5G connectivity. It is designed to work with 4G LTE networks. However, it is backward compatible with 3G networks as well.
The range of the Alcatel Linkzone 2 hotspot can vary depending on various factors such as the surrounding environment and interference. In general, it can provide a stable Wi-Fi connection within a range of approximately 150 feet or 45 meters.