
Welcome to our comprehensive guide on how to tighten the headset on your mountain bike (MTB). The headset is a crucial component of your bike’s steering system, connecting the fork to the frame and ensuring smooth and precise handling. Over time, the headset can become loose due to regular use or improper maintenance, leading to potential safety concerns and compromised performance. Therefore, knowing how to properly tighten the headset is essential for every MTB rider. In this article, we will walk you through the step-by-step process of tightening the headset, including the tools you will need, common signs of a loose headset, and tips to prevent future issues. Read on to discover how to keep your MTB’s headset functioning optimally and enhance your riding experience.
Inside This Article
- Why Tightening the Headset is Important
- Tools Needed for Tightening the Headset
- Step-by-Step Process for Tightening the Headset on an MTB
- Tips for Maintaining a Tight Headset on Your MTB
- Conclusion
- FAQs
Why Tightening the Headset is Important
When it comes to mountain biking, having a properly tightened headset is crucial for a safe and enjoyable ride. The headset is the component that connects the fork to the frame, allowing you to steer your bike. If the headset is loose or not properly tightened, it can result in a number of issues that can compromise your control and stability on the trails.
One of the biggest reasons why tightening the headset is important is for improved steering responsiveness. When the headset is loose, it can cause a delay in your steering inputs. This can make it more challenging to navigate corners and obstacles, affecting your overall handling and potentially increasing the risk of accidents.
Tightening the headset also ensures better stability and control. A loose headset can lead to unwanted movements, such as front-end wobbling or a vague feeling when turning. These issues not only affect your confidence on the bike but also make it harder to maintain balance, especially in technical sections or at higher speeds.
Furthermore, tightening the headset helps prevent premature wear and damage to the headset bearings. When the headset is loose, the bearings can become misaligned, resulting in uneven pressure distribution and increased friction. Over time, this can lead to excessive wear, affecting the smoothness of your steering and potentially causing costly repairs.
Properly tightening the headset is not only about improving performance but also ensuring your safety. A loose headset can cause sudden and unexpected steering changes, which can be dangerous, particularly when riding challenging terrain or at high speeds. By taking the time to tighten your headset, you are minimizing the risk of accidents and enhancing your overall riding experience.
Remember that regular maintenance and inspections are essential to keep your headset properly tightened. It is a good practice to check and adjust the headset tightness before each ride, especially if you have noticed any issues or if you have recently disassembled and reassembled your bike.
Tools Needed for Tightening the Headset
When it comes to tightening the headset on your MTB, having the right tools on hand can make the job much easier and more efficient. Here are the essential tools you’ll need to get the job done:
- 5mm Allen wrench: This versatile tool is indispensable for most bike maintenance tasks, including tightening the headset. Make sure you have one with a long handle for better leverage.
- Adjustable wrench: An adjustable wrench will come in handy for holding the headset locknut in place while you tighten the headset. Choose one that fits the size of your locknut.
- Headset press: Although not strictly necessary, a headset press can provide a more controlled and precise installation of the headset. It ensures uniform pressure is applied, preventing any damage to the bearings or frame. If you don’t have a headset press, a rubber mallet can be used, but it’s not as ideal.
- Grease: Applying grease to the bearing surfaces and the headset cups is essential to reduce friction and ensure smooth operation. Use a high-quality bicycle-specific grease for best results.
- Torque wrench: While not essential, a torque wrench can be useful for achieving the recommended torque settings when tightening the headset. This helps avoid overtightening, which can damage the headset or lead to steering issues.
- Cleaning supplies: It’s always a good practice to clean the headset components thoroughly before installation. Have some degreaser and a clean cloth or brush on hand to remove any dirt or debris.
With these tools at your disposal, you’ll be well-prepared to tackle the task of tightening the headset on your MTB. Remember to follow the manufacturer’s guidelines and take your time to ensure a proper and secure installation.
Step-by-Step Process for Tightening the Headset on an MTB
Riding your mountain bike (MTB) on rugged terrains can cause the headset to loosen over time. A loose headset can lead to wobbling or a shaky steering feel, impacting your control and safety. To keep your MTB in optimal condition, it’s important to regularly check and tighten the headset.
Step 1: Start by checking the tightness of your headset. Stand in front of your bike and hold onto the front brake while moving the handlebars back and forth. If you feel any play or knocking sensation, it means that your headset needs to be tightened.
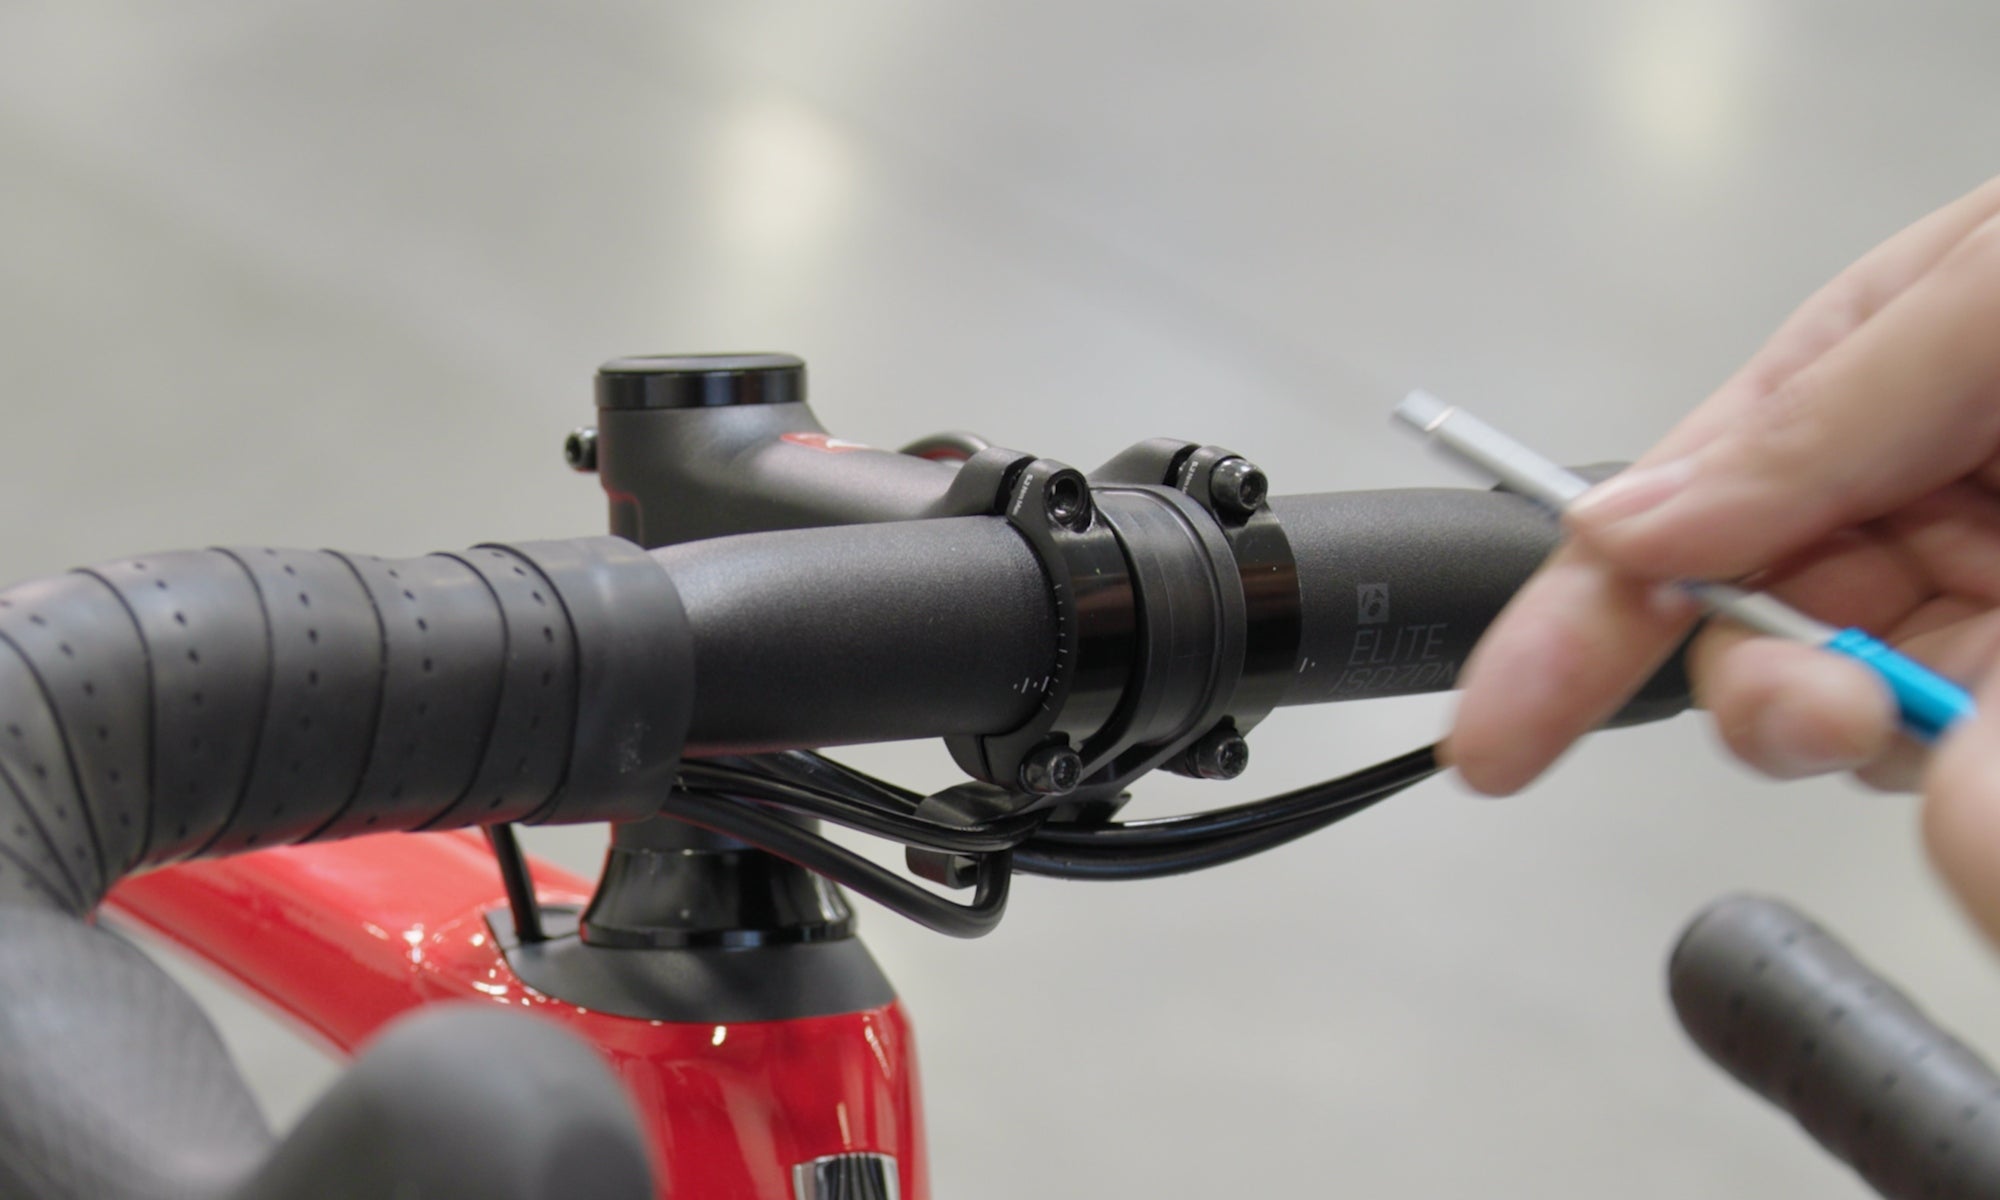
Step 2: To tighten the headset, you will need a few tools. Grab a 5mm Allen wrench and a 15mm cone wrench. You may also need a torque wrench to ensure that you tighten the headset to the recommended specifications, but this is optional.
Step 3: Locate the headset’s top cap, which is usually located on top of the stem. Use the 5mm Allen wrench to loosen the bolt on the top cap by a quarter turn counterclockwise. This will relieve any tension on the headset.
Step 4: Next, use the 15mm cone wrench to loosen the locknut located just below the stem. Turn it counterclockwise to loosen it, but ensure that you don’t loosen it too much—just enough to allow for adjustment.
Step 5: With the locknut loosened, you can now adjust the tension on the headset itself. Use the 5mm Allen wrench to turn the top cap bolt clockwise to tighten the headset. Start with a small, incremental turn and check the tightness after each adjustment.
Step 6: As you tighten the headset, be sure to hold onto the front brake and rock the bike back and forth to feel for any play or knocking. Continue making small adjustments until the play is eliminated, and the headset feels tight without restricting the movement of the handlebars.
Step 7: Once you are satisfied with the tightness of the headset, hold the top cap in place with the Allen wrench and use the 15mm cone wrench to tighten the locknut. Turn it clockwise until it is snug against the top cap, but be careful not to overtighten it.
Step 8: Finally, check the tightness of the headset one last time by holding onto the front brake and moving the handlebars back and forth. There should be no play or knocking, indicating that your headset is properly tightened.
By following these step-by-step instructions, you can easily tighten the headset on your MTB to ensure a safe and smooth riding experience. Remember to regularly check the tightness of your headset and perform any necessary adjustments. Proper maintenance goes a long way in keeping your bike in top shape.
If you are unsure about performing these adjustments yourself, it is always a good idea to consult a professional bike mechanic.
Tips for Maintaining a Tight Headset on Your MTB
When it comes to mountain bikes, having a properly tightened headset is essential for safety and optimal performance. The headset is the component that connects the fork to the frame, allowing for steering and stability. Over time, the headset can loosen due to regular use and vibrations from off-road trails. To ensure a tight and secure headset on your MTB, here are some tips to follow.
1. Check for Loose Headset: Regularly inspect your headset for any signs of looseness. This includes a wobbly or clunking feeling when you turn the handlebars. If you notice any play or movement in the headset, it’s time to tighten it up.
2. Gather the Necessary Tools: To tighten the headset on your MTB, you’ll need a few tools. These typically include a 5mm Allen wrench or a headset wrench, depending on the type of headset you have. Make sure you have the right tools before proceeding.
3. Loosen Stem Bolts: Before tightening the headset, you’ll need to loosen the stem bolts. These are the bolts connecting the handlebar to the stem. By loosening these bolts, you’ll have easier access to the headset components for adjustment.
4. Adjust the Top Cap: The top cap is located on top of the headset and typically has a bolt or Allen screw. Use your 5mm Allen wrench or headset wrench to adjust the top cap. You’ll want to tighten it just enough to remove any play in the headset, but not too tight to restrict movement.
5. Tighten Stem Bolts: Once the top cap is adjusted, it’s time to tighten the stem bolts. Use your tool to gradually tighten each bolt in a crisscross pattern. This ensures an even and secure tightening of the stem to the fork’s steerer tube.
6. Test the Headset Tightness: After completing the tightening process, it’s crucial to test the headset’s tightness. Hold the front brake and rock the bike back and forth. You should not feel any movement or hear any clicking or knocking sounds. If you do, repeat the tightening process until the headset feels solid and secure.
7. Maintenance and Regular Inspections: To maintain a tight headset on your MTB, it’s important to regularly inspect and maintain it. Check for any signs of loosening before each ride and address the issue immediately to avoid potential safety hazards. Additionally, perform routine maintenance tasks like cleaning and lubricating the headset bearings.
By following these tips and staying proactive in maintaining a tight headset, you can ensure a safe and enjoyable riding experience on your MTB. Remember, a properly tightened headset contributes to better control, enhanced steering response, and overall bike performance.
Conclusion
In conclusion, tightening the headset on your MTB is an essential maintenance task that ensures optimal performance and rider safety. By following the steps outlined in this guide, you can easily tighten your headset and eliminate any play or wobbling in the handlebars. Remember to inspect the headset regularly and check for any signs of wear or damage. If you encounter any issues that you’re unsure how to address, it’s always best to consult a professional bike mechanic for assistance.
Proper headset adjustment is crucial for enjoying a smooth and comfortable ride, as well as maintaining control and maneuverability on the trails. It’s worth taking the time to learn how to tighten your headset properly, as it can greatly enhance your overall biking experience. So don’t hesitate to grab your tools and get to work on tightening that headset on your MTB. Happy riding!
FAQs
Q: Why is it important to tighten the headset on my mountain bike?
A: Tightening the headset on your mountain bike ensures proper steering control and stability. Loose headsets can affect your ability to navigate safely and can lead to accidents on the trails.
Q: How do I know if my headset needs tightening?
A: There are a few signs that indicate your headset may need tightening. These include a wobbly handlebar, a loose or shaky front fork, clicking or creaking sounds when turning, or a general feeling of instability while riding. If you experience any of these symptoms, it’s important to check and tighten your headset.
Q: What tools do I need to tighten my headset?
A: To tighten your headset, you will need a set of Allen wrenches or a headset wrench, depending on the type of headset on your mountain bike. Additionally, having a torque wrench can help ensure that you tighten the headset to the manufacturer’s specifications.
Q: Can I tighten my headset myself or should I take it to a bike shop?
A: If you have some mechanical knowledge and the necessary tools, you can tighten your headset yourself. However, if you are unsure or not confident in your abilities, it is recommended to take your bike to a trusted bike shop where a professional can ensure it is tightened correctly.
Q: Are there any specific steps I should follow to tighten my headset?
A: Yes, there are a few steps to follow to properly tighten your headset. Start by loosening the stem bolts, then use your Allen wrench or headset wrench to tighten the top cap bolt. Once tightened, retighten the stem bolts evenly and check for any play or looseness in the headset. Repeat these steps as needed until the headset is secure.