
Are you tired of playing your Nintendo Switch on a small screen? Maybe you want to enjoy the immersive gaming experience on your big screen TV? If so, you need to know how to use a Switch Docking Station. The Switch Docking Station is a simple yet powerful accessory that allows you to connect your Switch console to your TV effortlessly. It provides a seamless transition from handheld mode to TV mode, giving you the best of both worlds. Whether you want to play games with friends and family or simply want a more immersive gaming experience, using a Switch Docking Station is the way to go. In this article, we will guide you through the process of using a Switch Docking Station, step by step. So, grab your Nintendo Switch and let’s get started!
Inside This Article
- What is a Switch Docking Station?
- Setting Up the Switch Docking Station
- Connecting the Nintendo Switch to the Docking Station
- Docking Station Display Options
- Docking Station Audio Options
- Charging the Nintendo Switch with the Docking Station
- Nintendo Switch Docking Station Troubleshooting
- Conclusion
- FAQs
What is a Switch Docking Station?
A Switch Docking Station is a device specifically designed for the Nintendo Switch console. It is an essential accessory that allows you to connect your Nintendo Switch to your television or monitor, transforming it into a home gaming console. The Docking Station provides a seamless transition from playing games on the go to a larger screen gaming experience in the comfort of your living room.
With a Switch Docking Station, you can enjoy playing your favorite Nintendo Switch games on a bigger display, taking advantage of the enhanced graphics and immersive gameplay. It offers a convenient way to switch between handheld and TV mode, giving you the flexibility to adapt to different gaming scenarios.
The Switch Docking Station also serves as a charging dock for your Nintendo Switch. When connected to the Docking Station, the console automatically starts charging, allowing you to keep your device powered up for extended gaming sessions. This eliminates the need to constantly connect and disconnect cables, providing a convenient and hassle-free charging solution.
In addition to charging, the Docking Station provides various connectivity options. It features USB ports, allowing you to connect additional accessories such as controllers, charging cables, or external storage devices. This expands the functionality of your Nintendo Switch and enhances your gaming experience even further.
Overall, a Switch Docking Station is a must-have accessory for Nintendo Switch owners who desire a seamless transition from handheld gaming to TV gaming. It offers a convenient way to connect your console to a larger display, charges your device while playing, and provides additional connectivity options to enhance your gaming setup.
Setting Up the Switch Docking Station
The Switch Docking Station is an essential accessory for Nintendo Switch owners who want to enjoy their gameplay experience on a larger screen. Setting up the Switch Docking Station is a straightforward process that ensures a seamless transition from handheld to docked mode. Here’s a step-by-step guide on how to set up your Switch Docking Station:
1. Gather the necessary components:
Before getting started, make sure you have all the components needed for the setup. You’ll need the Switch Docking Station itself, the AC adapter (charges the console), an HDMI cable (connects the dock to the TV), and a TV or monitor with an HDMI input.
2. Choose the ideal location:
Select a suitable location for your Switch Docking Station. Ensure that it’s close to a power outlet and has sufficient space to accommodate the dock and the Nintendo Switch console.
3. Connect the AC adapter:
Take the AC adapter and plug it into the power outlet. Then, connect the other end of the adapter to the USB-C port on the Switch Docking Station.
4. Connect the HDMI cable:
Take one end of the HDMI cable and plug it into the HDMI port on the back of the Switch Docking Station. Connect the other end of the cable to an available HDMI input on your TV or monitor.
5. Insert the Nintendo Switch:
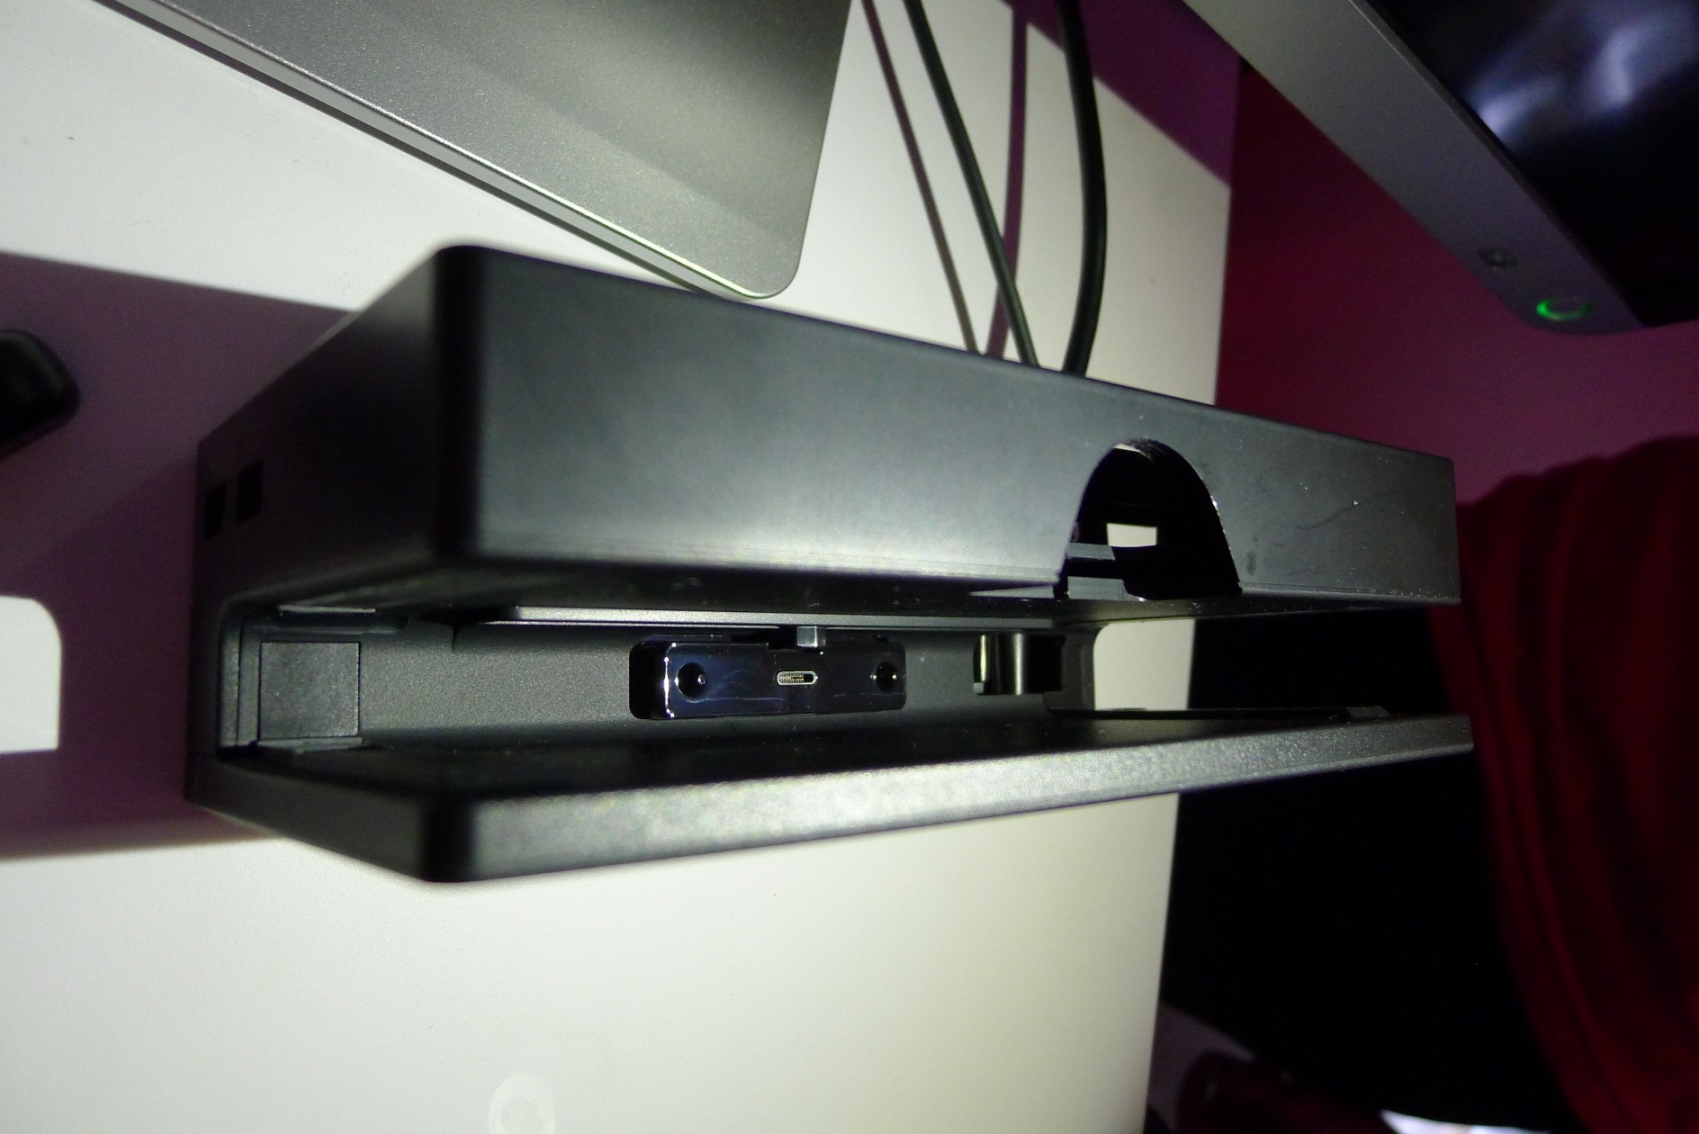
Slide the Nintendo Switch console into the Switch Docking Station. Ensure that the USB-C port on the bottom of the console lines up with the USB-C port on the dock.
6. Power on the dock:
Press the power button located on the top left-hand side of the Switch Docking Station to turn it on. The dock will power up, and the Nintendo Switch console will display on the connected TV or monitor.
7. Adjust TV settings (if necessary):
Depending on your TV or monitor, you may need to adjust the input or display settings to ensure the best picture quality. Consult your TV’s user manual for instructions on how to do this.
Congratulations! You have successfully set up your Switch Docking Station. Now you can enjoy playing your Nintendo Switch games on the big screen, immersing yourself in the world of gaming.
Connecting the Nintendo Switch to the Docking Station
One of the key features of the Nintendo Switch is its ability to seamlessly switch between handheld and docked modes. When you’re ready to play on the big screen, connecting the Nintendo Switch to the docking station is a simple process. Just follow these steps:
1. Position the Docking Station: Find a suitable location for the docking station near your TV or monitor. Make sure there is enough space for the Switch to connect and for the cables to reach the necessary ports.
2. Connect the AC Adapter: Plug one end of the AC adapter into the back of the docking station and the other end into a power outlet. Make sure the AC adapter is securely connected.
3. Connect the HDMI Cable: Take the HDMI cable and plug one end into the HDMI OUT port on the back of the docking station. Connect the other end of the cable to the HDMI input on your TV or monitor.
4. Connect the USB-C Cable: Grab the USB-C cable that came with your Nintendo Switch and plug one end into the USB-C port on the bottom of the Switch console. Connect the other end of the cable into the USB-C port on the back of the docking station.
5. Position the Switch: Carefully slide the Nintendo Switch into the slot on the front of the docking station. Make sure the connectors on the bottom of the Switch align with the corresponding ports in the dock.
6. Ensure Proper Connection: Gently push the Switch down until it clicks into place. This ensures that it is securely connected to the docking station. You should see the Switch’s screen appear on your TV or monitor once it is properly inserted.
7. Power on the Dock: Press the power button on the front of the docking station to turn it on. This will activate the display on your TV or monitor and allow you to start playing your Nintendo Switch games on the big screen.
That’s it! You’ve successfully connected your Nintendo Switch to the docking station. Now you can enjoy your games on the larger display, fully immersing yourself in the gaming experience.
Docking Station Display Options
When using a docking station for your Nintendo Switch, you have a variety of display options to choose from. These options allow you to customize your gaming experience and make the most out of the graphics capabilities of the console.
Here are some of the display options that you can explore:
- TV Mode: Connecting your Switch to the docking station and then to a TV allows you to play games on a larger screen. This mode is perfect for multiplayer gameplay or when you simply want to enjoy your games on a bigger display.
- Handheld Mode: Removing the Switch from the docking station and playing games directly on the console is known as handheld mode. In this mode, the Switch’s built-in screen becomes the display, offering portability and convenience.
- Tabletop Mode: If you don’t have access to a TV but still want to play on a larger screen than the handheld mode provides, you can use tabletop mode. This involves using the kickstand on the back of the Switch and placing it on a stable surface, such as a table or desk, while using detached Joy-Con controllers.
- Dual Screens: Some docking stations come with additional USB ports or HDMI outputs, allowing you to connect your Switch to multiple displays simultaneously. This setup can be useful for streaming, recording gameplay, or for using one screen for gameplay and the other for browsing or monitoring chat channels.
Overall, these display options give you the flexibility to play your Nintendo Switch games in a way that suits your preferences and gaming environment. Whether you prefer the immersive experience of playing on a TV, the portability of handheld mode, or the convenience of tabletop mode, a docking station opens up a world of possibilities for every type of gamer.
Docking Station Audio Options
When it comes to using a docking station for your Nintendo Switch, there are various audio options available to enhance your gaming experience. Whether you prefer using speakers, headphones, or even a sound system, the docking station allows you to enjoy high-quality audio output.
1. Using Speakers: One of the simplest ways to enjoy audio from your Nintendo Switch while connected to the docking station is by using external speakers. You can connect the speakers to the docking station’s audio output port using an appropriate audio cable. This allows you to enjoy immersive sound without the need for headphones.
2. Connecting Headphones: If you prefer a more personal audio experience, you can easily connect headphones to the docking station. The docking station provides a 3.5mm audio jack that allows you to plug in your headphones. Once connected, you can enjoy the game’s audio directly through your headphones, providing a more intimate gaming experience.
3. Bluetooth Connectivity: Another convenient audio option offered by some docking stations is Bluetooth connectivity. This feature allows you to connect wireless headphones or speakers to the docking station without the need for any cables. Simply pair your Bluetooth devices with the docking station and enjoy wireless audio while gaming.
4. Utilizing a Sound System: For those who want a more immersive audio experience, you can connect your docking station to a sound system or home theater setup. Most docking stations provide audio output ports that allow you to connect to external sound systems using appropriate cables. This enables you to enjoy the game’s audio through powerful speakers with surround sound capabilities, enhancing the overall gaming experience.
Keep in mind that the audio options available may vary depending on the specific model and brand of the docking station you are using. It’s always a good idea to consult the manufacturer’s instructions or documentation to ensure proper setup and compatibility.
By exploring the different audio options offered by your docking station, you can customize your gaming experience to suit your preferences. Whether you prefer shared audio through speakers, immersive audio through headphones, or the power of a sound system, the docking station provides a versatile solution for enhancing your Nintendo Switch gaming sessions.
Charging the Nintendo Switch with the Docking Station
One of the key features of a Nintendo Switch Docking Station is its ability to charge the Nintendo Switch console while it is docked. This ensures that your console is ready to go whenever you want to play, without having to worry about battery levels.
To charge your Nintendo Switch using the docking station, simply connect the AC adapter to the docking station’s power input. The AC adapter should have come with your Nintendo Switch console, and it is the same one that you would use to charge the console directly. Simply plug the AC adapter into a power outlet, and then connect the other end to the power input on the docking station.
Once the AC adapter is connected to the docking station, simply slide your Nintendo Switch console into place. The docking station has a cradle that holds the console securely, allowing it to charge while also providing a stable connection for gameplay on your TV.
When the Nintendo Switch is properly docked, you will see a small LED light on the front of the dock. This light indicates that the Nintendo Switch is successfully charging. If the LED light does not turn on, double-check that the AC adapter is properly connected and that it is receiving power from the outlet.
It’s important to note that the Nintendo Switch can be charged while you’re playing games on your TV using the docking station. This allows for extended play sessions without worrying about the battery draining. However, it’s always a good idea to keep an eye on the battery level to ensure you don’t run out of power in the middle of your gaming session.
In addition to charging your Nintendo Switch, the docking station also offers the convenience of easily switching between playing on your TV and playing in handheld mode. Simply dock your Nintendo Switch to play on the big screen, and when you’re ready to take it on the go, just slide it out of the docking station. It’s a seamless transition that adds versatility to your gaming experience.
So, whether you’re in the mood for some solo gaming on your TV or want to take your Nintendo Switch on the go, the docking station ensures that your console is always charged and ready for action. And with the added benefit of easily switching between TV and handheld mode, you’ll have a truly immersive and flexible gaming experience.
Nintendo Switch Docking Station Troubleshooting
If you’re experiencing any issues with your Nintendo Switch docking station, don’t worry! We’ve compiled a list of common problems and their solutions to help you get back to gaming seamlessly.
1. No Signal on TV
If you’re not seeing any signal on your TV when you connect your Nintendo Switch to the docking station, there may be a few reasons for this. First, make sure that the HDMI cable is securely connected to both the docking station and the TV. Additionally, ensure that your TV is set to the correct HDMI input. If the issue persists, you can try restarting both the Switch console and the docking station.
2. Docking Station Not Charging the Switch
If the docking station is not charging your Nintendo Switch, there are a few steps you can take to troubleshoot the issue. Start by checking the power adapter and making sure it’s securely connected to both the docking station and a power outlet. You should also verify that the USB-C cable is properly inserted into the dock and the Switch console. If the problem persists, try using a different power adapter and cable to see if that resolves the issue.
3. Audio Not Playing on TV
If you’re experiencing an issue where the audio is not playing on your TV when the Nintendo Switch is docked, there are a few potential solutions. First, check the audio settings on your Switch console and ensure that the audio output is set to “TV” or “Automatic”. Additionally, try adjusting the volume on your TV and make sure it’s not muted or set to a low level. If the problem continues, you can try restarting both the console and the docking station.
4. Switch Not Fitting Properly in the Dock
If you’re having difficulty fitting your Nintendo Switch into the docking station, it’s possible that there may be an obstruction preventing a proper connection. Inspect the docking station and make sure there are no foreign objects or debris inside, as this can interfere with the docking process. Additionally, check for any damage to the USB-C port on the Switch console. If necessary, gently clean the port to remove any dirt or debris.
5. Overheating
If you notice that your Nintendo Switch or the docking station becomes excessively hot during use, it could be due to poor ventilation or prolonged usage. Ensure that the docking station is placed on a flat and well-ventilated surface to allow for proper airflow. If the overheating persists, try reducing the duration of use or taking breaks to prevent overheating.
6. Resetting the Docking Station
If none of the above troubleshooting steps resolve the issue with your Nintendo Switch docking station, you can try resetting the dock. To do this, first, power off both the Switch console and the dock. Then unplug the power adapter from the dock and wait for around 30 seconds. Afterward, reconnect the power adapter, power on the switch and test the docking station again.
By following these troubleshooting steps, you can resolve many common issues with your Nintendo Switch docking station. However, if you continue to experience problems, it may be best to contact Nintendo’s customer support for further assistance.
Conclusion
In conclusion, using a Switch docking station is a convenient and practical way to maximize the functionality of your Nintendo Switch. Whether you want to enjoy a larger screen experience, charge your device on the go, or connect to external devices for a more immersive gaming experience, a docking station provides all these benefits and more. With its easy setup and seamless compatibility, you can effortlessly switch between handheld and docked modes without any hassle.
Investing in a high-quality docking station will not only enhance your gaming experience but also protect your Switch from potential damage. It is important to choose a well-designed and reliable docking station that offers stability, multiple ports, and efficient charging capabilities. By following the manufacturer’s instructions and guidelines, you can safely and effectively use your Switch docking station for hours of uninterrupted gaming enjoyment on your TV or monitor.
So why wait? Get your Switch docking station today and experience the versatility and convenience it brings to your gaming life!
FAQs
1. What is a Switch Docking Station?
A Switch Docking Station is an accessory designed for the Nintendo Switch gaming console. It allows you to connect your Nintendo Switch to your TV or monitor, providing a larger display for an immersive gaming experience. Additionally, it facilitates charging your Switch while playing in docked mode.
2. How do I connect my Nintendo Switch to a Switch Docking Station?
Connecting your Nintendo Switch to a Switch Docking Station is simple. First, ensure that the docking station is connected to a power source. Then, gently slide your Switch into the docking station’s USB-C connector. It will click securely into place. Finally, connect the docking station to your TV or monitor using an HDMI cable.
3. Can I charge my Nintendo Switch while it is in the docking station?
Yes, you can charge your Nintendo Switch while it is docked. When the Switch is connected to the docking station, it will automatically charge the console’s battery. This allows you to play games on the TV or monitor without worrying about the battery running out.
4. Can I play games on my TV or monitor with the Nintendo Switch Docking Station?
Absolutely! The primary purpose of the Nintendo Switch Docking Station is to extend the gaming experience to a larger screen. Once your Switch is docked and connected to your TV or monitor via HDMI, you can grab your Joy-Con controllers or a Pro Controller and start playing your favorite games on the big screen.
5. Can I use an external controller with the Nintendo Switch Docking Station?
Yes, you can use an external controller with the Nintendo Switch Docking Station. In addition to the Joy-Con controllers, the Switch Docking Station offers compatibility with the versatile Nintendo Switch Pro Controller. The Pro Controller allows for a more traditional gaming experience and is ideal for players who prefer a gamepad-style controller.