
Are you tired of switching between Google Maps and Apple Music on your iPhone? Well, you’re in luck! Connecting Google Maps to Apple Music on your iPhone allows you to seamlessly control your music playback while navigating. Whether you’re on a road trip or just commuting to work, this nifty feature can make your journey a whole lot more enjoyable. By integrating these two essential apps, you can easily access your favorite songs, playlists, and podcasts without having to toggle between screens. In this article, we’ll walk you through the simple steps of connecting Google Maps to Apple Music on your iPhone, so you can experience the ultimate convenience and enjoyment while on the go.
Inside This Article
- Step 1: Download and Install Google Maps on your iPhone
- Step 2: Download and Install Apple Music on your iPhone
- Step 3: Connect Google Maps to Apple Music
- Step 4: Access Apple Music in Google Maps while navigating
- Conclusion
- FAQs
Step 1: Download and Install Google Maps on your iPhone
Google Maps is a powerful navigation app that provides accurate directions, real-time traffic updates, and comprehensive mapping services. To connect Google Maps to Apple Music on your iPhone, you’ll need to first download and install the Google Maps app from the App Store. Here’s how you can do it:
- Open the App Store on your iPhone.
- Tap on the Search tab at the bottom of the screen.
- Type “Google Maps” in the search bar at the top of the screen.
- Tap on the Google Maps app when it appears in the search results.
- Tap on the Get button next to the app to download and install it.
- Wait for the app to download and install on your iPhone. This may take a few moments depending on your internet connection speed.
- Once the installation is complete, tap on the Open button to launch Google Maps.
Congratulations! You have successfully downloaded and installed Google Maps on your iPhone. Now that you have the app ready, you can proceed to the next step and download Apple Music.
Step 2: Download and Install Apple Music on your iPhone
Apple Music is a popular music streaming service that provides a vast library of songs, curated playlists, and personalized recommendations. To connect Apple Music to Google Maps on your iPhone, you’ll need to download and install the Apple Music app. Here’s how you can do it:
1. Open the App Store: On your iPhone, tap on the App Store icon, which is a blue icon with an “A” inside a white circle.
2. Search for Apple Music: Once you’re in the App Store, tap on the Search tab at the bottom right corner of the screen. In the search bar at the top, type “Apple Music” and tap the Search button.
3. Select Apple Music: From the search results, tap on the Apple Music app, which has a red icon with a white music note inside a white circle.
4. Install Apple Music: On the app page, tap the Get button, which will then turn into an Install button. Tap the Install button, and if prompted, authenticate with your Apple ID or use Touch ID/Face ID to confirm the installation.
5. Wait for the installation to complete: The App Store will download and install Apple Music on your iPhone. The duration may vary depending on your internet speed.
6. Sign in to Apple Music: Once the installation is complete, the Apple Music app will appear on your home screen. Tap on it to open the app. If you’re already subscribed to Apple Music, sign in with your Apple ID and password. If not, you have the option to sign up for a free trial or subscribe to a plan.
7. Set up Apple Music: After signing in, you may be prompted to set up Apple Music by selecting your favorite genres and artists. This will help Apple Music personalize your music recommendations.
That’s it! You have successfully downloaded and installed Apple Music on your iPhone. Now, you’re ready to connect it to Google Maps and enjoy your favorite tunes while navigating.
Step 3: Connect Google Maps to Apple Music
Connecting Google Maps to Apple Music on your iPhone allows you to seamlessly integrate your favorite tunes into your navigation experience. Follow these simple steps to set up the connection:
1. Open the Google Maps app on your iPhone and tap on the menu icon (three horizontal lines) located in the top-left corner of the screen.
2. In the menu, scroll down and select “Settings”.
3. Tap on the “Navigation” option in the Settings menu.
4. Look for the “Music playback controls” section and tap on the “Apple Music” option.
5. You will be prompted to grant Google Maps access to your Apple Music library. Tap “OK” to proceed.
6. Once the connection is established, you will see an Apple Music icon appear on the Google Maps navigation screen.
7. Now, when you start a navigation in Google Maps, you can control your music playback directly from the navigation screen.
8. To access your Apple Music library, tap on the Apple Music icon on the navigation screen. This will open a control panel with options to play, pause, skip tracks, and adjust the volume.
9. You can also use voice commands to control your music playback while navigating. Just say “Hey Siri” followed by your command, such as “Play next track” or “Pause music”.
10. Enjoy your favorite music while getting turn-by-turn directions in Google Maps!
By connecting Google Maps to Apple Music, you can enhance your navigation experience and make your journeys more enjoyable with a personalized soundtrack. Start following these steps to make the connection and enjoy the best of both worlds.
Step 4: Access Apple Music in Google Maps while navigating
Once you have successfully connected Google Maps to Apple Music on your iPhone, you can easily access your favorite songs and playlists while navigating. Here’s how:
1. Open the Google Maps app on your iPhone.
2. Enter your destination and start the navigation.
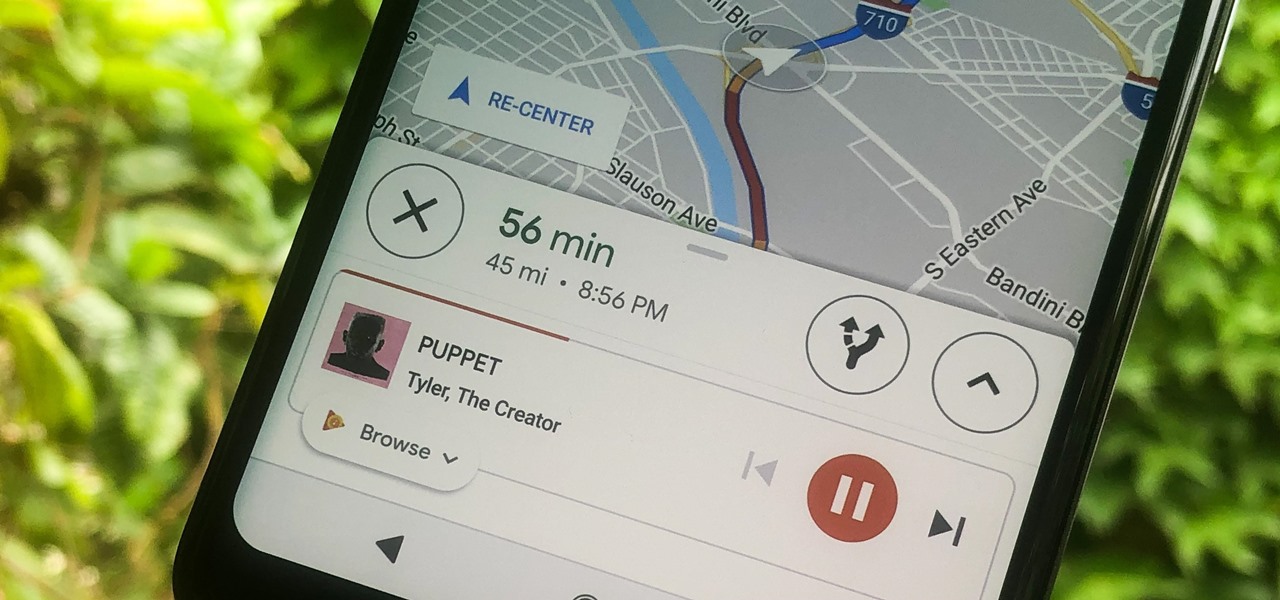
3. Look for the music control icon on the navigation screen. It is located at the bottom left corner, next to the directions button. It resembles a music note inside a circle.
4. Tap on the music control icon to open the Apple Music interface within Google Maps.
5. You will see the Apple Music interface overlaying the navigation screen. From here, you can access your Apple Music library, playlists, and recently played songs.
6. Use the search bar or browse through your library to find the song or playlist you want to listen to while navigating.
7. Once you have selected a song or playlist, it will start playing automatically. You can control the volume and playback options using the music controls within the Apple Music interface.
8. To minimize the Apple Music interface, swipe it towards the bottom of the screen.
9. The navigation screen will now display a small music control bar at the bottom, allowing you to easily pause, skip, or change the song without interrupting your navigation.
10. To access the full Apple Music interface again, simply tap on the music control bar.
By accessing Apple Music through Google Maps while navigating, you can enjoy your favorite tunes and playlists without having to switch between apps. It adds an extra layer of convenience and entertainment to your journey.
Now you’re all set to enjoy a seamless and musical navigation experience with Google Maps and Apple Music on your iPhone.
Conclusion
Connecting Google Maps to Apple Music on your iPhone can greatly enhance your navigation experience and make your commutes or road trips more enjoyable. By following the simple steps outlined in this guide, you can seamlessly integrate Apple Music into your Google Maps app and enjoy your favorite tunes while getting turn-by-turn directions.
In this article, we discussed the steps to connect Google Maps to Apple Music and highlighted the benefits of combining these two powerful apps. Whether you’re using Google Maps for daily navigation or embarking on a long journey, syncing your music with your navigation system can make the experience more personalized and immersive.
So, next time you hit the road, don’t forget to connect Google Maps to Apple Music on your iPhone and make your drives more melodious and enjoyable. Happy travels!
FAQs
Q: Can I connect Google Maps to Apple Music on my iPhone?
A: Yes, you can connect Google Maps to Apple Music on your iPhone. In fact, it’s a great way to enjoy your favorite music while using Google Maps for navigation. Here’s how you can do it.
Q: How do I connect Google Maps to Apple Music?
A: To connect Google Maps to Apple Music on your iPhone, you need to have both apps installed and updated to their latest versions. Open Google Maps and start navigating to your destination. Swipe up from the bottom of the screen to reveal the bottom panel and tap on the “Music” icon. Select Apple Music as your music streaming service, and you’re all set to enjoy your tunes while using Google Maps.
Q: Can I control Apple Music playback from within Google Maps?
A: Absolutely! Once you’ve connected Google Maps to Apple Music, you’ll be able to control playback directly from within the Google Maps app. This means you can easily play, pause, skip tracks, and adjust the volume without having to switch between apps.
Q: Are there any limitations when using Apple Music with Google Maps?
A: While you can enjoy seamless music playback through Apple Music within Google Maps, there are a few limitations to keep in mind. Firstly, this feature is only available for iOS devices, specifically on iPhones. Secondly, you need an active Apple Music subscription to stream music. Lastly, your mobile data or Wi-Fi connection is required for uninterrupted music playback.
Q: Can I integrate other music streaming services with Google Maps?
A: Yes, in addition to Apple Music, Google Maps also allows integration with other popular music streaming services like Spotify and Pandora. The steps to connect these services are similar to the ones mentioned earlier for Apple Music. Simply select your preferred music streaming platform from the Music icon within Google Maps and follow the prompts to link your accounts.