
Are you looking to enhance collaboration and productivity on your iPad running the latest iPadOS 16? Then you’re in luck! Freeform, a powerful app designed specifically for iPad, allows seamless collaboration and sharing of boards across multiple users. Whether you’re working on a group project, brainstorming ideas, or creating a visual presentation, Freeform provides a versatile platform to share and collaborate effortlessly.
In this article, we will guide you through the process of sharing a board on Freeform on your iPad running iPadOS 16. We’ll discuss the steps involved, provide tips for effective collaboration, and address common questions that may arise along the way. By the end of this article, you’ll be ready to leverage the full potential of Freeform to collaborate seamlessly and achieve your productivity goals on your iPad. So, let’s get started!
Inside This Article
- Sharing a Board on Freeform
- Setting Up Collaboration on Freeform for iPad
- Inviting Others to Collaborate on Freeform
- Managing Collaborators on Freeform
- Conclusion
- FAQs
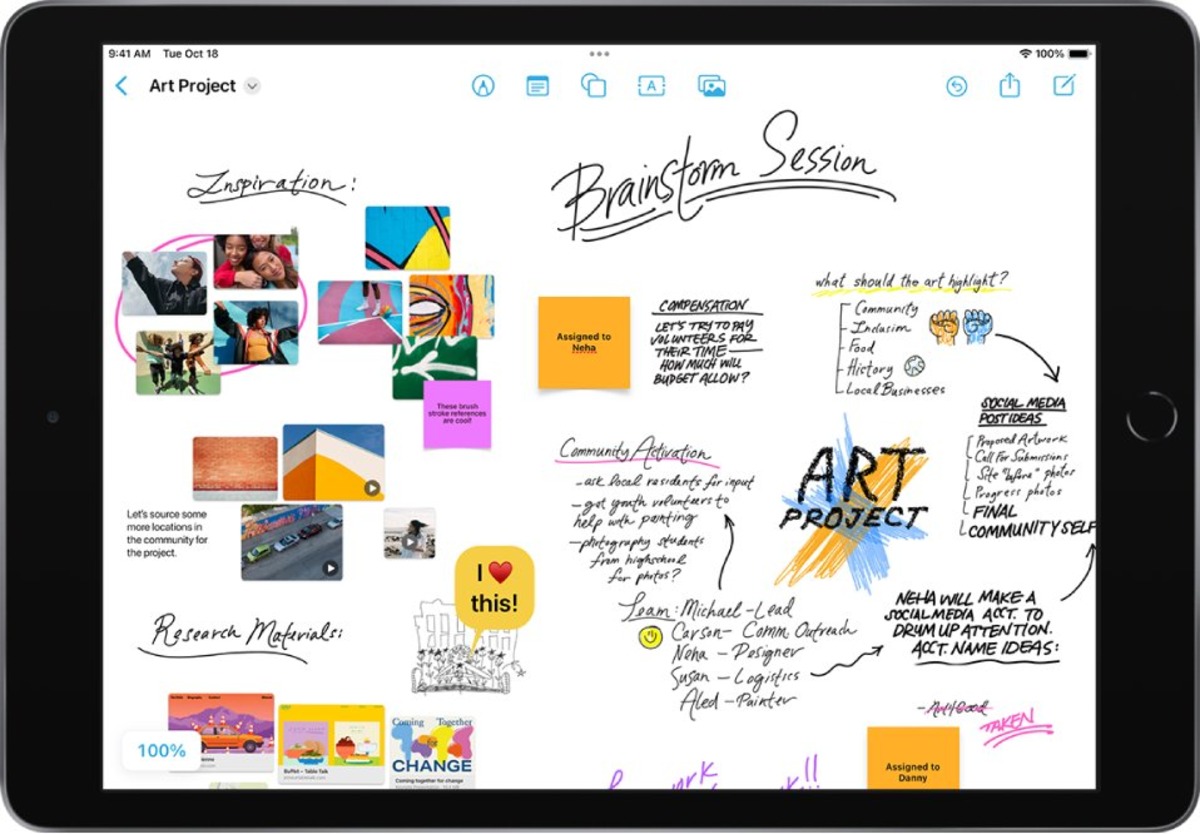
Sharing a Board on Freeform
Collaboration is essential in today’s digital age, and with iPadOS 16, sharing and collaborating on a Freeform board has never been easier. Freeform is a versatile and intuitive app that allows you to create and organize ideas, plans, and projects on your iPad. Whether you’re working on a group project, brainstorming with colleagues, or simply seeking input from others, sharing a Freeform board is a fantastic way to promote collaboration.
Here’s a step-by-step guide on how to share a board on Freeform:
- Open the Freeform app on your iPad.
- Choose the board you want to share.
- Tap on the share icon, usually represented by an arrow pointing upwards.
- Select the sharing method that suits your needs. You can choose to share via email, messaging apps, or even through third-party collaboration tools like Slack or Microsoft Teams.
- Enter the email addresses, contact names, or groups of the people you want to invite to collaborate on the board.
- Add a message or a brief description to provide context or instructions for the collaborators.
- Review the sharing settings to ensure that you’re granting the desired permissions to the collaborators.
- Tap on the ‘Share’ or ‘Send’ button to initiate the sharing process.
By following these straightforward steps, you’ll be able to share your Freeform board efficiently and effortlessly. Your collaborators will receive a notification or an invitation email, depending on the sharing method you chose. Once they accept the invitation, they will have access to the board and can contribute their ideas, comments, and edits to foster a collaborative environment.
Setting Up Collaboration on Freeform for iPad
If you’re an iPad user running iPadOS 16, you have access to an incredible collaborative feature on Freeform. With this feature, you can seamlessly share and collaborate on boards with others, making it perfect for brainstorming sessions, team projects, or simply working on creative ideas together.
The process of setting up collaboration on Freeform is straightforward, and in this article, we will guide you through the steps to get started. Let’s dive in!
Sharing a New Freeform Board
The first step towards collaboration is to create and share a new Freeform board. Follow these simple steps:
- Launch the Freeform app on your iPad.
- Create a new board by tapping on the “+” icon.
- Give your board a name and customize it with the desired background or templates available.
- Tap on the “Share” icon located at the top-right corner of the screen.
- Choose the sharing method – you can either invite collaborators directly or generate a link to share.
- If you choose to invite collaborators directly, enter their email addresses or select them from your contacts.
- Select the desired permission level for the collaborators (more on that in the next section).
- Tap “Send” to share the board.
Once the board is shared, the collaborators will receive an invitation to join the board and start collaborating with you.
Inviting Collaborators to the Board
There are two ways to invite collaborators to your Freeform board:
- Direct Invitation: This method allows you to invite specific individuals by entering their email addresses or selecting them from your contacts.
- Link Sharing: The other method is to generate a shareable link that you can send via email, messaging apps, or any other preferred platform. Anyone with the link can join the board.
Choose the method that suits your collaboration needs and preferences. Keep in mind that you have full control over who can access and collaborate on your board.
Granting and Managing Collaborator Permissions
When inviting collaborators to your board, it’s important to manage their permissions to ensure a smooth and efficient collaboration process. Freeform provides three levels of permissions:
- View Only: Collaborators with view-only permission can only see what’s on the board. They cannot make any edits or add content.
- Comment: Collaborators with comment permission can add comments and suggestions but cannot make direct changes to the board.
- Edit: Collaborators with edit permission can make changes, add content, and modify the board. They have full editing capabilities.
To manage permissions:
- Open the Freeform board you have shared.
- Tap on the “Collaborators” icon at the top-right corner of the screen.
- Find the collaborator whose permissions you want to manage.
- Tap on their name and select the desired permission level.
- Changes to permissions will be applied immediately.
With this granular control over permissions, you can ensure that collaborators have the right level of access and participation on the board.
Collaborating in Real-time on the Freeform Board
Once your collaborators have joined the board, collaboration becomes seamless. Here are some key features and tips for real-time collaboration on Freeform:
- Real-time Updates: All collaborators see the changes and edits made to the board in real-time, making it easy to work together simultaneously.
- Annotation Tools: Use the built-in annotation tools to highlight, underline, or draw attention to specific elements on the board.
- Commenting: Encourage collaboration and exchange ideas using the commenting feature. Collaborators can leave comments on various elements of the board.
- Version History: Freeform automatically saves the version history of the board, allowing you to track changes and revert to previous versions if needed.
With these powerful collaboration tools, you can work together with your team or colleagues seamlessly, regardless of your physical location.
Now that you know how to set up collaboration on Freeform for iPad, it’s time to unleash your creativity and work together to bring your ideas to life. Enjoy the collaborative experience!
Inviting Others to Collaborate on Freeform
If you’re using Freeform on your iPad running iPadOS 16, you can easily invite others to collaborate with you on a Freeform board. Collaborating with others can enhance productivity and creativity as you can work together in real-time, brainstorm ideas, and share thoughts.
To invite others to collaborate on a Freeform board, you need to follow a few simple steps:
Step 1: Open the Freeform Board
First, open the Freeform board that you want to share with others. Ensure that you are logged into your account and have the necessary permissions to invite collaborators.
Step 2: Tap on the Share Icon
In the Freeform board, look for the share icon. It typically resembles an arrow pointing out of a box and can be found in the top right corner of the screen. Tap on this icon to proceed.
Step 3: Choose a Sharing Method
After tapping on the share icon, a sharing options menu will appear. From here, you can choose how you want to invite others to collaborate. You may have options such as email, messaging apps, or social media platforms.
Step 4: Select Recipients
Depending on the sharing method you choose, you will need to select the recipients of the invitation. This can be done by entering their email addresses, selecting contacts from your address book, or choosing from your list of friends or followers on social media.
Step 5: Add a Personal Message (Optional)
If you want to personalize the invitation, you can add a message to accompany the invite. This can be a brief explanation of what the Freeform board is about, the purpose of collaboration, or any other relevant information you wish to share.
Step 6: Send the Invitation
Once you have selected the recipients and added a message (if desired), you’re ready to send the invitation. Tap on the “Send” or “Invite” button, depending on the sharing method you chose, to notify the recipients about the invitation.
Once the recipients receive the invitation, they can join the Freeform board and start collaborating with you. It’s important to note that they might need to sign up for an account or have the Freeform app installed on their iPad to access the board.
By inviting others to collaborate on Freeform, you can unlock a whole new level of creativity and productivity. So go ahead, share your board, and start collaborating with your team, friends, or colleagues today!
Managing Collaborators on Freeform
Once you have invited collaborators to your Freeform board on iPad and they have accepted the invitation, you can easily manage their permissions and ensure a seamless collaboration experience.
To manage collaborators on Freeform, follow these simple steps:
- Open the Freeform app on your iPad and navigate to the board where you have invited collaborators.
- Tap on the “Collaborators” button, usually located in the top right or left corner of the screen.
- A list of the collaborators who have access to the board will be displayed. This list will include the names and email addresses of the collaborators.
- Tap on the name of the collaborator whose permissions you want to manage.
Upon tapping the collaborator’s name, you will be presented with several options:
- Remove Collaborator: If you need to revoke a collaborator’s access to the board, you can simply tap on the “Remove Collaborator” option. Confirm the action when prompted.
- Change Permissions: By selecting the “Change Permissions” option, you can modify the collaborator’s access level. The available permissions may vary depending on the Freeform version you are using, but typically include “Can Edit,” “Can Comment,” and “Can View Only.”
- Send Message: If you need to communicate with a specific collaborator, you can send them a message directly through the Freeform app by tapping on the “Send Message” option.
Remember that managing collaborators on Freeform allows you to have full control over who can access and interact with your board. It ensures that the collaboration is productive and secure.
Now that you know how to manage collaborators on Freeform, you can confidently invite teammates, clients, or friends to collaborate on your iPad board and work together efficiently.
Conclusion
Sharing boards on Freeform on iPad is a powerful feature that enhances collaboration and productivity. With the latest update of iPadOS 16, users can easily share their boards with others, allowing team members to work together seamlessly.
By following the step-by-step process, users can create a shared board, invite collaborators, and grant them the necessary permissions. The ability to work concurrently, leave comments, and make real-time updates makes Freeform a valuable tool for group projects, brainstorming sessions, and creative collaborations.
With Freeform on iPad, sharing your boards has never been easier. Take advantage of this feature to streamline your workflow, boost team productivity, and bring your ideas to life. Start collaborating today and unlock the full potential of Freeform on your iPad!
FAQs
1. How do I share a board on Freeform on iPad for collaboration?
To share a board on Freeform on iPad for collaboration, follow these steps:
- Open the Freeform app on your iPad.
- Select the board you want to share.
- In the top-right corner of the screen, tap on the “Share” icon.
- Choose the sharing method: you can share it via AirDrop, Messages, Email, or any other compatible app.
- Select the contact or app you want to share the board with, and follow the prompts to complete the sharing process.
2. Can I collaborate on a shared board in real-time with others?
Yes, you can collaborate on a shared board in real-time with others. When you share a board on Freeform, invitees can access and edit the board simultaneously. This allows for seamless collaboration where changes made by one user are instantly visible to others.
3. Is it possible to revoke access to a shared board?
Yes, you can revoke access to a shared board on Freeform. Simply follow these steps:
- Open the Freeform app on your iPad.
- Select the shared board for which you want to revoke access.
- In the top-right corner of the screen, tap on the “Share” icon.
- Find the contact or app you shared the board with.
- Swipe left on the contact or app, and select “Remove.”
4. Can I collaborate on a shared board with users who don’t have the Freeform app?
Yes, you can collaborate on a shared board with users who don’t have the Freeform app. When you share a board, you can choose to send a copy of the board as a PDF or image file. This way, even if the users don’t have Freeform, they can still view and make suggestions on the shared content.
5. Can I set access permissions for shared boards?
Currently, Freeform does not have the option to set access permissions for shared boards. When you share a board, the recipients have full access to edit and make changes to the content. However, you can always revoke access if needed, as mentioned in the previous FAQ.