
Welcome to the world of the iPhone 7! Congratulations on your new purchase, and get ready to experience the power and versatility that this iconic device has to offer. As you unbox your shiny new iPhone, you might be wondering how to set it up in the most efficient and effective way possible. Well, you’ve come to the right place.
In this comprehensive guide, we will walk you through the process of setting up your iPhone 7, from transferring data from your old device to customizing your settings to suit your preferences. Whether you’re a seasoned iPhone user or new to the iOS ecosystem, our step-by-step instructions and expert tips will ensure that you get the most out of your new iPhone 7.
So, get ready to dive in and unleash the full potential of your new iPhone 7!
Inside This Article
- Getting Started – Charging your iPhone 7 – Powering on your iPhone 7 – Selecting language and region settings
- Connecting to Wi-Fi and Cellular Networks
- Setting up Apple ID and iCloud: Creating a new Apple ID, Signing in with an existing Apple ID, Configuring iCloud settings
- Transferring Data from your Old iPhone- Using iCloud backup- Using iTunes backup- Restoring from an iTunes or iCloud backup
- Customizing Settings and Personalizations
- Installing and Updating Apps
- Syncing and Managing Data – Syncing with iTunes – Syncing with iCloud – Managing storage and backups
- Exploring Additional Features- Configuring Apple Pay- Enabling Find My iPhone- Setting up FaceTime and iMessage
- Conclusion
- FAQs
Getting Started – Charging your iPhone 7 – Powering on your iPhone 7 – Selecting language and region settings
When you first get your brand new iPhone 7, the first step is to ensure it has enough power to function properly. To do this, locate the charging port at the bottom of the device and connect the lightning cable provided in the box. Plug the other end of the cable into a power source such as a wall adapter or a USB port on your computer.
Once your iPhone 7 is connected to a power source, it will automatically begin charging. You can check the battery level by looking at the battery icon displayed on the screen. It is recommended to let the device charge for at least 30 minutes before proceeding to the next step.
After your iPhone 7 has gathered enough power, it’s time to power it on. To do this, locate the power button on the right side of the device. Press and hold the power button until the Apple logo appears on the screen. This indicates that the device is booting up.
Once your iPhone 7 has finished booting up, you will be prompted to select the language and region settings. This step is important as it determines the language used throughout the device and the region-specific features and services available. Swipe left or right to scroll through the list of languages and tap on the one you prefer. Then, tap on the region or country that applies to your location. Once you have made your selections, tap on the “Continue” button.
By completing these initial steps, you have successfully powered on your iPhone 7 and set up the language and region settings. Next, you can proceed to the next section to learn more about connecting to Wi-Fi and cellular networks.
Connecting to Wi-Fi and Cellular Networks
One of the first tasks you’ll need to complete when setting up your new iPhone 7 is connecting to Wi-Fi and cellular networks. This step is crucial for accessing the internet, downloading apps, and staying connected with friends and family. Here’s a step-by-step guide to help you get started:
Accessing Wi-Fi settings
To access Wi-Fi settings, go to the “Settings” app on your iPhone 7. It’s represented by the gear icon, and you can usually find it on the home screen or in your app drawer. Tap on “Wi-Fi” to enter the Wi-Fi settings menu.
Connecting to a Wi-Fi network
Once you’re in the Wi-Fi settings menu, you’ll see a list of available networks. Tap on the network you want to connect to from the list. If the network is password protected, you’ll be prompted to enter the password. Type in the correct password and tap “Join” to connect.
If you don’t see the Wi-Fi network you want to connect to, make sure you’re within range of the network and that it’s functioning properly. You may also need to wait for a few seconds for the network to appear on the list.
Setting up cellular data
In addition to Wi-Fi, you’ll also want to set up your cellular data on your iPhone 7. This will enable you to have internet access even when Wi-Fi is not available. To set up cellular data, follow these steps:
- Go to the “Settings” app on your iPhone 7.
- Tap on “Cellular”.
- Toggle the switch next to “Cellular Data” to the on position.
- If you have a cellular data plan, your iPhone 7 will automatically connect to your carrier’s network. If prompted, enter any additional details provided by your carrier, such as APN settings or a PIN code.
Once you’ve completed these steps, you should be connected to both Wi-Fi and cellular networks on your iPhone 7. This will allow you to enjoy seamless internet access, whether you’re at home, at work, or on the go.
In case you encounter any issues with your Wi-Fi or cellular connectivity, make sure to check your network settings, restart your iPhone, or contact your network provider for assistance. With a reliable and secure connection, you’ll be able to make the most out of your new iPhone 7.
Setting up Apple ID and iCloud: Creating a new Apple ID, Signing in with an existing Apple ID, Configuring iCloud settings
Setting up an Apple ID and configuring iCloud on your new iPhone 7 is an essential step to access a range of Apple services and features. Whether you’re creating a new Apple ID or signing in with an existing one, this guide will help you navigate the process smoothly. Additionally, we’ll cover the steps to configure your iCloud settings to ensure your data is backed up and easily accessible across all your Apple devices.
Creating a new Apple ID:
If you don’t already have an Apple ID, setting one up is quick and easy. To create a new Apple ID, follow these steps:
- On your iPhone 7, go to the Settings app.
- Tap on “Sign in to your iPhone” or “Create New Apple ID.”
- Follow the on-screen prompts to enter your personal information, including your name, email address, and password. Make sure to choose a strong password to protect your account.
- Agree to the Terms and Conditions and verify your email address, if prompted.
- You can now use your newly created Apple ID to access various Apple services, such as the App Store, iCloud, and Apple Music.
Signing in with an existing Apple ID:
If you already have an Apple ID, signing in on your new iPhone 7 is a seamless process. Simply follow these steps:
- On your iPhone 7, go to the Settings app.
- Tap on “Sign in to your iPhone” or “Sign in to your device.”
- Enter your Apple ID and password.
- Tap “Sign In.”
- Your existing Apple ID will now be associated with your iPhone 7, allowing you to access all your previous purchases and iCloud data.
Configuring iCloud settings:
After setting up or signing in with your Apple ID, it’s important to configure your iCloud settings. iCloud allows you to automatically back up your data, sync content across devices, and access files from any Apple device with your Apple ID. Here’s how to configure your iCloud settings:
- On your iPhone 7, go to the Settings app.
- Tap on your name at the top of the screen to access your Apple ID settings.
- Tap on “iCloud.”
- You’ll see a list of options, such as Photos, Contacts, Calendars, and more. Toggle the switches to enable or disable the syncing of specific data types with iCloud.
- If you have multiple Apple devices, you can also enable iCloud Drive to access and edit files across all your devices.
- Scroll down to the bottom of the iCloud settings page and tap on “Backup.”
- Toggle the switch next to “iCloud Backup” to enable automatic backups for your device. You can also tap on “Back Up Now” to manually initiate a backup.
- With your iCloud settings configured, your data will now be regularly backed up and accessible across your Apple devices.
By following these steps, you can seamlessly set up your Apple ID, sign in with an existing one, and configure your iCloud settings on your new iPhone 7. This ensures that you can enjoy the full range of Apple services and have peace of mind knowing your data is backed up and easily accessible.
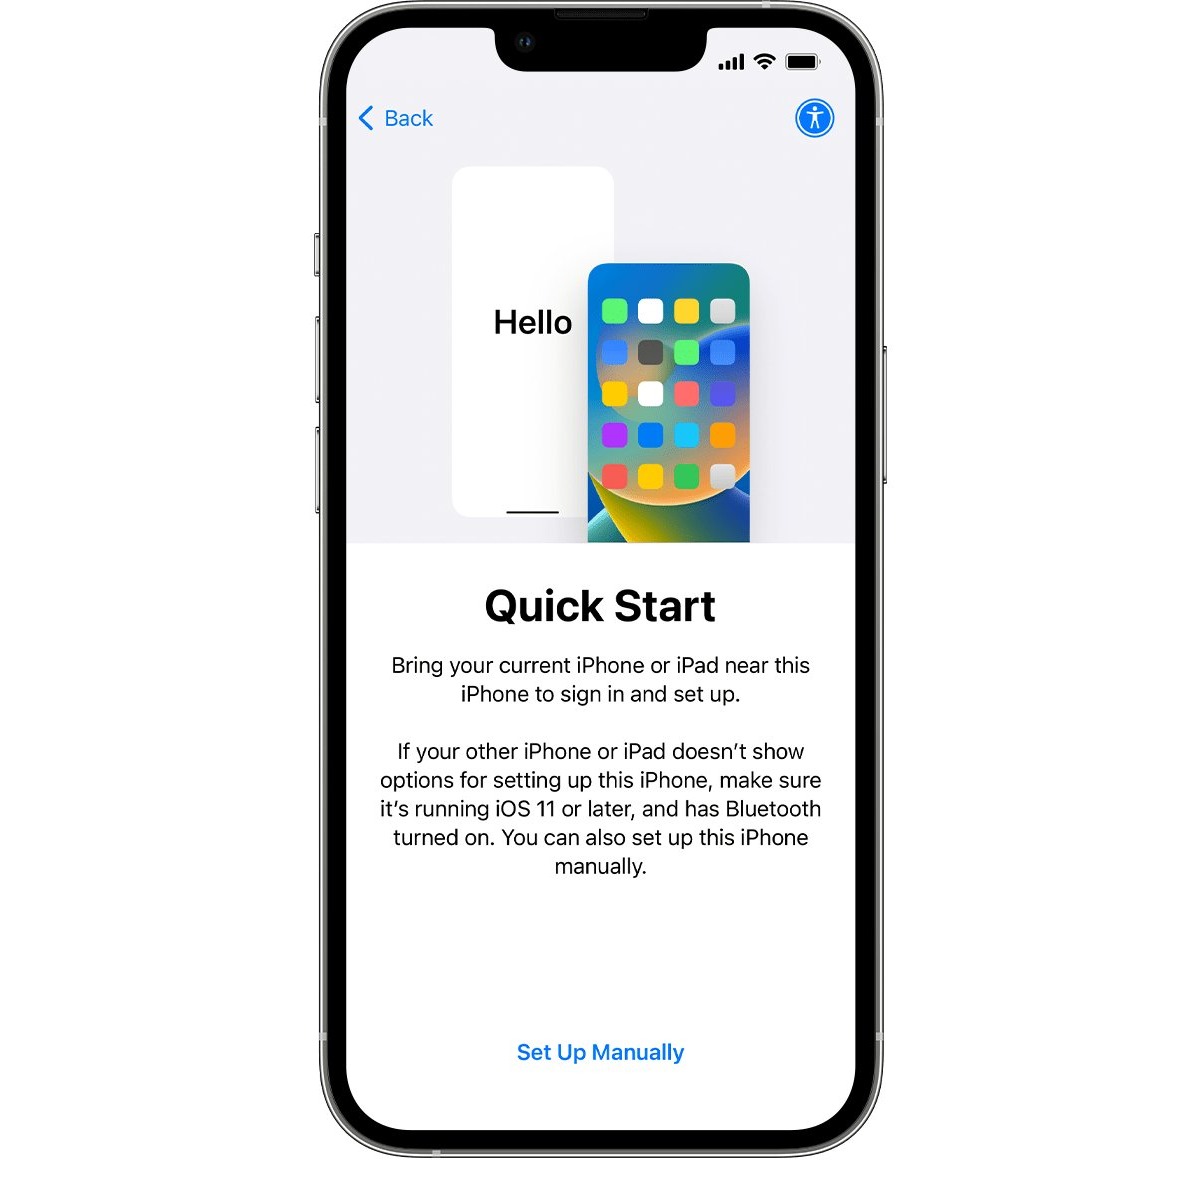
Transferring Data from your Old iPhone- Using iCloud backup- Using iTunes backup- Restoring from an iTunes or iCloud backup
When setting up your new iPhone 7, one of the most important steps is transferring your data from your old iPhone. Luckily, Apple provides two convenient methods for transferring data: using iCloud backup and using iTunes backup. Let’s explore how each method works and how you can restore your data on your new iPhone.
Using iCloud Backup:
Using iCloud backup is a simple and hassle-free way to transfer your data to your new iPhone. Here’s how you can do it:
- Ensure that your old iPhone is connected to Wi-Fi and logged into your iCloud account.
- On your old iPhone, go to “Settings” and tap on your name at the top of the screen.
- Tap on “iCloud” and then on “iCloud Backup.”
- Make sure that the “iCloud Backup” toggle is enabled, and then tap on “Back Up Now” to initiate the backup process.
- Once the backup is complete, turn on your new iPhone 7 and follow the setup instructions.
- During the setup process, choose “Restore from iCloud Backup.”
- Sign in with your Apple ID and select the most recent backup that you created with your old iPhone.
- Allow your new iPhone to complete the restore process, and soon you’ll have all your data transferred to your new device.
Using iTunes Backup:
If you prefer using iTunes to transfer your data, follow these steps:
- Connect your old iPhone to your computer and open iTunes.
- Select your device in the iTunes interface.
- In the “Summary” tab, click on “Back Up Now” to create a backup of your old iPhone.
- Once the backup is complete, disconnect your old iPhone and connect your new iPhone 7 to the computer.
- Follow the on-screen setup instructions on your new iPhone.
- When prompted, select the option to “Restore from iTunes Backup.”
- In iTunes, choose the backup from your old iPhone that you just created.
- Allow the restore process to complete, and soon your new iPhone will have all your data from your old device.
Restoring from an iTunes or iCloud Backup:
If you have already completed the setup process and did not restore from a backup, don’t worry. You can still restore your data by following these steps:
- Ensure that your new iPhone is connected to Wi-Fi.
- Go to “Settings” on your new iPhone and tap on “General.”
- Scroll down and tap on “Reset.”
- Choose “Erase All Content and Settings.”
- Follow the on-screen instructions to erase your new iPhone.
- Once your iPhone restarts, follow the setup instructions and choose the “Restore from iCloud Backup” or “Restore from iTunes Backup” option.
- Sign in with your Apple ID and select the appropriate backup.
- Allow the restore process to complete, and your new iPhone will have all your data.
By using iCloud or iTunes backup, you can effortlessly transfer your data from your old iPhone to your new iPhone 7. Whether you prefer the convenience of iCloud or the familiarity of iTunes, both methods ensure that you won’t lose any important information during the transition. So, get ready to enjoy your new iPhone with all your old data at your fingertips!
Customizing Settings and Personalizations
When you get your new iPhone 7, one of the first things you’ll want to do is customize its settings and personalize it to your liking. Here are a few key areas to focus on:
Adjusting Display and Brightness Settings
To ensure a comfortable viewing experience, you can adjust the display and brightness settings on your iPhone 7. Simply go to the “Settings” app and tap on “Display & Brightness.” From there, you can adjust the brightness level using the slider. If you prefer a warmer or cooler color tone, you can also enable the “Night Shift” feature, which reduces blue light emitted by the screen during nighttime hours.
Setting up Touch ID and Passcode
Protecting your device with Touch ID and a passcode adds an extra layer of security. To set up Touch ID, which allows you to unlock your iPhone and make secure purchases using your fingerprint, go to “Settings” and select “Touch ID & Passcode.” Follow the prompts to configure Touch ID by placing your finger or thumb on the Home button. Additionally, you can set a passcode (either numeric or alphanumeric) for further protection.
Personalizing Siri Settings
Siri, the intelligent voice assistant on your iPhone, can be customized to better meet your needs. To personalize Siri settings, open “Settings” and tap on “Siri & Search.” From here, you can enable or disable Siri’s voice feedback, customize the language and accent, and even change Siri’s gender. You can also specify whether Siri should respond when your device is locked or activate by saying “Hey Siri.”
By adjusting these settings and personalizing your iPhone 7, you can enhance your overall user experience and make your device feel uniquely yours.
Installing and Updating Apps
One of the great things about owning an iPhone 7 is access to the vast array of apps available in the App Store. Whether you’re looking for productivity tools, entertainment options, or social media platforms, the App Store has it all. Here’s a step-by-step guide on how to access the App Store, download and install apps, and keep them updated.
Accessing the App Store
To access the App Store on your iPhone 7, simply locate the “App Store” icon on your home screen and tap on it. The App Store will open, and you’ll be greeted with a wide variety of app categories to explore.
Once you’re inside the App Store, you can navigate through different sections such as “Featured”, “Top Charts”, “Categories”, or use the search function to find specific apps. The “Featured” section highlights popular and recommended apps, while the “Top Charts” section displays the most downloaded and highly-rated apps.
Downloading and Installing Apps
When you find an app you want to download and install, tap on the app’s icon to view its details page. Here, you can read more about the app, check user reviews, and see screenshots or videos to get a better idea of what the app offers.
Once you’ve decided to install an app, tap the “Get” or “Download” button. You may be prompted to enter your Apple ID password or use Face ID/Touch ID for authentication. After confirming your download, the app will begin downloading and installing on your iPhone 7. Depending on the app’s size and your internet connection speed, the installation process may take a few seconds or several minutes.
Once the app is successfully installed, its icon will appear on your home screen, ready to be used. You can rearrange app icons, create folders, or put your favorite apps in the dock area for quick access.
Updating Apps
It’s important to keep your apps up to date to ensure you have the latest features, bug fixes, and security improvements. To update your apps on iPhone 7, follow these steps:
- Open the App Store on your iPhone 7.
- Tap on your profile icon or your Apple ID at the top right corner of the screen.
- Scroll down and under the “Pending Updates” section, you’ll see a list of apps that have updates available.
- Tap the “Update” button next to each app to update it individually or tap “Update All” to update all the apps at once.
- If prompted, enter your Apple ID password or use Face ID/Touch ID for authentication.
The selected apps will begin updating, and once the process is complete, you’ll have the latest version of each app on your iPhone 7. You can also enable automatic updates by going to “Settings” > “App Store” and toggling on the “App Updates” option.
By following these instructions, you’ll be able to access the App Store, download and install apps, and keep them updated on your iPhone 7. Enjoy exploring the vast world of apps and make the most out of your device!
Syncing and Managing Data – Syncing with iTunes – Syncing with iCloud – Managing storage and backups
Syncing your iPhone 7 with iTunes is a convenient way to backup and manage your data. To get started, you’ll need to have the latest version of iTunes installed on your computer. Once you’ve connected your iPhone 7 to your computer using a USB cable, follow these steps:
- Launch iTunes and select your iPhone 7 from the Devices menu.
- In the Summary tab, you will find options for syncing your music, videos, photos, and more. Choose the content you want to sync with your iPhone 7.
- Click on the Apply or Sync button to initiate the syncing process.
Syncing with iTunes allows you to not only backup your data but also transfer media files, such as music and videos, from your computer to your iPhone 7. It’s a great way to keep all your multimedia organized and easily accessible.
On the other hand, if you prefer a more seamless and wireless syncing experience, you can take advantage of iCloud. With iCloud, your iPhone 7 can automatically backup and sync your data whenever you’re connected to Wi-Fi. Here’s how to set it up:
- Go to the Settings app on your iPhone 7.
- Tap on your Apple ID at the top of the screen.
- Select “iCloud” and turn on the toggle switch next to the apps you want to sync, such as Contacts, Calendars, Photos, and more.
- Ensure the “iCloud Backup” option is enabled. This will automatically backup your iPhone 7 to iCloud periodically.
Using iCloud for syncing and backups ensures that your data is always up-to-date across all your devices. It also provides a convenient way to restore your iPhone 7 if you ever need to reset it or switch to a new device.
Managing storage and backups on your iPhone 7 is essential to ensure that you have enough space for your apps, photos, and other files. To manage your storage and backups, follow these steps:
- Go to Settings and tap on “General.”
- Select “iPhone Storage.
- Here, you’ll see a breakdown of your storage usage. You can offload unused apps, delete large files, or enable “Optimize Storage” to automatically manage your storage space.
- To manage your backups, go to Settings, tap on your Apple ID, select “iCloud,” then “Manage Storage.” From here, you can delete old backups or manage the storage of specific apps.
By regularly managing your storage and backups, you can free up space on your iPhone 7 and ensure that your device runs smoothly.
Syncing and managing data on your iPhone 7 is crucial for keeping your device organized, up-to-date, and secure. Whether you choose to sync with iTunes or utilize iCloud for wireless syncing and backups, these methods allow you to conveniently manage your media, apps, and files. Additionally, managing storage and backups ensures that you have enough space for all your needs. Take the time to set up these syncing and management practices, and you’ll enjoy a seamless experience with your iPhone 7.
Exploring Additional Features- Configuring Apple Pay- Enabling Find My iPhone- Setting up FaceTime and iMessage
Once you have successfully set up your new iPhone 7, there are several additional features you can explore to enhance your user experience. In this section, we will discuss how to configure Apple Pay, enable Find My iPhone, and set up FaceTime and iMessage.
Configuring Apple Pay: Apple Pay is a convenient and secure way to make payments using your iPhone 7. To set up Apple Pay, follow these steps:
- Open the Wallet app on your iPhone.
- Tap the “+” button to add a credit or debit card.
- Follow the on-screen instructions to add your card details.
- If your bank supports it, you may need to verify your card details through a verification code or a phone call.
- Once your card is verified, you can start using Apple Pay for contactless payments.
Enabling Find My iPhone: Find My iPhone is a useful feature that allows you to locate your device if it’s lost or stolen. Here’s how to enable Find My iPhone:
- Go to the Settings app on your iPhone.
- Tap your Apple ID at the top of the screen.
- Select “iCloud” from the list of options.
- Scroll down and toggle on the “Find My iPhone” option.
- You can also enable “Send Last Location” to automatically send your device’s location to Apple when the battery is critically low.
Setting up FaceTime and iMessage: FaceTime and iMessage are Apple’s messaging and video calling services. Here’s how to set them up:
- FaceTime:
- Open the FaceTime app on your iPhone.
- Sign in with your Apple ID, or create a new Apple ID if you don’t have one.
- Toggle on the “FaceTime” option to enable the service.
- You can now make FaceTime video or audio calls to other Apple users.
- iMessage:
- Go to the Settings app on your iPhone.
- Tap on “Messages”.
- Toggle on the “iMessage” option.
- Sign in with your Apple ID, or create a new Apple ID if needed.
- You can now send and receive free iMessages to other Apple users.
With Apple Pay, Find My iPhone, FaceTime, and iMessage configured on your iPhone 7, you can maximize the value and functionality of your device. These additional features add convenience, security, and the ability to stay connected with friends and family.
Conclusion
The iPhone 7 is a powerful and versatile device that can greatly enhance your mobile experience. By following the steps outlined in this article, you can ensure that you set up your new iPhone 7 the right way, optimizing its features and maximizing its potential. From backing up your old device to setting up Touch ID and Apple Pay, taking these necessary steps will ensure a seamless transition to your new device and protect your data from being lost. Additionally, don’t forget to explore the various settings and customization options available on your iPhone 7 to make it truly your own. With its sleek design, advanced camera capabilities, and exciting features, the iPhone 7 is a great choice for anyone looking for a top-notch smartphone. So go ahead, dive into the world of iPhone 7 and enjoy the convenience and innovation it has to offer!
FAQs
1. Can I use my current SIM card with the iPhone 7?
Yes, the iPhone 7 uses a nano-SIM card, so if your current SIM card is compatible, you can use it in your new iPhone. However, if your current SIM card is larger, you will need to contact your mobile carrier to get a new nano-SIM card.
2. How do I transfer my data from my old phone to the iPhone 7?
There are a few methods you can use to transfer your data to your new iPhone 7. One option is to use iCloud backup to restore your data from your previous iPhone or other Apple devices. Another option is to use iTunes to transfer your data from a backup of your old phone. You can also use third-party apps or services to transfer specific data, such as contacts, photos, and messages.
3. Do I need to have an Apple ID to set up the iPhone 7?
Yes, you will need an Apple ID to set up and use your iPhone 7. An Apple ID is required to access the App Store, iTunes, iCloud, and other Apple services. If you don’t have an Apple ID, you can create one during the setup process on your iPhone or through the Apple website.
4. Can I use my existing accessories with the iPhone 7?
If you have accessories that use the traditional 3.5mm headphone jack, such as headphones or speakers, you may need an adapter to connect them to the iPhone 7. The iPhone 7 removed the headphone jack, so it uses the Lightning port for audio. However, most other accessories, such as charging cables and Bluetooth devices, should be compatible with the iPhone 7.
5. How do I protect my iPhone 7 from damage?
To protect your iPhone 7 from damage, it’s recommended to use a protective case and a screen protector. A case can provide impact resistance and prevent scratches, while a screen protector can guard against cracks and scratches on the display. Additionally, you should avoid exposing your iPhone 7 to extreme temperatures, water, and other liquids.