
If you have recently purchased an Xperia Tablet and are wondering how to turn on the data to access the internet, you’ve come to the right place. The Xperia Tablet is a powerful device that offers a range of features and functionalities, including the ability to connect to cellular networks for data access on the go. In this article, we will guide you through the steps to turn on the data on your Xperia Tablet, allowing you to stay connected and enjoy all the benefits of mobile internet browsing, streaming, and downloading. Whether you’re a tech-savvy individual or new to the world of tablets, we will provide you with clear and easy-to-follow instructions to ensure a hassle-free experience. So, without further ado, let’s dive into the process of turning on the data on your Xperia Tablet.
Inside This Article
- Troubleshooting Steps:
- Checking Wi-Fi Settings:
- Enabling Mobile Data: – Accessing the settings menu – Activating mobile data option
- Resetting Network Settings:
- Updating Software: – Checking for software updates – Installing the latest software version
- Conclusion
- FAQs
Troubleshooting Steps:
If you’re having trouble turning on the data on your Xperia tablet, don’t worry – there are a few troubleshooting steps you can take to resolve the issue. Follow the steps below to get your data up and running in no time.
1. Checking Wi-Fi Settings:
The first thing you’ll want to do is check your Wi-Fi settings to make sure everything is set up correctly. Start by ensuring that Wi-Fi is turned on in your tablet’s settings. Simply swipe down from the top of the screen and tap on the Wi-Fi icon to enable it.
Next, check to see if your tablet is connected to the correct Wi-Fi network. Sometimes, devices can automatically connect to a different network, causing the data to not work as expected. Open your tablet’s Wi-Fi settings, and verify that it is connected to the appropriate network.
2. Enabling Mobile Data:
If you’re still experiencing issues after checking your Wi-Fi settings, the next step is to enable mobile data. Start by accessing the settings menu on your Xperia tablet. You can usually find it by swiping down from the top of the screen and tapping on the gear icon.
Once you’re in the settings menu, look for the “Network & Internet” or “Connections” option. Tap on it, and then locate the “Mobile Data” or “Data Usage” option. Make sure the toggle switch next to it is turned on to enable mobile data.
3. Resetting Network Settings:
If enabling mobile data didn’t solve the problem, you can try resetting the network settings on your Xperia tablet. This will remove any saved Wi-Fi networks and Bluetooth connections, so be aware that you’ll need to set them up again after the reset.
To reset the network settings, navigate to the settings menu once again. Look for the “System” or “System & Updates” option, and then tap on it. From there, select “Advanced” or “Reset options,” and choose the option to reset network settings. Confirm the reset, and wait for your tablet to reboot.
4. Updating Software:
If all else fails, it’s worth checking if there’s a software update available for your Xperia tablet. Software updates often include bug fixes and performance improvements, which can help resolve connectivity issues.
To check for software updates, go to the settings menu on your tablet. Look for the “System” or “System & Updates” option, and tap on it. From there, select “Software Update” or “Check for updates.” If an update is available, follow the on-screen instructions to download and install it.
By following these troubleshooting steps, you should be able to turn on the data on your Xperia tablet successfully. If you’re still experiencing issues, it may be worth contacting the manufacturer or your service provider for further assistance.
Checking Wi-Fi Settings:
When it comes to turning on data on your Xperia tablet, the first thing you should do is check your Wi-Fi settings. Here are the steps to ensure you have a successful connection:
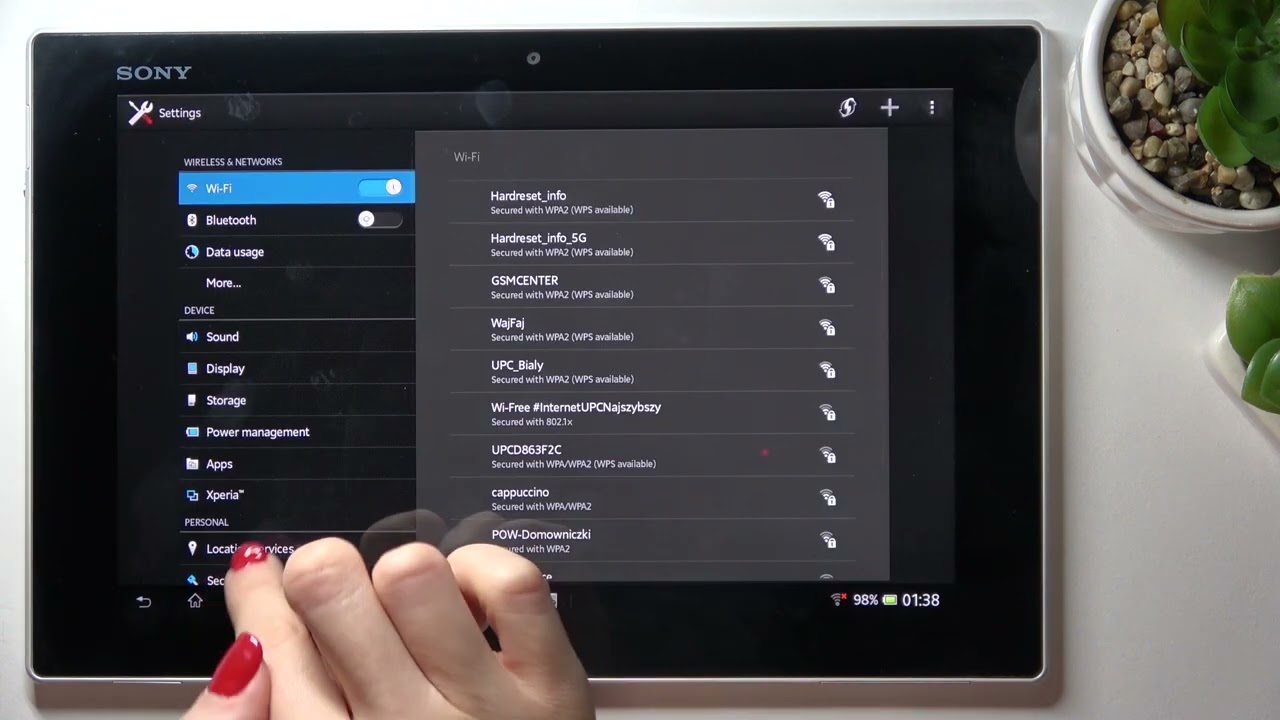
- Ensuring Wi-Fi is turned on: Start by navigating to your tablet’s settings menu. Look for the Wi-Fi option and make sure it is turned on. If it is already enabled, move on to the next step.
- Verifying the tablet is connected to the correct network: Once Wi-Fi is turned on, you’ll see a list of available networks. Check if your desired network is visible and select it to connect. If your network requires a password, make sure to enter it correctly. Once connected, your tablet should display the Wi-Fi icon in the status bar.
By following these simple steps, you can ensure that your Xperia tablet is correctly connected to a Wi-Fi network. This will allow you to access the internet and any online services that require a network connection.
Enabling Mobile Data: – Accessing the settings menu – Activating mobile data option
One of the most common reasons why users face difficulties in turning on data on their Xperia tablets is that mobile data is not enabled. To enable mobile data, you need to follow a few simple steps. Here’s a step-by-step guide to help you through the process:
1. Start by accessing the settings menu on your Xperia tablet. You can usually find the settings app on your home screen or in the app drawer. Look for the gear icon or the word “Settings” to identify the app.
2. Once you have opened the settings menu, scroll down or swipe to find the “Network & Internet” or “Connections” option. Tap on it to proceed.
3. Within the network settings, you should see an option labeled “Mobile Data” or “Data Usage.” Tap on this option to access the mobile data settings.
4. In the mobile data settings, you will find a switch that allows you to turn on or off the mobile data connection. Ensure that the switch is toggled to the “On” position to activate mobile data.
5. After activating mobile data, you may need to wait a few moments for the connection to establish. Once the data connection is established, you should see the appropriate icon (such as 4G or LTE) in the status bar of your Xperia tablet, indicating that mobile data is now enabled.
It is worth noting that enabling mobile data on your Xperia tablet may incur additional charges from your mobile service provider, depending on your data plan. It is advisable to keep track of your data usage and adjust your plan accordingly to avoid any unexpected fees.
Following these steps should successfully enable mobile data on your Xperia tablet, allowing you to enjoy a seamless internet browsing experience and access online content wherever you go.
Resetting Network Settings:
When you’re experiencing connectivity issues with your Xperia Tablet, one of the troubleshooting steps you can take is resetting the network settings. This action can help resolve any configuration problems that may be hindering your tablet’s ability to connect to the internet. Here’s how you can navigate to the settings menu and select the option to reset network settings:
1. On your Xperia Tablet, locate and tap on the “Settings” app. This app may be represented by a gear or a cogwheel icon.
2. Once you’re in the settings menu, scroll down until you find the “Network & Internet” section. Tap on it to proceed.
3. In the “Network & Internet” section, you should see various options related to network connectivity. Look for the option that says “Reset Wi-Fi, mobile & Bluetooth.” Tap on it to continue.
4. A confirmation prompt may appear, informing you about the consequences of resetting network settings. This action will remove all saved Wi-Fi networks, Bluetooth devices, and cellular network settings. If you’re certain that you want to proceed, select the “Reset Settings” or similar option.
5. Wait for a few moments while the system resets the network settings. Once the process is complete, your tablet will restart automatically.
6. After the restart, you’ll need to reconfigure your Wi-Fi connection and other network settings. Go back to the settings menu and set up your Wi-Fi network by selecting the appropriate network name and entering the password.
By resetting the network settings on your Xperia Tablet, you can often resolve connectivity issues and regain full access to the internet and other network services. However, keep in mind that this action will remove any saved Wi-Fi networks and other network-related settings, so be prepared to set them up again after the reset.
Updating Software: – Checking for software updates – Installing the latest software version
Keeping your Xperia Tablet up-to-date with the latest software is crucial for optimal performance and to access the latest features and security enhancements. Updating the software is a straightforward process that involves checking for updates and installing the latest version. Here’s how you can update the software on your Xperia Tablet:
1. Checking for software updates: To begin, ensure that your tablet is connected to the internet, either through Wi-Fi or mobile data. Locate the “Settings” app on your home screen or in the app drawer, and tap on it to open. Look for the “System” or “About” option, and select it. Within this menu, you should find the “Software Update” or “System Updates” option. Tap on it to start checking for updates.
2. Installing the latest software version: After tapping on the “Software Update” or “System Updates” option, your tablet will automatically check for available updates. If a new software version is detected, you will be prompted to download and install it. Make sure your tablet is connected to a stable Wi-Fi network or has a strong mobile data signal to ensure the update is downloaded successfully. Follow the on-screen instructions to install the update, and do not interrupt the process until it is completed.
It is recommended to have your tablet connected to a power source during the software update to avoid any interruptions due to low battery. Some updates may take a few minutes to download and install, while others may require a longer time, depending on the size and complexity of the update.
Updating the software on your Xperia Tablet not only improves performance but also ensures that your device is equipped with the latest security patches to protect your data. Regularly checking for software updates and installing them promptly is a good practice to keep your tablet running smoothly and securely.
Turning on data on your Xperia tablet is a simple and essential step to ensure a seamless internet connectivity experience. By following a few easy steps, you can enable data on your device and stay connected wherever you go.
Remember to keep an eye on your data usage to avoid any unexpected charges. By staying on top of your data plan and making the most of your Xperia tablet’s internet capabilities, you can enjoy a world of possibilities at your fingertips.
With data turned on, you can browse the web, stream videos, download apps, and stay connected with friends and family through social media and messaging apps. Don’t let a lack of internet access hold you back – turn on your data and unlock the full potential of your Xperia tablet today!
FAQs
FAQ 1: How do I turn my data on my Xperia Tablet?
To turn on the data on your Xperia Tablet, follow these steps:
- Swipe down from the top of the screen to open the Notification Panel.
- Tap on the gear icon to open the Settings app.
- Scroll down and tap on “Network & internet.”
- Tap on “Mobile network.
- Toggle the switch next to “Mobile data” to turn it on.
FAQ 2: Can I use mobile data to browse the internet on my Xperia Tablet?
Yes, once you have turned on the data on your Xperia Tablet as mentioned in the previous FAQ, you can use mobile data to browse the internet, access emails, use social media apps, stream videos, and more, just like you would on a smartphone.
FAQ 3: How can I check my data usage on my Xperia Tablet?
To check your data usage on your Xperia Tablet, follow these steps:
- Open the Settings app on your Xperia Tablet.
- Scroll down and tap on “Network & internet.”
- Tap on “Data usage.”
- You will see a graph showing your data usage. You can also set a data limit and receive notifications when you approach it.
FAQ 4: Can I share my Xperia Tablet’s data connection with other devices?
Yes, you can share your Xperia Tablet’s data connection with other devices through a process called “tethering.” To enable tethering on your Xperia Tablet, follow these steps:
- Open the Settings app on your Xperia Tablet.
- Scroll down and tap on “Network & internet.”
- Tap on “Hotspot & tethering.
- Toggle the switch next to “Wi-Fi hotspot” to turn it on.
- Set a network name and password for the hotspot.
Once the hotspot is activated, other devices can connect to it and use your Xperia Tablet’s data connection.
FAQ 5: Are there any data-saving features on my Xperia Tablet?
Yes, Xperia Tablets come with several data-saving features to help you conserve your data usage. Here are a few:
- Data Usage Control: Under the “Data usage” settings, you can enable the “Data Usage Control” feature, which restricts background data usage for apps.
- Data Saver Mode: In the “Network & internet” settings, you can enable the “Data Saver” mode, which reduces data usage by optimizing webpages and restricting data access for certain apps.
- Data Warning & Limit: You can set a data warning and limit in the “Data usage” settings to receive notifications and control your data usage.
These features can help you manage your data usage and avoid exceeding your data plan.