
Are you excited about getting your hands on the latest iPhone 14? Congratulations! As you unbox your brand new device, the first thing you need to do is activate it. Activating your iPhone 14 is a simple process that ensures your device is ready for use. Whether you are setting up a new phone or switching from another device, the activation process ensures that your iPhone 14 is linked to your carrier’s network and ready to make calls, send messages, and access mobile data. In this article, we will guide you through the steps to activate your iPhone 14, whether you are a new iPhone user or an existing user looking to upgrade. So, let’s dive in and get your iPhone 14 up and running in no time!
Inside This Article
- Overview of iPhone 14 Activation Process
- Step 1: Checking for SIM Card Compatibility
- Step 2: Powering On the iPhone 14
- Step 3: Connecting to Wi-Fi or Cellular Network
- Step 4: Setting Up Touch ID or Face ID
- Step 5: Signing in with Apple ID and iCloud
- Step 6: Enabling Location Services
- Step 7: Restoring Data from a Backup
- Step 8: Updating Software and Apps
- Step 9: Activating iMessage and FaceTime
- Step 10: Authenticating with Carrier for Service Setup
- Conclusion
- FAQs
Overview of iPhone 14 Activation Process
Activating your new iPhone 14 is an essential step to start using it and unlock all its features. Whether you’re upgrading from an older iPhone or switching from a different brand, the activation process is straightforward and can be completed in just a few minutes. In this article, we will guide you through the steps to activate your iPhone 14, from preparing for activation to setting up and personalizing your device.
Before you begin the activation process, there are a few things you should do to ensure a smooth experience. Firstly, make sure you have a stable internet connection. Activation requires an internet connection to communicate with Apple’s activation servers. Additionally, ensure that your SIM card is inserted correctly and that you have a compatible carrier SIM card that is activated and functioning properly.
Once you have taken care of the necessary preparations, you can start activating your iPhone 14. To do this, power on your device by pressing and holding the power button until the Apple logo appears. You will then be greeted with the “Hello” screen, indicating that your iPhone is ready to be set up.
To activate your iPhone 14, follow the on-screen instructions. You will be prompted to select your language, region, and connect to a Wi-Fi network. Connecting to Wi-Fi is crucial during activation as it allows your iPhone to download the latest updates and verify your device with Apple’s activation servers.
Once you are connected to Wi-Fi, your iPhone 14 will proceed to activate. This process involves verifying your device’s unique identifier with Apple’s servers and syncing your carrier information. Depending on your internet connection speed, this step may take a few moments. It’s important to note that during this process, your old phone may lose service temporarily.
After your iPhone 14 is successfully activated, you will be prompted to set up Face ID or Touch ID, depending on the model of your device. These biometric features enhance the security of your iPhone by allowing you to unlock it with your face or fingerprint. Follow the on-screen instructions to complete the setup process.
Once you have set up biometric authentication, you can proceed to sign in with your Apple ID or create a new one. Your Apple ID is crucial for accessing various Apple services and backing up your device. If you already have an Apple ID, simply sign in with your credentials. If not, you can create a new Apple ID directly from your iPhone 14.
After signing in with your Apple ID, you will have the option to restore your iPhone from a previous backup or set it up as a new device. If you have a backup from an older iPhone, restoring it will transfer all your data, apps, and settings to your new iPhone 14. If you prefer to start fresh, choose the option to set up as a new device.
Once you have completed these steps, your iPhone 14 is fully activated and ready to use. You can now explore the various features, download apps from the App Store, and customize your device to your liking. Enjoy your new iPhone 14 and all the possibilities it offers!
Step 1: Checking for SIM Card Compatibility
Before you can activate your iPhone 14, it is important to ensure that your SIM card is compatible with the device. Follow these steps to check for SIM card compatibility:
1. Locate the SIM card tray on your iPhone 14. It is usually located on the side of the device.
2. Use the SIM card removal tool, or a small paperclip, to gently eject the SIM card tray.
3. Carefully remove the SIM card from the tray and inspect it for any physical damage. Look for any signs of bending, scratches, or dents.
4. Check the size of the SIM card. The iPhone 14 requires a Nano-SIM card. If your current SIM card is not a Nano-SIM, you will need to contact your mobile service provider to obtain a compatible SIM card.
5. If you have a Nano-SIM card, make sure it is activated and ready for use. If you are unsure whether your SIM card is activated, you can contact your mobile service provider for assistance.
6. Once you have confirmed that your SIM card is compatible and activated, carefully reinsert it into the SIM card tray. Make sure the SIM card is properly aligned with the tray before pushing it back into the device.
Now that you have checked for SIM card compatibility, you are ready to proceed with the activation process of your iPhone 14.
Step 2: Powering On the iPhone 14
Once you have inserted the SIM card into your iPhone 14, it’s time to power it on and start the activation process. Follow these simple steps to get your new device up and running:
1. Locate the power button, which is usually located on the right side of the device. It may also be on the top or left side, depending on the iPhone model.
2. Press and hold the power button until the Apple logo appears on the screen. This typically takes a few seconds.
3. Once the Apple logo is displayed, release the power button. The iPhone will then boot up and you will be greeted with the “Hello” screen.
4. Swipe up from the bottom of the screen or press the home button to begin the setup process.
5. Follow the on-screen instructions to select your language, region, Wi-Fi network, and other preferences. You may be asked to enter your Apple ID and password if you have one. If you don’t have an Apple ID, you can create one during the setup process.
6. Once you have completed the setup process, your iPhone 14 will be activated and ready to use. You can now start exploring its features, downloading apps, and personalizing your device to your liking.
Remember to keep your iPhone 14 connected to a stable Wi-Fi network during the setup process to ensure a smooth activation experience.
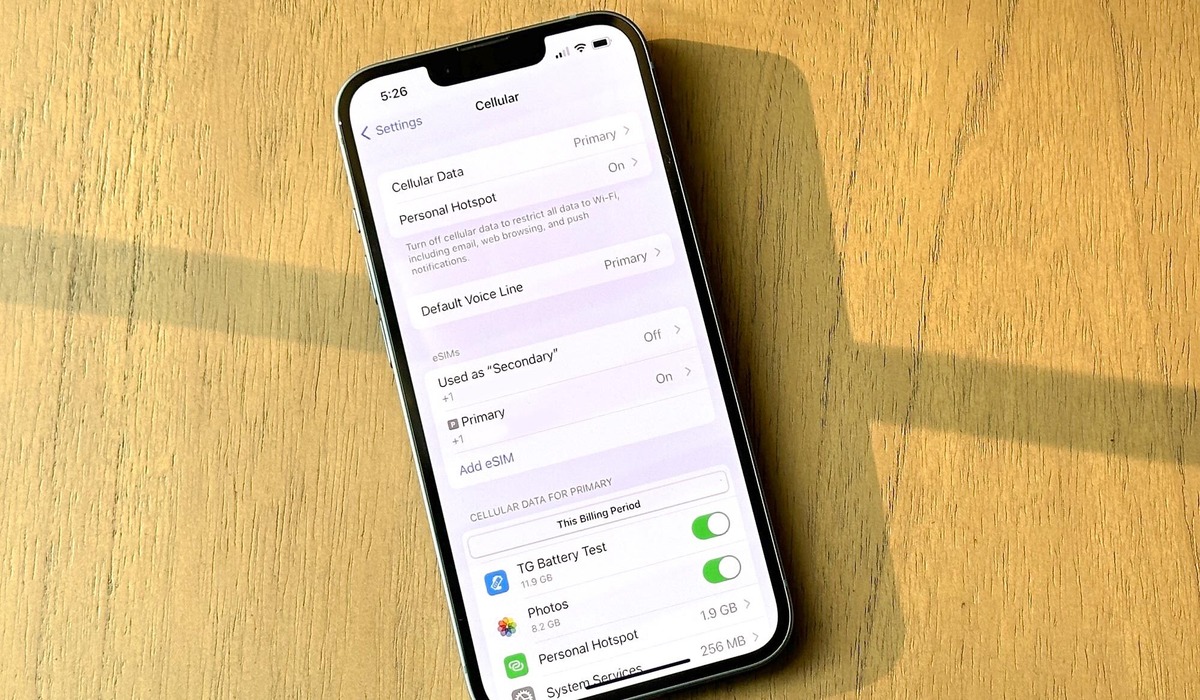
Step 3: Connecting to Wi-Fi or Cellular Network
After activating your new iPhone 14, the next step is to connect it to a Wi-Fi or cellular network. This will ensure that you can make calls, send messages, and access the internet on your device. Follow the steps below to get connected:
1. On your iPhone 14, go to the Settings app. You can find it on the home screen, represented by a gear icon.
2. In the Settings menu, tap on the Wi-Fi option. If you have a cellular data plan, you can alternatively select the Cellular option.
3. If you’re using Wi-Fi, ensure that the Wi-Fi toggle switch is turned on. Your device will then scan for available networks. Tap on the network you want to connect to from the list.
4. If the network you want to connect to is password protected, you will need to enter the password. Use the on-screen keyboard to input the correct password and then tap Join or Connect.
5. Once connected to a Wi-Fi network, your iPhone 14 will display a checkmark next to the network name. You can also see the Wi-Fi signal strength indicator next to the network name. The stronger the signal, the better the connection.
6. If you prefer to use a cellular data network, select the Cellular option in the Settings menu. Make sure that the Cellular Data toggle switch is turned on.
7. Wait for your iPhone 14 to search for and connect to available cellular networks. Once connected, you will see the name of your carrier displayed at the top left corner of the screen, alongside the signal strength indicator.
8. If your cellular data connection requires a PIN or password, you may be prompted to enter it at this stage.
And there you have it! Your iPhone 14 is now connected to a Wi-Fi or cellular network, allowing you to enjoy uninterrupted internet access and communication capabilities.
Step 4: Setting Up Touch ID or Face ID
One of the key features of the iPhone 14 is the ability to unlock your device and authenticate purchases using either Touch ID or Face ID. Follow the steps below to set up either of these features:
1. Touch ID Setup:
To set up Touch ID, which uses your fingerprint for authentication, follow these steps:
- On the “Hello” screen, tap on “Set Up Touch ID” option.
- Place your finger on the Home button and follow the on-screen instructions to complete the fingerprint setup process.
- You can add multiple fingerprints by tapping on “Add a Fingerprint” and repeating the setup process.
2. Face ID Setup:
If your iPhone 14 supports Face ID, which uses facial recognition for authentication, you can set it up by following these steps:
- On the “Hello” screen, tap on “Set Up Face ID” option.
- Position your face within the frame displayed on the screen and move your head in a circle to complete the initial Face ID setup.
- Follow the on-screen instructions to continue setting up Face ID, including tilting your head and looking at the screen.
- Once the setup process is complete, Face ID will be ready to use.
Note:
If you prefer not to use either Touch ID or Face ID, you can skip the setup by tapping on “Set Up Later in Settings” option. In this case, you can still use a passcode to unlock your device and authenticate purchases.
With Touch ID or Face ID set up on your iPhone 14, you can enjoy the convenience and security of quickly unlocking your device and authorizing transactions with just a touch or a glance.
Step 5: Signing in with Apple ID and iCloud
After setting up the basic preferences on your iPhone 14, it’s time to sign in with your Apple ID and iCloud account. Your Apple ID is your gateway to all the Apple services, including the App Store, iTunes, iCloud, and more. Here’s how you can sign in and access these features on your new iPhone:
1. Open the “Settings” app on your iPhone 14.
2. Scroll down and tap on “Sign in to your iPhone.”
3. Enter your Apple ID and password. If you don’t have an Apple ID, you can create one by tapping on “Don’t have an Apple ID or forgot it?” and following the on-screen instructions.
4. Once signed in, you will be prompted to set up iCloud. iCloud allows you to automatically back up your data, access it from any device, and synchronize your photos, contacts, calendars, and more. Choose whether you want to enable iCloud or not. It is recommended to enable iCloud for a seamless and secure experience.
5. If you choose to enable iCloud, you will be asked to select the types of data you want to sync with iCloud. This includes contacts, calendars, photos, documents, and more. Toggle on the options according to your preference.
6. You may also be asked if you want to use iCloud Keychain, which securely stores your passwords and credit card information across all your Apple devices. It can save you the hassle of remembering complex passwords and entering them manually.
7. Once you have set up iCloud, your iPhone 14 will start syncing your data with iCloud. Depending on the amount of data, this process may take some time. It is recommended to connect to a Wi-Fi network to avoid using cellular data during the initial sync.
8. Voila! You are now signed in with your Apple ID and iCloud account on your iPhone 14. You can start exploring the App Store, downloading your favorite apps, accessing your iCloud Drive, and enjoying all the benefits of being a part of the Apple ecosystem.
Remember, your Apple ID and iCloud account are crucial for accessing various Apple services and ensuring a seamless and integrated user experience. Keep your login credentials secure and never share them with anyone to protect your personal information and privacy.
Step 6: Enabling Location Services
Enabling location services on your iPhone 14 is an essential step to fully utilize the device’s capabilities. Location services allow applications and services to access your location information, providing you with personalized and location-based experiences. Here’s how you can enable location services on your iPhone 14:
1. Unlock your iPhone 14 and navigate to the home screen.
2. Tap on the “Settings” app icon, which resembles a gear.
3. In the Settings menu, scroll down and tap on “Privacy.”
4. Select “Location Services” near the top of the Privacy menu.
5. You will find an overview of all the applications and services that have requested access to your location data. You can toggle the switch to the right of each app’s name to enable or disable location services on an individual basis.
6. To enable location services for all apps, make sure the switch at the top of the screen is toggled on. This will allow applications to use your precise location.
7. If you want to control how location services are used for specific apps, you can customize the settings by tapping on the desired app. Here, you can choose to allow location access “Never,” “While Using the App,” or “Always.” Select the appropriate option based on your preference.
8. Some apps may provide additional options to refine their use of location services. Explore the settings for each app to tailor the location access according to your needs.
9. After configuring the location services settings, you can go back to the Privacy menu by tapping “Back” in the top-left corner of the screen.
10. Finally, exit the Settings app by pressing the home button or swiping up from the bottom of the screen if your iPhone 14 has Face ID.
By enabling location services on your iPhone 14, you can enjoy various location-based features such as maps, weather updates, personalized recommendations, and more. However, it is important to review and consider privacy implications before granting location access to every app.
Step 7: Restoring Data from a Backup
After successfully activating your iPhone 14, it’s time to restore your data from a backup. This is a crucial step that ensures all your important files, contacts, settings, and apps are transferred to your new device seamlessly.
To restore your data, follow these simple steps:
- Connect to Wi-Fi: Make sure your iPhone 14 is connected to a stable Wi-Fi network. This is necessary to download the backup from iCloud or iTunes.
- Access the Set Up screen: If you haven’t already done so, complete the initial setup steps for your iPhone 14. You should now be at the Set Up screen.
- Select “Restore from iCloud Backup” or “Restore from iTunes Backup”: Depending on where you have your backup stored, choose the appropriate option. If your backup is in iCloud, select “Restore from iCloud Backup.” If the backup is in iTunes on your computer, choose “Restore from iTunes Backup.”
- Sign in to your Apple ID or iTunes account: You may be prompted to sign in to your Apple ID or iTunes account. Enter your credentials to proceed.
- Choose the backup: Once signed in, you will see a list of available backups. Select the most recent one that contains the data you wish to restore.
- Wait for the restore process to complete: The restore process may take some time, depending on the size of your backup and the speed of your internet connection. Make sure your iPhone remains connected to Wi-Fi and power until the process is complete.
- Follow the on-screen instructions: Once the restore process is finished, follow the on-screen instructions to complete the setup of your iPhone 14. This may include entering certain settings, such as your Apple ID password, Wi-Fi network, and Touch ID or Face ID.
- Verify your restored data: After setting up your iPhone, check if your data has been successfully restored. Open your contacts, messages, photos, and apps to ensure everything is in place. If you encounter any issues or missing data, you may need to repeat the restore process or contact Apple Support for further assistance.
Restoring your data from a backup is an essential step in the activation process of your iPhone 14. It allows you to seamlessly transfer all your important files, settings, and apps to your new device. By following the steps outlined above, you can ensure a smooth transition and continue using your iPhone without missing a beat.
Step 8: Updating Software and Apps
Once you’ve successfully activated your iPhone 14, it’s time to update the software and apps to ensure that you have the latest features and security patches. Regularly updating your device’s software and apps is crucial in keeping it running smoothly and protected from potential vulnerabilities.
To update the software on your iPhone 14, follow these simple steps:
1. Connect to a Wi-Fi network: Before you can update the software, make sure your iPhone 14 is connected to a Wi-Fi network. This will ensure a stable and fast internet connection, which is essential for downloading and installing updates.
2. Open the Settings app: Locate and tap on the Settings app, which can be found on your home screen. The Settings app is represented by a grey icon with gears.
3. Scroll down and tap General: In the Settings menu, scroll down and tap on the “General” option. It is usually located near the top of the list.
4. Tap Software Update: Within the General settings, you will find the “Software Update” option. Tap on it to proceed.
5. Check for updates: Your iPhone 14 will now check for any available software updates. If an update is available, you will see a message indicating the update’s details and size.
6. Download and install: If there is an update available, tap “Download and Install” to begin the update process. Make sure your device is connected to a power source to prevent any interruptions during the update.
7. Enter your passcode: If prompted, enter your device passcode to authorize the installation of the update. This step is necessary to ensure the security of your iPhone 14.
8. Wait for the update to complete: The download and installation process may take some time, depending on the size of the update and your internet speed. Allow your iPhone 14 to complete the update process without interrupting it.
9. Update your apps: After updating the software, it’s a good idea to update your apps as well. Open the App Store, tap on your profile picture, and scroll down to the “Available Updates” section. Tap “Update All” to update all your apps, or individually update the ones you prefer.
Congratulations! With the software and apps now updated on your iPhone 14, you can enjoy the latest features, improvements, and enhanced security.
Step 9: Activating iMessage and FaceTime
After successfully activating your iPhone 14, the next step is to activate iMessage and FaceTime. These two features are essential for communicating with your contacts through text messages and video calls. Here’s a step-by-step guide to help you activate iMessage and FaceTime on your new iPhone 14.
1. Open the “Settings” app on your iPhone 14 by tapping on the gear icon located on the home screen.
2. Scroll down and tap on “Messages”.
3. In the Messages settings, you will find the option for iMessage. Toggle the switch to enable iMessage.
4. A pop-up message will appear informing you that your carrier may charge for using iMessage. Tap “Enable” to continue.
5. Once iMessage is enabled, you can choose to associate your email address with iMessage. This allows you to receive iMessages on multiple devices. Tap on “Send & Receive” to proceed.
6. Under the “You can be reached by iMessage at” section, you will see your phone number and email address. By default, your phone number is selected. You can add additional email addresses by tapping on “Add Another Email…”
7. Tap on any email addresses you want to associate with iMessage to enable them for receiving messages. You can also remove email addresses by tapping on the checkmark next to them.
8. To activate FaceTime, go back to the main Settings menu and tap on “FaceTime”.
9. Toggle the switch to enable FaceTime.
10. Similar to iMessage, you can choose which email addresses to associate with FaceTime. Tap on “Use your Apple ID for FaceTime” to manage your email addresses.
11. Under the “You can be reached by FaceTime at” section, you will see your phone number and email address. You can add or remove email addresses using the same steps as with iMessage.
12. Now that iMessage and FaceTime are activated, you can start using these features to stay connected with your family and friends through text messaging and video calls.
It’s worth mentioning that iMessage and FaceTime require an internet connection, either through Wi-Fi or cellular data. Be sure to have an active internet plan to use these features seamlessly.
By following these steps, you have successfully activated iMessage and FaceTime on your new iPhone 14. Enjoy the convenience of instant messaging and face-to-face conversations with your loved ones!
Step 10: Authenticating with Carrier for Service Setup
After completing the initial setup of your iPhone 14, the next step is to authenticate with your carrier to activate the service. This is an important step that allows you to make calls, send messages, and access cellular data on your device.
To authenticate with your carrier, follow these steps:
- Make sure your iPhone 14 is connected to a Wi-Fi network.
- Open the Settings app on your iPhone.
- Scroll down and tap on the “Cellular” or “Mobile Data” option.
- Tap on “Carrier Services” or “Service Provider” (the name may vary depending on your carrier).
- If prompted, enter your carrier account details, such as your phone number and account password.
- Wait for your iPhone to authenticate with your carrier. This may take a few moments.
- Once the authentication is complete, you will see the name of your carrier and the signal bars on the top-left corner of the screen.
If you encounter any issues during the authentication process, try the following troubleshooting steps:
- Make sure you have an active SIM card inserted in your iPhone 14.
- Restart your iPhone by pressing and holding the power button until the slider appears. Then, slide it to power off and wait for a few seconds before turning it back on.
- Check if there are any carrier updates available by going to Settings > General > About. If an update is available, follow the on-screen instructions to install it.
- Contact your carrier’s customer support for further assistance if the issue persists.
Once your iPhone 14 is successfully authenticated with your carrier, you can enjoy all the services and features provided by your cellular network. You can make and receive calls, send text messages, browse the internet using cellular data, and more.
Remember to keep your iPhone 14 connected to a Wi-Fi network whenever possible to conserve your cellular data usage. This will help you avoid any unexpected charges on your monthly bill.
In conclusion, activating an iPhone 14 is a relatively straightforward process that can be done in a few simple steps. By following the instructions provided by Apple, users can quickly set up their device and start enjoying all the features and functionalities it offers. Whether it’s through a cellular carrier or using a Wi-Fi connection, activating your iPhone 14 is an essential step to ensure you can make calls, send messages, browse the internet, and use various apps seamlessly.
With its advanced technology, sleek design, and cutting-edge features, the iPhone 14 is a powerful device that caters to the needs and demands of modern-day smartphone users. By activating your iPhone 14 correctly, you can unlock its full potential and take advantage of its impressive capabilities. So, go ahead and activate your iPhone 14 today to experience the seamless integration of hardware and software that Apple is known for.
FAQs
Q: How do I activate my iPhone 14?
A: Activating your iPhone 14 is a simple process. To begin, ensure that your device is connected to a stable Wi-Fi network. Then, follow the on-screen instructions to set up your device. You may need to enter your Apple ID or create a new one if you don’t have it already. Once the setup is complete, your iPhone 14 will be activated and ready to use.
Q: Can I activate my iPhone 14 without a Wi-Fi connection?
A: While it is possible to activate your iPhone 14 without a Wi-Fi connection, it is highly recommended to have a stable Wi-Fi network available during the activation process. This ensures a smoother and faster activation, as well as allows your device to download any necessary updates or software patches.
Q: What if I forgot my Apple ID during the activation process?
A: If you forgot your Apple ID during the activation process of your iPhone 14, you can retrieve it by visiting the Apple ID website and clicking on the “Forgot Apple ID or password” link. Follow the instructions provided to recover your Apple ID. Alternatively, you can contact Apple Support for further assistance.
Q: How long does the activation process take?
A: The activation process for the iPhone 14 typically takes only a few minutes. However, this can vary depending on factors such as network connectivity, Apple server load, and the speed of your device. In most cases, you should be able to complete the activation and start using your iPhone 14 within 10-15 minutes.
Q: Do I need a SIM card to activate my iPhone 14?
A: Yes, you will need a compatible SIM card to activate your iPhone 14. The SIM card is used to establish a connection with your cellular network provider. If you already have a SIM card, you can insert it into your iPhone 14 during the activation process. If you don’t have a SIM card, you can contact your cellular network provider to obtain one.