
In today’s connected world, having a reliable and efficient Wi-Fi connection is essential. This is especially true when it comes to your Yealink phone, which relies on a stable internet connection for seamless communication and productivity. Whether you’re setting up your Yealink phone for the first time or experiencing connectivity issues, knowing how to connect it to Wi-Fi is crucial. In this article, we will guide you through the step-by-step process of connecting your Yealink phone to Wi-Fi, ensuring that you can make calls, access online features, and stay connected with ease. So, let’s dive in and explore the simple and hassle-free ways to connect your Yealink phone to Wi-Fi.
Inside This Article
- Overview
- Step 1: Accessing the Phone’s Settings
- Step 2: Connecting to Wi-Fi Network
- Step 3: Configuring Wi-Fi Settings
- Troubleshooting Tips
- Conclusion
- FAQs
Overview
Connecting a Yealink phone to Wi-Fi can provide you with the flexibility and convenience of a wireless connection, allowing you to make and receive calls without being tied down by Ethernet cables. By following a few simple steps, you can easily connect your Yealink phone to a Wi-Fi network and enjoy the freedom to move around your office or home while staying connected.
In this article, we will guide you through the process of connecting your Yealink phone to Wi-Fi, ensuring a seamless and hassle-free setup. We will cover the prerequisites for connecting the phone to Wi-Fi, step-by-step instructions on accessing the phone’s settings, finding the Wi-Fi settings, and connecting to your Wi-Fi network.
Whether you are a small business owner, a remote worker, or a tech enthusiast, this guide will help you unleash the true potential of your Yealink phone by enabling wireless connectivity. So let’s get started and make your Yealink phone wire-free!
Step 1: Accessing the Phone’s Settings
In order to connect your Yealink phone to a Wi-Fi network, you first need to access the phone’s settings. Follow the steps below to get started:
- Ensure that your Yealink phone is turned on and connected to a power source.
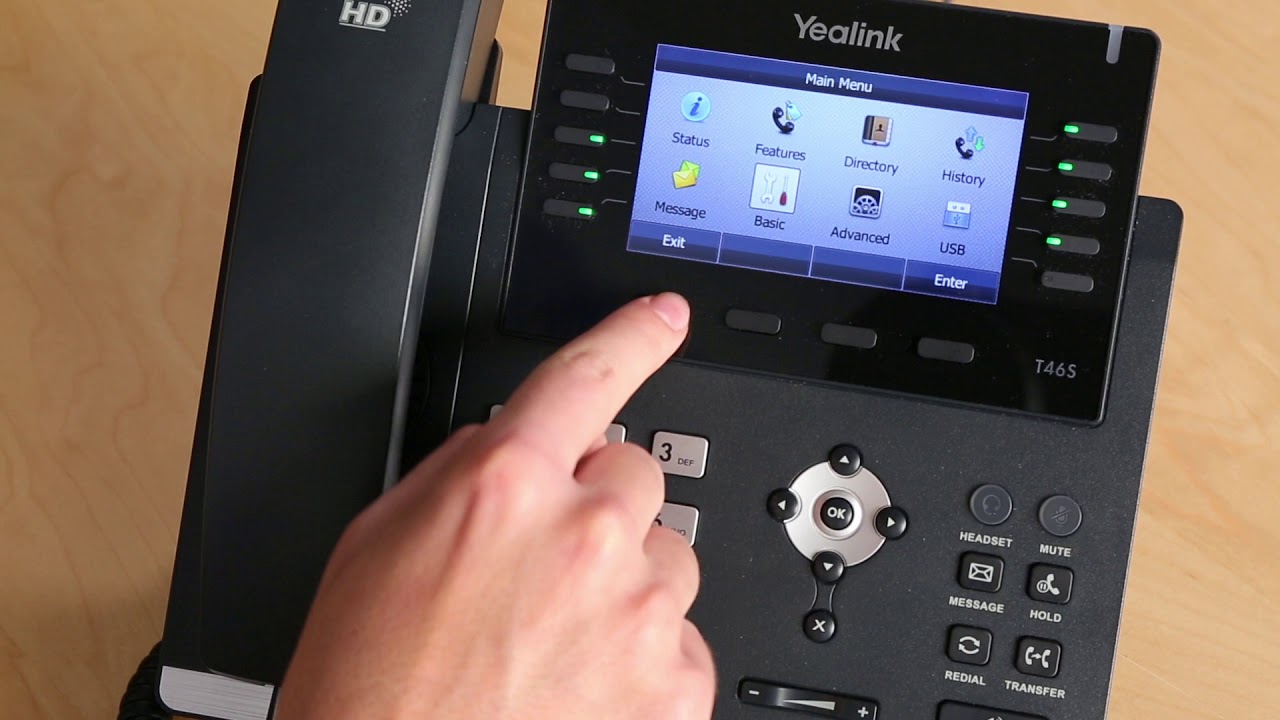
- Locate the menu button on your Yealink phone. On most models, this button is represented by an icon with three horizontal lines or dots.
- Press the menu button to enter the settings menu. You may need to navigate through the menu using the arrow keys or touchscreen, depending on your specific model.
- In the settings menu, look for the “Network” or “Wi-Fi” option. This is typically represented by an icon with network signal bars.
- Select the “Network” or “Wi-Fi” option to access the network settings.
Once you have successfully accessed the phone’s settings, you can proceed to the next step of connecting your Yealink phone to Wi-Fi.
Step 2: Connecting to Wi-Fi Network
Once you have accessed the settings of your Yealink phone, the next step is to connect it to your Wi-Fi network. This will ensure that your phone can seamlessly connect to the internet and allow you to make and receive calls without any interruptions. Follow the steps below to connect your Yealink phone to a Wi-Fi network:
- Step 1: Navigate to the Wi-Fi Settings: In the Yealink phone settings, locate and select the “Network” or “Wi-Fi” option. This will take you to the Wi-Fi settings page where you can manage your network connections.
- Step 2: Scan for Wi-Fi Networks: On the Wi-Fi settings page, you will find an option to scan for available Wi-Fi networks. Click on this option to initiate a network scan. The Yealink phone will search for nearby Wi-Fi networks and display them on the screen.
- Step 3: Select the Wi-Fi Network: From the list of available networks, identify your desired Wi-Fi network and click on it. If the network is secured, you will be prompted to enter the network password. Use the phone’s keypad or on-screen keyboard to enter the password accurately.
- Step 4: Connect to the Wi-Fi Network: After entering the correct password, click on the “Connect” or “Join” button to establish a connection to the selected Wi-Fi network. The Yealink phone will attempt to connect to the network and display a confirmation message once the connection is successful.
It is important to ensure that you enter the correct Wi-Fi network password to avoid any connection issues. Double-check the password and make sure it is accurate to establish a seamless connection.
Once connected to the Wi-Fi network, your Yealink phone will be able to make and receive calls using the internet. This allows for greater flexibility and mobility, without requiring a direct wired connection to your router. Enjoy the convenience of using your Yealink phone over Wi-Fi!
Step 3: Configuring Wi-Fi Settings
Once you have accessed the Wi-Fi settings on your Yealink phone, it’s time to configure the necessary details to establish a connection. Follow the step-by-step guide below to successfully connect your Yealink phone to a Wi-Fi network.
1. Locate the Wi-Fi network you want to connect to. Your Yealink phone will display a list of available Wi-Fi networks in the surrounding area. Select the network you want to connect to from the list.
2. If the network you want to connect to is secured with a password, you will need to enter it. When prompted, use the phone’s keypad or on-screen keyboard to enter the Wi-Fi password accurately. Take care to enter it correctly, as incorrect passwords will result in a failed connection.
3. Once you have entered the password, your Yealink phone will attempt to establish a connection to the Wi-Fi network. It may take a few moments for the connection to be established, so be patient. During this time, you may see a loading or connecting indicator on your phone’s screen.
4. If the connection is successful, your Yealink phone will display a confirmation message or indicator, indicating that it is now connected to the Wi-Fi network. You can now enjoy the benefits of a wireless connection, such as making VoIP calls or accessing the internet.
5. In case the connection fails, double-check the Wi-Fi password you entered. Ensure that it is correct and try again. If you continue to experience connectivity issues, make sure that your Wi-Fi router is functioning properly, and consider contacting your network administrator for further assistance.
Now that you have successfully configured the Wi-Fi settings on your Yealink phone, you can enjoy the convenience of a wireless connection. Whether you are using the phone for personal or professional purposes, being connected to Wi-Fi allows for greater flexibility and productivity.
Troubleshooting Tips
When it comes to connecting your Yealink phone to Wi-Fi, there may be instances where you encounter some issues. Don’t worry! We’ve got you covered with these troubleshooting tips to help you get your Yealink phone connected to Wi-Fi seamlessly.
1. Double-check your Wi-Fi credentials: Make sure you have entered the correct Wi-Fi network name (SSID) and password. Even a small typo can prevent your Yealink phone from connecting to the network. Confirm the details and ensure they are entered accurately.
2. Check your Wi-Fi signal strength: Weak Wi-Fi signals can cause connection problems. Ensure that your Yealink phone is within the range of the Wi-Fi router. If you are far away from the router, try moving closer or consider getting a Wi-Fi extender to boost the signal strength in that area.
3. Restart your Yealink phone and Wi-Fi router: Sometimes, a simple restart can fix connectivity issues. Power off your Yealink phone and unplug your Wi-Fi router from the power source. Wait for a few seconds, then plug in the router and power on your phone. This can help refresh the connection and resolve any temporary glitches.
4. Verify the Wi-Fi settings on your Yealink phone: Go to the Wi-Fi settings on your Yealink phone and make sure the Wi-Fi feature is enabled. You can also try forgetting the Wi-Fi network and reconnecting to it. If possible, check if the same credentials work on another device to narrow down the issue.
5. Update the firmware of your Yealink phone: Software updates often come with bug fixes and improved compatibility. Check the manufacturer’s website for any available firmware updates for your Yealink phone model. Updating the firmware can potentially resolve any known issues related to Wi-Fi connectivity.
6. Reset network settings on your Yealink phone: If none of the above steps work, you can try resetting the network settings on your Yealink phone. Keep in mind that this will remove all saved Wi-Fi networks, so make sure you have the necessary credentials to reconnect. Go to the settings menu and look for the option to reset network settings.
7. Contact customer support: If you have tried all the troubleshooting steps and are still unable to connect your Yealink phone to Wi-Fi, it is worth reaching out to the manufacturer’s customer support. They can provide specific guidance based on your device model and guide you through any further troubleshooting steps.
Remember, connecting your Yealink phone to Wi-Fi should be a smooth and straightforward process. But in case you encounter any issues, these troubleshooting tips will help you overcome them and get your device connected without any hassle.
Conclusion
In conclusion, connecting your Yealink phone to Wi-Fi is a simple and convenient way to enhance your communication experience. Whether you are in an office setting or a remote location, being able to connect your phone to Wi-Fi allows for seamless communication and access to various online features.
By following the easy steps outlined in this guide, you can ensure a successful connection and enjoy the benefits of a reliable network connection. Remember to check for any firmware updates regularly to maintain optimal performance and security.
Now, you can confidently connect your Yealink phone to Wi-Fi and enjoy the convenience of wireless communication! Stay connected and make the most out of your Yealink phone’s capabilities.
FAQs
Q: Can I connect my Yealink phone to Wi-Fi?
Yes, you can connect your Yealink phone to Wi-Fi. The process may vary depending on the specific model of your Yealink phone, but generally, you can access the Wi-Fi settings on your phone and enter the network’s SSID and password to establish a connection.
Q: How do I find the Wi-Fi settings on my Yealink phone?
To find the Wi-Fi settings on your Yealink phone, navigate to the “Settings” menu. Look for the “Network” or “Wireless” option, and then select “Wi-Fi.” This will allow you to access the Wi-Fi settings where you can connect to a network.
Q: What if I don’t see the Wi-Fi option in the settings menu?
If you don’t see the Wi-Fi option in the settings menu of your Yealink phone, it is possible that your specific phone model does not have built-in Wi-Fi capabilities. In this case, you may need to use an Ethernet connection or seek an alternative solution to connect to the internet.
Q: Can I connect multiple Yealink phones to the same Wi-Fi network?
Yes, you can connect multiple Yealink phones to the same Wi-Fi network. Each phone will need to go through the Wi-Fi connection process individually, entering the SSID and password for the network.
Q: How can I improve the Wi-Fi connection on my Yealink phone?
There are several ways to improve the Wi-Fi connection on your Yealink phone:
- Ensure that your phone is within range of the Wi-Fi router.
- Check if there are any obstacles or interference affecting the Wi-Fi signal, and reposition the phone if necessary.
- Update the firmware on your Yealink phone to the latest version, as it may include improvements to Wi-Fi connectivity.
- Consider using a Wi-Fi extender or access point to boost the signal strength in your area.