
Are you struggling with transferring calls on your Yealink phone? Fear not, because in this article, we will guide you through the process step-by-step. Whether you are a business professional or just a regular user, knowing how to transfer calls seamlessly is essential for effective communication and customer service. We understand that learning new features and functions can be overwhelming, but we are here to simplify the process for you. By the end of this article, you will have a solid understanding of how to transfer calls on your Yealink phone, enhancing your productivity and ensuring that important conversations are appropriately redirected. So, let’s get started and explore the world of call transferring on Yealink phones!
Inside This Article
- Overview of Yealink Phone
- Steps to Transfer a Call on Yealink Phone
- Troubleshooting Tips for Call Transfers on Yealink Phone
- Conclusion
- FAQs
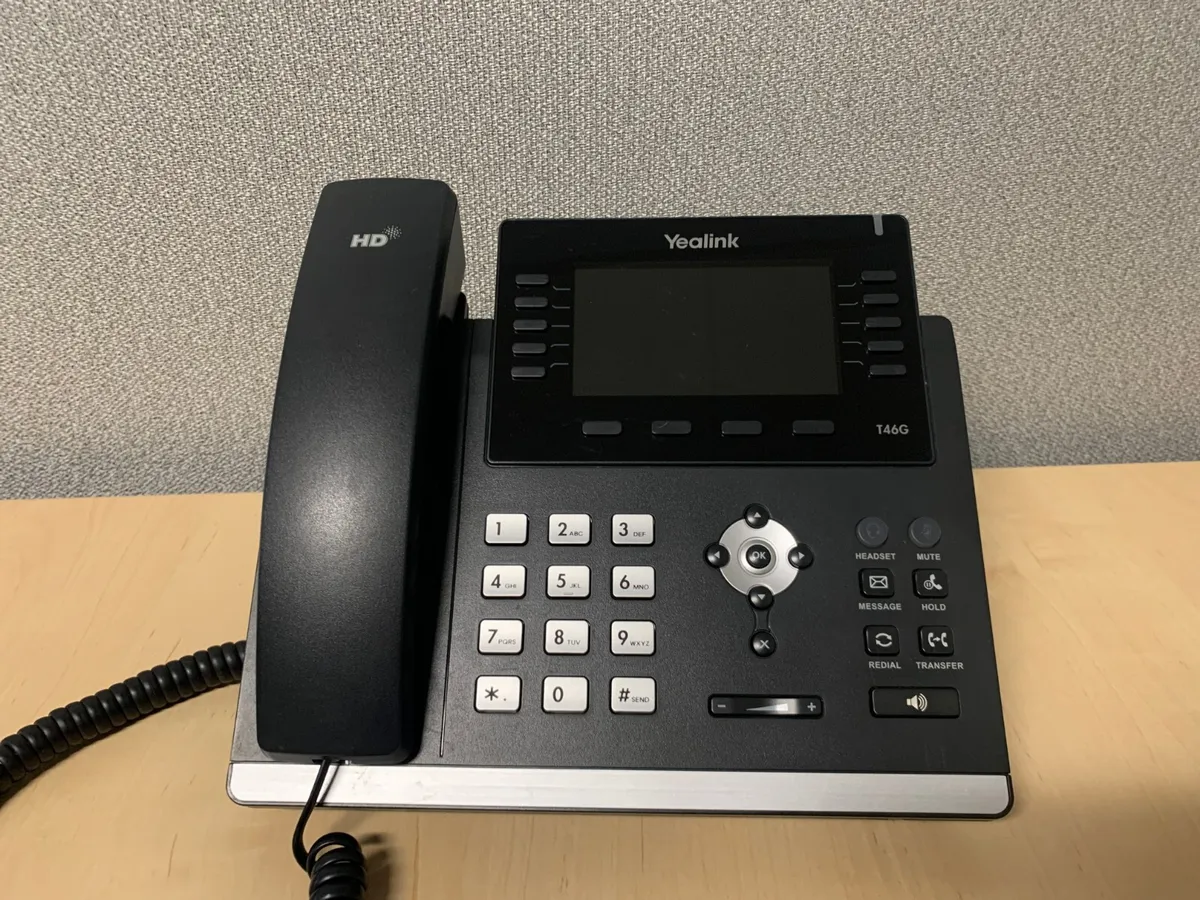
Overview of Yealink Phone
Yealink is a leading provider of high-quality, feature-rich communication solutions, including a wide range of IP phones. Yealink phones are known for their reliability, advanced features, and user-friendly interface, making them a popular choice for businesses of all sizes.
Yealink phones come in different models, each offering unique features tailored to meet the diverse needs of users. From entry-level phones to high-end executive models, Yealink offers a comprehensive range of options that cater to various communication requirements.
One of the standout features of Yealink phones is their voice clarity. Equipped with advanced audio technologies, such as HD voice and noise suppression, Yealink phones ensure crystal-clear conversations, even in noisy environments.
In addition to excellent audio quality, Yealink phones boast intuitive and easy-to-use interfaces. With a vibrant color display, customizable buttons, and intuitive navigation, users can quickly and efficiently access the phone’s features and functions.
Yealink phones also support a variety of communication protocols, including SIP and H.323, ensuring seamless integration with various IP-based phone systems. This versatility allows businesses to leverage their existing communication infrastructure while benefiting from the advanced capabilities of Yealink phones.
Further enhancing the user experience, Yealink phones offer a host of productivity-enhancing features. These include call forwarding, call waiting, call transfer, conference calling, voicemail, speed dial, and more. With these features at their disposal, users can improve efficiency, streamline communication, and optimize their workflow.
Yealink phones also prioritize security, with built-in encryption protocols and advanced authentication mechanisms. This ensures that sensitive information remains protected and prevents unauthorized access to the phone and its communication channels.
Overall, Yealink phones deliver a combination of performance, reliability, and user-friendly features that make them an excellent choice for businesses seeking a powerful and efficient communication solution.
Steps to Transfer a Call on Yealink Phone
Transferring a call on a Yealink Phone is a simple and seamless process. Whether you’re in a busy office environment or working remotely, being able to transfer calls efficiently is essential for effective communication. Here are the steps to transfer a call on a Yealink Phone:
- Answer the incoming call: When an incoming call is received on your Yealink Phone, simply lift the handset or press the designated answer button to answer the call.
- Initiate the transfer: Once you are on the call, you may need to initiate the transfer. There are different methods to do this, depending on the specific Yealink Phone model and configuration.
- Blind transfer: To perform a blind transfer, also known as an unannounced transfer, simply press the “Transfer” or “Tran” button on your Yealink Phone. This will place the caller on hold and open a new line for you to make the transfer.
- Consultative transfer: If you prefer to consult with the intended recipient before completing the transfer, you can use the consultative transfer method. During the call, press the “Transfer” or “Tran” button on your Yealink Phone, dial the recipient’s extension or phone number, and wait for them to answer. Once they are on the line, you can inform them about the transfer and then press the “Transfer” or “Tran” button again to complete the transfer.
- Complete the transfer: After initiating the blind or consultative transfer, depending on the method you chose, press the “Transfer” or “Tran” button again to complete the transfer. This will connect the caller with the intended recipient and disconnect your line from the call.
It’s worth noting that the exact steps may vary slightly depending on the specific Yealink Phone model and the phone system or software used. If you encounter any difficulties or have questions about the transfer process, referring to the user manual or reaching out to technical support can provide further assistance.
Troubleshooting Tips for Call Transfers on Yealink Phone
If you’re experiencing difficulties with call transfers on your Yealink Phone, don’t worry, as we have some troubleshooting tips to help you overcome these issues. Whether you’re unable to transfer calls or encountering inconsistencies during the transfer process, these tips will help you resolve the problem and ensure smooth call transfers on your Yealink Phone.
1. Check Call Transfer Settings: Start by checking the call transfer settings on your Yealink Phone. Navigate to the phone’s menu or settings and ensure that the call transfer feature is enabled. If it’s disabled, simply enable it to allow for call transfers.
2. Verify Call Transfer Method: Yealink Phones typically offer multiple call transfer methods, such as blind transfer, attended transfer, or consultative transfer. Verify that you’re using the correct transfer method for your specific transfer requirements. Refer to the phone’s user manual or reach out to your IT department for guidance if needed.
3. Ensure Sufficient Network Connectivity: Call transfer issues can sometimes occur due to network connectivity problems. Check your internet connection and make sure it is stable and running smoothly. If you’re using Wi-Fi, try switching to a wired connection for better stability during call transfers.
4. Update Firmware: Outdated firmware can cause compatibility issues and impact the functionality of call transfers on Yealink Phones. Visit the Yealink website or contact your phone system administrator to check for firmware updates. Updating to the latest firmware version can often resolve any underlying software issues.
5. Test Transfer with Different Numbers: If you’re encountering issues transferring calls to specific numbers or extensions, try transferring a call to a different number or extension to see if the problem persists. This will help determine if the issue is specific to a certain number or a general problem with call transfers.
6. Restart or Reset the Phone: Sometimes, a simple restart can fix minor glitches that may be affecting call transfers. Try restarting your Yealink Phone and check if the transfer functionality is restored. If the problem persists, you may consider resetting the phone to its factory settings as a last resort. However, make sure to backup any important data before performing a reset.
7. Contact Technical Support: If you’ve exhausted all troubleshooting steps and the call transfer issue is still unresolved, it’s advisable to get in touch with Yealink technical support or your phone system provider. They will have in-depth knowledge of the Yealink system and can provide further assistance in diagnosing and resolving any complex issues.
By following these troubleshooting tips, you can overcome common call transfer problems on your Yealink Phone. Remember to consult your Yealink Phone’s documentation or reach out to technical support for specific guidance related to your model and phone system setup. Enjoy seamless call transfers and efficient communication on your Yealink Phone!
Conclusion
Transferring a call on a Yealink phone is a straightforward process that can greatly enhance communication and productivity in a business setting. Whether you need to transfer a call to another extension, a colleague, or a different department, Yealink phones offer a variety of options to suit your needs.
By understanding the different call transfer methods and using the appropriate steps for each situation, you can ensure that calls are seamlessly transferred without any disruptions or confusion. Remember to take advantage of features like blind transfer and attended transfer, which can improve efficiency and customer satisfaction.
With its user-friendly interface and robust functionality, the Yealink phone makes call transfer a breeze. So, whether you’re in a small office or a large call center, you can rely on your Yealink phone to handle call transfers with ease and professionalism.
Now that you know how to transfer a call on a Yealink phone, you can confidently navigate calls and provide excellent customer service. So go ahead, pick up your Yealink phone, and transfer those calls like a pro!
FAQs
FAQ 1: How do I transfer a call on a Yealink phone?
Answer: To transfer a call on a Yealink phone, follow these steps:
- During an active call, press the “Transfer” softkey on your Yealink phone.
- Enter the extension or phone number to which you want to transfer the call.
- Press either the “Blind” or “Attended” transfer key, depending on whether you want to transfer the call directly or announce the caller to the recipient before transferring.
- Hang up to complete the transfer.
Make sure to consult your phone’s user manual for specific instructions, as the steps may vary slightly depending on the model of your Yealink phone.
FAQ 2: Can I transfer a call to a mobile phone using a Yealink phone?
Answer: Yes, you can transfer a call to a mobile phone using a Yealink phone. When transferring the call, simply enter the mobile phone number instead of an internal extension. Keep in mind that this may incur additional charges, so make sure you have the necessary permissions or plans in place before transferring calls to mobile numbers.
FAQ 3: Is it possible to transfer a call on a Yealink phone without announcing the caller to the recipient?
Answer: Yes, you can transfer a call without announcing the caller to the recipient. This is known as a “blind” transfer on a Yealink phone. To perform a blind transfer, simply press the “Transfer” softkey, enter the extension or phone number, and then press the “Blind Transfer” key instead of the “Attended Transfer” key. The call will be immediately transferred without the recipient being informed in advance.
FAQ 4: What is the difference between a blind transfer and an attended transfer on a Yealink phone?
Answer: A blind transfer is a type of call transfer where the caller is directly transferred to another extension or phone number without any prior announcement to the recipient. On the other hand, an attended transfer allows you to speak with the recipient before transferring the call. During an attended transfer on a Yealink phone, you can provide information about the caller or discuss the reason for the transfer before completing the transfer.
FAQ 5: Can I place a call on hold while performing a transfer on a Yealink phone?
Answer: Yes, you can place a call on hold while performing a transfer on a Yealink phone. To place a call on hold, simply press the “Hold” softkey during an active call. Once the call is on hold, you can proceed with the transfer process by following the steps mentioned earlier. You can then retrieve the held call or transfer it to another extension or phone number. Each Yealink phone model may have slight differences in how the hold function is accessed, so refer to the user manual for specific instructions.