
Are you fascinated by those stunning time-lapse videos you see on social media? Do you want to try your hand at creating your own captivating time-lapse masterpiece? Well, you’re in luck! With the advancement of technology, you can now easily create a time-lapse video right on your mobile phone. Gone are the days when you needed expensive equipment and extensive technical knowledge to achieve this effect. In this article, we will guide you through the step-by-step process of creating a time-lapse video using just your phone. From choosing the right settings to selecting the perfect subject, we will cover it all. So, grab your phone and get ready to capture the passage of time in a mesmerizing way!
Inside This Article
- How to Choose the Perfect Location
- Setting Up Your Phone for Time-Lapse Recording
- Adjusting the Time-Lapse Settings
- Capturing the Time-Lapse Video
- Conclusion
- FAQs
How to Choose the Perfect Location
When it comes to creating a captivating time-lapse video on your phone, selecting the right location plays a crucial role. It can make the difference between a mundane time-lapse and a visually striking masterpiece. So how do you choose the perfect location for your time-lapse project? Here are some tips to help you out:
1. Scenic Beauty: Look for locations that offer stunning natural or man-made scenery. Consider picturesque landscapes, iconic landmarks, bustling cityscapes, or even the changing colors of a sunset over the horizon.
2. Interesting Subjects: Find subjects that have movement or change over time. This can include busy streets, flowing rivers, moving clouds, or even the growth of plants. These dynamic elements can add visual interest to your time-lapse.
3. Lighting Conditions: Pay attention to the lighting conditions of the location. Natural lighting, such as golden hour or dramatic weather, can add a captivating touch to your time-lapse. Experiment with different times of day to capture the perfect lighting for your desired effect.
4. Access and Safety: Ensure that you have proper access to the location and that it is safe to set up your equipment. Consider any permits or permissions that may be required, especially if you are shooting in a public or private space.
5. Unique Perspectives: Look for ways to capture the scene from interesting angles or viewpoints. This can create a sense of depth and make your time-lapse more visually engaging. Experiment with different heights, angles, and even camera movements if possible.
6. Background Noise: Consider the audio aspect of your time-lapse. If the location you choose has excessive background noise, it may distract from the overall video. Aim for quieter locations or use external microphones if necessary to achieve better audio quality.
By considering these factors, you can choose a location that will elevate the impact of your time-lapse video and leave viewers in awe of your creativity and technical skills.
Setting Up Your Phone for Time-Lapse Recording
Time-lapse videos are a great way to capture the passage of time in a condensed and visually stunning format. With just a few simple steps, you can set up your phone to record mesmerizing time-lapse footage. Here’s how:
1. Choose a stable surface: Place your phone on a tripod or any stable surface to ensure that it remains steady throughout the recording. This is crucial to maintaining the smoothness of your time-lapse video.
2. Clean the camera lens: Wipe the lens of your phone’s camera with a microfiber cloth to remove any smudges or fingerprints. A clean lens will guarantee crisp and clear footage.
3. Enable airplane mode: To prevent any interruptions during the recording process, it’s a good idea to enable airplane mode. This will ensure that incoming calls or notifications don’t interrupt your time-lapse video.
4. Adjust the exposure and focus: Most smartphones offer manual control over exposure and focus settings. To capture the best possible time-lapse footage, experiment with different exposure levels and ensure that the focus is set to the desired focal point.
5. Set the time-lapse interval: Time-lapse videos are created by capturing a series of photos or frames at set intervals and then stitching them together. Depending on the subject and desired effect, you can adjust the interval according to your preference. For example, a construction project may require a longer interval, while a sunset may require a shorter one.
6. Use a time-lapse app: Although many smartphones offer built-in time-lapse modes, using a dedicated time-lapse app can provide you with more control and flexibility over the process. Explore the app store on your device to find a suitable one that meets your needs.
7. Start the recording: Once you have set up all the necessary parameters, it’s time to start recording your time-lapse video. Press the record button on your phone or within the time-lapse app, and let it capture the unfolding scene.
By following these steps and with a little practice, you can easily set up your phone to record breathtaking time-lapse videos. Remember to experiment with different settings and subjects to unleash your creativity and capture stunning moments in a unique way.
Adjusting the Time-Lapse Settings
Once you have chosen the perfect location and set up your phone for time-lapse recording, the next step is to adjust the time-lapse settings. This will ensure that you capture the desired effect and create a stunning time-lapse video.
1. Interval: The interval determines the frequency at which your phone takes photos during the time-lapse recording. A shorter interval, such as one second, will result in a faster-paced time-lapse, while a longer interval, such as one minute, will create a slower-paced time-lapse. Experiment with different intervals to achieve the desired effect.
2. Duration: The duration refers to the total length of time that you want your time-lapse video to cover. This can range from a few minutes to several hours, depending on the subject and the effect you are trying to achieve. Keep in mind that longer durations will require more storage space on your phone.
3. Exposure: In some cases, you may need to adjust the exposure settings to ensure that your time-lapse video is properly exposed. This is especially important when shooting in changing lighting conditions, such as during sunrise or sunset. Most phones have an automatic exposure setting, but you can also manually adjust the exposure if needed.
4. Focus: To keep your time-lapse video sharp and in focus, it is important to set the focus correctly. Some phones have autofocus capabilities, which can be useful for capturing a variety of scenes. However, if you want to maintain a consistent focus throughout the entire time-lapse, you can set the focus manually and lock it in place.
5. Quality: The quality of your time-lapse video will depend on the resolution and frame rate settings of your phone. Higher resolutions and frame rates will result in a more detailed and smoother time-lapse. However, keep in mind that higher quality settings will also require more storage space.
6. Stabilization: To ensure that your time-lapse video is stable and free from shaky footage, you can enable the stabilization feature on your phone. This will help compensate for any hand movements or vibrations, resulting in a smoother and more professional-looking time-lapse.
7. Additional settings: Depending on your phone model and the camera app you are using, there may be additional settings available for adjusting the time-lapse recording. These can include options for adding music or filters to your time-lapse, as well as controlling the playback speed or adding transitions between frames.
Remember, the specific steps for adjusting the time-lapse settings may vary depending on the make and model of your phone. It is recommended to refer to your phone’s user manual or online resources for detailed instructions specific to your device.
Capturing the Time-Lapse Video
Once you have set up your phone and adjusted the time-lapse settings, it’s time to start capturing your time-lapse video. Follow these steps to ensure you capture stunning footage:
1. Find the perfect angle: Look for a stable surface or use a tripod to keep your phone steady. Choose an angle that captures the desired subject and background.
2. Frame your shot: Use the viewfinder or screen of your phone to frame the shot. Consider the composition, ensuring the subject is clear and well-positioned within the frame.
3. Start recording: Once you are ready, tap the record button to start capturing the time-lapse. It’s important to keep your phone steady throughout the recording to avoid any unwanted movements.
4. Monitor the progress: While the time-lapse is recording, periodically check the footage to make sure everything is going smoothly. Adjust the framing or settings if necessary.
5. Allow for sufficient recording time: Depending on the subject and desired effect, your time-lapse may take anywhere from a few minutes to several hours. Make sure you have enough battery life and storage space to complete the recording.
6. Be patient: Time-lapse videos require patience, as they often capture slow and gradual changes. Avoid interrupting the recording or moving the phone until the desired duration has passed.
7. Stop recording: When you are satisfied with the length and content of your time-lapse video, tap the stop button to end the recording. Double-check that the footage has been saved properly before moving on.
8. Review and edit: Once the time-lapse video is recorded, take some time to review the footage. Trim the clips, adjust the speed, and apply any desired filters or effects to enhance the final result.
9. Share and enjoy: With your time-lapse video complete, it’s time to share your creation with others. Use social media platforms, video sharing sites, or even create a compilation of your time-lapse videos to showcase your skills and creativity.
Remember, the more you practice, the better you will become at capturing captivating time-lapse videos. Experiment with different settings, subjects, and locations to create unique and visually stunning footage.
Conclusion
In conclusion, capturing stunning time-lapse videos on your phone is an exciting and accessible way to unleash your creativity. With the advancements in mobile phone technology, you no longer need expensive equipment to create mesmerizing time-lapse sequences. By following the steps outlined in this article, you can easily capture the passing of time in a unique and captivating way.
Remember to select a stable shooting location, adjust the exposure and focus settings, use a tripod or stable surface, and ensure a consistent power supply to your phone. Experiment with different intervals and durations to achieve the desired time-lapse effect.
With a bit of practice and a touch of creativity, you can create stunning time-lapse videos that will mesmerize your viewers. So go ahead, grab your phone, and start capturing the passage of time in a whole new way!
FAQs
1. Can I do a time-lapse video on my mobile phone?
Yes, you can definitely do a time-lapse video on your mobile phone. Most modern smartphones have built-in features or additional apps that allow you to create stunning time-lapse videos.
2. What is a time-lapse video?
A time-lapse video is a technique where a series of photos are taken at regular intervals and then played back at a much higher speed, creating a visually captivating effect. This technique is commonly used to capture the gradual passage of time or to condense long events into a short video.
3. How can I create a time-lapse video on my phone?
To create a time-lapse video on your phone, follow these steps:
- Open your camera app or download a time-lapse app from your phone’s app store.
- Choose a stable location or use a tripod to avoid shaking.
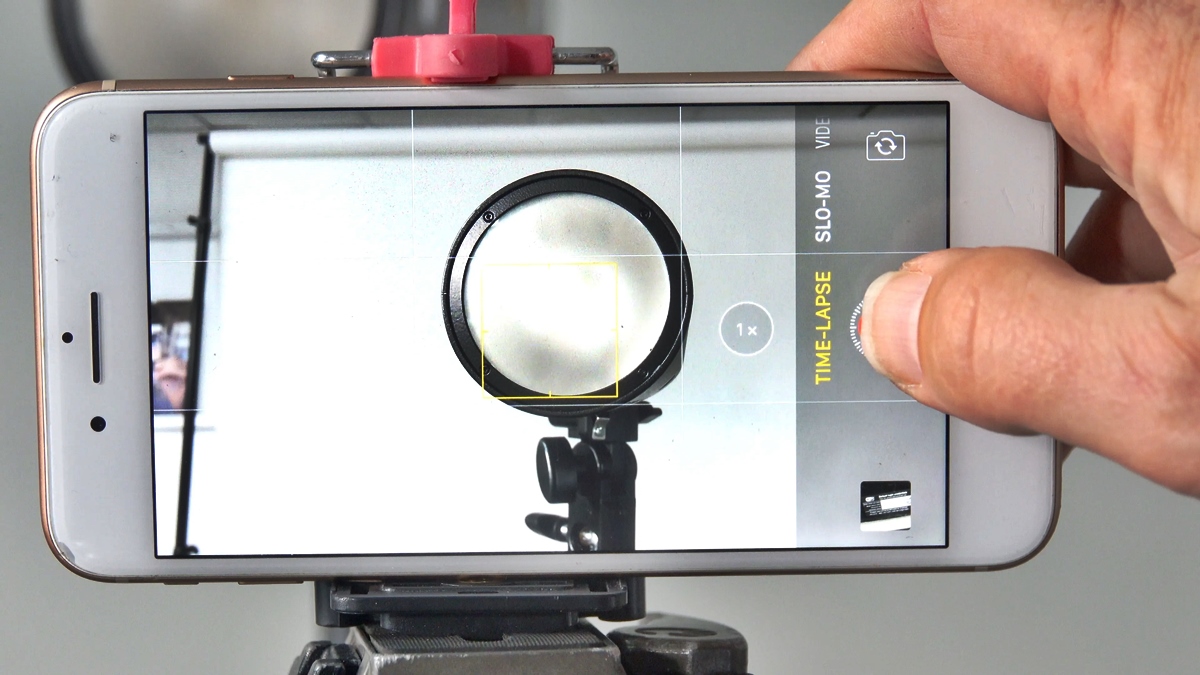
- Select the time-lapse mode in your camera app or open the time-lapse app.
- Set the desired interval between each frame (usually ranging from a few seconds to a few minutes).
- Start recording and let the camera capture the sequence of photos.
- Once you’re done recording, the app will automatically compile the photos into a time-lapse video.
4. Are there any tips for creating better time-lapse videos?
Here are some tips to create better time-lapse videos on your phone:
- Find an interesting subject or scene that will undergo noticeable changes over time.
- Plan your time-lapse based on the duration of the event or the changing elements.
- Use a sturdy tripod or a stable surface to avoid any camera movement.
- Experiment with different intervals between frames to capture the desired effect.
- Consider using external accessories like lens attachments or stabilizers to enhance the quality of your footage.
5. What are some popular time-lapse apps for mobile phones?
There are numerous time-lapse apps available for both iOS and Android devices. Some popular options include Hyperlapse by Instagram, Lapse It, Framlapse, and Time-Lapse Camera HD. These apps offer various features and editing options to help you create professional-looking time-lapse videos.