
The iPhone 13 is the latest addition to Apple’s flagship lineup, and it comes packed with a range of impressive features. One of the standout capabilities of the iPhone 13 is its ability to record stunning videos. Whether you’re an aspiring filmmaker, a content creator, or simply want to capture precious moments, the iPhone 13’s video recording capabilities will leave you astounded.
In this article, we will explore how to make the most of your iPhone 13’s video recording capabilities. From adjusting settings to capturing different perspectives, we will guide you through the process of recording videos that are not only visually captivating but also tailored to your unique style. So grab your iPhone 13 and let’s dive into the world of video recording!
Inside This Article
- Section 1: Preparing for Video Recording
- Section 2: Choosing the Right Recording Settings
- Section 3: Using the Camera App to Record Video
- Section 4: Enhancing Your Video Recording Experience
- Section 5: Tips and Tricks for Better Video Recording
- Conclusion
- FAQs
Section 1: Preparing for Video Recording
Before you start recording a video on your iPhone 13, there are a few steps you can take to ensure a smooth and successful recording experience. These preparations will help you capture high-quality videos that you can cherish for years to come.
1. Clear Storage Space: Make sure your iPhone 13 has plenty of available storage space. Video files can take up a significant amount of storage, so it’s essential to have enough room to accommodate your recordings. Delete any unnecessary files or transfer them to a cloud storage service to free up space.
2. Check Battery Level: Recording videos can be a power-intensive task, so it’s crucial to ensure that your iPhone 13 has sufficient battery life. Charge your device fully or keep it connected to a power source while recording to avoid any interruptions due to low battery.
3. Stabilize Your iPhone: Shaky footage can ruin the viewing experience. Consider using a tripod or a stabilizing device to keep your iPhone steady while recording. This will help eliminate unwanted camera movements and create smoother and more professional-looking videos.
4. Clean the Camera Lens: Smudges and dirt on the camera lens can impact the quality of your videos. Gently wipe the lens with a clean microfiber cloth to remove any fingerprints, dust, or smudges. This simple step can make a significant difference in the clarity and sharpness of your recordings.
5. Disable Distractions: To ensure uninterrupted recording sessions, put your iPhone in Do Not Disturb mode or turn off notifications. Incoming calls, messages, and other notifications can disrupt your video recording and cause distractions. It’s best to minimize any potential interruptions.
6. Plan Your Shots: Take some time to think about the shots you want to capture and plan your video accordingly. Consider the composition, lighting, and subject matter to create visually compelling videos. Having a rough plan in mind will help you capture the moments you want with more precision and creativity.
By following these preparation steps, you’ll be ready to embark on your video recording journey with your iPhone 13. Now that you’re prepared, let’s move on to the next section and explore the various recording settings you can use to capture your videos in the best possible way.
Section 2: Choosing the Right Recording Settings
When it comes to recording videos on your iPhone 13, choosing the right recording settings is crucial to ensure that your footage meets your desired quality standards. With the advancements in iPhone technology, you have a range of options to customize your recording experience. Here are some key factors to consider:
1. Resolution: The iPhone 13 offers different resolution options for video recording. The most common resolutions include 720p, 1080p, and 4K. Higher resolutions provide sharper and more detailed videos, but they also take up more storage space. Assess your requirements and choose a resolution that balances quality and storage constraints.
2. Frame Rate: The frame rate determines the number of frames captured per second in your video. The iPhone 13 supports frame rates of 24, 30, and 60 frames per second (fps). Higher frame rates result in smoother video playback, especially for fast-moving subjects. Consider the content you plan to capture and choose the appropriate frame rate accordingly.
3. Video Format: The iPhone 13 supports different video formats, including High Efficiency Video Coding (HEVC) and H.264. HEVC offers better compression and quality at lower file sizes, while H.264 is widely compatible with various devices and platforms. Check the compatibility of your intended playback devices and choose the format accordingly.
4. HDR and Dolby Vision: If you want to capture videos with enhanced dynamic range and lifelike colors, the iPhone 13 offers support for HDR (High Dynamic Range) and Dolby Vision. These technologies allow for more vibrant and immersive video playback on compatible devices. Enable HDR or Dolby Vision depending on your preferences and playback capabilities.
5. Camera Settings: In addition to recording settings, don’t forget to optimize your camera settings. For example, enabling video stabilization can help reduce shakiness, while adjusting exposure and focus settings manually can give you more control over your footage. Explore the camera settings menu and experiment with different options to achieve the desired effect.
By carefully choosing the right recording settings, you can ensure that your videos on the iPhone 13 are captured with the best possible quality. Take some time to familiarize yourself with the available options and adjust them based on your specific needs and preferences. Remember, proper recording settings can make a significant difference in the final outcome of your videos.
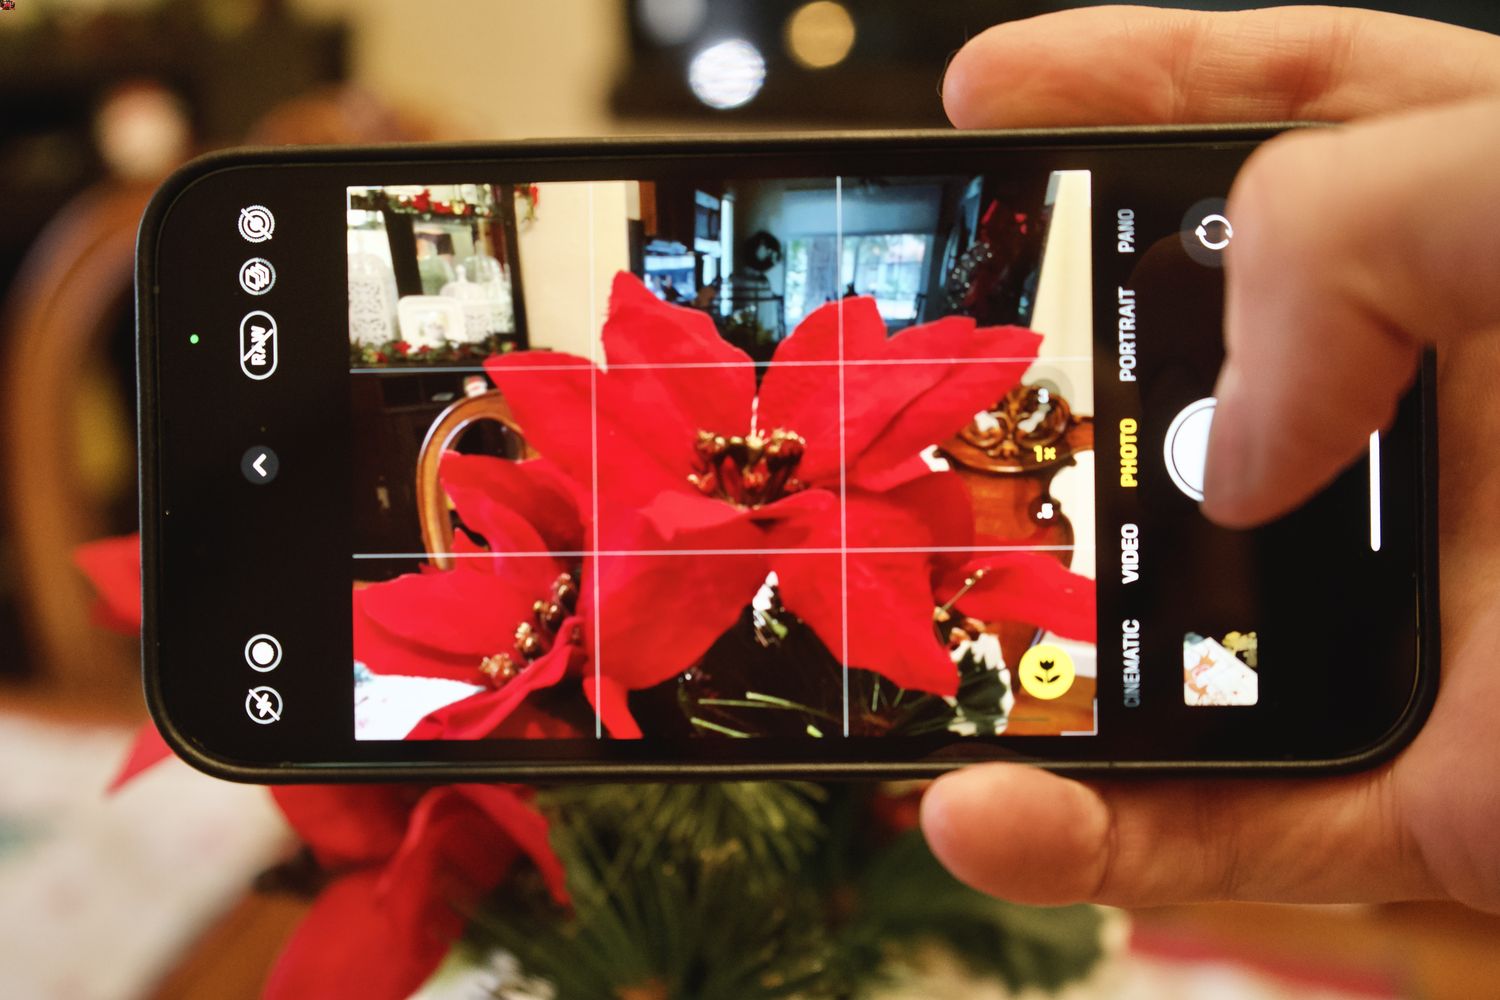
Section 3: Using the Camera App to Record Video
Recording high-quality videos on your iPhone 13 is a breeze thanks to the powerful built-in Camera app. This user-friendly app offers a range of features and settings to help you capture stunning videos with ease. Whether you’re shooting a family gathering, a special event, or simply capturing everyday moments, the Camera app has got you covered. In this section, we’ll explore how to use the Camera app to record videos on your iPhone 13.
To start recording a video, open the Camera app and swipe to the “Video” mode. You can easily switch between different modes by swiping left or right on the screen. Once you’re in the Video mode, focus on your subject by tapping on it on the screen. The camera will automatically adjust the focus and exposure to ensure your video is sharp and well-lit.
Before you hit the record button, it’s important to familiarize yourself with the various settings available in the Camera app. By tapping on the arrow icon at the top of the screen, you’ll open up a range of options such as video resolution, frame rate, and stabilization. Adjust these settings based on your preferences and the type of video you’re recording. For example, if you’re shooting a fast-paced action sequence, you might want to choose a higher frame rate for smoother playback.
One of the handy features of the Camera app is the ability to zoom in and out while recording. To zoom in, pinch the screen with two fingers, and to zoom out, spread them apart. Keep in mind that the digital zoom may result in a loss of image quality, so use it sparingly and opt for moving closer to your subject whenever possible.
While recording, you can also take photos without interrupting the video. To do this, simply tap the white shutter button that appears next to the record button. This feature comes in handy when you want to capture a still image while shooting a video.
If you want to capture a specific moment or create a slow-motion effect, you can use the slow-motion feature in the Camera app. To activate it, swipe left on the screen until you reach the “Slo-Mo” mode. Keep in mind that slow-motion videos take up more storage space, so make sure you have enough free space on your iPhone.
Once you’re done recording, tap the red record button again to stop. You’ll find the recorded video in the “Photos” app, where you can play it, edit it, or share it with your friends and family. The Camera app also offers basic video editing tools, including trimming and cropping, so you can refine your videos right on your iPhone.
The Camera app on your iPhone 13 is a powerful tool for capturing videos. By mastering its features and settings, you can make the most out of your video recording experience. So, grab your iPhone, open up the Camera app, and start capturing incredible videos that will impress everyone!
Section 4: Enhancing Your Video Recording Experience
Recording videos on your iPhone 13 is just the beginning. To truly enhance your video recording experience, there are several features and techniques you can utilize. Let’s dive into some tips and tricks that will take your videos to the next level.
1. Use the Video Stabilization Feature: The iPhone 13 is equipped with optical image stabilization technology, which helps minimize camera shake when capturing videos. This feature ensures that your footage remains steady, resulting in smoother and more professional-looking videos.
2. Experiment with Different Camera Angles: Don’t be afraid to get creative with your camera angles. Try shooting from different perspectives, such as low angles or high angles, to add visual interest to your videos. You can also utilize the grid feature in the camera app to assist you in achieving balanced compositions.
3. Adjust Exposure and Focus: The iPhone 13 allows you to manually adjust the exposure and focus while recording videos. To do this, simply tap and hold on the area of the screen where you want to set the focus and exposure. This feature gives you greater control over the lighting and sharpness of your videos.
4. Utilize the Time-Lapse and Slo-Mo Modes: The Time-Lapse and Slo-Mo modes are fantastic tools for capturing unique and captivating videos. Time-Lapse compresses longer events into shorter videos, while Slo-Mo slows down the action to create dramatic effects. Experiment with these modes to add variety to your videos.
5. Take Advantage of the Burst Mode: Burst mode allows you to capture a series of photos in rapid succession. This feature can be incredibly useful when recording videos, as it enables you to choose the best frames later on. To activate Burst mode, simply hold down the shutter button while recording.
6. Incorporate Natural Lighting: When recording videos, take advantage of natural lighting whenever possible. Natural light can add depth, warmth, and a more authentic look to your videos. Avoid harsh overhead lighting or shooting directly into bright light sources, as these can result in overexposed or underexposed footage.
7. Edit Your Videos: After recording, don’t forget to edit your videos to further enhance their quality. You can use the built-in iMovie app or third-party editing software to trim clips, add transitions, apply filters, and more. Editing allows you to create a polished final product that truly reflects your creative vision.
8. Experiment with Accessories: Consider investing in accessories like tripods, gimbals, or external microphones to expand your recording capabilities. Tripods and gimbals can help stabilize your shots, while external microphones can greatly improve audio quality. These accessories will help elevate the overall production value of your videos.
By applying these tips and tricks, you can enhance your video recording experience on your iPhone 13. Whether you’re capturing precious memories, creating content for social media, or documenting your adventures, these techniques will help you achieve professional-quality videos that truly stand out.
Section 5: Tips and Tricks for Better Video Recording
Recording video on your iPhone 13 is not just about pressing the record button. There are some tips and tricks you can use to improve the quality of your videos and make them more professional-looking. In this section, we will explore some of these tips and tricks to help you elevate your video recording game.
1. Find the Right Lighting: Lighting plays a crucial role in video recording. Look for natural light sources or use artificial lighting to ensure that your subject is well-lit. Avoid harsh shadows and dimly lit areas, as they can detract from the overall quality of your video.
2. Stabilize Your Shot: Shaky footage can make your videos look amateurish. To achieve a steady shot, you can use a tripod or invest in a smartphone stabilizer. This will help eliminate any unwanted camera movements and ensure that your videos are smooth and professional.
3. Use the Gridlines: The iPhone 13 offers gridlines in the camera settings. Enable them to help you compose your shots better. The gridlines follow the rule of thirds, which is a basic composition technique that can add balance and visual interest to your videos.
4. Experiment with Different Angles: Don’t be afraid to get creative with your shots. Try capturing your subject from various angles to add visual variety to your videos. You can shoot from high above, low to the ground, or from unique perspectives to make your videos more engaging and dynamic.
5. Use Manual Focus and Exposure: The iPhone 13 allows you to manually adjust the focus and exposure of your videos. This can be handy when you want to highlight specific elements or control the brightness in different lighting conditions. Simply tap and hold on the screen to lock the focus and exposure on your desired subject.
6. Take Advantage of Slow Motion and Time-Lapse: The iPhone 13 offers impressive slow-motion and time-lapse features. Experiment with these modes to capture captivating moments in a different way. Slow-motion can add drama to action sequences, while time-lapse can condense hours into seconds, showcasing the passage of time in a compelling manner.
7. Utilize Professional Video Editing Apps: To take your video recording to the next level, consider using professional video editing apps. These apps provide advanced editing features, filters, and effects that can enhance the visual appeal of your videos. Experiment with different apps to find the one that best suits your needs.
8. Add B-Roll and Cutaway Shots: B-roll and cutaway shots are additional footage that complement your main subject. Incorporating these shots in your videos can add depth and context, making them more engaging for the viewers. Capture scenic views, close-ups, or any relevant footage that enhances the narrative of your video.
9. Pay Attention to Audio: Good audio is just as important as good video quality. Ensure that your videos have clear and crisp audio by using an external microphone or positioning yourself closer to the source of the sound. This will greatly improve the overall viewing experience.
10. Practice and Experiment: Last but not least, improve your video recording skills by practicing and experimenting with different techniques. Don’t be afraid to try new things and push the boundaries of your creativity. The more you practice, the better you will become at capturing stunning videos with your iPhone 13.
By following these tips and tricks, you can elevate your video recording skills and produce high-quality videos that leave a lasting impact. Remember, practice makes perfect, so grab your iPhone 13 and start exploring the world of video recording.
The iPhone 13 is a powerful device that offers a seamless and convenient way to record videos. With its advanced camera features and user-friendly interface, capturing high-quality videos has never been easier. Whether you’re a professional videographer or someone who simply enjoys documenting precious moments, the iPhone 13 provides a versatile and reliable solution.
From its ability to shoot 4K videos at various frame rates to the inclusion of features like Optical Image Stabilization and Cinematic Mode, the iPhone 13 offers an impressive range of options for capturing dynamic and captivating footage. Whether you’re recording a family gathering, a breathtaking landscape, or even vlogging, the iPhone 13’s video recording capabilities are sure to exceed your expectations.
With its innovative technology and sleek design, the iPhone 13 is at the forefront of mobile videography. So, grab your iPhone 13 and start unleashing your creative potential by recording stunning videos that will leave a lasting impression.
FAQs
1. Can I record videos on the iPhone 13?
Yes, the iPhone 13 comes with a high-quality camera capable of recording stunning videos. It offers various video recording modes and features that allow you to capture professional-looking videos.
2. How do I access the video recording function on my iPhone 13?
To access the video recording function on your iPhone 13, simply open the Camera app and swipe to the video mode. You can then start recording by tapping the red button. You can also adjust settings such as resolution, frame rate, and stabilization options within the Camera app.
3. What are some tips for recording better videos with my iPhone 13?
To record better videos with your iPhone 13, here are some tips:
– Use natural lighting or consider using external lighting sources for a well-lit scene.
– Keep the camera steady by using a tripod or holding the phone with both hands.
– Experiment with different angles and perspectives to add visual interest to your videos.
– Use the built-in video editing tools on the iPhone to make adjustments and enhancements after recording.
4. How much video can I record on the iPhone 13?
The amount of video you can record on the iPhone 13 depends on the storage capacity of your device. The iPhone 13 offers different storage options, ranging from 128GB to 1TB. Higher storage capacity will allow you to record more videos without running out of space.
5. Can I record 4K videos on the iPhone 13?
Yes, the iPhone 13 supports 4K video recording. It offers various 4K resolution options, including 24fps, 25fps, 30fps, and 60fps, allowing you to capture high-resolution videos with exceptional detail and clarity.