
Have you ever experienced the frustration of your iPhone being disabled? It’s a common issue that can arise when you enter the wrong passcode multiple times or if your device is experiencing a software glitch. The last thing you want is to be locked out of your phone, unable to access your important data or communicate with friends and family.
But don’t worry! In this article, we will guide you through the steps to fix a disabled iPhone and get your device up and running again. Whether you have an iPhone X, iPhone SE, or any other model, we have got you covered. So, grab your device and let’s dive into the solutions that will help you regain access to your disabled iPhone.
Inside This Article
- Overview of a Disabled iPhone
- Common Causes of a Disabled iPhone
- Steps to Fix a Disabled iPhone
- Additional Tips and Considerations
- Overview of a Disabled iPhone
- Common Causes of a Disabled iPhone
- Steps to Fix a Disabled iPhone
- Additional Tips and Considerations
- Conclusion
- FAQs
If you find yourself dealing with a disabled iPhone, it can be quite frustrating. A disabled iPhone is usually a result of too many incorrect passcode attempts or a forgotten passcode. But don’t worry! In this article, we will guide you through the steps to fix a disabled iPhone and regain access to your device.
Overview of a Disabled iPhone
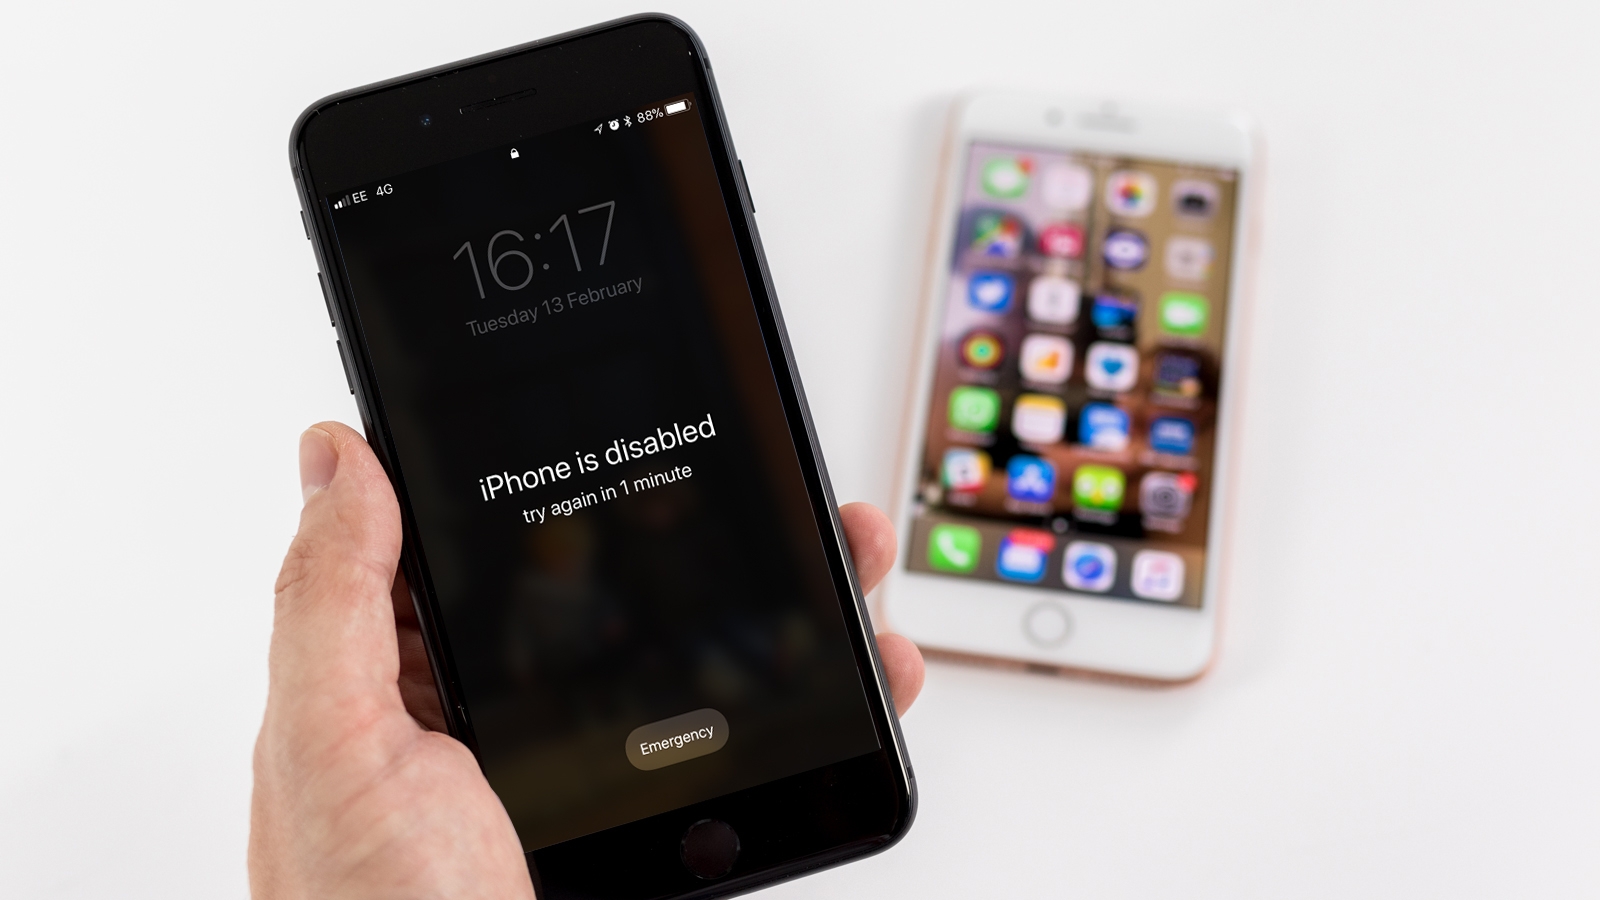
A disabled iPhone is essentially locked and inaccessible because of the security feature that kicks in after multiple incorrect passcode attempts. When this happens, you may see a message on your device saying “iPhone is disabled” accompanied by a time-based restriction. The duration of the lockout increases with each subsequent incorrect passcode entry.
Common Causes of a Disabled iPhone
There are a few common causes that can lead to a disabled iPhone. These include:
- Forgetting your iPhone passcode
- Mixing up numbers and entering incorrect passcodes
- Accidental activation of the passcode lock feature
- Attempts by unauthorized individuals to access your device
Steps to Fix a Disabled iPhone
Follow these steps to fix a disabled iPhone:
- Connect your iPhone to a computer that you have previously synced with.
- Launch iTunes or Finder (on macOS Catalina or later).
- If a prompt appears on your iPhone asking for permission to trust your computer, follow the on-screen instructions to grant permission.
- In iTunes or Finder, select your iPhone when it appears.
- Click on the “Restore iPhone” button.
- Follow the prompts to initiate the restore process. This will erase all data on your iPhone and install the latest iOS version.
- Wait for the restore process to complete. Your iPhone will restart during this process.
- Set up your iPhone as a new device or restore from a backup.
After following these steps, your disabled iPhone should be fixed and you will have access to it again. Remember to enter a passcode that you can easily remember to prevent future lockouts.
Additional Tips and Considerations
Here are a few additional tips and considerations to keep in mind when dealing with a disabled iPhone:
- If you don’t have access to a computer or you have never synced your iPhone before, you will need to use the recovery mode or iCloud to restore your device.
- Make sure to regularly back up your iPhone using iTunes or iCloud to safeguard your data in case of any future issues.
- If you continue to experience issues with a disabled iPhone, it is recommended to contact Apple Support for further assistance.
Now that you know the steps to fix a disabled iPhone, you can confidently tackle this issue and regain access to your device. Just remember to take precautions to prevent any future lockouts and keep your iPhone secure.
Overview of a Disabled iPhone
A disabled iPhone is a common issue that many users encounter. When an iPhone becomes disabled, it means that you are temporarily locked out of your device and are unable to access its contents or use its functions. This can be quite frustrating, especially if you rely heavily on your iPhone for communication, productivity, and entertainment.
There are several reasons why an iPhone may become disabled. One common cause is entering the wrong passcode multiple times in a row. The iPhone has a built-in security feature that disables the device after a certain number of incorrect passcode attempts to protect your data from unauthorized access. Other reasons for a disabled iPhone can include software glitches, hardware malfunctions, or issues with the device’s operating system.
It’s important to note that there are different levels of iPhone disabling. If you enter the wrong passcode multiple times in a row, your iPhone will be temporarily disabled for a few minutes, displaying a message indicating the time remaining before you can try again. However, if you continue to enter the wrong passcode, your iPhone may become permanently disabled, requiring more complex steps to regain access.
If you find yourself dealing with a disabled iPhone, it’s essential to know the steps to fix the issue and regain access to your device. The following sections will outline the necessary steps to alleviate the problem and get your iPhone back up and running.
Common Causes of a Disabled iPhone
It can be extremely frustrating when you find your iPhone disabled and unable to access your important data and features. Understanding the common causes of a disabled iPhone can help you prevent such situations and protect your device from potential damage. Let’s explore some of the common reasons why an iPhone may become disabled:
- Incorrect Passcode Entry: One of the most common causes of a disabled iPhone is entering the passcode incorrectly multiple times. If you enter the wrong passcode too many times, the device will automatically disable itself as a security measure.
- Software Glitches: In some cases, a software glitch or a bug in the iOS system can cause the iPhone to become disabled. This can happen during software updates or when downloading certain applications that are not compatible with the device.
- Hardware Issues: While less common, hardware issues such as a malfunctioning Home button or a faulty Touch ID sensor can also lead to a disabled iPhone. These issues can prevent you from properly entering your passcode and therefore disable your device.
- Water Damage: Accidentally dropping your iPhone in water or exposing it to excessive moisture can cause severe damage to the internal components. Water damage can lead to various issues, including a disabled iPhone.
- Failed Attempts to Jailbreak: Some users attempt to jailbreak their iPhone in order to customize its features and access additional functionalities. However, if the jailbreaking process is not done correctly, it can result in a disabled iPhone.
Knowing the common causes of a disabled iPhone can help you take preventive measures to avoid encountering such situations. Always make sure to handle your device with care, protect it from water damage, and avoid attempting any unauthorized modifications that can potentially disable your iPhone.
##
Steps to Fix a Disabled iPhone
A disabled iPhone can be a frustrating experience, but fear not, there are several steps you can take to fix the issue and get your iPhone back up and running. Follow the steps below to recover your disabled iPhone:
- Connect to iTunes: Connect your iPhone to your computer using a USB cable and launch iTunes. If you have previously synced your iPhone with iTunes, it will automatically initiate a backup. Wait for the backup to complete, as this step is crucial to ensure that you don’t lose any important data.
- Enter Recovery Mode: If you have never synced your iPhone with iTunes, or if the automatic backup did not start, you will need to enter recovery mode manually. To do this, press and hold the Home button and the Sleep/Wake button simultaneously until the iTunes logo appears on the iPhone’s screen. Release the buttons once the iTunes logo appears.
- Restore iPhone: In iTunes, you will see a pop-up window asking if you want to restore your iPhone. Click on the “Restore” button and wait for the process to complete. This will erase all the data on your iPhone and install the latest version of iOS. Once the restore is finished, you can choose to set up your iPhone as new or restore from a backup.
- Set Up as New or Restore from Backup: After the restore process is complete, you will be prompted to set up your iPhone. You can choose to set it up as new, which means starting from scratch with no previous data, or you can choose to restore from a backup. If you have a recent backup available, restoring from it will bring back your apps, settings, and other data.
- Update iOS: Once your iPhone is back up and running, it’s essential to update to the latest version of iOS. Go to the “Settings” app, tap on “General,” and select “Software Update.” If a software update is available, follow the prompts to download and install it. Keeping your iPhone up to date with the latest software version will help prevent future issues.
These steps should help you recover your disabled iPhone and restore its functionality. It’s crucial to note that restoring your iPhone will erase all your data, so it’s essential to have a recent backup available. Additionally, always make sure to keep your iPhone updated with the latest software to prevent potential issues in the future.
Additional Tips and Considerations
When dealing with a disabled iPhone, it’s essential to keep a few additional tips and considerations in mind to ensure a successful recovery. Here are some important things to remember:
- Backup your data: Before attempting any troubleshooting steps, it’s crucial to back up your iPhone’s data. This can be done using iCloud or iTunes, ensuring that your important files, photos, and documents are safe.
- Consult the Apple Support: If you’ve tried all the suggested steps and your iPhone is still disabled, it’s recommended to reach out to the Apple support team. They can provide you with specific instructions tailored to your device or direct you to authorized service centers for further assistance.
- Consider professional repair: In cases where the issue with your disabled iPhone is hardware-related, such as a faulty button or damaged charging port, it might be necessary to seek professional repair services. These experts have the tools and expertise to diagnose and fix complex issues that cannot be resolved through general troubleshooting.
- Protect your iPhone with a passcode: To prevent unauthorized access to your device and avoid the risk of it becoming disabled, make sure to set up a strong passcode. This will add an extra layer of security and protect your personal information from prying eyes.
- Update your iPhone regularly: Keeping your iPhone’s software up to date is crucial in maintaining its performance and security. Regularly check for software updates provided by Apple and install them as soon as they become available.
- Be cautious with jailbreaking: Jailbreaking your iPhone can offer additional customization options, but it also comes with risks. Modifying the system software can lead to stability issues, security vulnerabilities, and potential device malfunctions. Proceed with caution if you choose to jailbreak your iPhone.
- Consider AppleCare: If you frequently encounter issues with your iPhone, it may be worth investing in AppleCare. This extended warranty and support program can provide you with additional coverage and access to specialized technical support resources.
By following these additional tips and considerations, you’ll be well-equipped to handle a disabled iPhone and minimize potential risks or complications during the recovery process.
Conclusion
In conclusion, dealing with a disabled iPhone can be a frustrating experience, but there are several methods you can use to fix it. Whether it’s due to a forgotten passcode or a software glitch, the solutions provided in this article will help you regain access to your device and get it back up and running.
Remember, it’s important to stay calm and patient throughout the process. Follow the steps carefully, and if one method doesn’t work, try another one. In some cases, you may need to restore your iPhone to factory settings, which will erase all data, so make sure you have a recent backup.
It’s also worth mentioning that prevention is key. Consider setting up a secure and memorable passcode, enabling Touch ID or Face ID, and regularly updating your iPhone’s software to prevent any potential issues in the future.
With the information provided here, you now have the tools and knowledge to resolve the issue of a disabled iPhone. So, don’t panic when you encounter this problem. Instead, follow the steps outlined in this article and get your device back in working order. Happy fixing!
FAQs
1. How does an iPhone get disabled?
An iPhone can become disabled if you enter the incorrect passcode multiple times or if it experiences a software issue. It is a security feature designed to protect your device and its data.
2. What should I do if my iPhone is disabled?
If your iPhone is disabled, you can try connecting it to a computer with iTunes and follow the steps to restore or update the device. Alternatively, you can also try using the iCloud website to erase your device remotely.
3. How can I fix a disabled iPhone without iTunes?
If you don’t have access to a computer with iTunes, you can still fix a disabled iPhone by using iCloud’s Find My service. With this option, you can remotely erase your device and set it up as new.
4. Can I recover my data from a disabled iPhone?
If you have a recent backup of your iPhone, you can restore your data after fixing the disabled device. However, if you don’t have a backup, it may not be possible to recover the data from a disabled iPhone.
5. Can a disabled iPhone be unlocked?
Unlocking a disabled iPhone depends on the specific circumstances. If you have the correct passcode or can reset it using your Apple ID, you can unlock the device. However, if the iPhone is disabled due to other reasons, it may require additional steps to unlock it.