
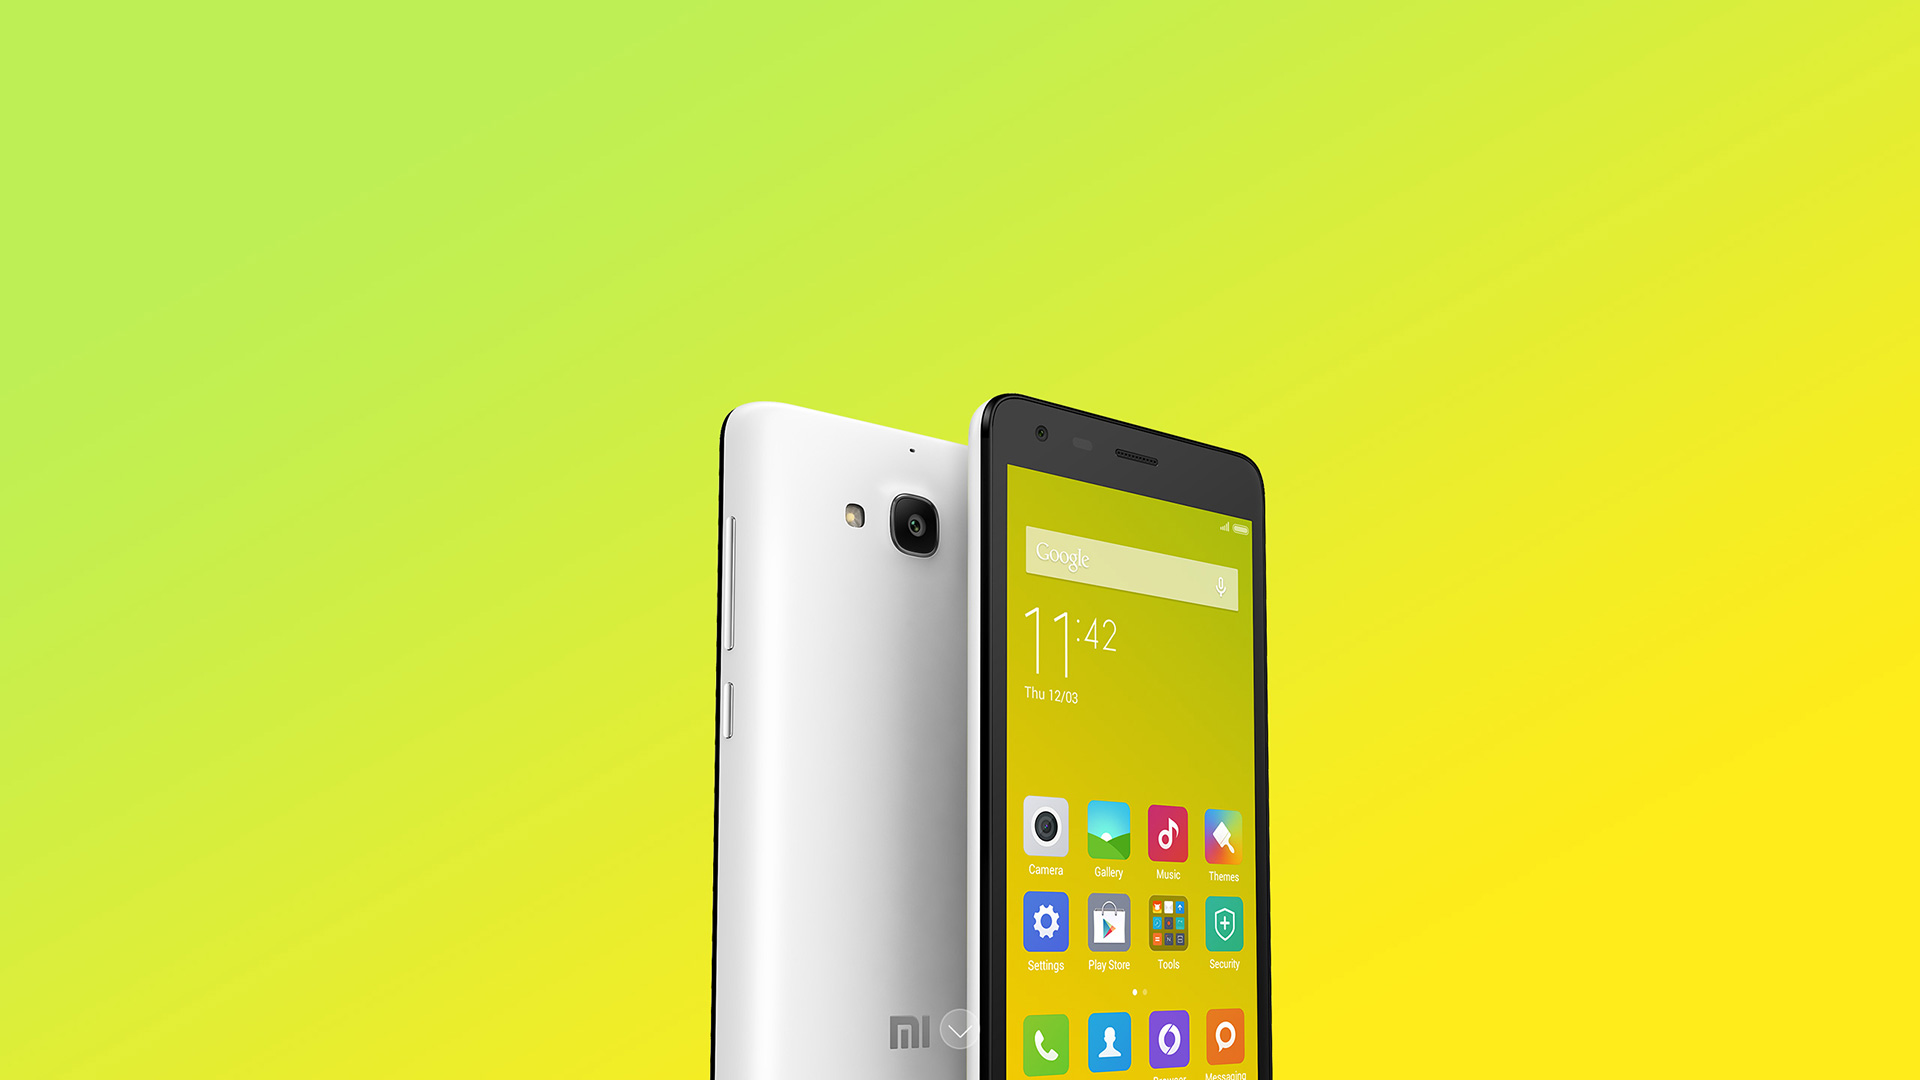
Are you a proud owner of a Xiaomi Redmi 2 and looking to enhance its performance? One of the best ways to do so is by flashing a custom ROM on your device. Flashing a ROM allows you to customize and optimize your phone’s operating system, giving you access to new features, improved performance, and the ability to personalize your device to meet your specific needs.
But what exactly is flashing a ROM, and how can you do it on your Xiaomi Redmi 2? In this article, we will guide you through the process step-by-step, providing you with the necessary information and instructions to successfully flash a custom ROM on your phone. Whether you’re a seasoned enthusiast or a beginner in the world of Android customization, we’ve got you covered.
Inside This Article
- Before You Begin
- Step 1: Download the Required Files
- Step 2: Unlock Bootloader
- Step 3: Install TWRP Recovery
- Step 4: Backup Existing Data
- Step 5: Flash ROM using TWRP
- Step 6: Wipe Data and Cache
- Step 7: Reboot and Enjoy
- Conclusion
- FAQs
Before You Begin
Before you start the process of flashing the ROM on your Xiaomi Redmi 2, there are a few important things you need to consider:
- Backup your data: Flashing a new ROM will erase all the data on your device. It’s crucial to back up your important files, contacts, and media to avoid any data loss.
- Charge your device: Make sure your Xiaomi Redmi 2 is adequately charged to avoid any interruption during the flashing process. It’s recommended to have at least 50% battery before starting.
- Ensure a stable internet connection: A stable and reliable internet connection is essential for downloading the necessary files and ROM. Make sure you are connected to a Wi-Fi network or have a sufficient mobile data plan.
- Enable USB debugging: To connect your Xiaomi Redmi 2 to your computer and transfer files, you need to enable USB debugging mode. Go to Settings > About Phone > Tap on MIUI version several times to enable developer options, and then go to Developer Options and enable USB debugging.
- Unlock the bootloader: Xiaomi devices require the bootloader to be unlocked before flashing custom ROMs. This step is crucial, and it’s essential to follow the correct procedure provided by Xiaomi to unlock the bootloader.
- Research and choose a compatible ROM: There are several custom ROM options available for the Xiaomi Redmi 2. It’s important to research and choose a ROM that is compatible with your device model and version. Make sure to download it from a reputable source.
By considering these important factors, you will be well-prepared and ready to proceed with flashing a ROM on your Xiaomi Redmi 2. Ensuring a proper backup, stable internet connection, and following the correct steps will help ensure a smooth and successful flashing process.
Step 1: Download the Required Files
Before you begin the process of flashing a ROM on your Xiaomi Redmi 2, you need to make sure you have all the necessary files downloaded. These files will enable you to successfully install the ROM on your device. Here’s what you need to do:
- First, you’ll need to find a reliable source to download the ROM file. Make sure to choose a reputable website or forum where ROMs are shared by experienced users. This will reduce the risk of downloading any malicious files.
- Once you’ve identified a trustworthy source, search for the ROM specifically designed for your Xiaomi Redmi 2 model. It’s crucial to download the correct ROM version to ensure compatibility and prevent any issues during the installation process.
- Before downloading the ROM, check if there are any additional files or tools required to flash it. Some ROMs might need specific drivers or supporting software to work properly on your device. Download these files and keep them accessible on your computer.
- Ensure that your computer has a stable internet connection before initiating any downloads. A slow or interrupted download could result in a corrupted ROM file, leading to complications during the flashing process.
- Once the ROM file and any supporting files are downloaded, create a dedicated folder on your computer. This folder will serve as a central location for all the required files, making it easier to locate them during the flashing process.
- Move the ROM file and any other supporting files that you have downloaded into the dedicated folder on your computer. Organizing your files in this way will help you keep track of everything and minimize the chance of accidentally using the wrong file during the flashing process.
Once you have successfully downloaded all the required files and organized them in a dedicated folder, you are ready to move on to the next step. In the next step, we will guide you through unlocking the bootloader of your Xiaomi Redmi 2.
Step 2: Unlock Bootloader
Unlocking the bootloader is an important step to ensure full control over your Xiaomi Redmi 2 device. By unlocking the bootloader, you gain the ability to install custom ROMs, root your device, and perform various other modifications.
Before you proceed with unlocking the bootloader, it’s crucial to note that this process will erase all the data on your device. Therefore, it’s crucial to backup any important files or data that you don’t want to lose.
To unlock the bootloader of your Xiaomi Redmi 2, follow these steps:
- Step 1: Enable Developer Options
- Step 2: Enable USB Debugging
- Step 3: Request Unlocking Permission
- Step 4: Unlock Bootloader
- Step 5: Verify Bootloader Status
To enable Developer Options, go to Settings on your device. Scroll down and tap on ‘About phone’. Locate ‘MIUI version’ and tap on it seven times. This will enable Developer Options on your device.
In Developer Options, scroll down and find ‘USB Debugging’. Toggle the switch to enable it. This will allow your device to communicate with your computer when connected via USB.
Go to Xiaomi’s official website and search for the bootloader unlock page. Follow the instructions to request unlocking permission. Once the request is submitted, it may take a few days for approval.
Once your unlocking permission is granted, you will receive a confirmation SMS or email. Follow the instructions to unlock the bootloader. This usually involves downloading and running the Xiaomi Unlock Tool on your computer, connecting your device in fastboot mode, and following the on-screen instructions.
After completing the unlocking process, you can verify the unlocked bootloader status by rebooting your device into fastboot mode. Connect your phone to your computer, open the command prompt or terminal, and enter the command ‘fastboot devices. If your device is listed, it means the bootloader is unlocked.
Unlocking the bootloader of your Xiaomi Redmi 2 expands your device’s capabilities, allowing you to customize and optimize its performance to suit your preferences. Remember that unlocking the bootloader voids the warranty, so proceed with caution and make sure you understand the risks involved.
Step 3: Install TWRP Recovery
Installing Team Win Recovery Project (TWRP) recovery is crucial in order to flash a custom ROM on your Xiaomi Redmi 2. TWRP recovery is a custom recovery image that allows you to perform various advanced functions on your device, such as creating backups, flashing custom ROMs, and more.
Follow the steps below to install TWRP recovery on your Xiaomi Redmi 2:
- Make sure you have already unlocked the bootloader of your Redmi 2. If not, refer to “Step 2: Unlock Bootloader” for detailed instructions.
- Download the TWRP recovery image specifically designed for your Xiaomi Redmi 2 model. Ensure that you download the latest stable version from a reliable source.
- Connect your Redmi 2 to your computer using a USB cable.
- Copy the downloaded TWRP recovery image file to the internal storage of your device.
- Disconnect your Redmi 2 from the computer.
- Power off your device completely.
- Boot your Redmi 2 into fastboot mode by pressing and holding the Volume Down and Power buttons simultaneously until the fastboot screen appears.
- Once you are in fastboot mode, connect your Redmi 2 to the computer again.
- Open a command prompt or terminal window on your computer.
- Navigate to the folder where you saved the TWRP recovery image file.
- Type the following command in the command prompt or terminal window:
fastboot flash recovery twrp.img(Replace “twrp.img” with the actual filename of the TWRP recovery image file) - Wait for the flashing process to complete.
- Once the flashing process is done, type the command:
fastboot rebootto reboot your Redmi 2. - Your device should now boot into TWRP recovery.
Congratulations! You have successfully installed TWRP recovery on your Xiaomi Redmi 2. Now you can proceed to the next step and backup your existing data before flashing a custom ROM.
Step 4: Backup Existing Data
Before flashing a new ROM on your Xiaomi Redmi 2, it is essential to backup all your existing data to ensure that you don’t lose anything during the process. Follow these steps to perform a full backup of your device:
1. Connect Your Device
Start by connecting your Xiaomi Redmi 2 to your computer using a USB cable. Make sure that the device is recognized and connected properly.
2. Enable USB Debugging
Next, you need to enable USB debugging on your Xiaomi Redmi 2. Go to Settings, then select About Phone and tap on MIUI version several times until you see the “You are now a developer!” message. Then, go back to Settings, select Additional Settings, and tap on Developer options. Toggle the USB debugging option to enable it.
3. Install ADB and Fastboot Drivers
Install ADB and Fastboot drivers on your computer. These drivers are necessary for establishing a connection between your device and your PC.
4. Open Command Prompt
In your computer’s search bar, type “cmd” and select Command Prompt from the search results. This will open a command window.
5. Enter ADB Commands
In the command prompt, enter the following commands one by one:
adb devices
This command will verify if your device is connected properly. It should display your device’s serial number if the connection is successful.
adb backup -apk -shared -all -f backup.ab
This command will initiate the backup process and create a backup file named “backup.ab” on your computer.
6. Follow Backup Instructions
Once you enter the second command, a backup wizard will appear on your phone’s screen. Follow the instructions on your device to choose the data you want to back up.
7. Encrypt Backup (Optional)
If you want to secure your backup file with a password, you can encrypt it. Simply follow the instructions on your phone’s screen to set a password.
8. Complete the Backup
Once you have selected your desired data and optionally encrypted the backup, click the “Back Up My Data” button on your phone to start the backup process. This may take some time, depending on the amount of data you have.
By following these steps, you will be able to create a backup of all your important data on the Xiaomi Redmi 2. This way, if anything goes wrong during the ROM flashing process, you can restore your device to its previous state without losing any crucial information.
Step 5: Flash ROM using TWRP
Now that you have successfully installed TWRP recovery on your Xiaomi Redmi 2, it’s time to flash the ROM. Flashing a ROM allows you to install a custom firmware that can offer various features and enhancements not found in the stock ROM.
Before proceeding, make sure you have downloaded the ROM file for your Xiaomi Redmi 2. It is important to choose a ROM that is compatible with your device model to avoid any issues during the flashing process.
Here’s how to flash the ROM using TWRP recovery:
- Boot your Xiaomi Redmi 2 into TWRP recovery mode. You can do this by powering off your device, and then pressing and holding the Volume Up and Power buttons simultaneously until the TWRP logo appears.
- In TWRP recovery mode, tap on the “Wipe” button and then swipe the “Factory Reset” slider to wipe your device’s data and cache partitions. This step is necessary to ensure a clean installation of the ROM.
- After wiping, go back to the main menu of TWRP and tap on the “Install” button.
- Navigate to the location where you have saved the ROM file on your device and select it.
- Swipe the “Swipe to Confirm Flash” slider to start the flashing process. Be patient as this may take a few minutes to complete.
- Once the flashing process is finished, tap on the “Reboot System” button.
After your device reboots, you will have successfully flashed the ROM using TWRP. Give your Xiaomi Redmi 2 some time to optimize and settle in with the new firmware. You can now explore the new features and customization options offered by the custom ROM.
It is worth noting that the flashing process can be risky if not done correctly. Make sure to follow the steps precisely and avoid any interruptions during the process. Always have a backup of your important data before flashing a ROM, as it will erase all your existing data.
If you encounter any issues or have questions during the flashing process, you can refer to the FAQs section below for some common troubleshooting tips.
Step 6: Wipe Data and Cache
Before flashing a new ROM on your Xiaomi Redmi 2, it is recommended to wipe the data and cache partitions. This ensures a clean installation and minimizes any potential conflicts or issues that may arise from residual data from the previous ROM. Follow the steps below to wipe the data and cache:
1. Boot into TWRP Recovery: Turn off your Redmi 2 and then press and hold the Volume Up and Power buttons simultaneously until the device vibrates and the TWRP Recovery screen appears.
2. Select “Wipe”: In the TWRP main menu, tap on the “Wipe” option.
3. Choose Data and Cache Partitions: On the “Wipe” screen, you will see several partition options. Tap on “Advanced Wipe” and then select the data and cache partitions.
4. Swipe to Wipe: Once you have selected the data and cache partitions, swipe the “Swipe to Wipe” button at the bottom of the screen to initiate the wiping process. This will delete all the data and cache from your device.
5. Confirm Wipe: After swiping to wipe, TWRP will ask you to confirm the action. Tap on “Yes” to proceed with the wiping process.
6. Wait for Wiping to Complete: The wiping process may take a few moments to complete. Once finished, you will see a message indicating that the wipe was successful.
7. Go Back to the Main Menu: Tap on the “Back” button until you reach the main menu of TWRP Recovery.
8. Reboot System: From the main menu, select “Reboot” and then tap on “System” to reboot your Redmi 2.
After following these steps and successfully wiping the data and cache partitions, you can proceed with flashing the new ROM on your Xiaomi Redmi 2. This ensures a clean installation and can help prevent any potential issues that may arise from conflicting data.
Step 7: Reboot and Enjoy
Once you have successfully flashed the ROM on your Xiaomi Redmi 2 device and wiped the data and cache, it’s time to reboot your phone and start enjoying the new ROM. Rebooting your device is a crucial step to finalize the ROM installation process and ensure everything is running smoothly.
To reboot your Xiaomi Redmi 2, simply press and hold the power button until the power menu appears on your screen. From there, select the “Restart” option and wait for your device to boot up. Keep in mind that the first boot process may take a little longer than usual as your device optimizes and initializes the newly installed ROM.
Once your device has finished booting up, you will be greeted by the fresh interface of the new ROM. Take a moment to explore the features and customization options that the ROM offers. You may notice improvements in performance, battery life, and overall user experience compared to the previous ROM you were using.
This is also an excellent opportunity to set up your device according to your preferences. Customize your home screen layout, rearrange app icons, and personalize your settings to make your Xiaomi Redmi 2 feel truly yours.
It’s important to note that while flashing a new ROM can provide exciting new features and functionalities, it’s always essential to be cautious and aware of any potential risks involved. Make sure to follow the instructions carefully, and if you encounter any issues or errors during the process, reach out to the ROM developer or community for assistance.
So, sit back, relax, and enjoy the enhanced performance and features that the new ROM brings to your Xiaomi Redmi 2 device. Whether it’s a new user interface, improved battery life, or added customization options, the benefits of flashing a new ROM are sure to enhance your overall smartphone experience.
Conclusion
In conclusion, flashing the ROM on your Xiaomi Redmi 2 can be a beneficial process that allows you to customize your device, improve performance, and stay up to date with the latest software updates. However, it is essential to proceed with caution and follow the instructions carefully to avoid any potential risks or damage to your device.
By following the steps outlined in this article, you can confidently flash a ROM on your Xiaomi Redmi 2 and enjoy the benefits of a personalized and optimized device. Remember to backup your data, ensure you have the correct ROM file, and use reputable sources and tools. If you encounter any difficulties, refer to the FAQs section or seek assistance from an experienced user or the Xiaomi support forum.
Flashing a ROM can be an exciting and rewarding experience, allowing you to unlock the full potential of your Xiaomi Redmi 2. Take the time to explore different ROM options, experiment with customizations, and enjoy the enhanced performance and features that come with flashing your device.
FAQs
- Can I flash a custom ROM on my Xiaomi Redmi 2?
- How do I flash a custom ROM on my Xiaomi Redmi 2?
- What precautions should I take before flashing a custom ROM?
- What are the benefits of flashing a custom ROM on my Xiaomi Redmi 2?
- Can I revert back to the stock ROM after flashing a custom ROM?
Yes, you can flash a custom ROM on your Xiaomi Redmi 2. Flashing a custom ROM allows you to install a modified version of the Android operating system on your device, which can provide additional features, customization options, and performance improvements. However, it’s important to note that flashing a custom ROM can void your device’s warranty and may carry certain risks, so it’s crucial to follow the instructions carefully and be aware of the potential consequences.
To flash a custom ROM on your Xiaomi Redmi 2, you will need to follow a specific set of instructions. Generally, the process involves downloading the custom ROM file, booting your device into recovery mode, wiping the existing data, and then installing the new ROM. There are various resources and online tutorials available that provide step-by-step instructions for flashing custom ROMs on different devices. Make sure to find a trusted source and carefully follow the instructions provided.
Before flashing a custom ROM on your Xiaomi Redmi 2, it’s important to take certain precautions to minimize any potential risks. First, ensure that you have a full backup of all your important data, including contacts, photos, and documents. This will allow you to restore your data in case anything goes wrong during the flashing process. Additionally, make sure your device is fully charged or has enough battery power to prevent any interruptions. Lastly, double-check that you are using the correct custom ROM file that is compatible with your specific device model.
Flashing a custom ROM on your Xiaomi Redmi 2 can offer several benefits. Firstly, you can enjoy a more personalized and unique user experience by choosing a custom ROM that provides different themes, icons, and customization options. Custom ROMs often come with performance optimizations and tweaks that can enhance the speed and responsiveness of your device. Additionally, you may have access to features not available in the stock ROM, such as improved battery life, additional gesture controls, or advanced security options.
Yes, it is possible to revert back to the stock ROM after flashing a custom ROM on your Xiaomi Redmi 2. Most custom ROMs provide the option to restore the device to its original state by flashing the stock ROM. However, it’s essential to note that this process can vary depending on the custom recovery you are using and the specific ROM you have flashed. It is highly recommended to research and carefully follow the instructions provided by the ROM developer or a trusted source when reverting back to the stock ROM.