
Are you struggling to connect your Sony Xperia smartphone to your computer? Don’t worry, you’re not alone. Many Xperia users face difficulties in establishing a seamless connection between their device and their PC or Mac.
Having the ability to connect your Xperia to a computer opens up a world of possibilities. From transferring files and photos to managing your device’s storage and even performing software updates, a reliable connection is essential. However, with technology constantly evolving, it’s not uncommon for users to encounter connectivity issues.
In this article, we will guide you through the process of getting your Sony Xperia to connect with your computer. Whether you’re using a USB cable, Wi-Fi, or other methods, we’ll provide you with step-by-step instructions to ensure a successful connection. Say goodbye to frustrating connection issues and unlock the full potential of your Xperia device!
Inside This Article
- I. Installing Sony Xperia Drivers
- II. Connecting Sony Xperia to Computer via USB
- III. Enabling USB Debugging on Sony Xperia
- IV. Transferring Files between Sony Xperia and Computer
- Conclusion
- FAQs
I. Installing Sony Xperia Drivers
Before you can connect your Sony Xperia to your computer, you need to ensure that the necessary drivers are installed. These drivers are essential for establishing a proper connection and enabling the transfer of files between your phone and computer.
To install the Sony Xperia drivers, follow these steps:
- Go to the official Sony Xperia website and navigate to the “Support” section.
- Search for your specific Xperia model and locate the “Downloads” or “Drivers” section.
- Download the appropriate driver package for your operating system (Windows or Mac).
- Once the download is complete, locate the downloaded file and double-click on it to start the installation process.
- Follow the on-screen instructions to complete the driver installation.
- After the installation is successful, restart your computer to ensure that the drivers are properly loaded.
Once the Sony Xperia drivers are installed, you are ready to connect your phone to the computer and enjoy seamless file transfer and device management.
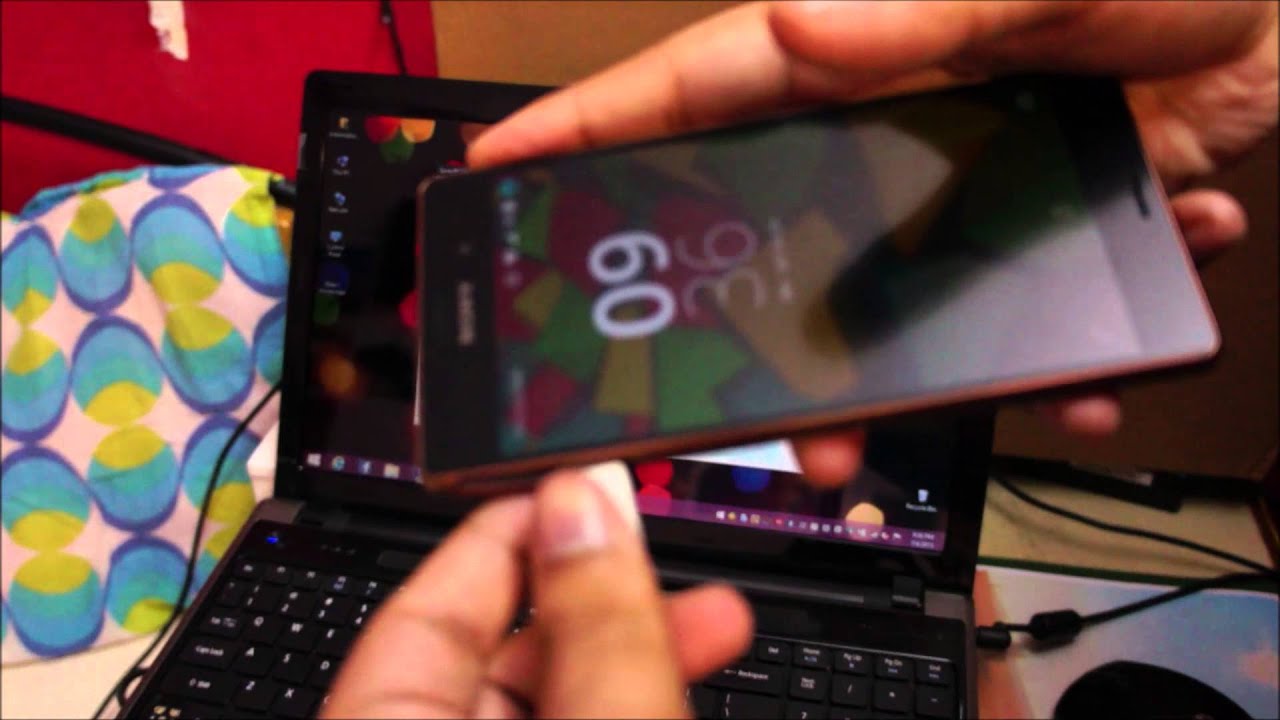
II. Connecting Sony Xperia to Computer via USB
Connecting your Sony Xperia to your computer via USB is a simple and straightforward process. By establishing this connection, you gain the ability to transfer files, sync data, and even perform software updates. Follow the steps below to ensure a successful connection:
Step 1: Use a compatible USB cable.
Before connecting your Sony Xperia to the computer, make sure you have a compatible USB cable. Most Sony Xperia smartphones use standard USB Type-C or micro USB cables. Ensure that the cable is in good condition and not damaged.
Step 2: Connect the USB cable to the computer.
Once you have the appropriate USB cable, plug one end into an available USB port on your computer. The USB ports are usually located on the sides or back of the computer tower, but for laptops, they can be on the sides or at the back as well. Make sure the connection is secure.
Step 3: Connect the USB cable to your Sony Xperia.
Take the other end of the USB cable and connect it to the USB port on your Sony Xperia smartphone. The location of the USB port may vary depending on the model, but it is usually located at the bottom or sides of the device. Gently insert the cable until it’s securely plugged in.
Step 4: Check your phone’s notification panel.
Once the USB cable is connected to both the computer and your Sony Xperia, your phone’s notification panel should display a USB connection notification. You may see options such as “Charge only,” “Transfer files,” or “MTP.” To establish a proper connection, tap on the notification and select the “Transfer files” or “MTP” option.
Step 5: Access your Sony Xperia on the computer.
After selecting the appropriate USB connection option on your phone, your computer should recognize and detect your Sony Xperia. It may take a few moments for the computer to install the necessary drivers and establish a connection. Once the connection is established, you can access your Sony Xperia as a storage device on your computer.
Step 6: Safely disconnect your Sony Xperia.
When you’re done transferring files or performing any other tasks, it’s important to safely disconnect your Sony Xperia from the computer. To do this, go to the notification panel on your phone and tap on the USB connection notification. Select the option to “Disconnect” or “Eject” your Sony Xperia from the computer. Once the notification disappears, you can safely unplug the USB cable from both your phone and the computer.
By following these steps, you can easily connect your Sony Xperia to your computer via USB and enjoy seamless file transfers and device management. Whether you need to transfer photos, music, videos, or any other files, this connection method provides a convenient way to access and manage your Xperia device from your computer.
III. Enabling USB Debugging on Sony Xperia
If you are a tech-savvy individual or a developer, you may have come across the term “USB debugging” when dealing with Android devices. USB debugging is a mode that allows your Sony Xperia device to communicate with your computer and take advantage of advanced debugging and development features. Enabling USB debugging on your Sony Xperia is a straightforward process, and in this section, we will guide you through the steps.
1. Start by unlocking your Sony Xperia device and accessing the Settings menu. You can do this by swiping down from the top of the screen and tapping the gear icon, or by accessing the Settings app from the app drawer.
2. In the Settings menu, scroll down and look for the “About phone” or “About device” option. Tap on it.
3. Once you are in the “About phone” or “About device” section, scroll down again and look for the “Build number” or “Build version” option. Tap on it repeatedly (about seven times) until you see a message that says “You are now a developer!” This will enable the Developer options on your device.
4. Now, go back to the main Settings menu and scroll down to find the newly unlocked “Developer options” or “Developer settings” menu. Tap on it to access the developer settings.
5. Within the Developer options menu, scroll down and locate the “USB debugging” option. It is usually located under the “Debugging” or “Debugging and development” section.
6. Toggle the switch next to “USB debugging” to turn it on. You may be prompted with a warning message informing you about the potential risks of enabling USB debugging. Read the message carefully and proceed if you understand the implications.
7. Once USB debugging is enabled, you can now connect your Sony Xperia device to your computer via USB and take advantage of advanced debugging, development, and data transfer features.
Remember that USB debugging is primarily intended for developers and advanced users. It should be used with caution, as it allows for direct access to your device’s system files and sensitive information. Make sure to disable USB debugging when you are not using it to minimize potential security risks.
Note: The steps outlined above may vary slightly depending on the model and Android version of your Sony Xperia device. However, the general process should remain the same.
IV. Transferring Files between Sony Xperia and Computer
Transferring files between your Sony Xperia smartphone and your computer is made easy with a few simple steps. Whether you want to move photos, videos, music, or documents, follow these instructions to ensure a hassle-free file transfer experience.
1. Connect your Sony Xperia to your computer using a USB cable. Make sure that both devices are powered on and unlocked.
2. Once connected, your computer should recognize your Sony Xperia as a removable storage device. It may take a few moments for the connection to be established.
3. On your computer, open the file explorer or finder window. You should see your Sony Xperia listed as a device or drive. Click on it to open the storage contents.
4. Locate the files you want to transfer on your computer. You can simply drag and drop them into the appropriate folder on your Sony Xperia, such as the “Pictures” or “Music” folder.
5. Alternatively, you can right-click on the files and select the “Copy” option. Then, navigate to the desired folder on your Sony Xperia and right-click again to choose the “Paste” option.
6. Wait for the files to finish copying. The time it takes will depend on the size of the files and the speed of your computer and USB connection.
7. Once the transfer is complete, safely eject your Sony Xperia from the computer. On Windows, you can do this by right-clicking on the device and selecting “Eject.” On Mac, drag the device icon to the trash bin and wait for it to disappear before unplugging the USB cable.
8. On your Sony Xperia, go to the appropriate app or folder to access the transferred files. For example, if you transferred photos, open the Gallery app to view them.
Now you can enjoy your files on both your Sony Xperia and your computer. Remember to disconnect the USB cable properly to avoid data corruption or damage to your device. Additionally, it’s always a good idea to make regular backups of important files to ensure their safety.
Conclusion
In conclusion, connecting your Sony Xperia phone to your computer can greatly enhance your mobile experience and productivity. Whether you want to transfer files, sync data, or perform system updates, establishing a reliable connection between your phone and computer is essential. By following the simple steps outlined in this article, you can easily connect your Sony Xperia phone to your computer and enjoy seamless data transfer and synchronization. Remember to use the appropriate USB cable, update your computer’s drivers if needed, and enable the necessary settings on your Sony Xperia phone. With a successful connection, you can efficiently manage your files, backup your data, and explore all the functionalities your Sony Xperia phone has to offer. Stay connected and make the most out of your Sony Xperia-powered mobile experience!
FAQs
1. How do I connect my Sony Xperia phone to a computer?
To connect your Sony Xperia phone to a computer, follow these steps:
- Ensure that you have the necessary USB cable to connect your phone to the computer.
- Connect one end of the USB cable to your phone and the other end to an available USB port on your computer.
- Once connected, your phone may prompt you to select a connection type. Choose “File Transfer” or “Transfer Files” to enable file transfer between your phone and the computer.
- After selecting the appropriate connection type, your computer should detect your Xperia phone as a removable storage device. If prompted, install any required drivers to establish a proper connection.
- You can now access your Sony Xperia phone on your computer by opening the file explorer or file manager and navigating to the device’s storage or SD card.
2. Can I transfer files wirelessly between my Sony Xperia phone and computer?
Yes, you can transfer files wirelessly between your Sony Xperia phone and computer using various methods:
- Bluetooth: Enable Bluetooth on both your Xperia phone and the computer. Pair the devices, and then you can send files wirelessly.
- FTP (File Transfer Protocol): Install a third-party FTP server app on your Xperia phone, and access it from your computer’s web browser using the provided IP address and credentials.
- Cloud storage: Upload files from your Xperia phone to cloud storage services like Google Drive or Dropbox, and then download them on your computer.
3. Can I use my Sony Xperia phone as a modem for my computer?
Yes, you can use your Sony Xperia phone as a modem to provide internet connectivity to your computer. This process is known as tethering or creating a mobile hotspot. To do so:
- Go to the Settings on your Xperia phone and find the “Network & Internet” or “Connections” section.
- Select “Tethering & portable hotspot” or a similar option.
- Turn on the “Mobile hotspot” or “Portable Wi-Fi hotspot” option.
- Configure hotspot settings such as the network name and password, if necessary.
- On your computer, enable Wi-Fi and connect to the Xperia phone’s hotspot network using the provided credentials.
4. How do I transfer photos from my Sony Xperia phone to my computer?
You can transfer photos from your Sony Xperia phone to your computer using the following methods:
- Connect your phone to the computer using a USB cable and follow the file transfer steps mentioned in the first FAQ.
- Use cloud storage services like Google Photos or Dropbox to upload your photos from your Xperia phone and then download them on your computer.
- You can also send photos wirelessly using Bluetooth or transfer them via email or messaging apps.
5. What should I do if my Sony Xperia phone is not recognized by the computer?
If your Sony Xperia phone is not recognized by the computer, try the following troubleshooting steps:
- Ensure that you’re using a compatible USB cable and try using a different cable if available.
- Make sure that your phone is unlocked and the screen is on while connecting it to the computer.
- Try connecting your Xperia phone to a different USB port on your computer.
- Restart both your Xperia phone and your computer and attempt the connection again.
- If possible, try connecting your phone to a different computer to rule out any issues with the original computer or its drivers.