
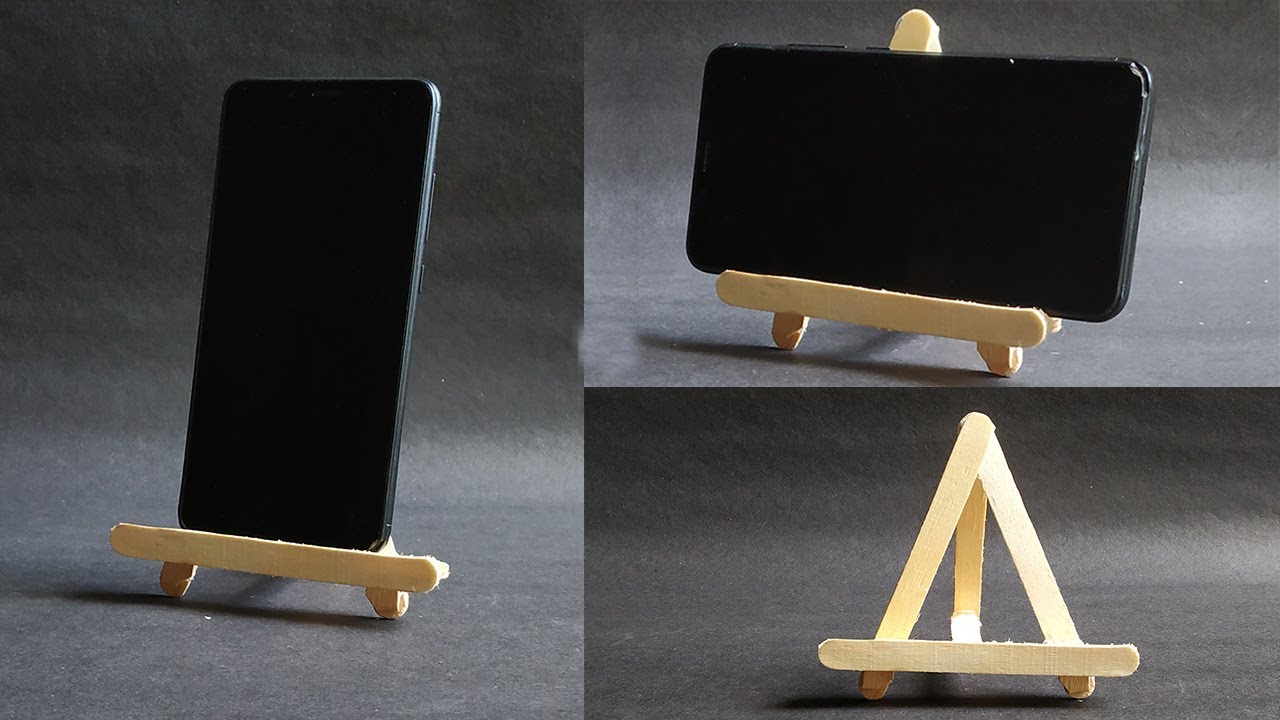
In today’s digital age, smartphones have become an integral part of our lives, serving not only as a communication tool but also as a device for capturing and sharing precious moments. Whether you’re a content creator, vlogger, or simply enjoy recording videos, having a stable phone stand is essential for capturing clear and steady footage. However, purchasing a professional phone stand can be costly, and DIY solutions can be just as effective. In this article, we will explore how to make a phone stand for recording using simple materials that you may already have at home. With just a little creativity and a few minutes of your time, you can have a budget-friendly phone stand that ensures your recordings are professional-looking and seamless.
Inside This Article
- Materials Needed
- Step 1: Gathering the Materials
- Step 2: Cutting the Cardboard
- Step 3: Folding and Assembling the Stand
- Step 4: Reinforcing the Stand
- Step 5: Final Touches and Personalization
- Conclusion
- FAQs
Materials Needed
Creating a phone stand for recording videos is a simple and fun DIY project that requires just a few materials. Here are the things you’ll need:
- Cardboard: Find a sturdy piece of cardboard that is large enough to accommodate the size of your phone.
- Scissors: You’ll need a pair of scissors to cut the cardboard into the desired shape.
- Ruler: A ruler will help you measure and create straight lines for cutting.
- Pencil: Use a pencil to mark the cutting lines on the cardboard.
- Decorative materials (optional): If you want to add a personal touch to your phone stand, gather any decorative materials you’d like to use, such as markers, stickers, or colored paper.
Once you have gathered these materials, you’ll be ready to move on to the next step of creating your phone stand. Remember, the specific size of the cardboard and the decorative materials can vary based on your preferences and the size of your phone. Let’s get started!
Step 1: Gathering the Materials
Before you can start crafting your very own phone stand for recording, you’ll need to gather a few materials. Don’t worry, you won’t need anything fancy or hard to find. Here’s what you’ll need:
- A sturdy piece of cardboard
- A ruler or measuring tape
- A pen or pencil
- A pair of scissors
- A craft knife (optional)
- Decorative materials (optional)
First and foremost, you’ll need a piece of cardboard that is strong enough to support your phone. Look for a piece that is thick enough to hold the weight of your device without bending or collapsing. If you have an old shipping box or packaging material lying around, that would work perfectly.
Next, you’ll need a ruler or measuring tape to ensure accurate measurements. This will help you cut the cardboard to the right size and angles, allowing your phone to sit comfortably while recording.
A pen or pencil is essential for marking measurements and lines on the cardboard. You’ll use this to outline the shapes and sizes for cutting.
A pair of scissors is a must-have tool for cutting the cardboard. Make sure they are sharp and can easily slice through the material. If you want more precise cuts, you can also use a craft knife, but this is optional and should be used with caution.
Lastly, if you want to add a personal touch to your phone stand, gather any decorative materials you’d like to use. These can include markers, paints, washi tapes, stickers, or any other craft supplies you have on hand. Get creative and make your phone stand unique!
Once you have all these materials ready, you’re all set to move on to the next step and start building your phone stand for recording.
Step 2: Cutting the Cardboard
Now that you have gathered all the necessary materials, it’s time to move on to the next step: cutting the cardboard. This step is crucial in creating the perfect phone stand for recording. Here’s what you need to do:
1. Take your piece of cardboard and using a ruler, measure and mark the desired dimensions for the stand. You can customize the size based on your preference and the size of your phone. Make sure to leave enough space for the phone to fit comfortably without tipping over.
2. Once you have marked the measurements, use a sharp utility knife or scissors to cut along the lines. Take your time and make clean, precise cuts to ensure the stability of the stand.
3. If your stand requires additional slots or cutouts for features like charging ports or headphone jacks, carefully measure and mark those areas on the cardboard. Use a knife or scissors to make the necessary cuts, ensuring they are accurate and align with your phone’s specifications.
4. After cutting out the main shape of the stand, you may also need to trim any excess cardboard or make additional adjustments to achieve the desired shape and stability. Take your time to refine the edges and corners for a polished look.
5. Once you are satisfied with the shape and size of the cardboard stand, double-check that it properly fits your phone. Place the phone on the stand, ensuring it rests securely without any wobbling or instability. If necessary, make any final adjustments to the design to improve the fit.
Cutting the cardboard is a crucial step in creating a sturdy and functional phone stand for recording. Take your time, measure accurately, and make clean cuts to ensure the best results. Once you have finished cutting the cardboard, you’re ready to move on to the next step of folding and assembling the stand.
Step 3: Folding and Assembling the Stand
Now that you have cut the cardboard into the necessary pieces, it’s time to fold and assemble them to create your phone stand for recording. Follow these steps to complete this stage:
- 1. Fold the bottom piece: Take the larger piece of cardboard that you cut earlier, which will serve as the base of your stand. Fold it in half horizontally, ensuring that the edges align neatly. This will create a crease at the midpoint of the cardboard.
- 2. Fold the side pieces: In order to create the side supports for your stand, take the two smaller pieces of cardboard and fold each one in half vertically. Like with the base piece, make sure that the edges meet perfectly to form a clean crease.
- 3. Assemble the stand: Now, take the folded side pieces and align them with the crease in the base piece. The folded edges should be facing inwards, creating a triangular shape on each side. Make sure the side supports are centered and balanced before proceeding.
- 4. Secure with tape: To keep the folded pieces in place, use a strong adhesive tape to secure them together. Apply the tape along the edges and where the base and side pieces meet. This will provide stability and prevent the stand from collapsing while in use.
- 5. Test the stability: Once you have finished assembling the stand, gently place your phone on the base to test its stability. Ensure that it rests securely and doesn’t wobble or topple over. If needed, make any necessary adjustments or reinforce the stand with additional tape.
By folding and assembling the cardboard pieces according to these steps, you have successfully created the basic structure of your phone stand for recording. The next step will involve reinforcing the stand to ensure its durability and enhancing its stability.
Step 4: Reinforcing the Stand
Now that you have assembled the basic structure of your DIY phone stand, it’s time to reinforce it to ensure stability and durability. Reinforcing the stand will help it withstand the weight of your phone and prevent any unintended collapses while using it.
Here are a few tips on how to reinforce your phone stand:
1. Double Layer Cardboard: If you’re using thin cardboard for your stand, consider adding an extra layer to enhance its strength. Simply cut out another piece of cardboard in the same shape as the main support and glue it on top. This will add extra support and stability to the stand.
2. Extra Glue: Apply an ample amount of glue to all the joints and connections of the stand. This will ensure that the pieces stay securely in place and prevent any wobbling or shifting of the structure.
3. Support Braces: For added stability, you can create support braces using additional pieces of cardboard. Cut out small strips of cardboard and glue them diagonally across the joints of the stand. These braces will reinforce the corners and prevent them from bending or collapsing.
4. Decorative Tape or Paint: In addition to reinforcing the stand, you can also add some aesthetic touches to make it look more appealing. Consider using decorative tape or paint to cover the cardboard edges and add a pop of color or pattern. This step is optional but can make your phone stand look more professional and polished.
By implementing these reinforcement techniques, you can create a sturdy and reliable phone stand that will securely hold your device during recording sessions or video calls. Now that your stand is reinforced, it’s time to move on to the final step – adding some personalization and finishing touches!
Step 5: Final Touches and Personalization
Now that you have successfully built your phone stand, it’s time to add some final touches and personalize it to make it truly your own. Making these additions will not only enhance the functionality of the stand but also give it a unique and eye-catching appearance.
Here are a few ideas to consider:
- Decorative Wrapping: One way to add a touch of personality to your phone stand is by wrapping it with decorative paper or fabric. Choose a design or pattern that reflects your personal style and interests. This simple addition can instantly transform the look of the stand and make it more visually appealing.
- Custom Paint Job: If you’re feeling adventurous, you can take it a step further by giving your stand a custom paint job. Use acrylic paint or spray paint to add color and patterns to the cardboard. Get creative and experiment with different techniques, such as splatter painting or stenciling, to achieve a unique and artistic look.
- Attach Accessories: Another way to personalize your phone stand is by attaching accessories or functional add-ons. For example, you could attach a mini whiteboard or sticky notes holder to jot down reminders or important information. You could also attach a small storage compartment to hold your earphones or other small accessories.
- Embellishments: Consider adding embellishments like stickers, gemstones, or even small LED lights to make your phone stand stand out. These little details can add a touch of whimsy and make your stand more visually appealing.
- Cable Management: To keep your charging cable neatly organized and prevent tangles, you can incorporate a cable management system into your phone stand. Attach small clips or hooks to hold the cable in place and ensure it remains tidy and accessible.
Remember, the goal is to make your phone stand not only functional but also visually appealing and unique to you. Feel free to get creative and add any additional personalized touches that suit your preferences and style.
By following these steps and incorporating your own personal flair, you have successfully created a phone stand that is not only practical but also a reflection of your creativity. Enjoy using your personalized phone stand for recording, watching videos, or any other activity that requires a steady and convenient hands-free setup!
Conclusion
Creating a phone stand for recording videos doesn’t have to be complicated or expensive. With a little creativity and some basic materials, you can easily make a stand that will enhance your recording experience. Whether you’re a vlogger, a content creator, or simply someone who enjoys capturing moments on their phone, having a stable and reliable phone stand is essential.
By following the steps outlined in this article, you now have several DIY options to choose from. Whether you prefer a simple tripod stand, a more customizable holder, or a hands-free option using everyday objects, you can find the one that fits your needs and budget.
Remember, having a sturdy phone stand will not only help you achieve better quality videos but also make the recording process more convenient and comfortable. So go ahead, unleash your creativity, and start making your own phone stand for recording today!
FAQs
1. Why do I need a phone stand for recording?
A phone stand is essential for recording as it provides stability and frees up your hands while capturing videos or taking photos. It ensures that your phone remains steady, resulting in clearer and less shaky footage.
2. Can I use any type of phone stand for recording?
Yes, there are various types of phone stands available in the market, including adjustable tripod stands, desktop stands, and clamp-on stands. The choice of stand depends on your recording needs and preferences. It is important to select a stand that is compatible with your phone model and offers the desired level of stability and flexibility.
3. Are there any DIY phone stand options for recording?
Absolutely! If you’re looking for a budget-friendly option or want to get creative, you can make your own phone stand using everyday items. For example, you can use a binder clip attached to a flexible object like a wire hanger or a selfie stick to create a makeshift stand. There are also various DIY tutorials available online to guide you through the process.
4. How do I set up a phone stand for recording?
The setup process may vary depending on the type of phone stand you have. However, in general, you can follow these steps:
- Attach your phone securely to the stand, ensuring it is stable and won’t slip.
- Adjust the stand’s height or angle to achieve the desired framing and perspective for your recording.
- Ensure that the stand is placed on a stable surface or, if using a tripod stand, set it up on a flat area.
- Double-check that the phone is securely attached and stable before starting your recording.
5. Are phone stands only useful for recording videos?
No, phone stands are versatile and can be used for various other purposes apart from recording videos. They are handy for FaceTime or video calls, taking stable photos, following recipes while cooking, watching movies or shows, and even as a docking station for charging your phone. So, even if you’re not into recording, a phone stand can still be a useful accessory for your daily activities.